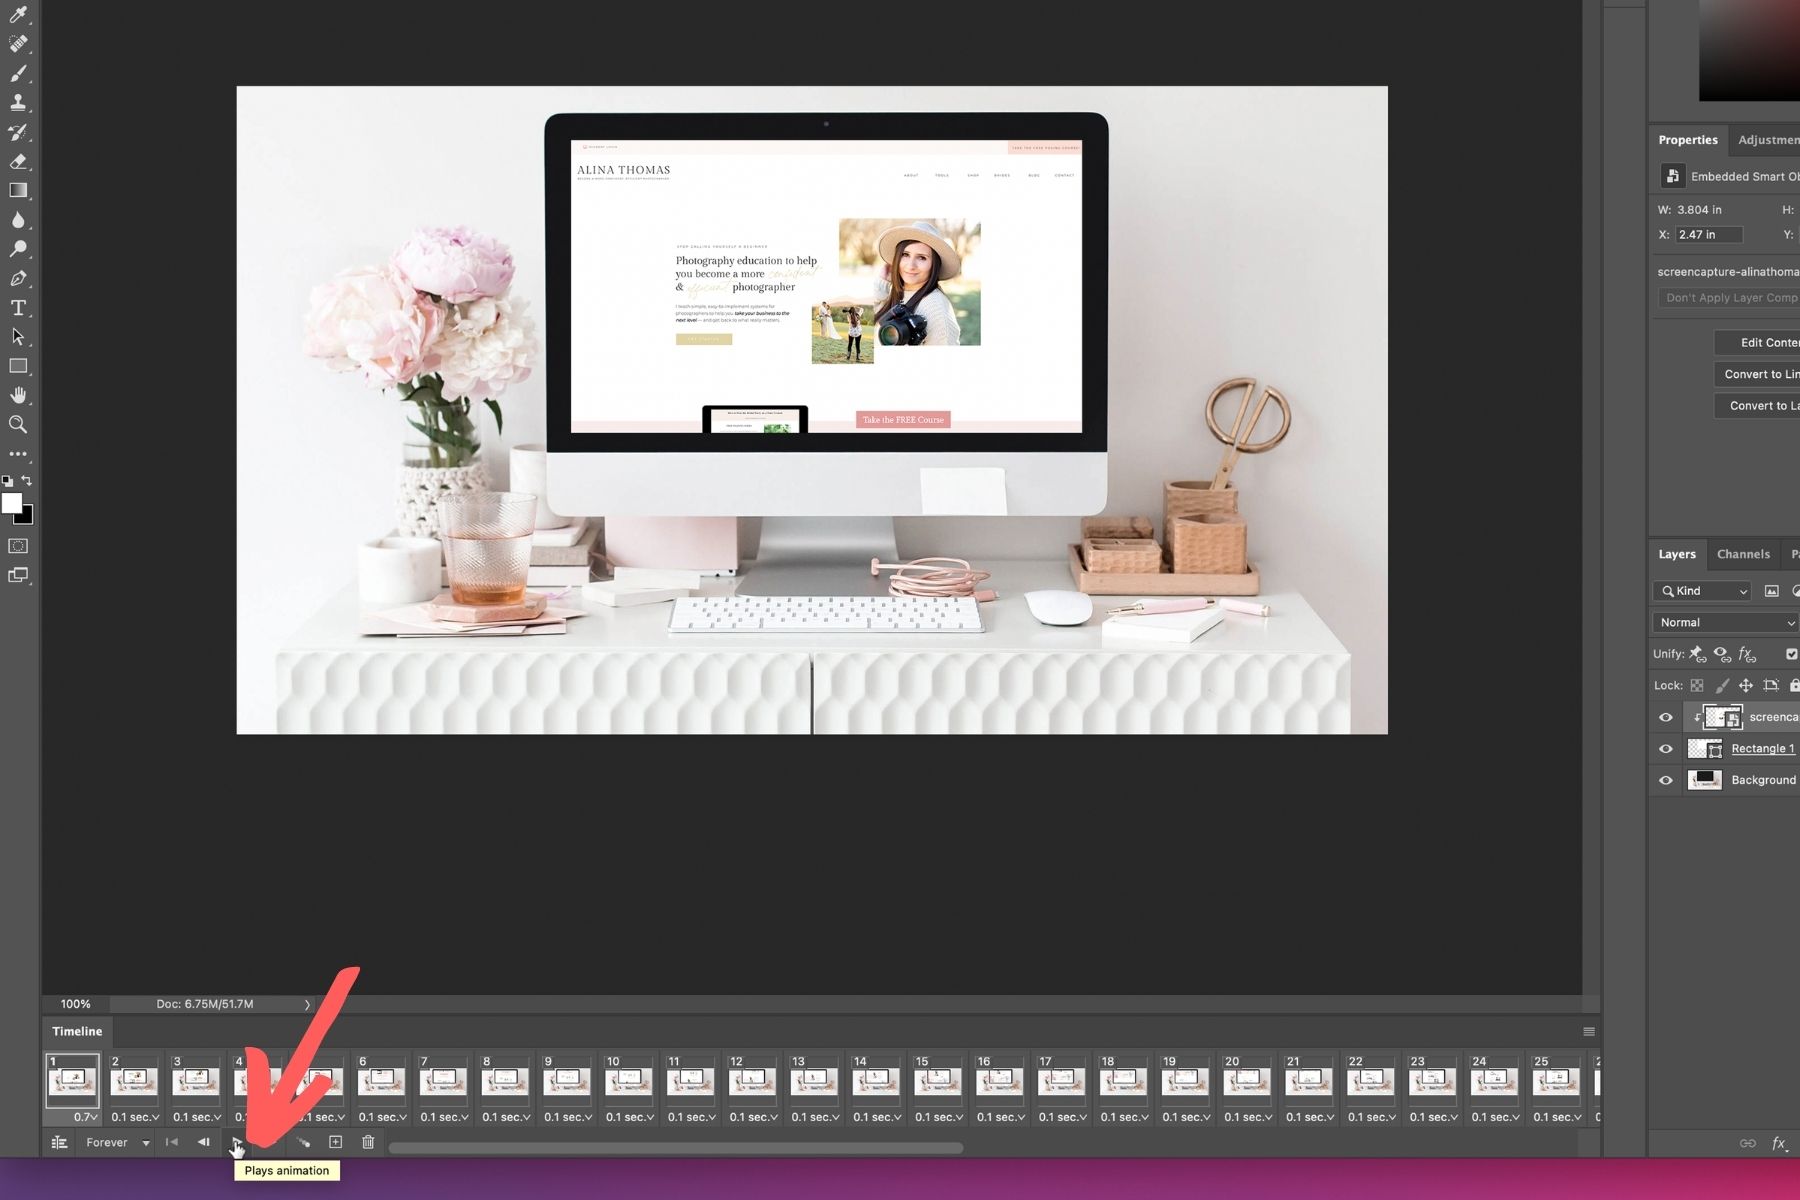
If you read my blog post last week, you know that I shared a super quick tutorial on how to create launch graphics for your website. Today, I’m taking it one step further and showing you how to create scrolling website graphics. Let’s get started!
Here’s my step-by-step process:
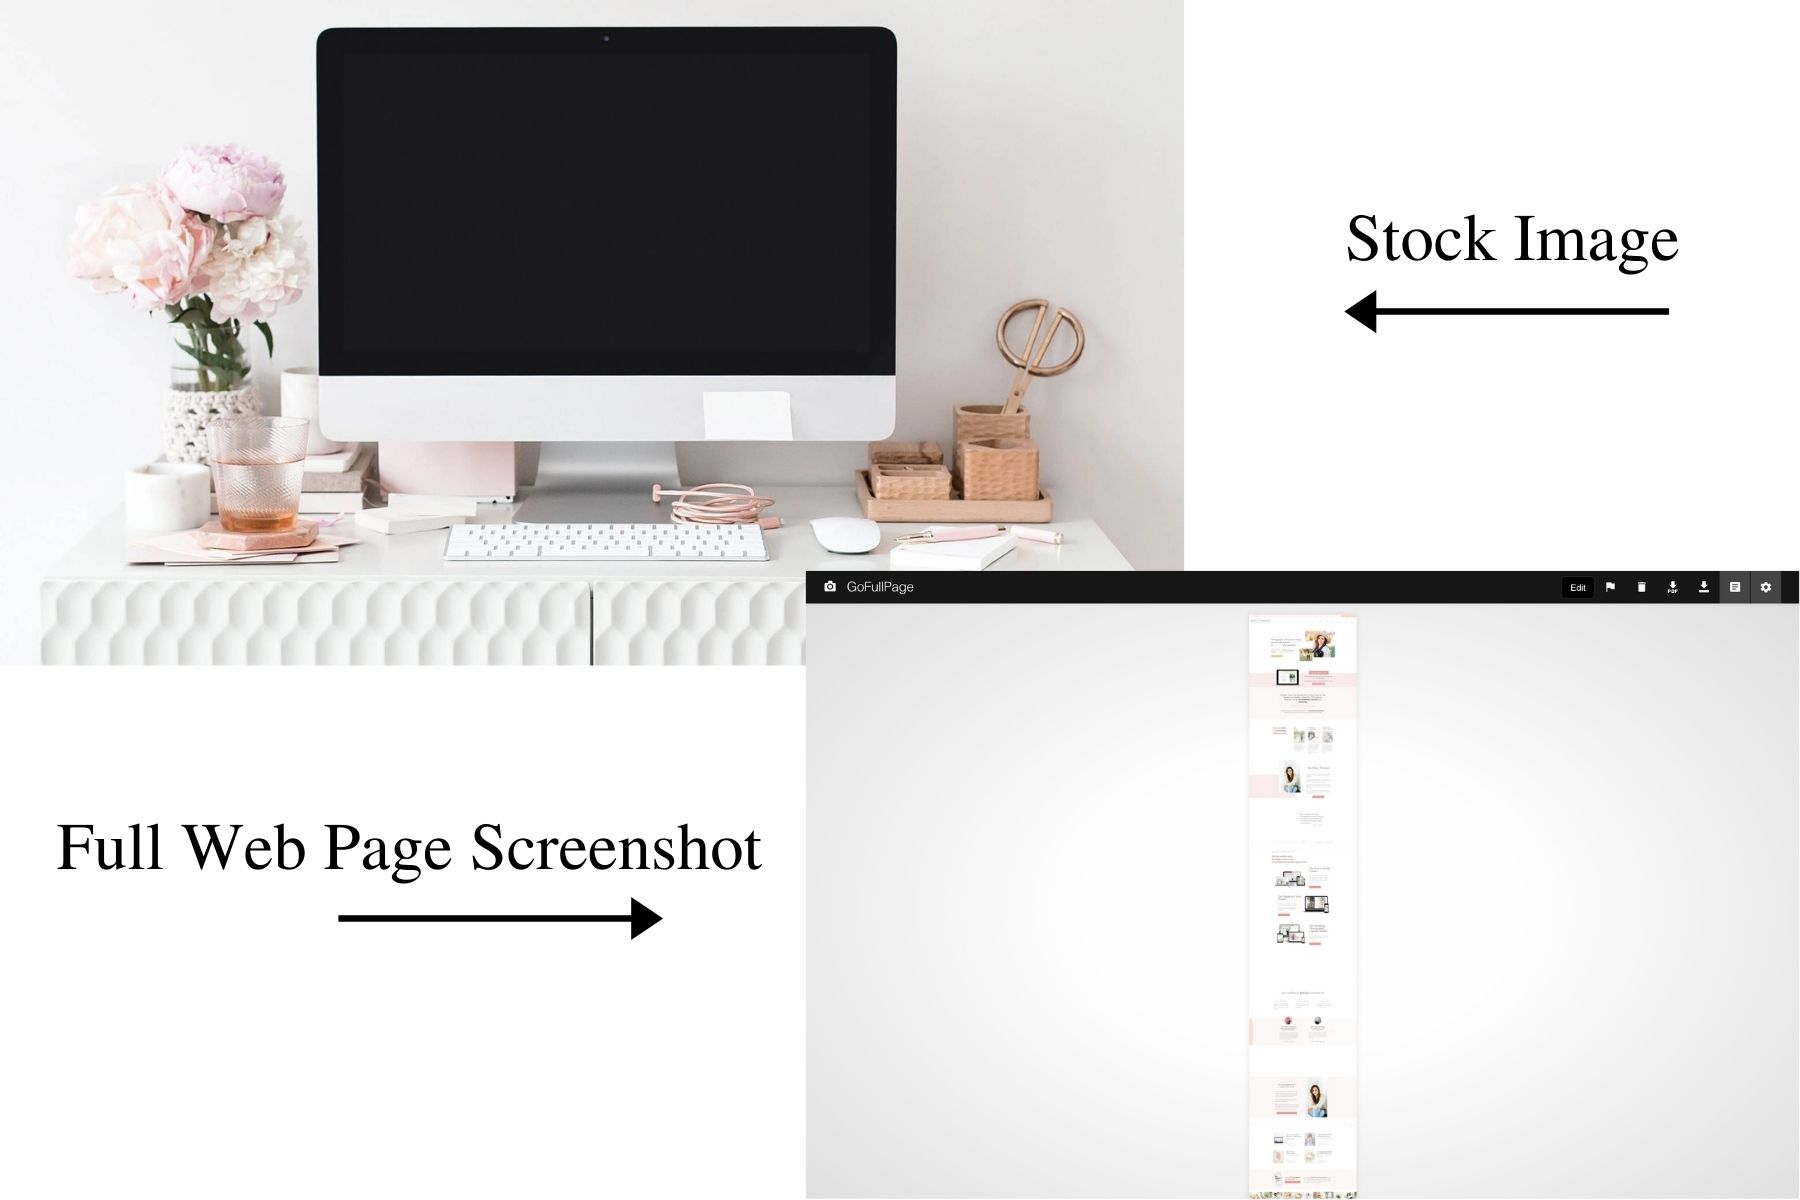
First, you’re going to need a stock image and a full page screenshot of your website. I like to use the “GoFullPage” Chrome extension to take a screenshot of a full web page. This is what it looks like.
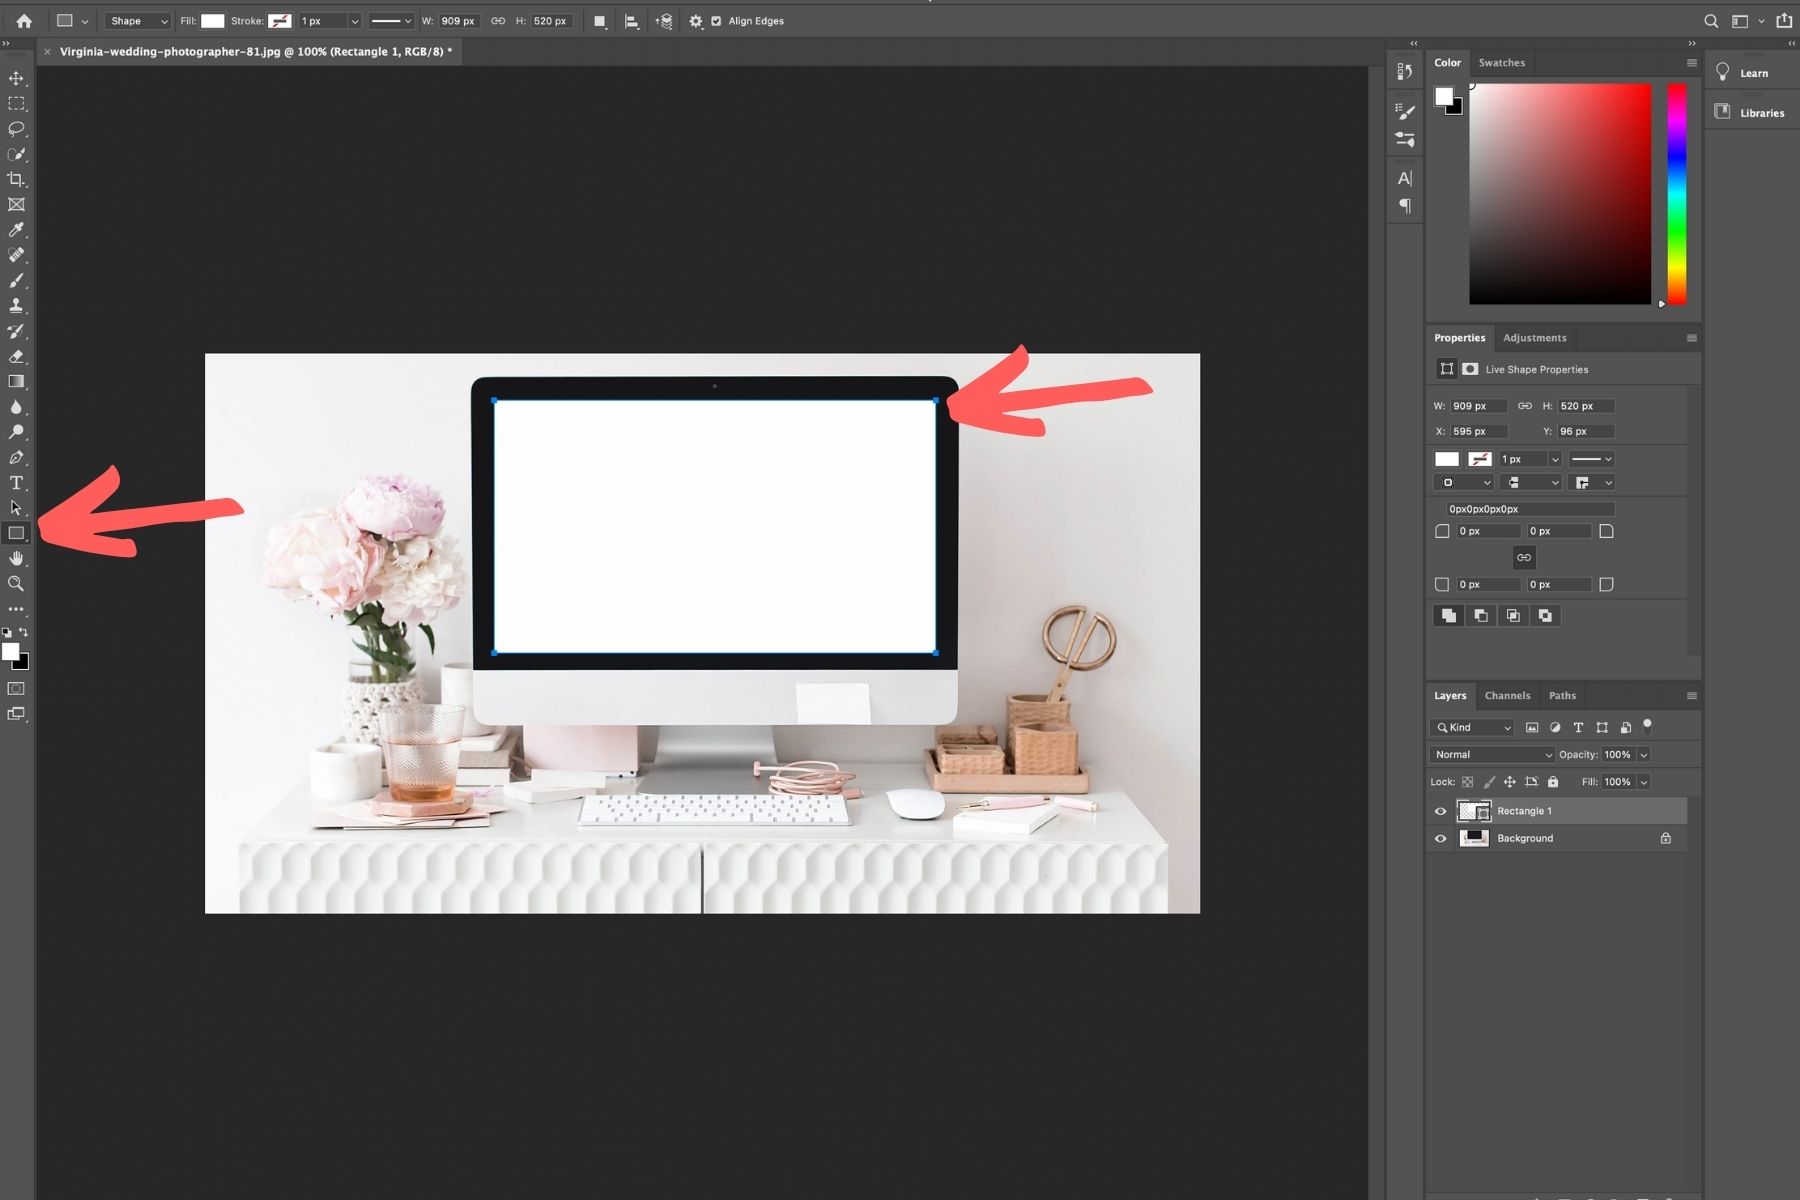
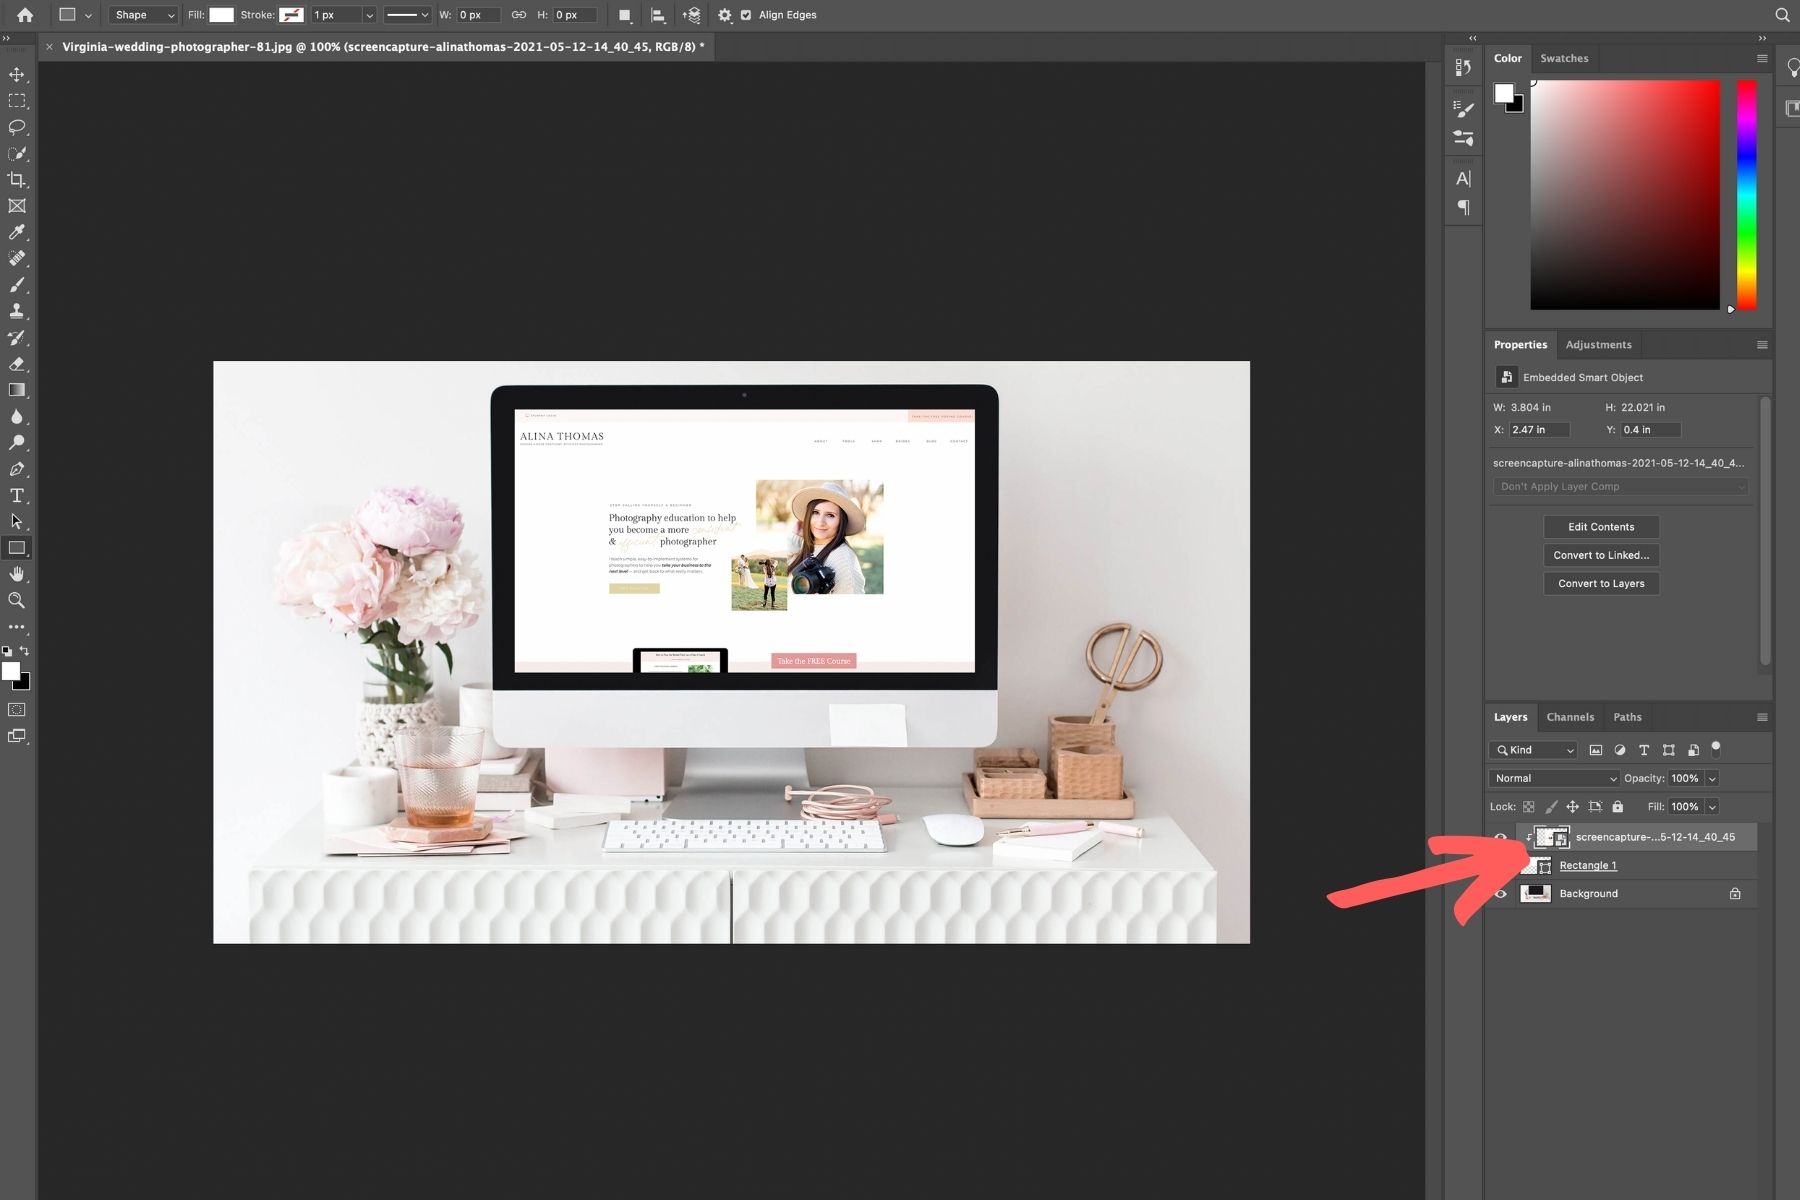
Next, you’re going to use the rectangle tool to draw a rectangle over the screen of your laptop/desktop.
Once you’re done, you’re going to drag your screenshot on top of your desktop/laptop image and resize it to fit the rectangle.
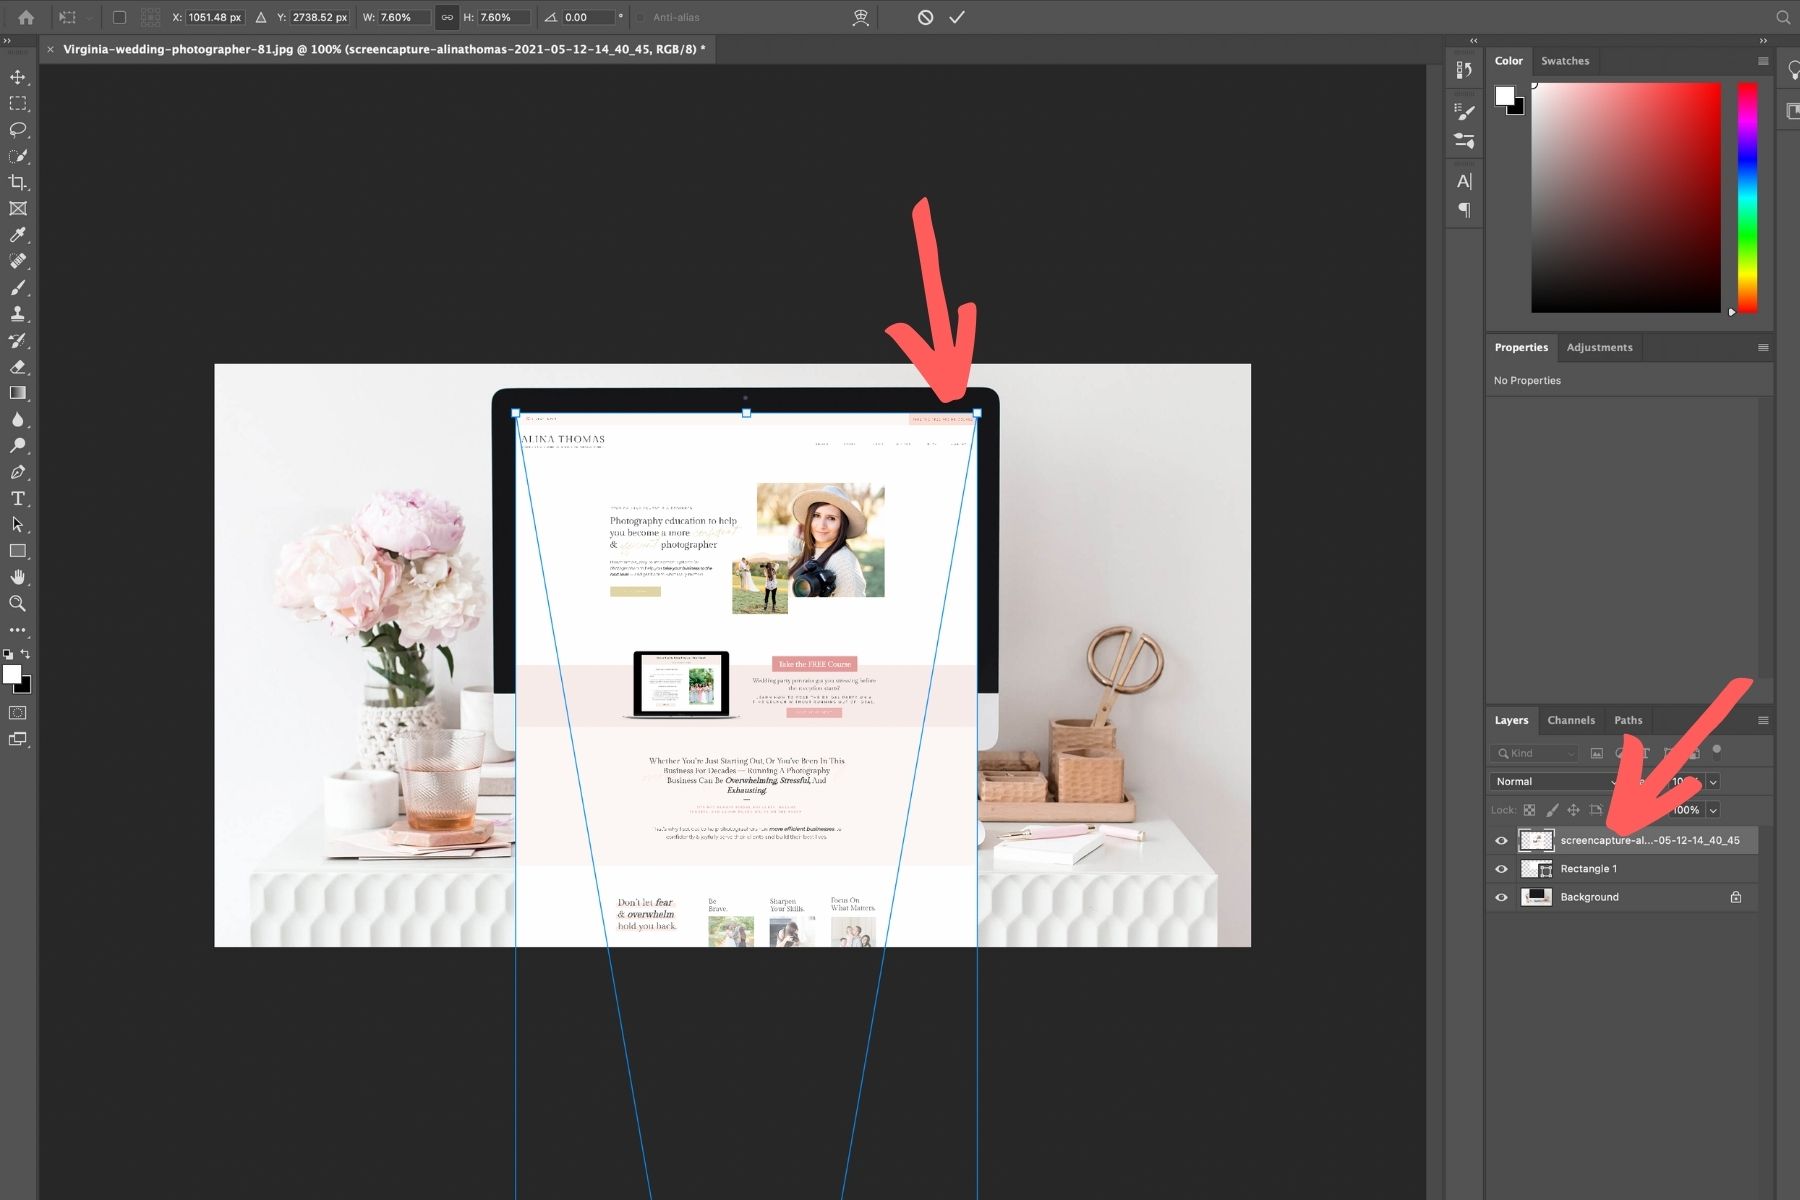
Then, you’re going to position your mouse between the two layers and hold down the option key on your keyboard (alt on Windows) until you see a little arrow and click on it. That’s going to lock your screenshot to your shape.
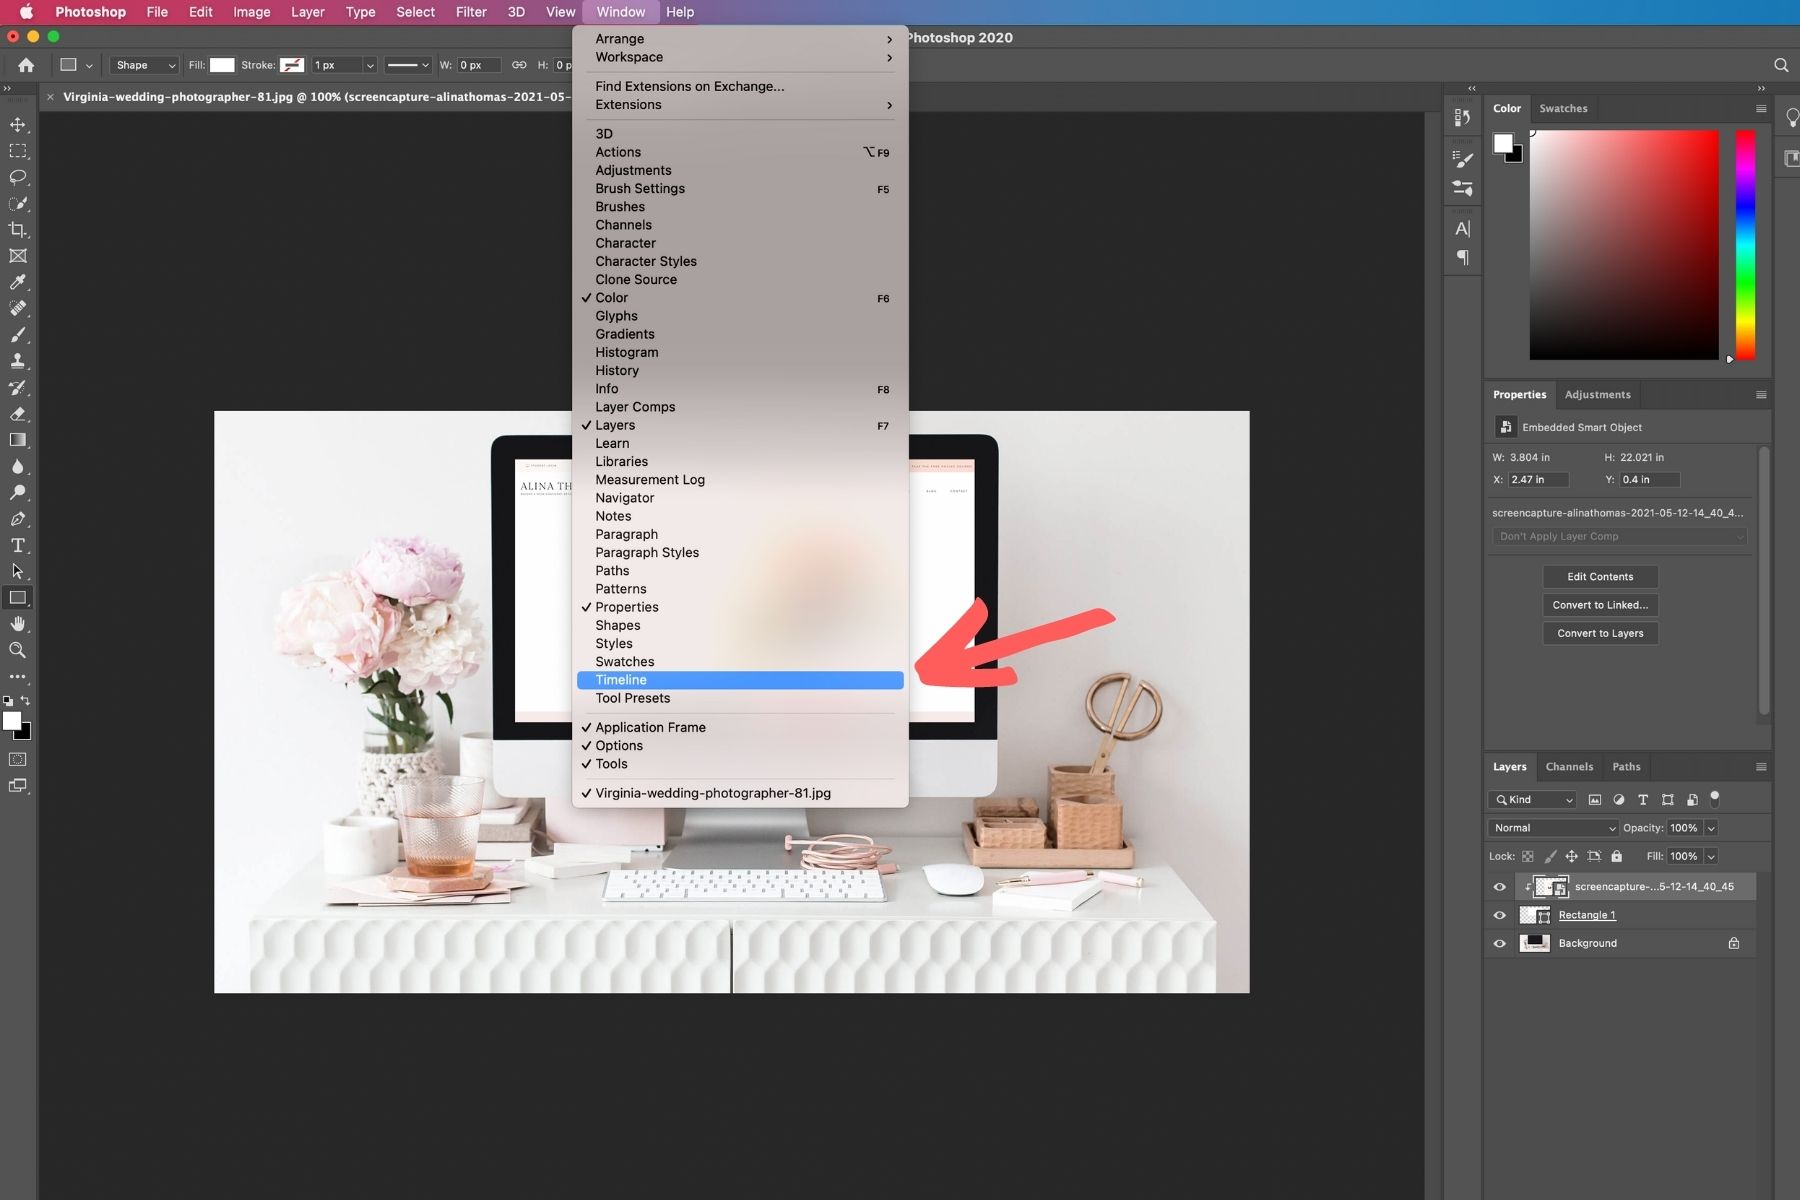
Next, go to Window → Timeline.
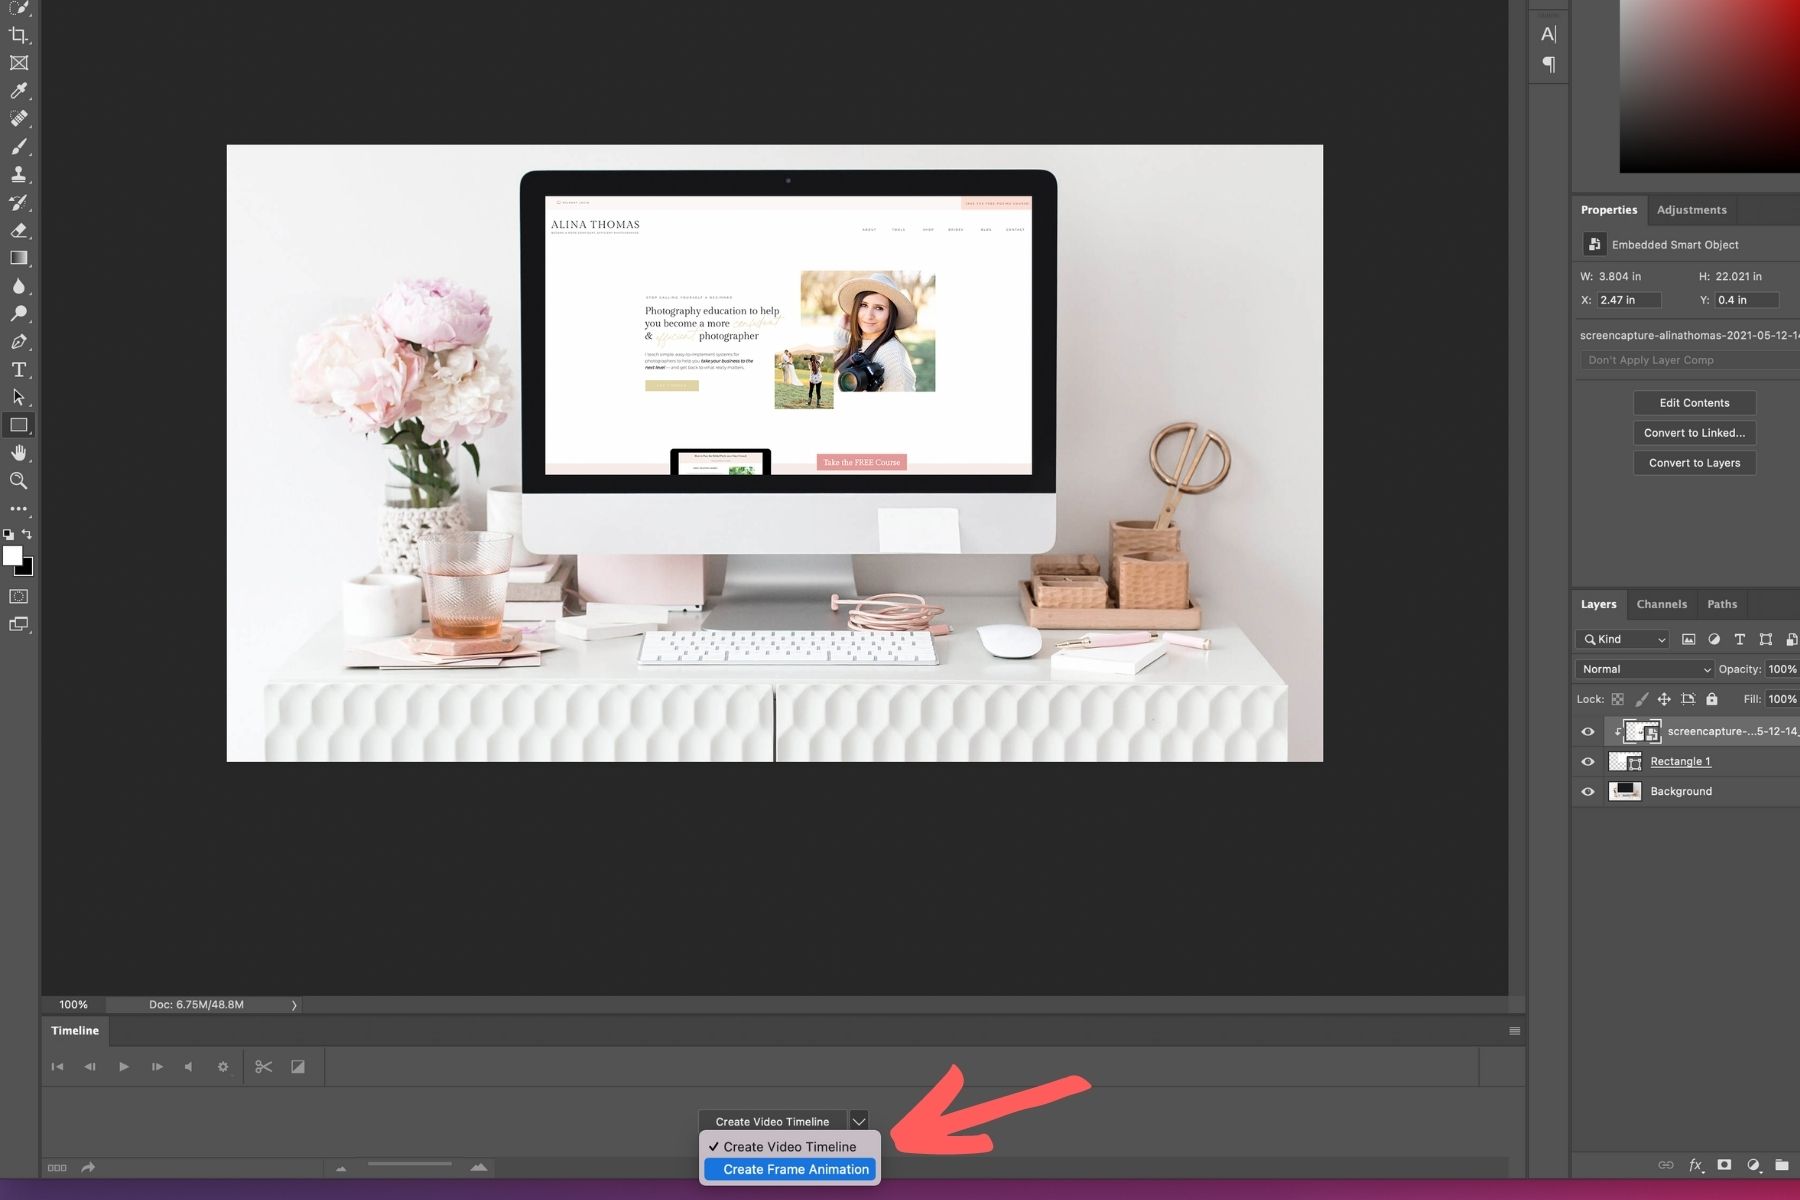
In your Timeline frame, click on “Create Frame Animation”.
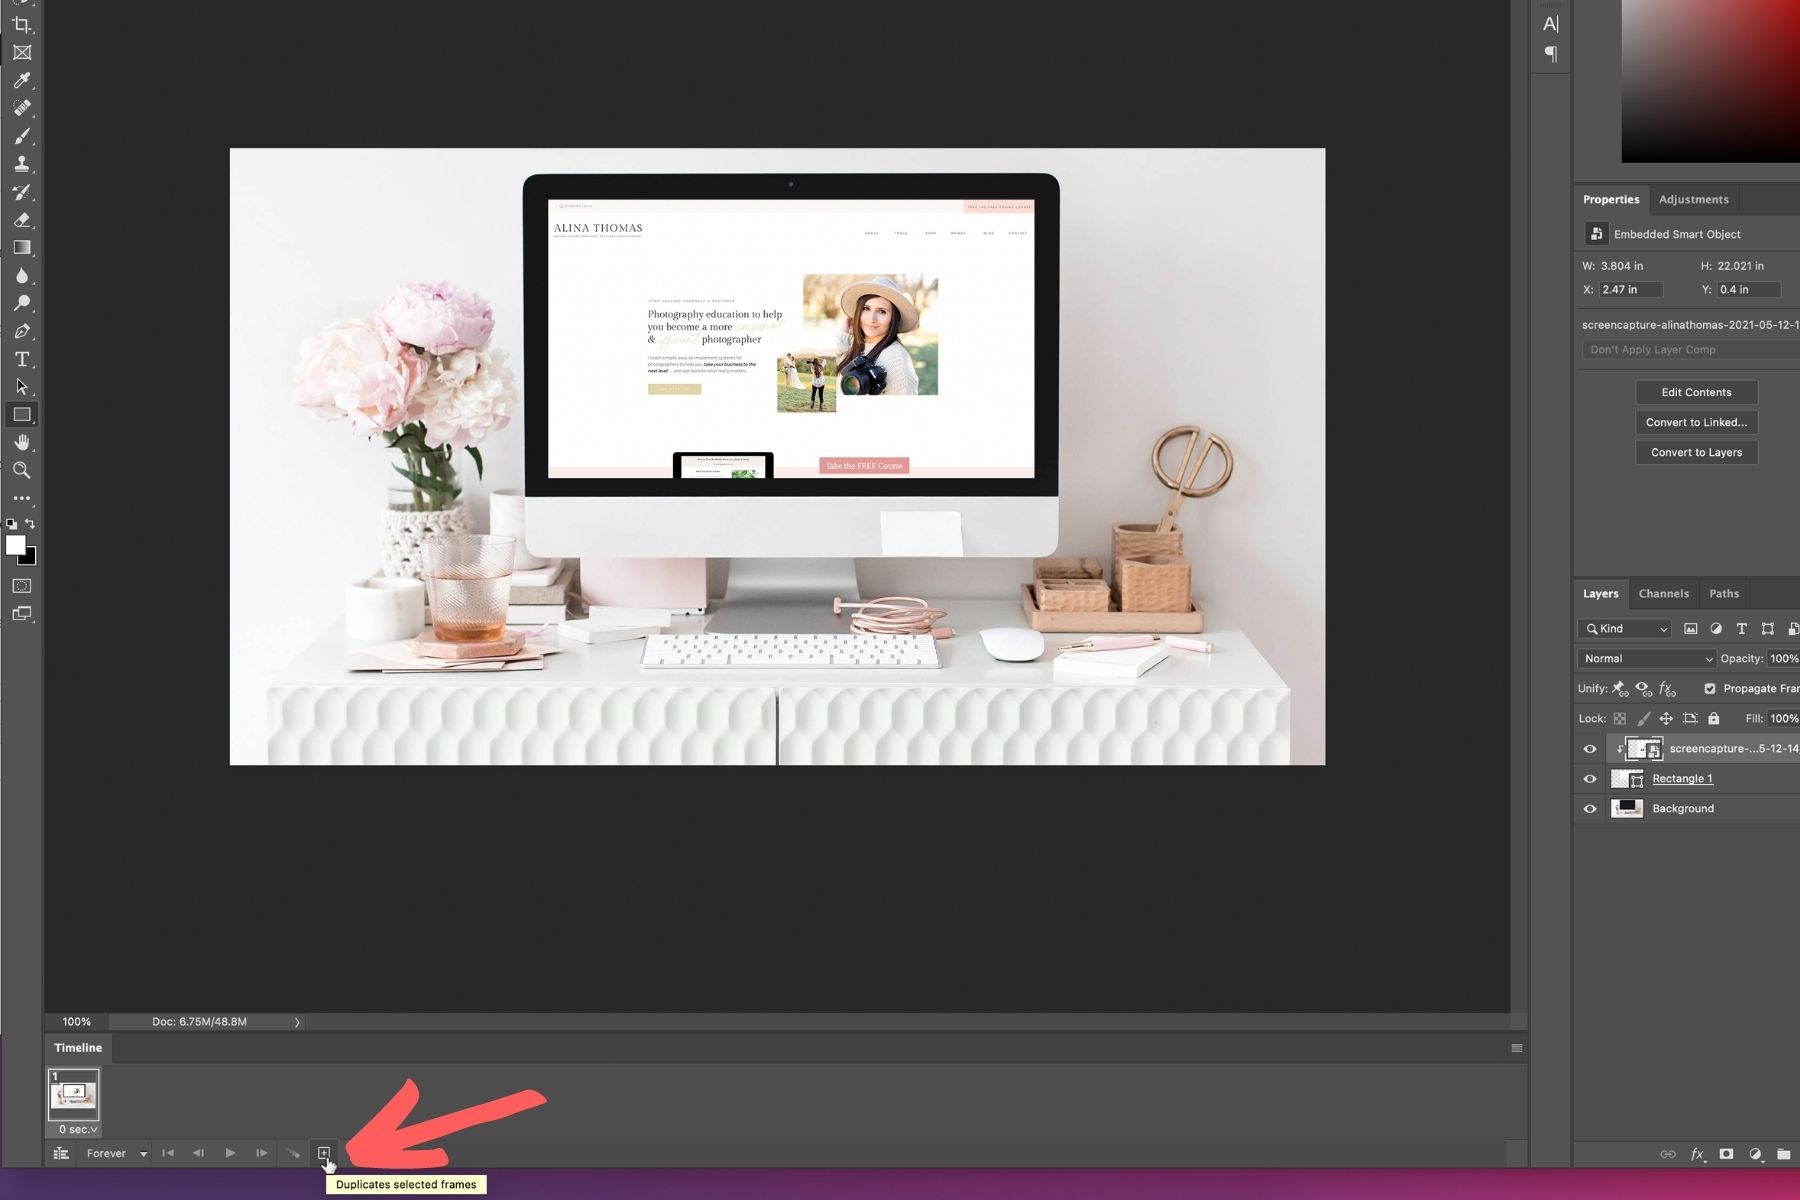
Then, you’re going to duplicate your frame by clicking the “+” sign.
Next, you’re going to click on your screenshot and scroll all the way to the bottom of your screenshot (that’s where your new frame will stop).
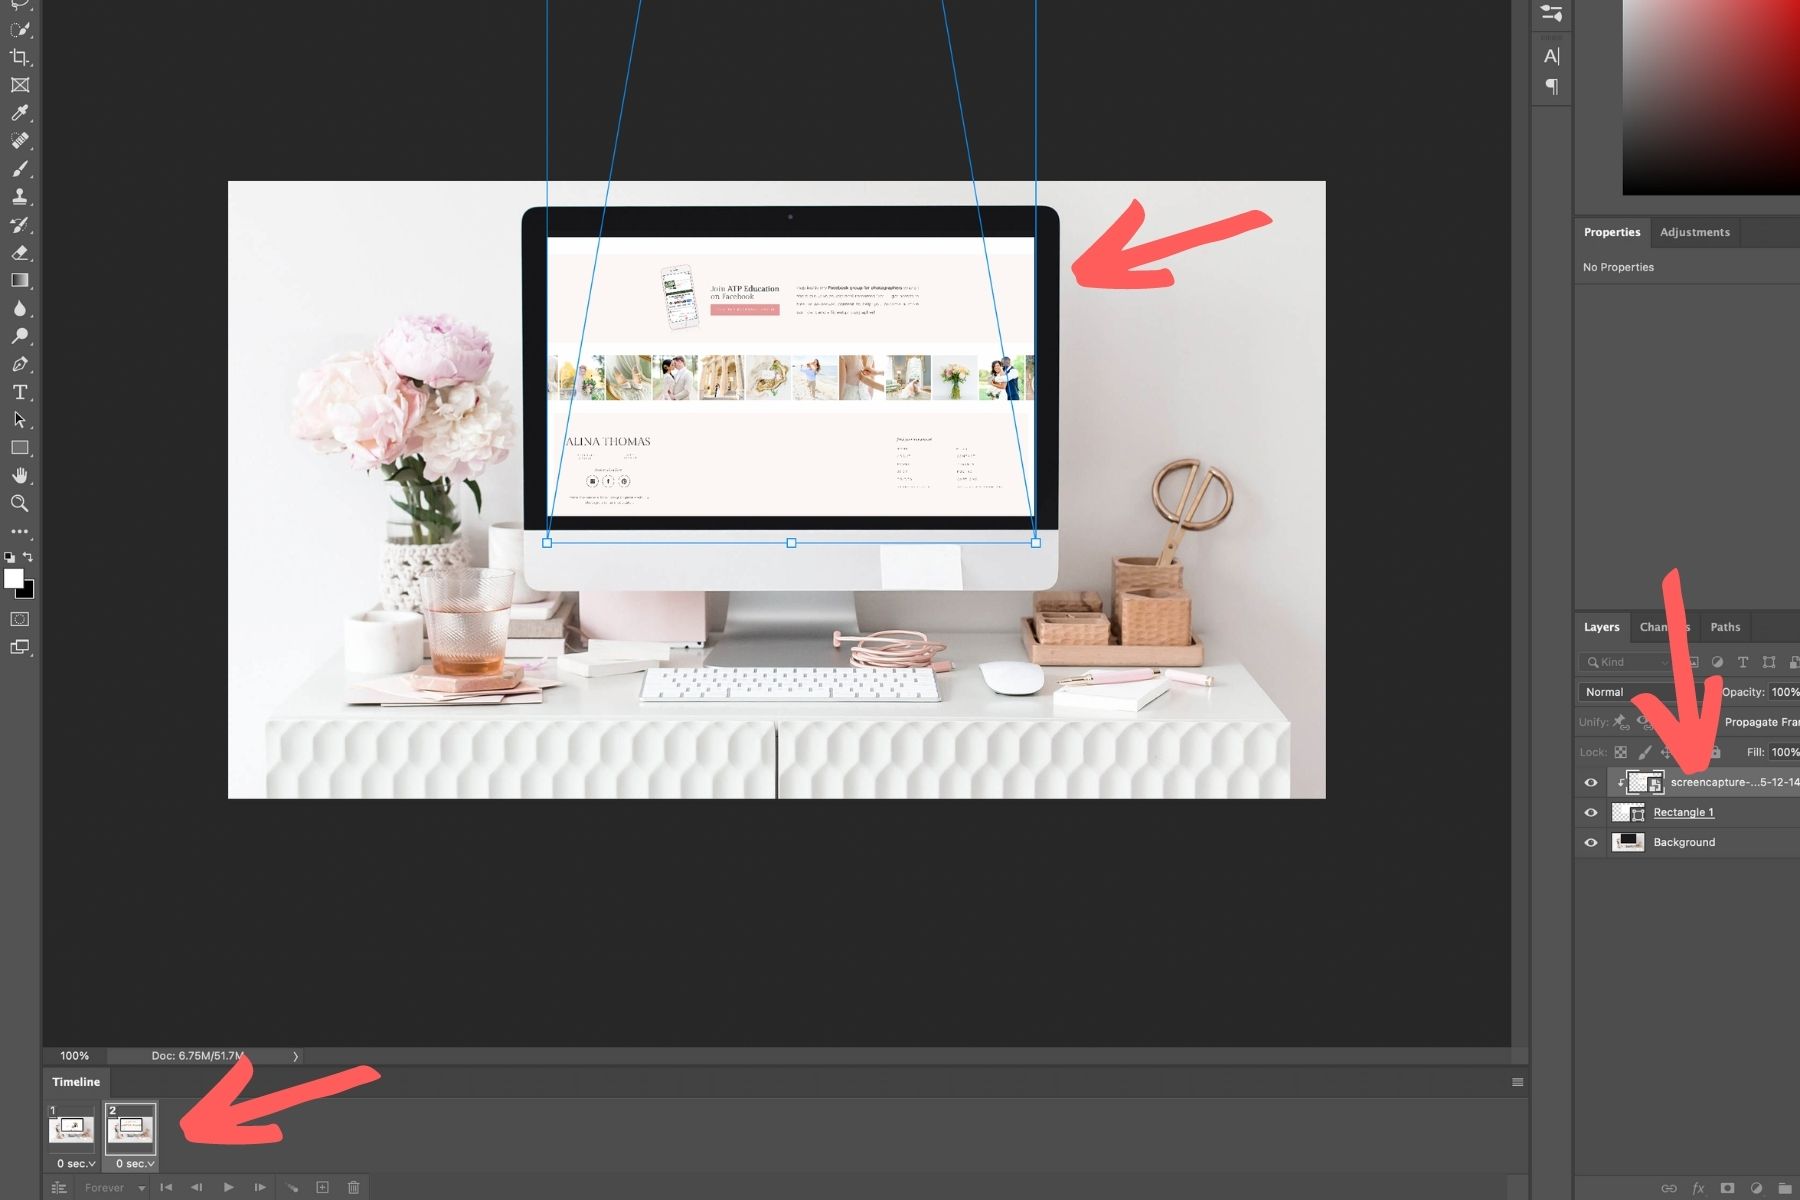
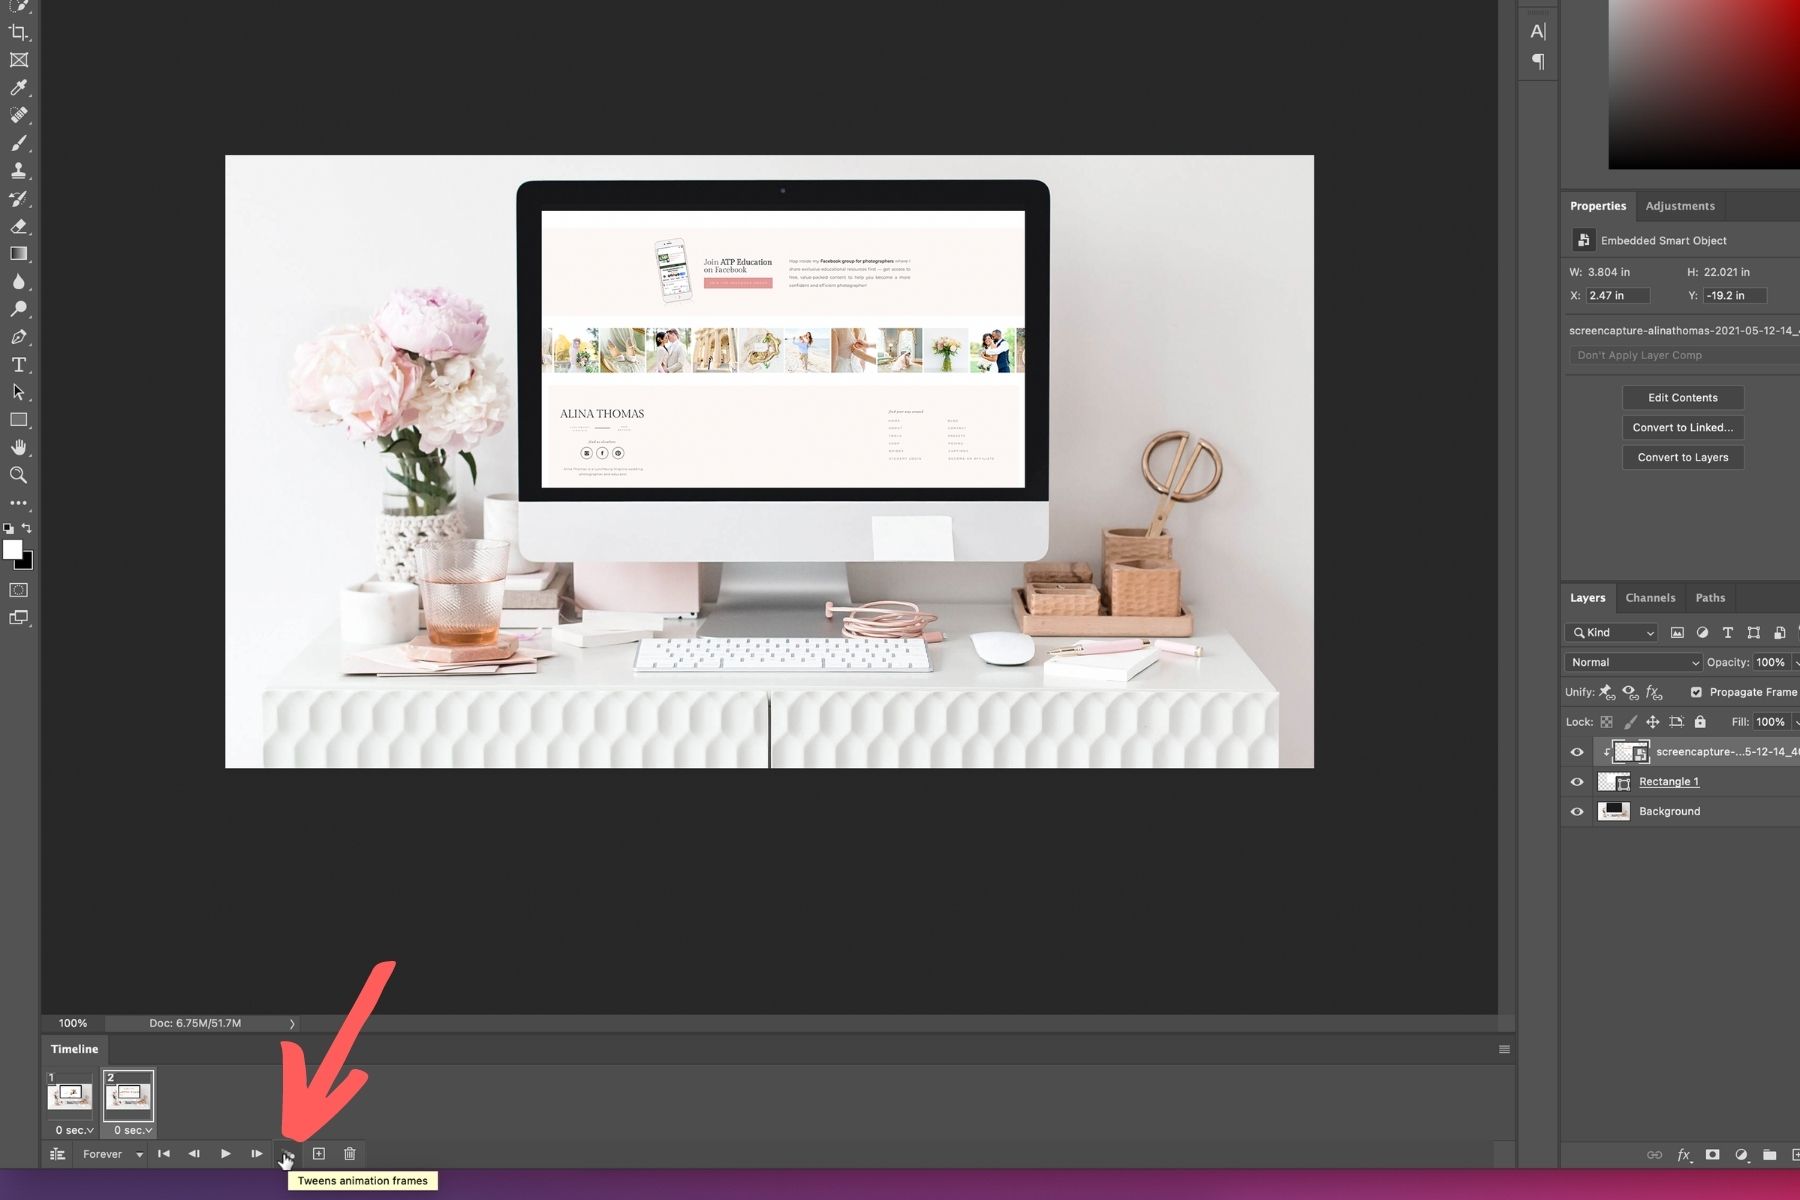
After this, you’ll want to select both frames and click on the Tweens Animation Frames icon.
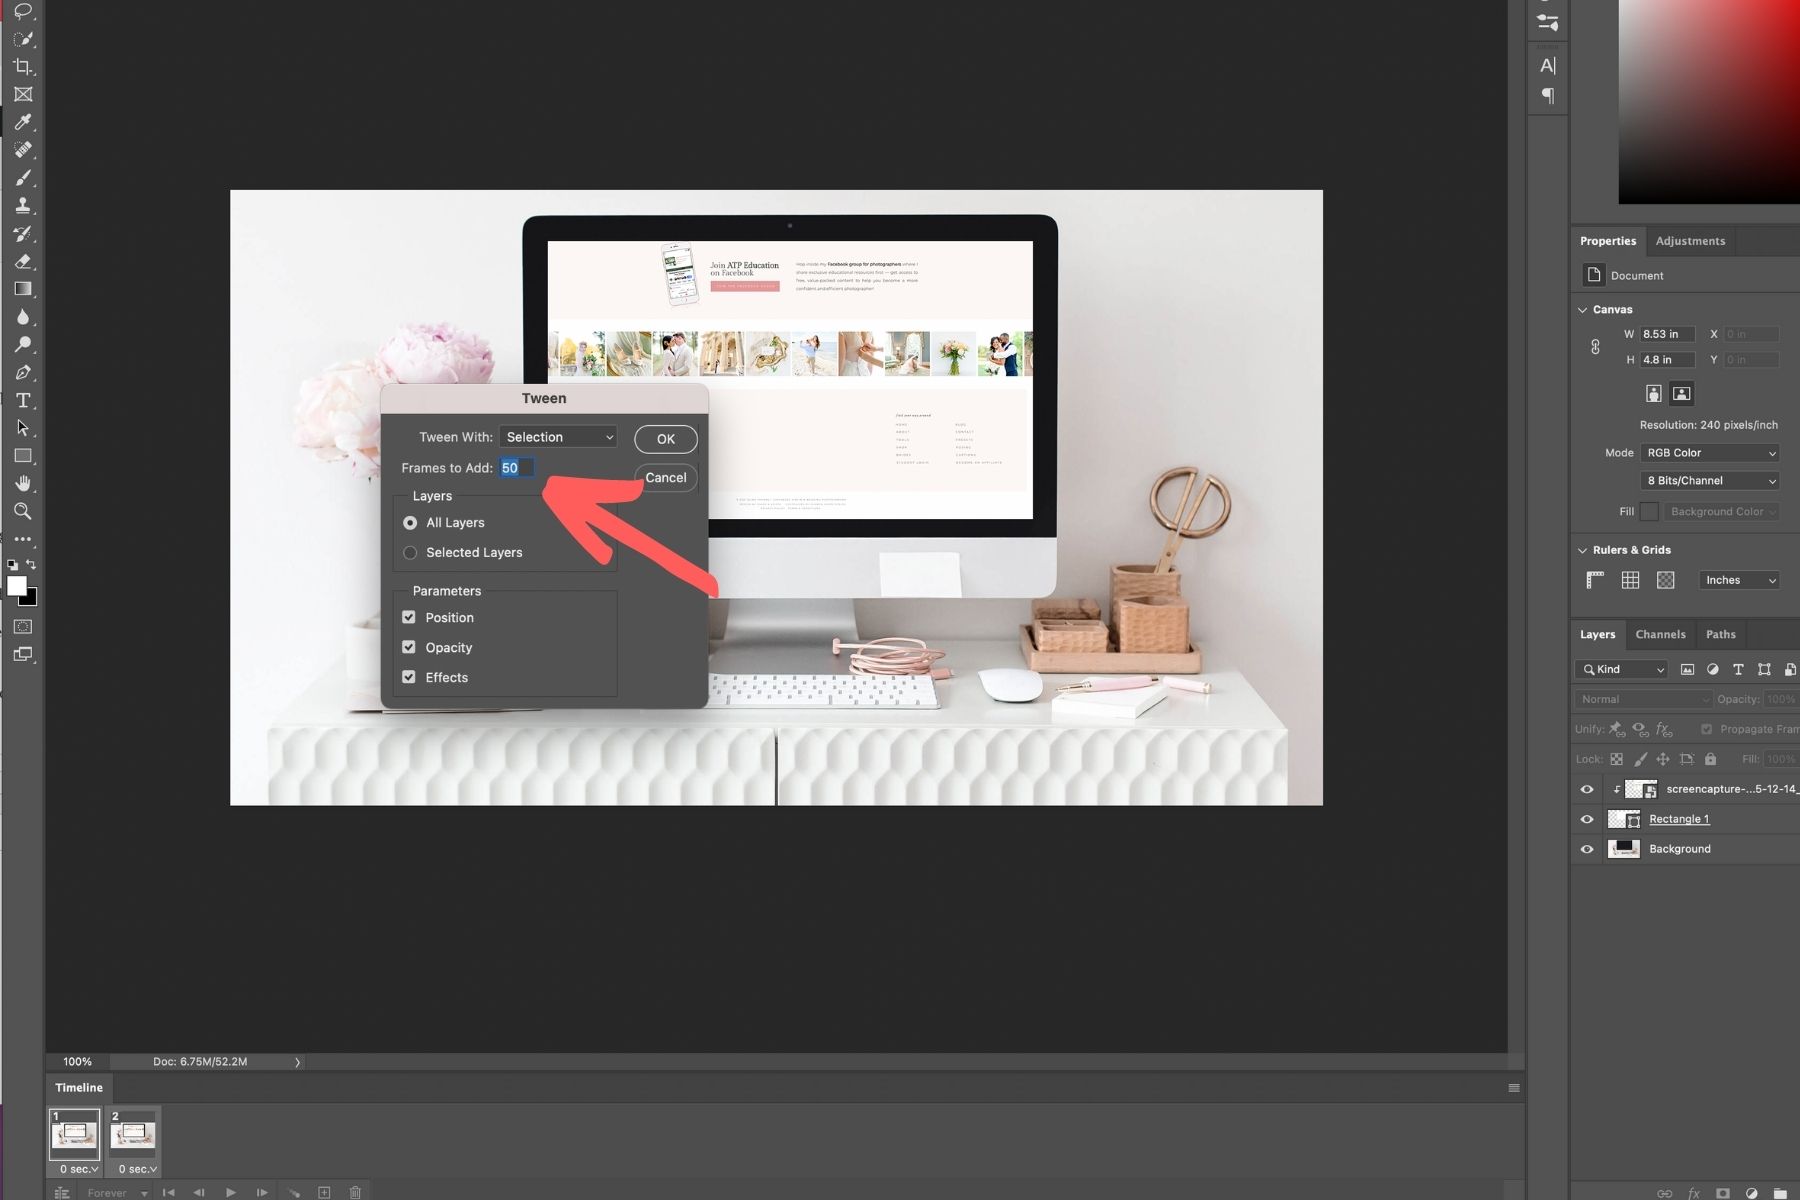
Then, choose “Frames to Add” and type 50.
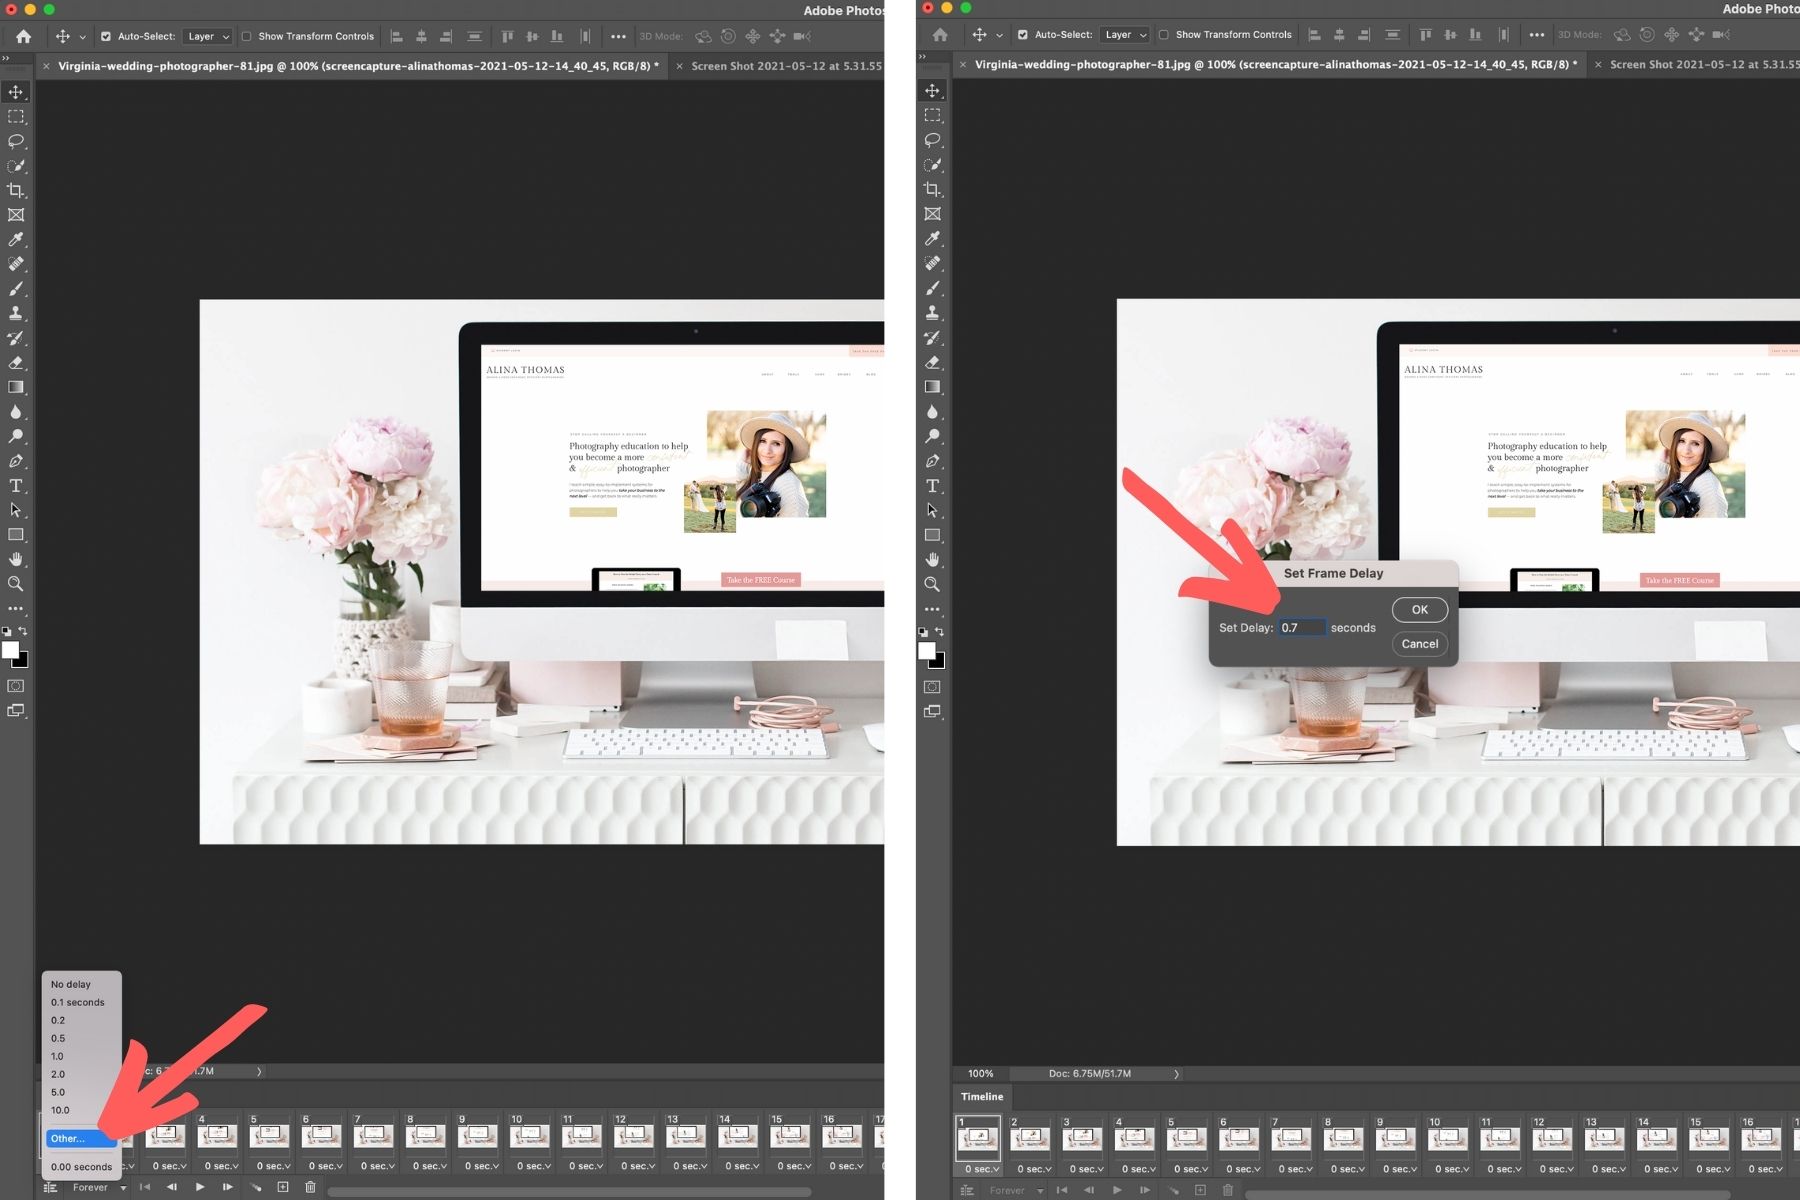
Next, you’re going to select all of the layers except for the first and last one, and choose a frame delay of 0.1 sec.
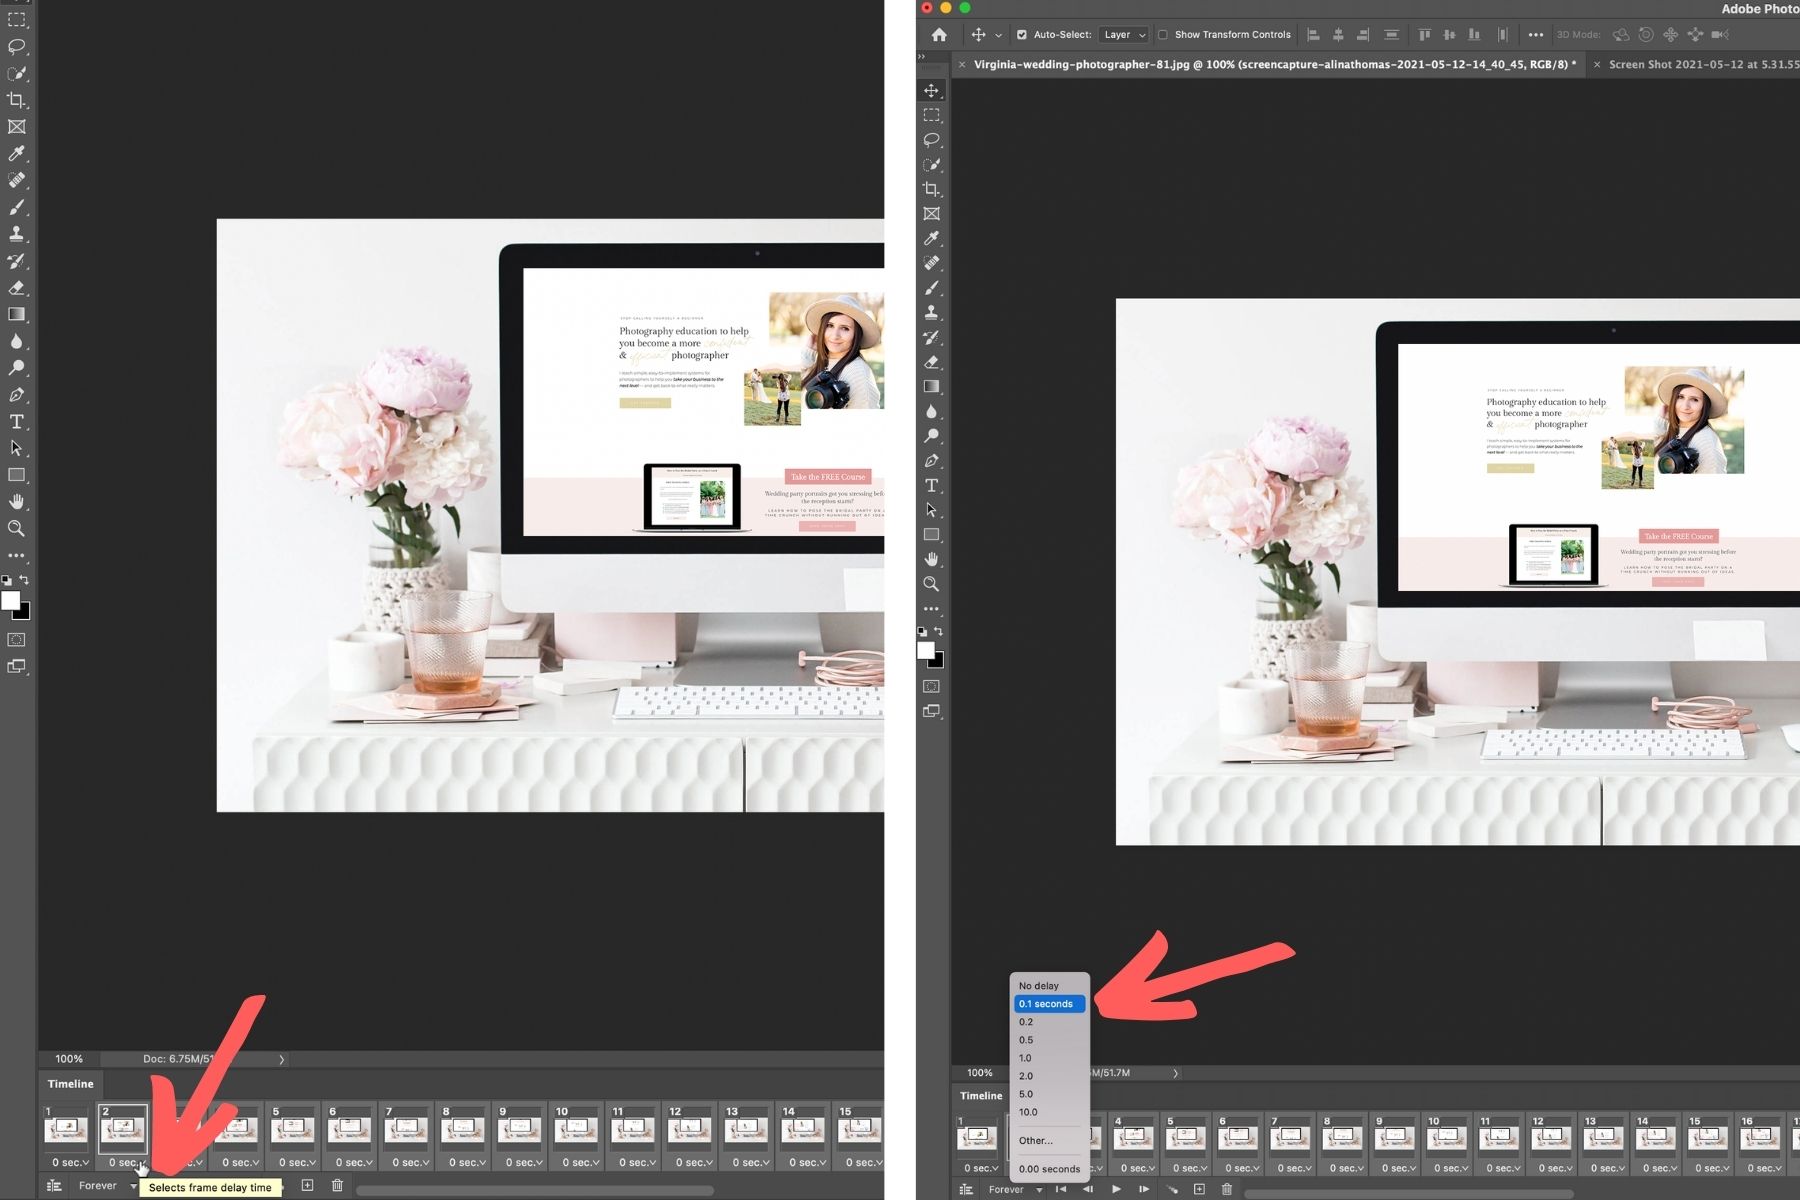
Then, you’re going to make the first and last frame 0.7 sec.
That’s how you create your scrolling website graphics. Easy, right?! To see your scrolling graphic in action, simply select the first frame and hit “play”. To save your graphic, click on File → Export → Render Video.
