

If you’re a wedding or portrait photographer looking to customize your camera to your shooting needs, then this Nikon D850 recommended settings blog post is for you.
I want today’s blog post to be the helpful guide I wish I had had a decade ago when I first started my business. Back then, I spent so much time trying to figure out which settings I needed to use as a wedding photographer and why.
After a lot of trial and error, I finally figured out how to set up my camera to be the best camera it can be for my wedding photography work. And today, I want to share my Nikon D850 recommended settings with you, so that you can unlock your camera’s full potential as well!
Customizing the Shooting Buttons
1. Manual Mode
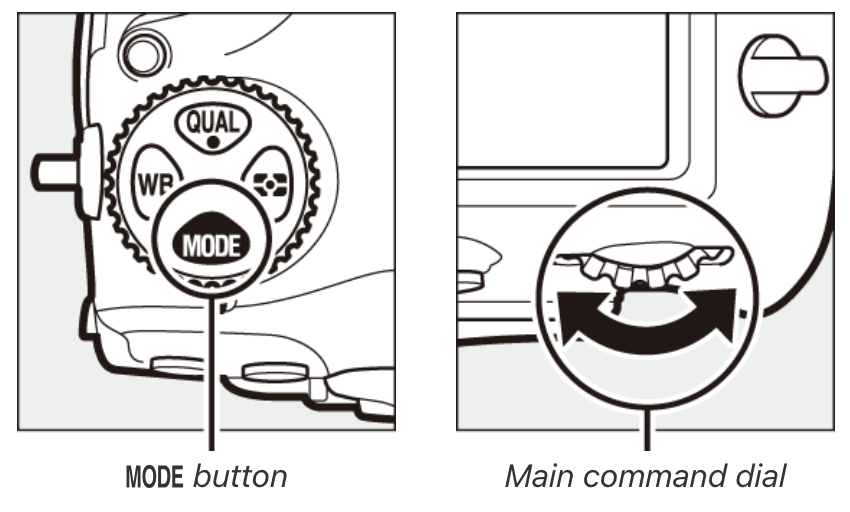
Make sure you are always shooting in manual mode so that you can have full control of your exposure rather than letting your camera decide which settings to use. To set your camera to shoot in manual mode, simply click the MODE button at the top left side of the camera, and use your command dial to select “M” for manual.
2. Metering Mode
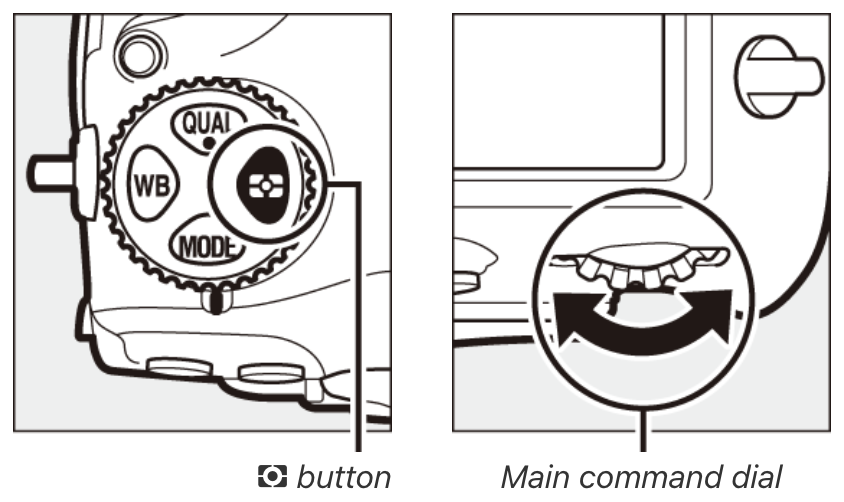
By default, your camera will be set to Matrix Metering. Change the metering mode to Center-Weight Metering by pressing the metering button at the top left side of the camera (next to the MODE button) and rotating the main command dial until the Center-Weight Metering setting is displayed in the viewfinder and control panel. For more in-depth information on why I choose to use this metering mode, check out the How to Get the Right Exposure in Camera blog post.
3. Autofocus Settings:
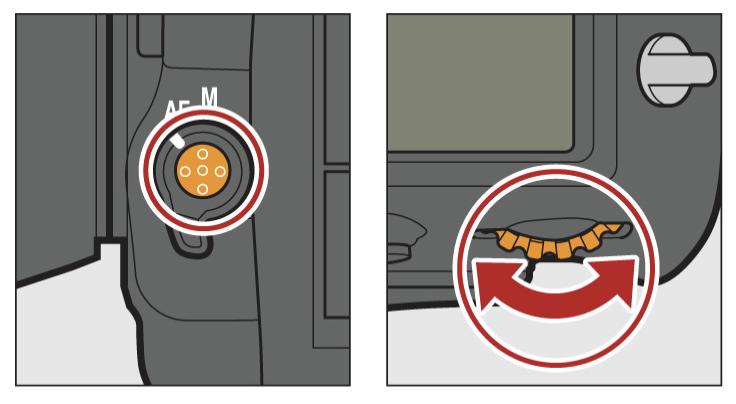
- Switch from AF-S (Single Shot) to AF-C (Continuous) mode. AF-S is used for stationary subjects, while AF-C allows you to change from a stationary subject to a moving subject very quickly (for example, if you’re taking a group picture of the bridal party, then having them walk towards the camera). Switch to AF-C by pressing the AF-mode button on the side of the camera and rotating the main command dial until it says AF-C.
- Set the autofocus point to single-point focus by pressing the AF-mode button and rotating the sub-command dial until it says S.
4. Highlight Display
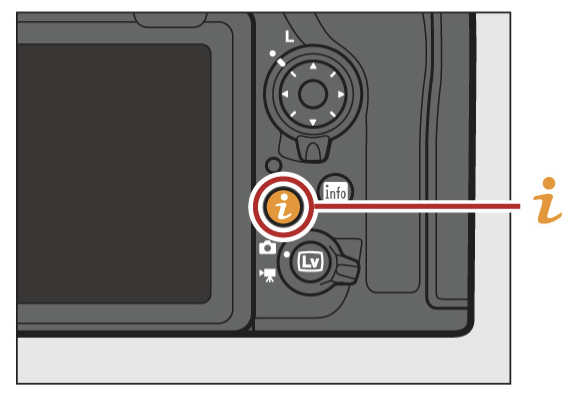
One of my favorite ways to ensure that I don’t overexpose my images and lose detail in the highlights (especially details on a wedding dress) is to check my LCD screen in the live view mode for movie recording. The LCD screen will show zebra stripes over the areas that are overexposed. To enable this setting, go to the live view mode for movie recording and:
- press the “i” button
- press Highlight Display → ON.
Playback Menu Customizations
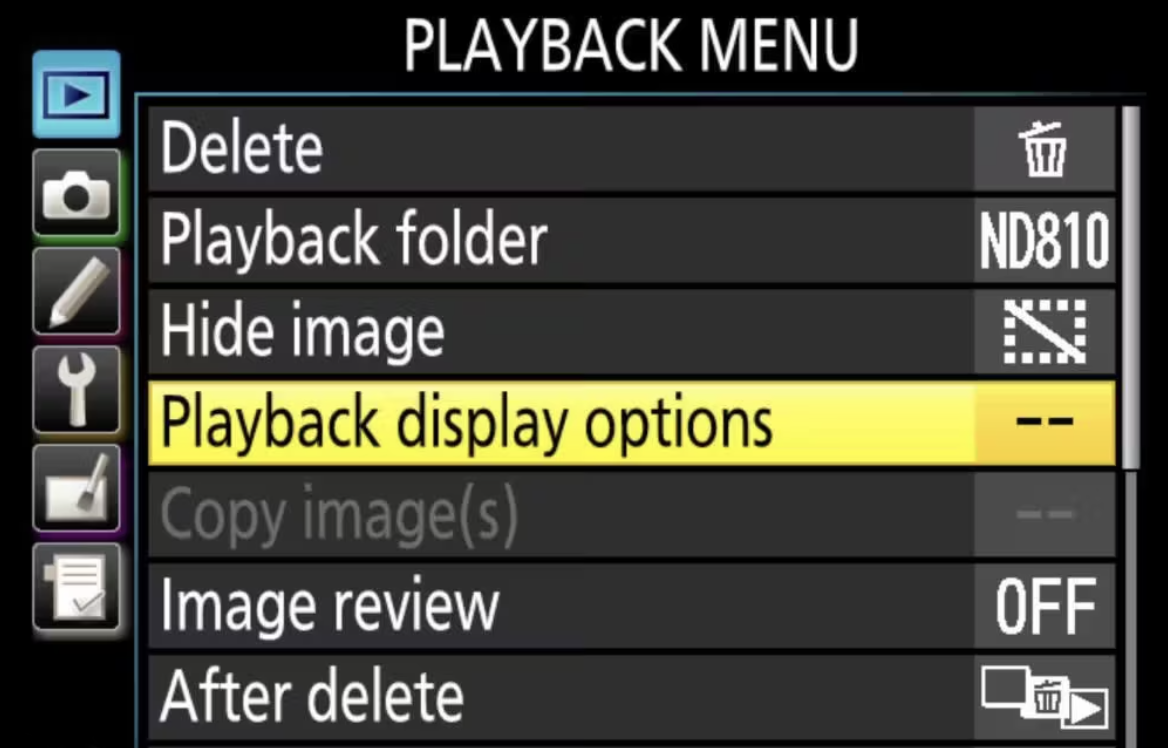
1. Playback Display Options
Go to Playback Menu → Playback Display Options and make sure that you have both RGB Histogram and Overview checked. Now, when you play back an image, you can press up on the joystick to get an overview of your settings, and if you press up a second time, you’re going to see the RGB histogram so you can read your exposure.
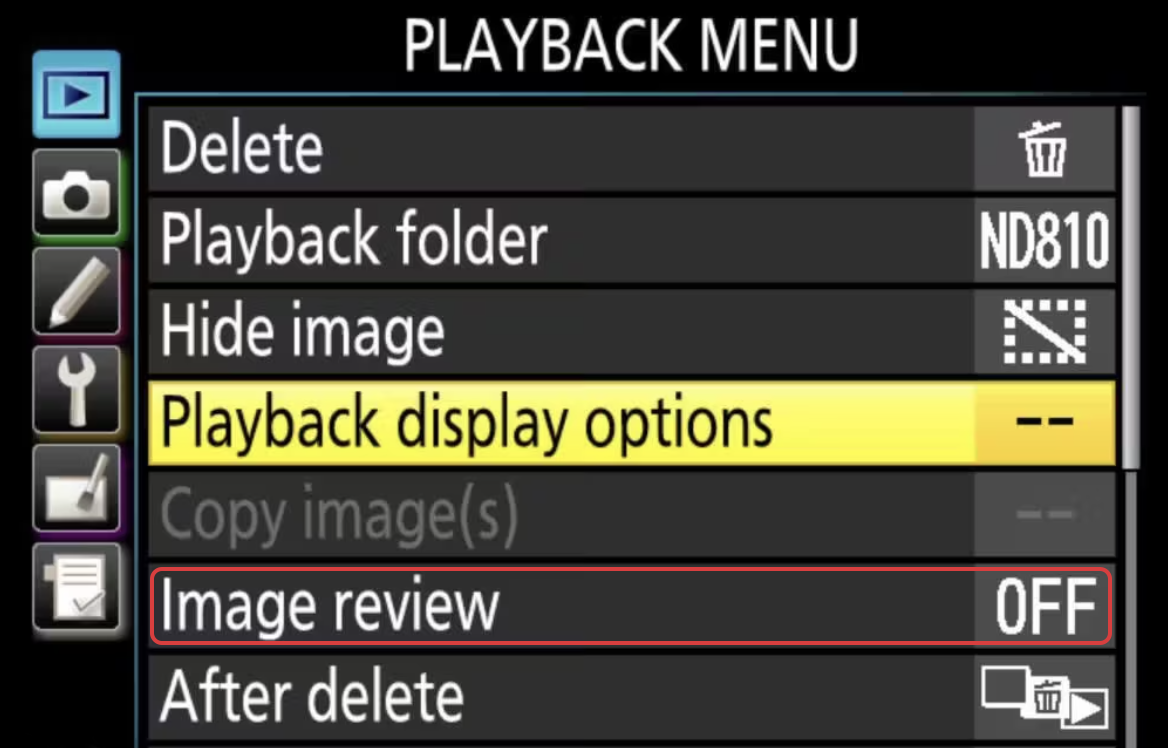
2. Image Review
- Go Playback Menu → Image Review → OFF.
By turning Image Review off, your images won’t automatically display on the back of the camera immediately after shooting, which helps with saving battery. I personally don’t like my images to automatically display on my LCD screen, especially if I’m taking a test shot and the image is overexposed or underexposed. And if I have wedding guests around me, I don’t want them to be able to see my test shots.
3. After Delete
This allows you to choose which picture will be displayed after an image is deleted. So, if you’re scrolling through your pictures in reverse order and delete an image, you’ll want the next picture that will be displayed to go in the same order as the one you were scrolling.
Playback Menu → After delete → Continue as before
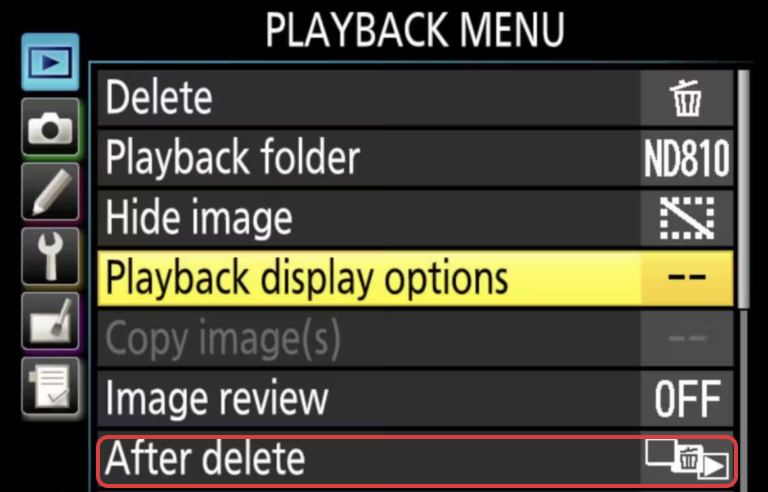
Photo Shooting Menu
1. File Naming
- Go to Photo Shooting Menu → File Naming to name your files.
This is important if you’re ever having issues with your photos to know exactly which camera took those particular images.
2. Primary Slot Selection
- Go to Photo Shooting Menu → Primary Slot Selection → SD Card Slot.
I like to make the SD card the primary card slot on my camera.
3. Card Role
- Go to Photo Shooting Menu → Secondary Slot Function → Backup.
As a wedding photographer this is a must! I always make sure that my images are backed up on two different cards in case one gets corrupted or fails for any reason.
4. Image Quality
- Go to Photo Shooting Menu → Image Quality → NEW (RAW).
Always make sure you’re shooting in RAW, not JPEG. This will allow for more flexibility when editing your images.
Custom Menu Settings
1. Back Button Focus
Assigning the AF-ON button to become the autofocus button is one of the most important things to customize. To do this, you need to go to your custom settings menu, then:
- Select “Autofocus” (a)
- Go down to “AF activation” (a8 on my D850)
- Select “AF-ON only” → Enable
- Use the “AF-ON” button on the back of the camera to focus

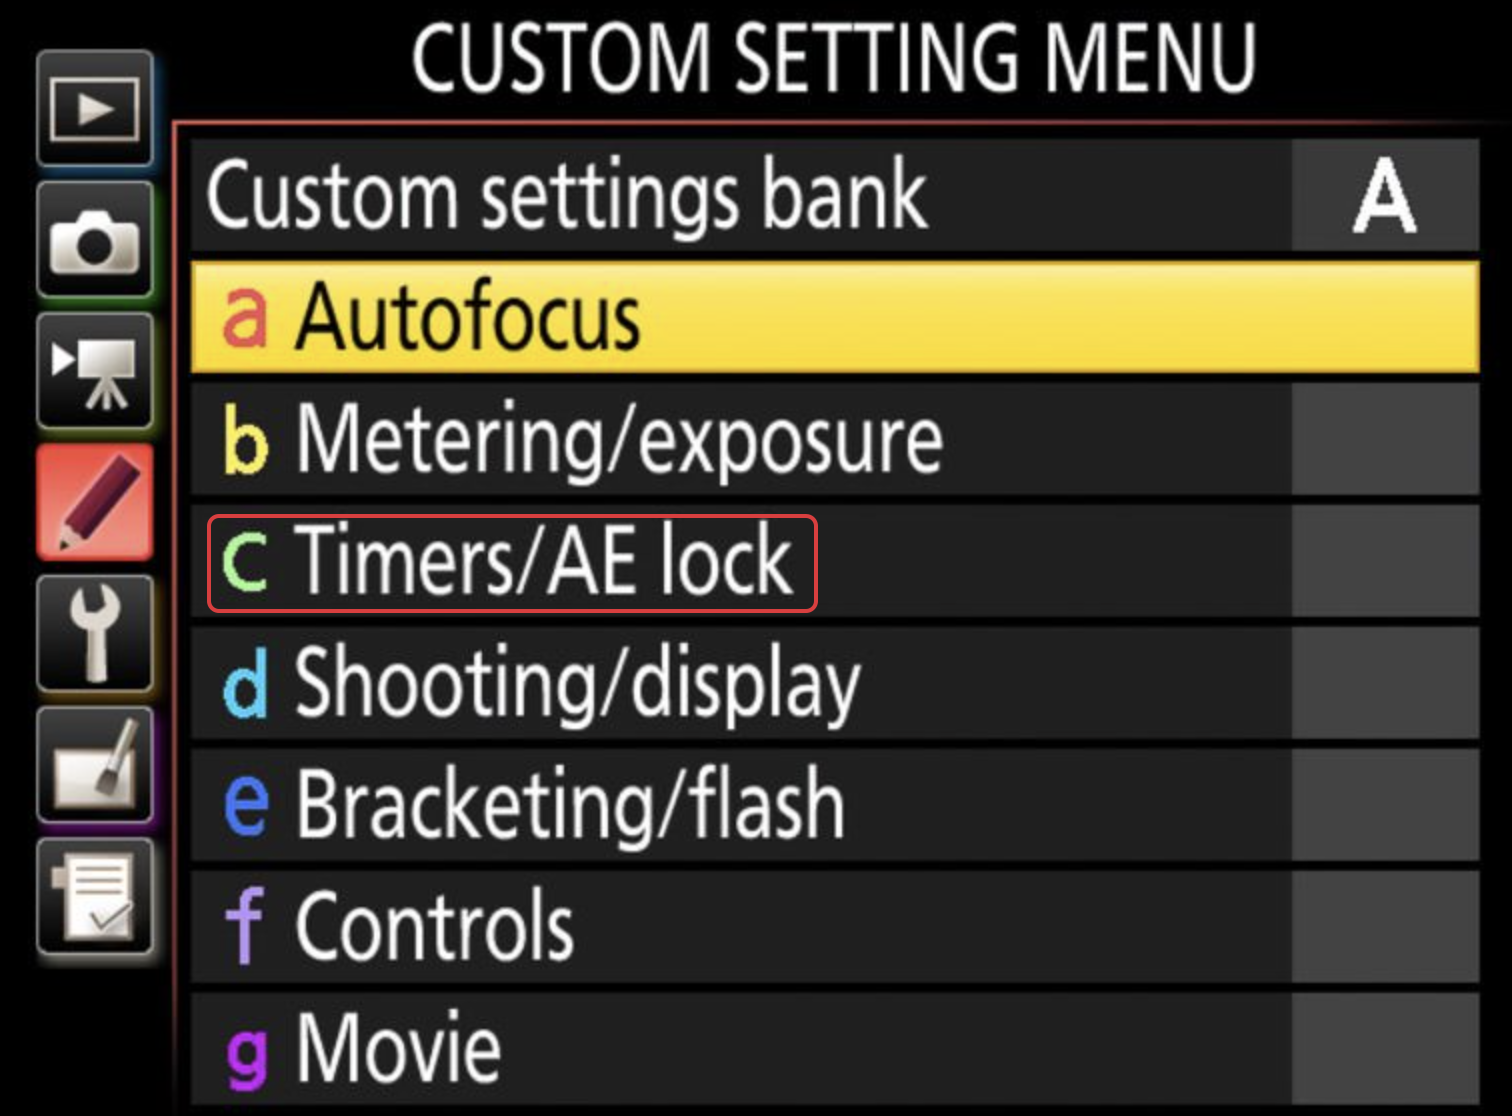
2. Timers/AE lock
- Custom Setting Menu → c2 Standby Timer → 1o min.
This ensures that my camera doesn’t go to sleep in between shots.
3. OK Button
I like to set my OK button to act as a zoom in button when I preview my images on the back of the camera to make sure that I achieved the focus that I wanted. To enable this setting, go to the custom setting menu, then click on:
- f2 Multi selector center button → Playback Mode → Zoom on/off → 1:1 (100%)
So now, when I preview an image, I can very quickly zoom in at 100% by pressing the OK button and checking the focus. When I’m done checking the focus, I simply press OK again and it zooms out to show me the entire image.
4. Customize Command Dials (f4)
I like to use my command and sub command dials to scroll through my images quickly, instead of using the joystick.
- f4 Customize command dials → Menus and playback → ON (allows me to scroll through my images one by one)
- f4 Customize command dials → Sub-dial frame advance 10 (allows me to scroll through my images in increments of ten)
Setup Menu
1. Copyright Information
- Setup Menu → Copyright Information → ON
Under Artist, I use my Name, Alina Thomas. And under Copyright, I use my website.
2. Slot Empty Release Lock
The slot empty release lock ensures that you have a memory card loaded before you take any images. Without a card, your shutter won’t be able to take any pictures. This is especially important during a wedding when you really don’t want to be able to press the shutter and have it go off thinking you’ve taken a shot when there are no cards inside the camera.
- Setup Menu → Slot Empty Release Lock → LOCK
This means that if you don’t have a card inside the camera, you won’t be able to fire the shutter. In my opinion, this should be a factory setting.
3. Save/Load Settings
If you have multiple D850 cameras and want to copy all of these settings onto your second camera, all you have to do is go to:
- Setup Menu → Save/Load Settings
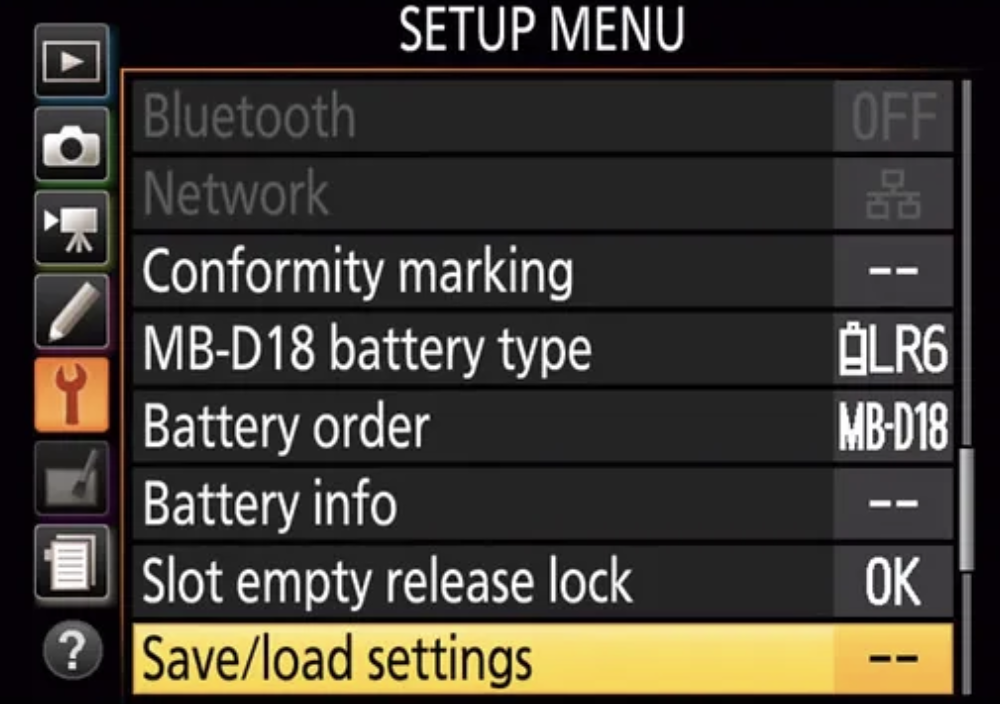
From here, you can save your settings to your SD card, then use that card to load the same setting unto your second camera (Don’t forget to change the image file name on the second camera!).
The Nikon D850 is an amazing camera for weddings and portrait photography and with these Nikon D850 recommended settings in place, you can push the boundaries of your photography to new heights!
*The illustrations used in this post are from the Nikon D850 user manual.
Want to stand out on social media? Get our customizable Canva templates for photographers – they’re absolutely FREE when you start a Caption Collective trial. (Don’t love Caption Collective? Cancel anytime!)


