If you want a faster editing workflow, then you’re in the right place! Are you tired of spending all day editing at your computer after a session? If you’re anything like me, then you didn’t become a photographer to spend half of your life in Lightroom editing your images. To help with that, here are my 5 tips for a faster editing workflow!
1. Cull More than Once
Cull through your images, then cull again (I can’t stress this enough!!). I use Narrative Select to quickly select which images I want to keep, and which images I need to discard due to them being blurry or duplicates of other images (this process is called “culling”). After I finish culling once, I go through my culled images again and only keep the best of the best. Why? Often times I would end up importing the first batch of culled images and edit them all. Then as I’d go through the photos one last time before exporting them, I noticed that I still had images that were duplicates or too similar and would end up deleting them from my Lightroom catalog anyway.
Not only did I waste time editing those images that I ended up not using, but I also spent more time reviewing the final gallery before exporting it because I had a lot more pictures to go through. Because Lightroom takes a few seconds to render each image, this step could literally take a couple extra hours. What would you do with a few extra hours in your day? I bet all of us could use some extra time, right?! This is one way that you can make sure you don’t spend more time on editing than you need to.
2. Edit the Blog Images First
After I cull through my images twice, I go through them a third time and select the images I want to feature on the blog. I usually end up with about 100 images to edit. If you’re editing a wedding, the key is to choose images from each stage of the day. Since I already edited photos from every part of the day for the blog, I can now simply sync them with the rest of the images. This saves me a lot of time because I don’t have to edit every single image from scratch. To sync your photos, simply click on the edited image first, then select the rest of the images you’d like to apply the same settings to, and click the Sync button in the bottom right corner in Lightroom.
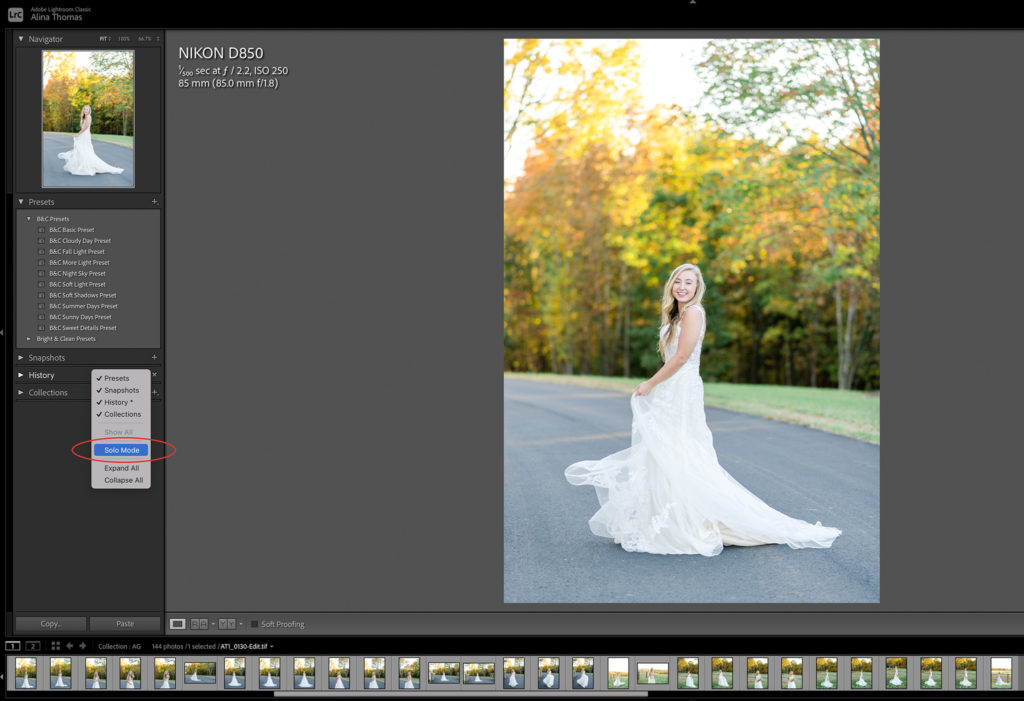
3. Use Solo Mode
If you’re still scrolling for days to find the right slider in the Develop Module in Lightroom, then you need to use Solo Mode. Solo Mode allows you to only have one panel open at a time, which means that if you want to move to the next one, you can see it in the Develop Module without having to scroll up and down trying to find it. This is truly a time saving option, especially if you’r editing on a laptop. To turn it on, simply right-click on any dark gray area in your left or right side panels and select “Solo Mode”. Give this a try and let me know how it works for ya!
4. Use Lightroom Presets the Smart Way
Whether you buy or create your own presets, narrow down your top 10 favorite ones and only use those. Why? Because consistency is key. If you like to download every single free preset out there and now have an impressive collection of 100+ presets, then it’s time to narrow them down, my friend. I have a lot of people ask me if I’m going to create more presets, and my answer is always the same, No! I created The Bright & Clean Presets to work with different lighting situations while giving the same consistent editing style in every situation. No more confusing “creative” names… instead each preset was named for the exact edit it’s made for.
Need brightness in your photo? Choose More Light.
Shot in bright sunshine? Choose Sunny Days.
Need to create that glowy, milky light for a gorgeous flat lay? Choose Sweet Details.
And repeat this simple process with ten reliable presets over and over again — getting the same gorgeous results every time.
The only way to edit consistently in every season and every lighting situation is to use a set of presets that are meant to give you the same editing style no matter the location, lighting conditions, or time of year scenarios.
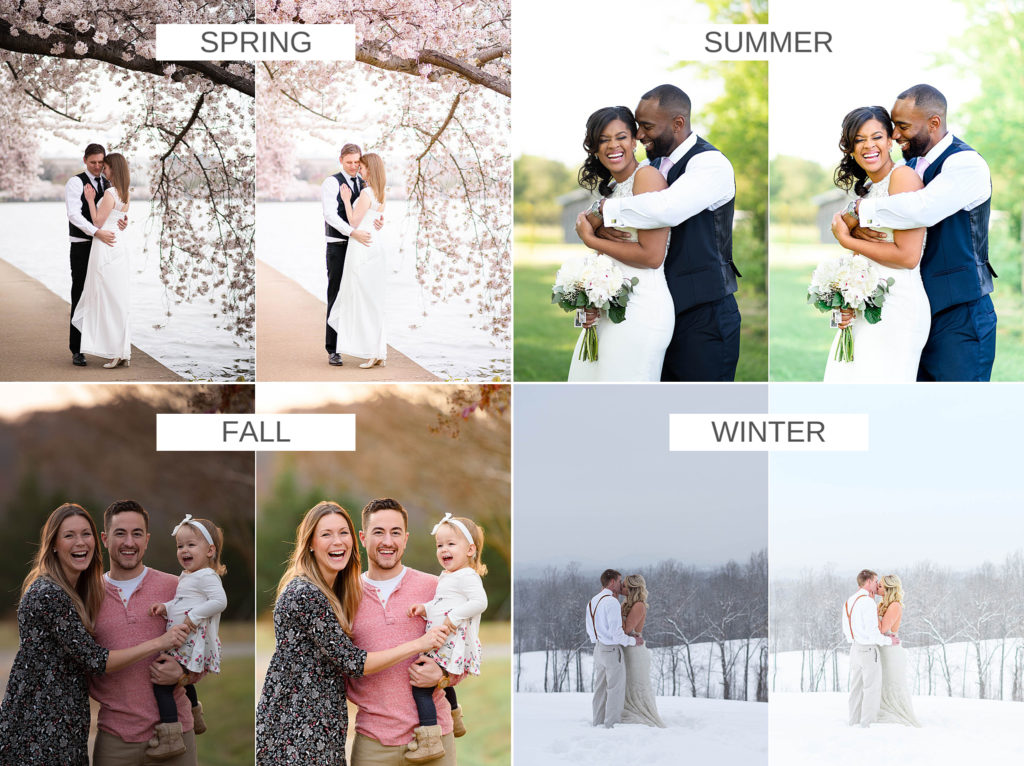
All of these images are natural, light & airy pictures that have vibrant colors and pop, even though they were all shot in different locations, at different times of the day, and in different seasons. Yet, they still look consistent! That’s what happens when you narrow down your presets to 10 or less!!
5. Create Export Presets
You don’t need to spend a lot of time figuring out your settings every single time you export your images from Lightroom. By creating export settings, you can make this a fun, easy, and fast process. You can create a preset for social media images, blog photos, or when exporting your pictures for your online gallery. To create your preset, simply choose your settings, then click “Add” in the bottom left corner. Name your preset, and you’re done.


These are my 5 tips for a faster editing workflow! Which one is your favorite?