Curious how to create your own presets in Lightroom Mobile? If you are looking to enhance your family and vacation photos, or want to finally have a cohesive looking Instagram feed, this blog post is for you.
Here’s how to give your photos that extra pizazz!
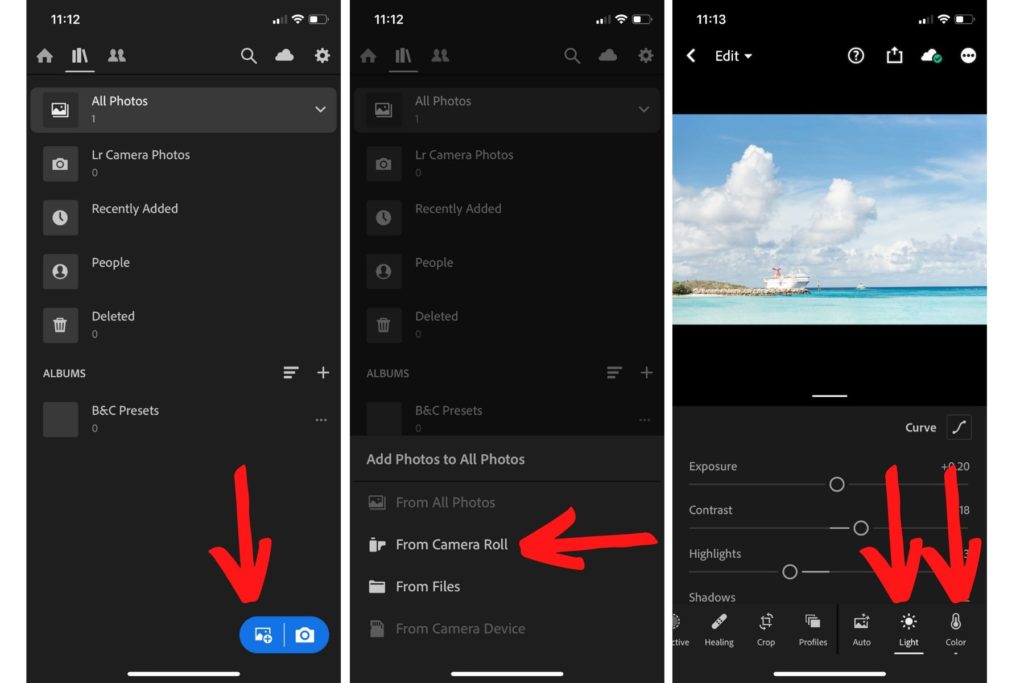
1. Download the Lightroom CC mobile app to your phone.
2. Upload a picture into your Lightroom mobile, or browse through your Lightroom photo library and select the image you’d like to edit.
3. Use the buttons in the bottom menu to edit your picture. I mainly use the “Light” and “Color” buttons.

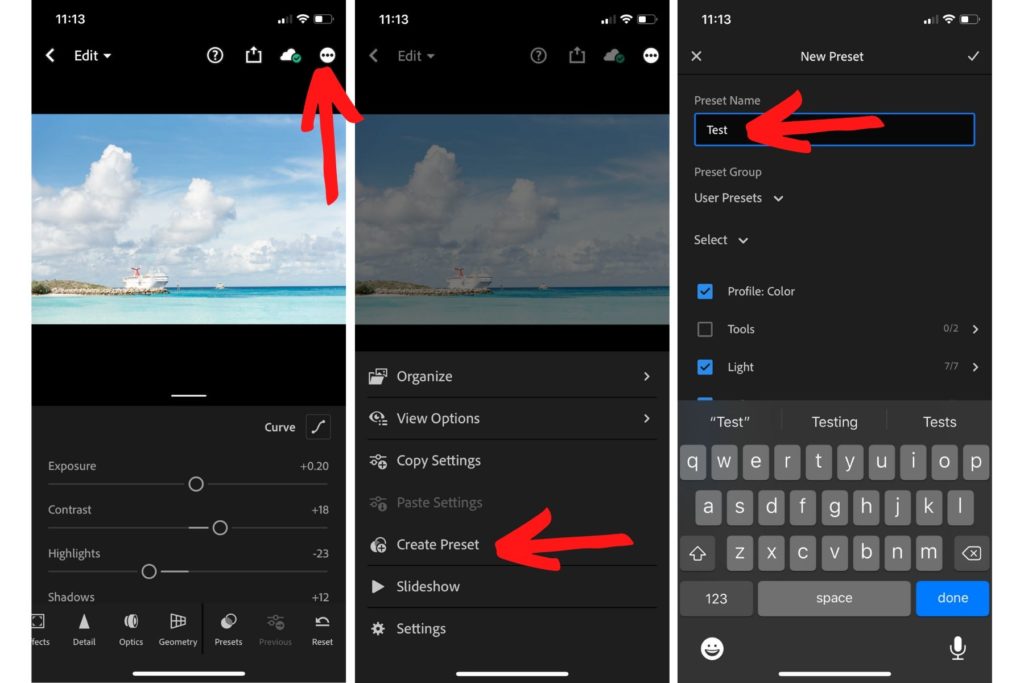
4. Once you’re done editing your photo, tap the three dots in the top right corner of your screen and select “Create Preset”.
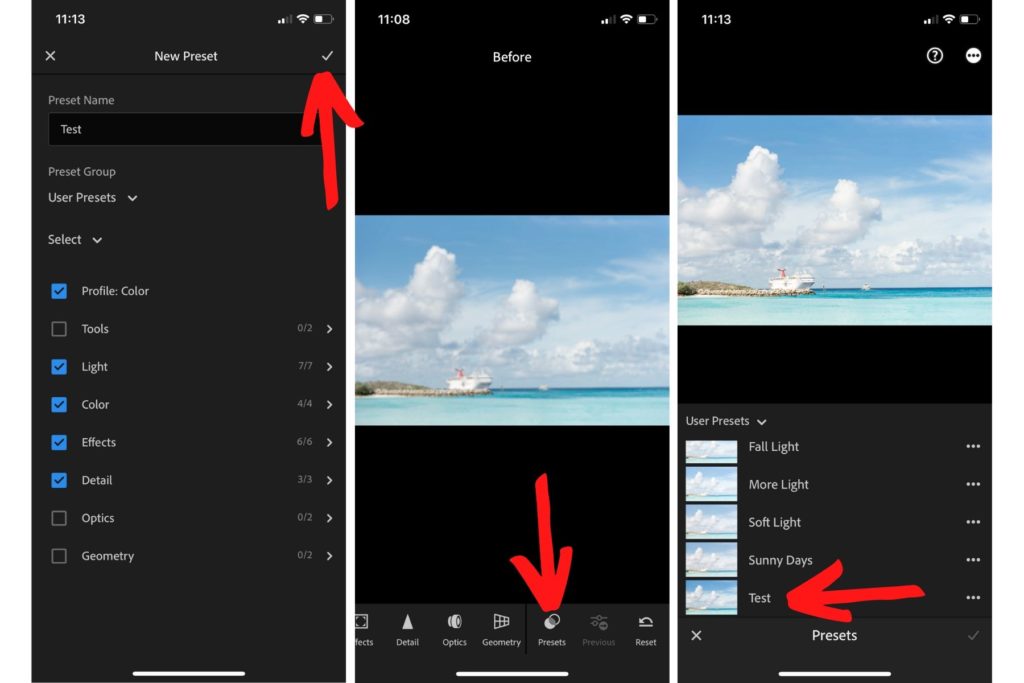
5. Name your preset, then tap the checkmark icon in the top right corner and you’re done.

That’s how you create your own presets in Lightroom Mobile. Pretty easy, right?
To apply your newly created preset to another image, all you have to do is:
– select your image
– swipe left until you see the “Presets” button in the bottom menu
– tap the “Presets” button to open your presets list.
– click on the preset of your choice and hit the check mark in the bottom right corner to apply the preset to your image

By the way, if you feel like your Instagram feed is all over the place and wish your phone photos finally looked “professional”, my Bright & Clean Presets will take your photos from “ok” to “fabulous” in just a few simple clicks. That’s right! Our best seller presets for Lightroom Mobile will help brighten up your photos so that your Instagram feed flows together. They are perfect for quick edits on the go that make everyday photos look amazing.
Introducing The Bright & Clean Presets
(The Mobile Collection)

Was about to offer presets and this was just what I was looking for. Thank you
Glad you found it helpful, Slawa! :)