

I’ve talked about how to pair images for the blog before, but I never actually shared a tutorial of how I do it. I recently got this question, so I thought I’d show you my step-by-step process for how I create collages for my blog or social media!
“How do you curate images for the blog, Instagram, and Facebook, and how do you make collages and with what software?”
– Asked by VDK Photography
What a great question! I answered the first part a couple of weeks ago in this blog post: How to Decide which Images to Post on the Blog vs Instagram. Today, I’m going to focus on the second half, all about the software that I use to create collages.
I use a program called BlogStomp to resize and pair my images together for the blog. BlogStomp is a simple blogging software that allows you to drag and drop your images and create collages to the exact size you want. Here’s how I use it for every single wedding and engagement blog post!
The Settings Tab
The first thing I do when I open BlogStomp is go to the Settings Tab → Output.
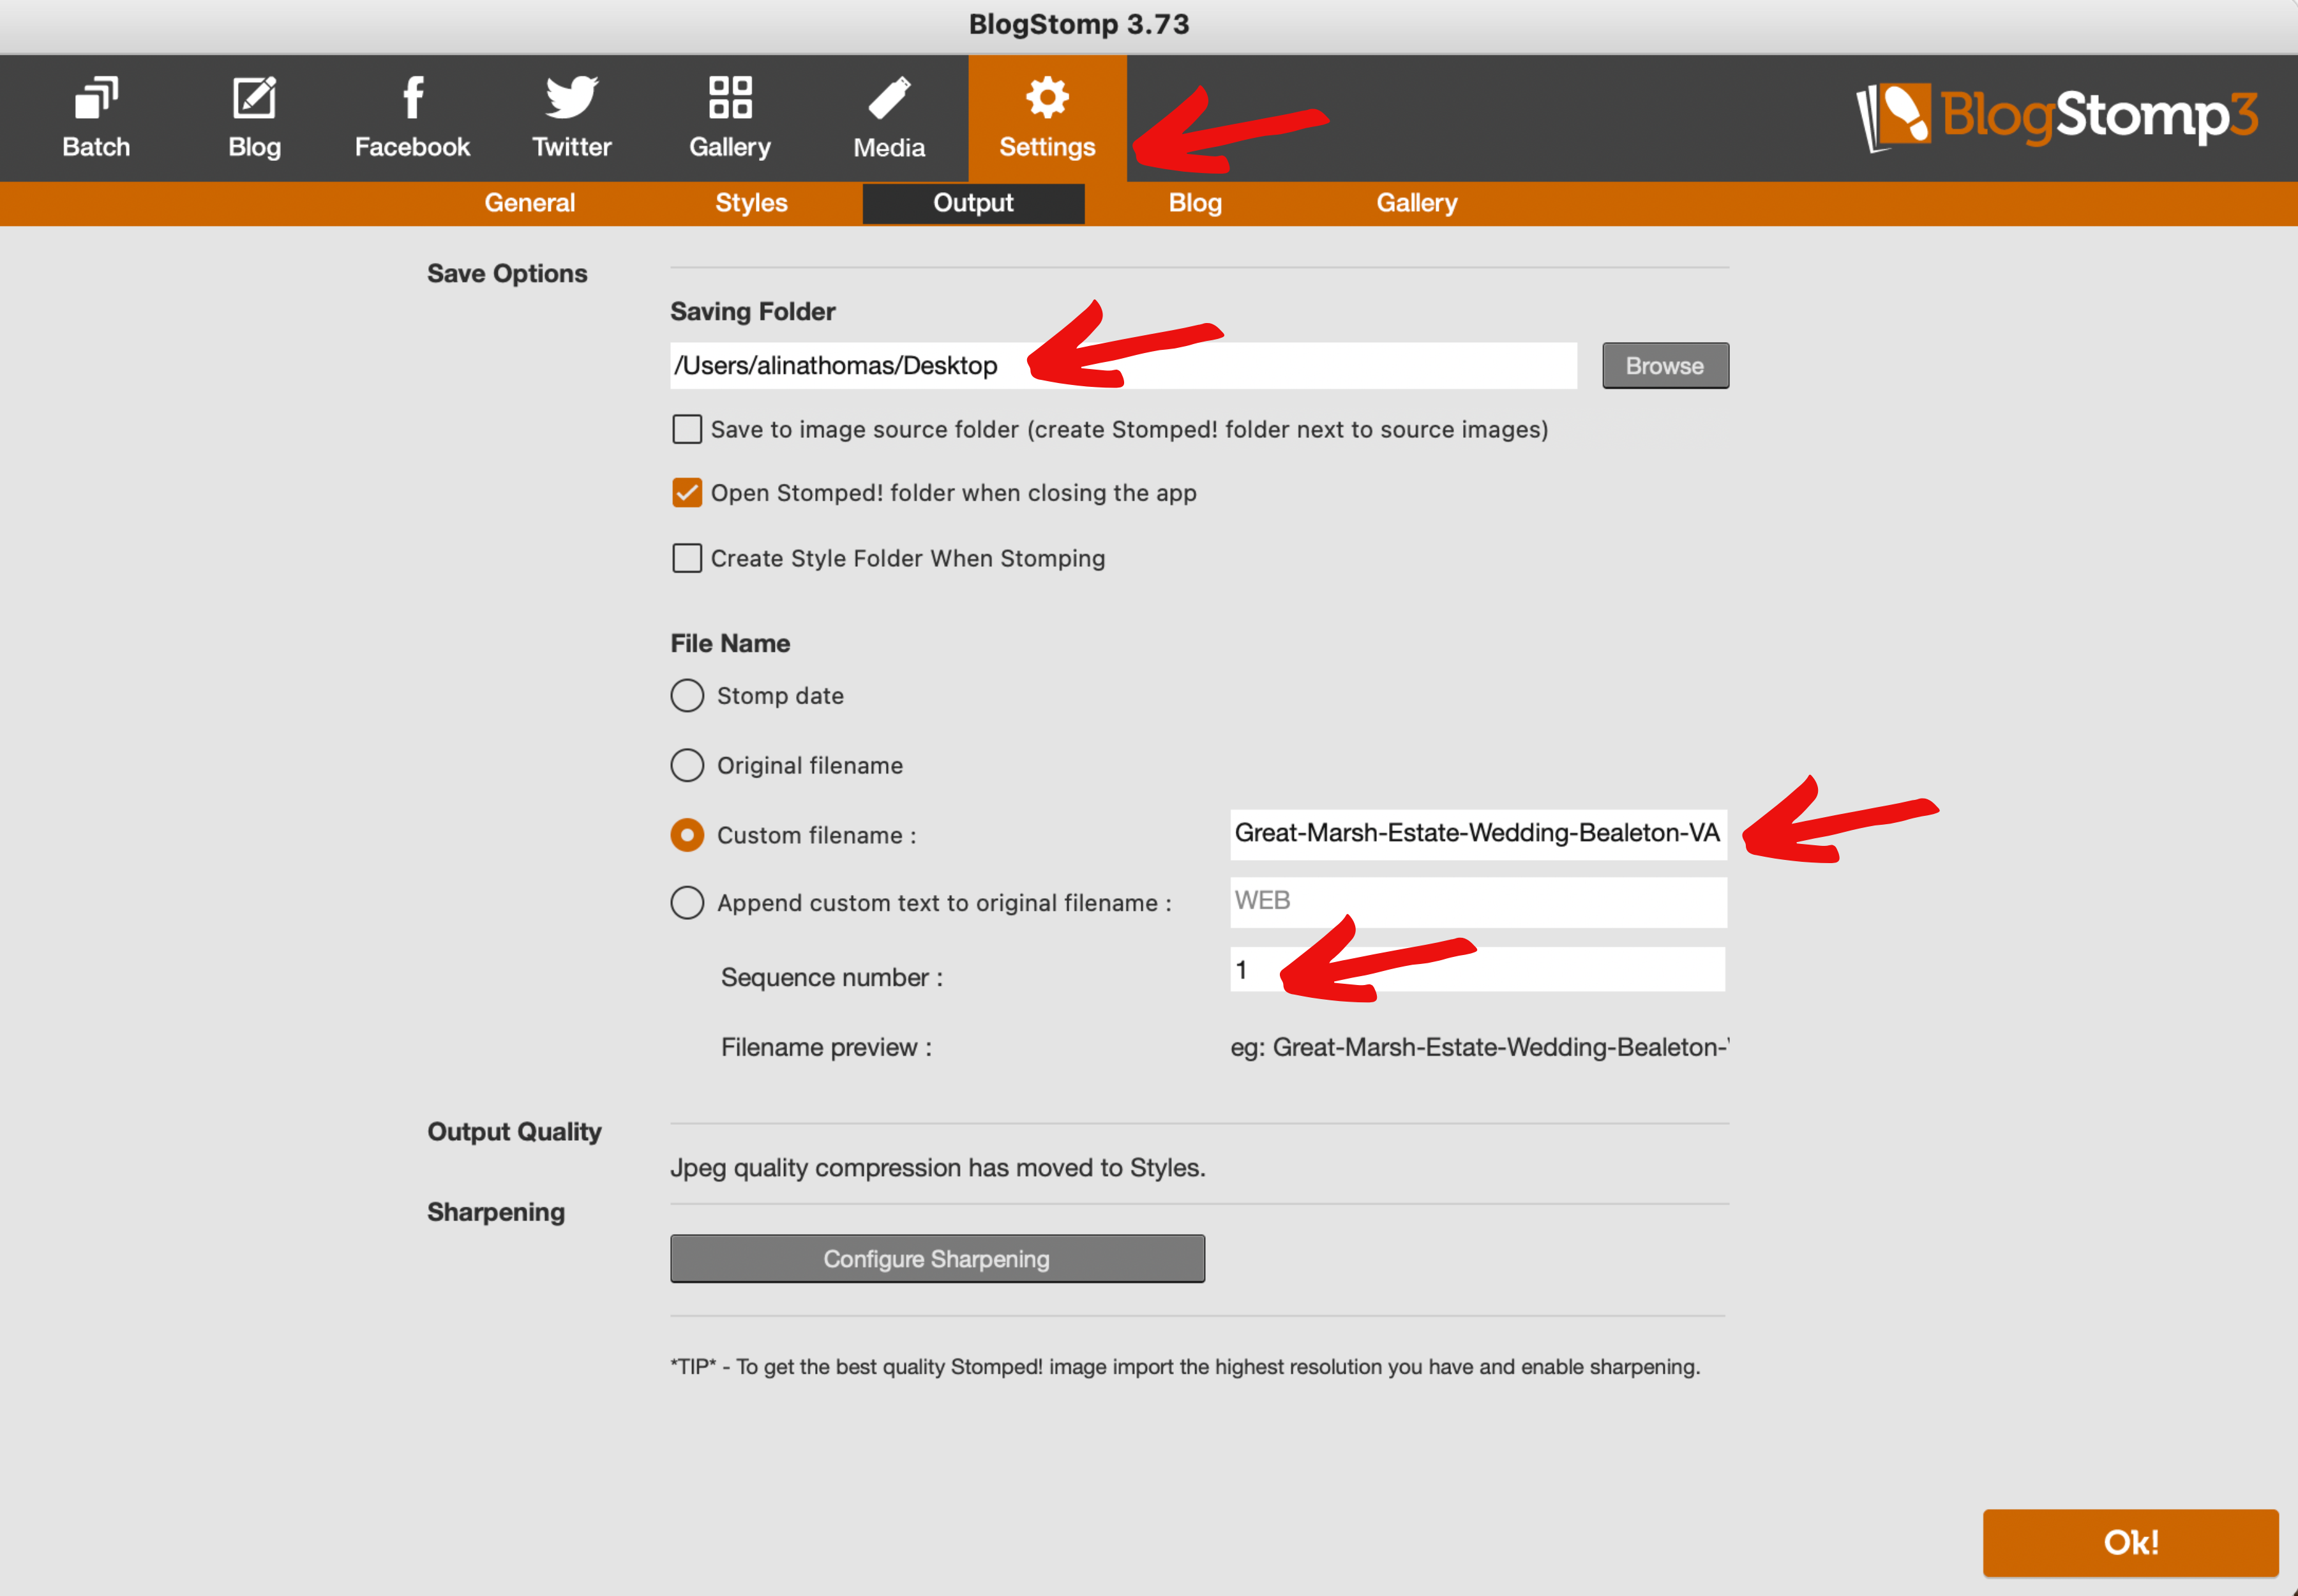
The first thing you need to decide is where you want your images to be saved. I usually just have them in a folder on my desktop.
Then I go down to “Custom filename” and choose what I want to name my images once they are exported from BlogStomp. Pro tip: Always use your keyword in your file name and separate each word by a dash (this is considered to be a best practice for SEO). When it comes to keywords, I usually use the venue name or the city/state that the wedding was in. You want to choose something that people would search for on Google.
*For more in-depth information on how to choose the right keywords, you can dive into this blog post: How to Optimize Blog Posts for SEO.
Next, in the “sequence number” box I usually select 1. That’s all I do at the Output level.
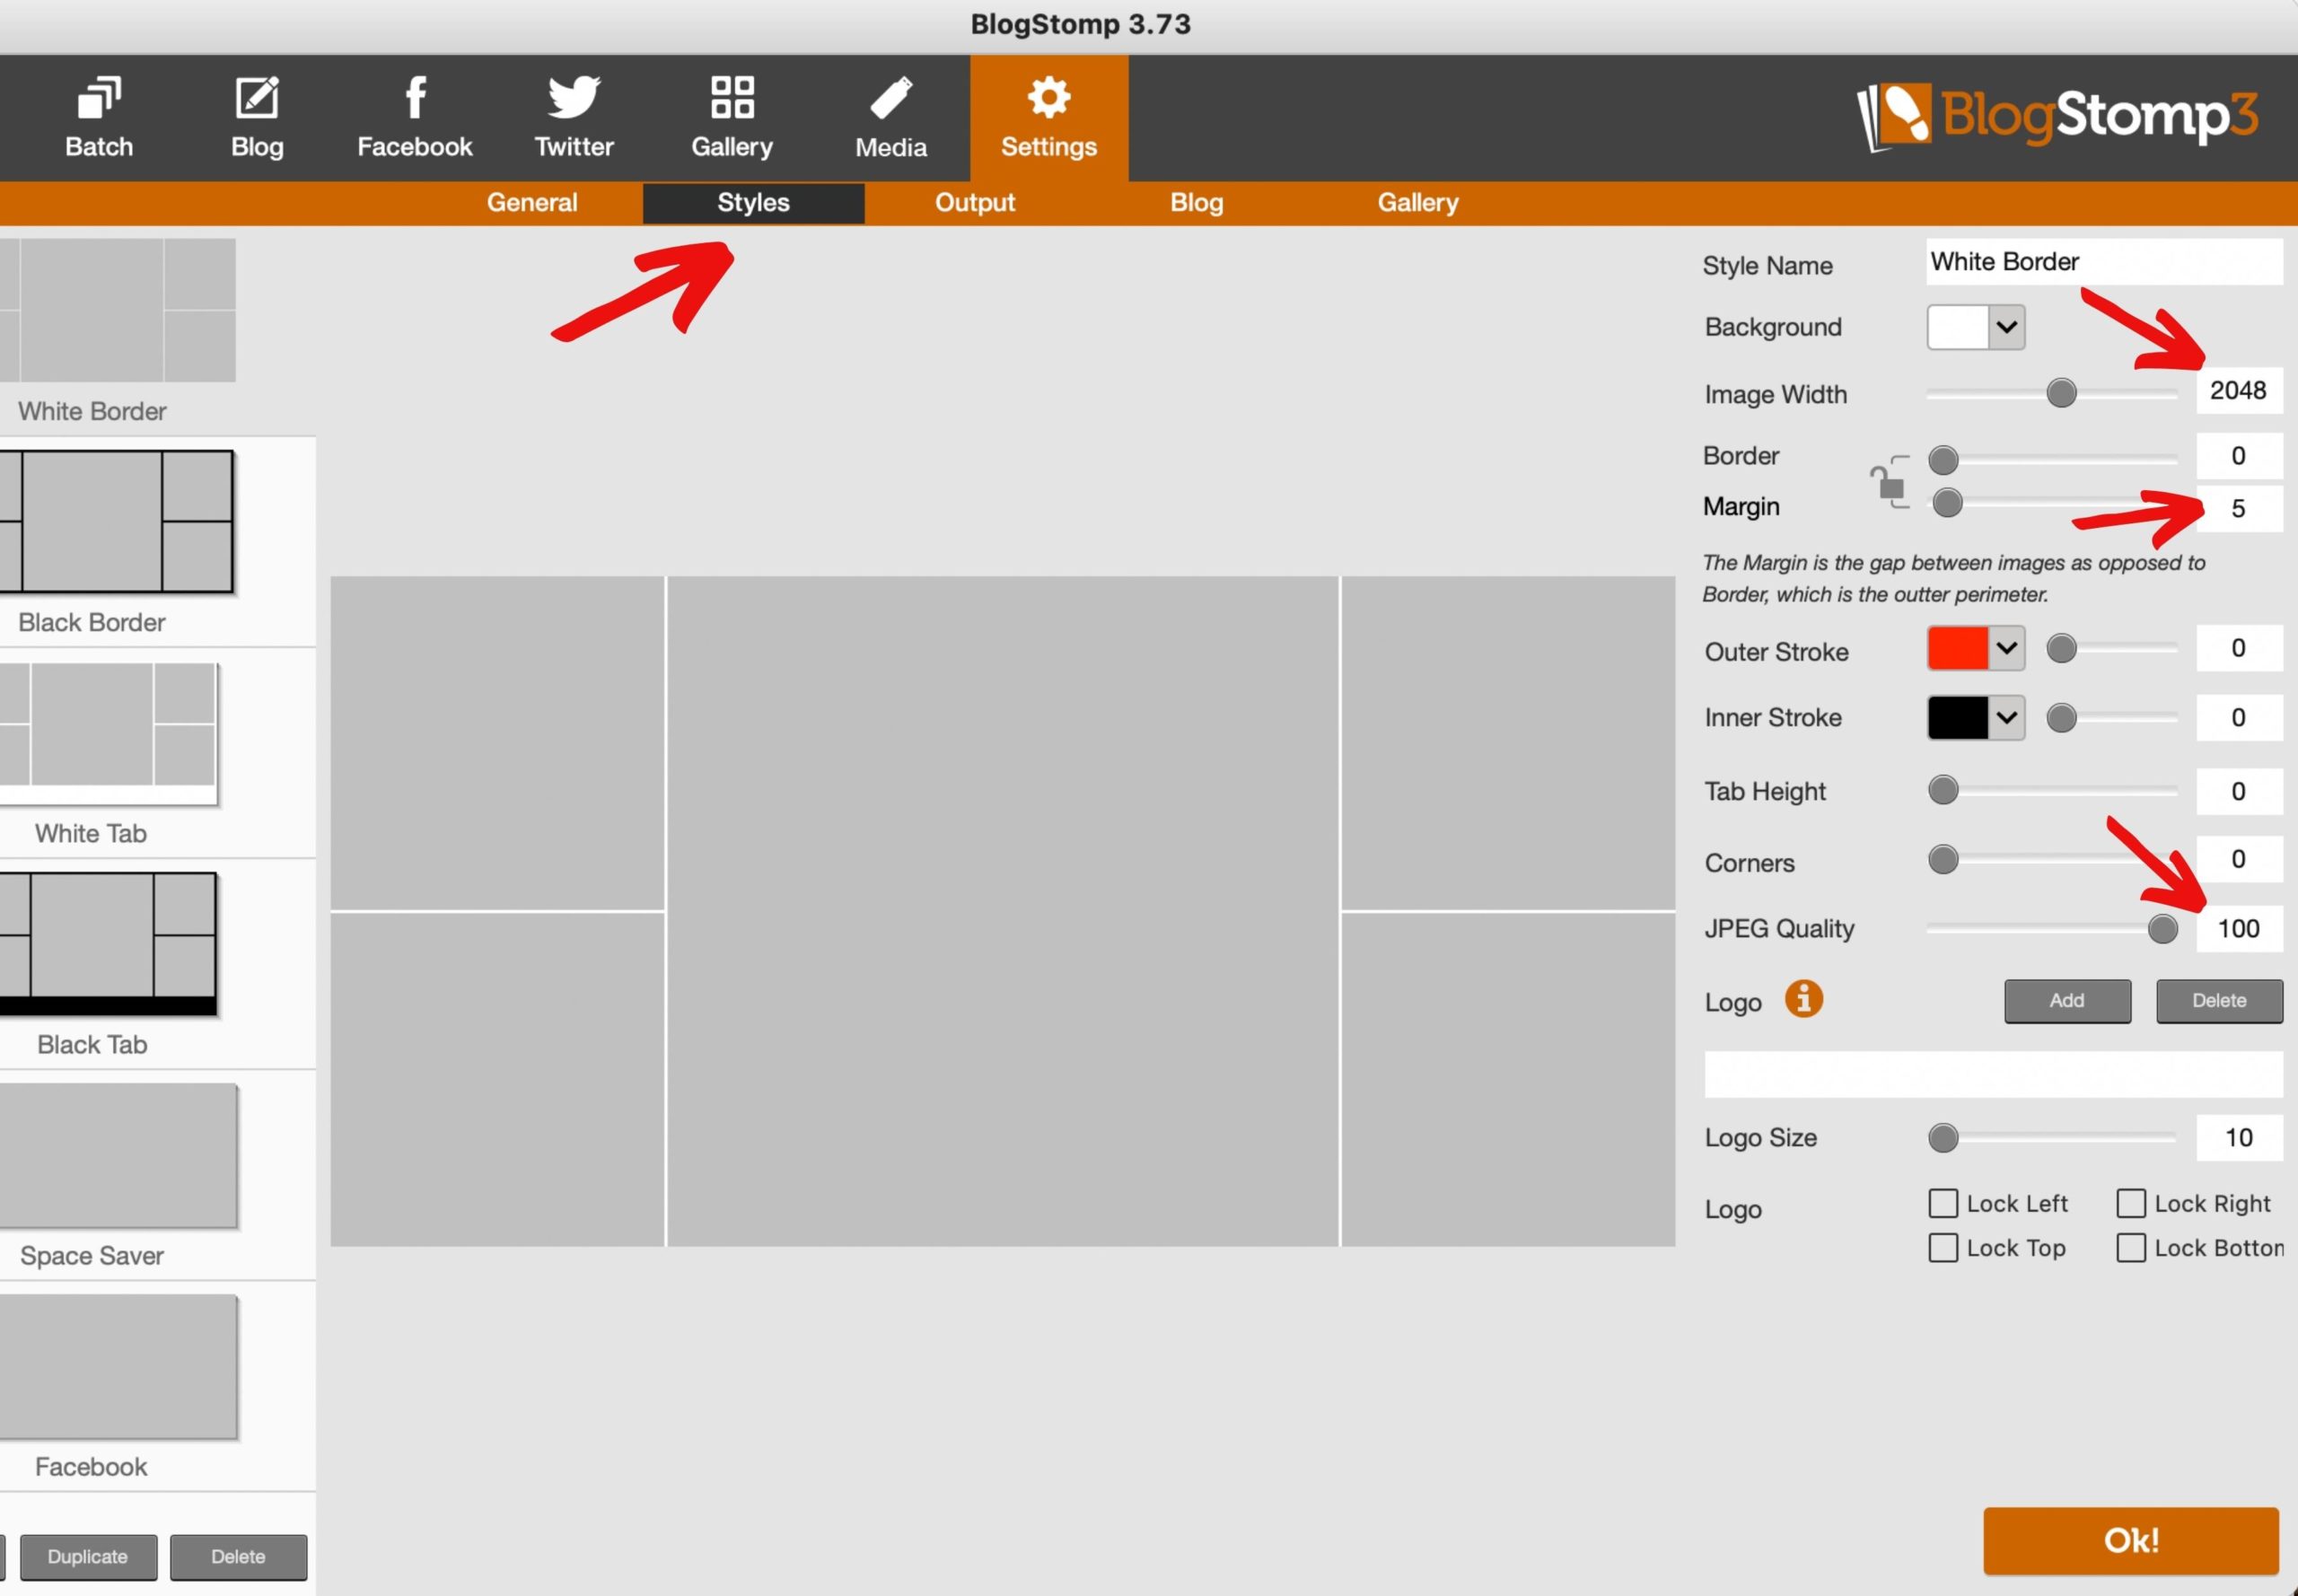
If this is your first time using BlogStomp, you might also want to set everything up at the Styles level as well. You only have to do this once, and it will save for you going forward. So, it’s a set and forget kind of step. The decisions you have to make here are your image width and border margin. You never want to upload full resolution images to your website because the large file size might slow down your site load time, which can impact your SEO negatively. I decided to use an image width of 2048 pixels because at the time that I originally set this up, that was the recommended image size for Facebook posts. So, in order to avoid resizing my images multiple times, I decided to stick with the recommended Facebook size, which was also a good size for my blog images.
The second thing you need to set at this level is your margin width. I set my margin width to 5 which has worked really well for me. Next, make sure that your JPEG quality is set to 100 and you’re all good to go.
The Freestyle Tab
Once you’ve set everything in the Settings Tab, it’s time to create your collages. You do this in the freestyle tab. First, you’re going to drag and drop the images that you want to use in your blog.
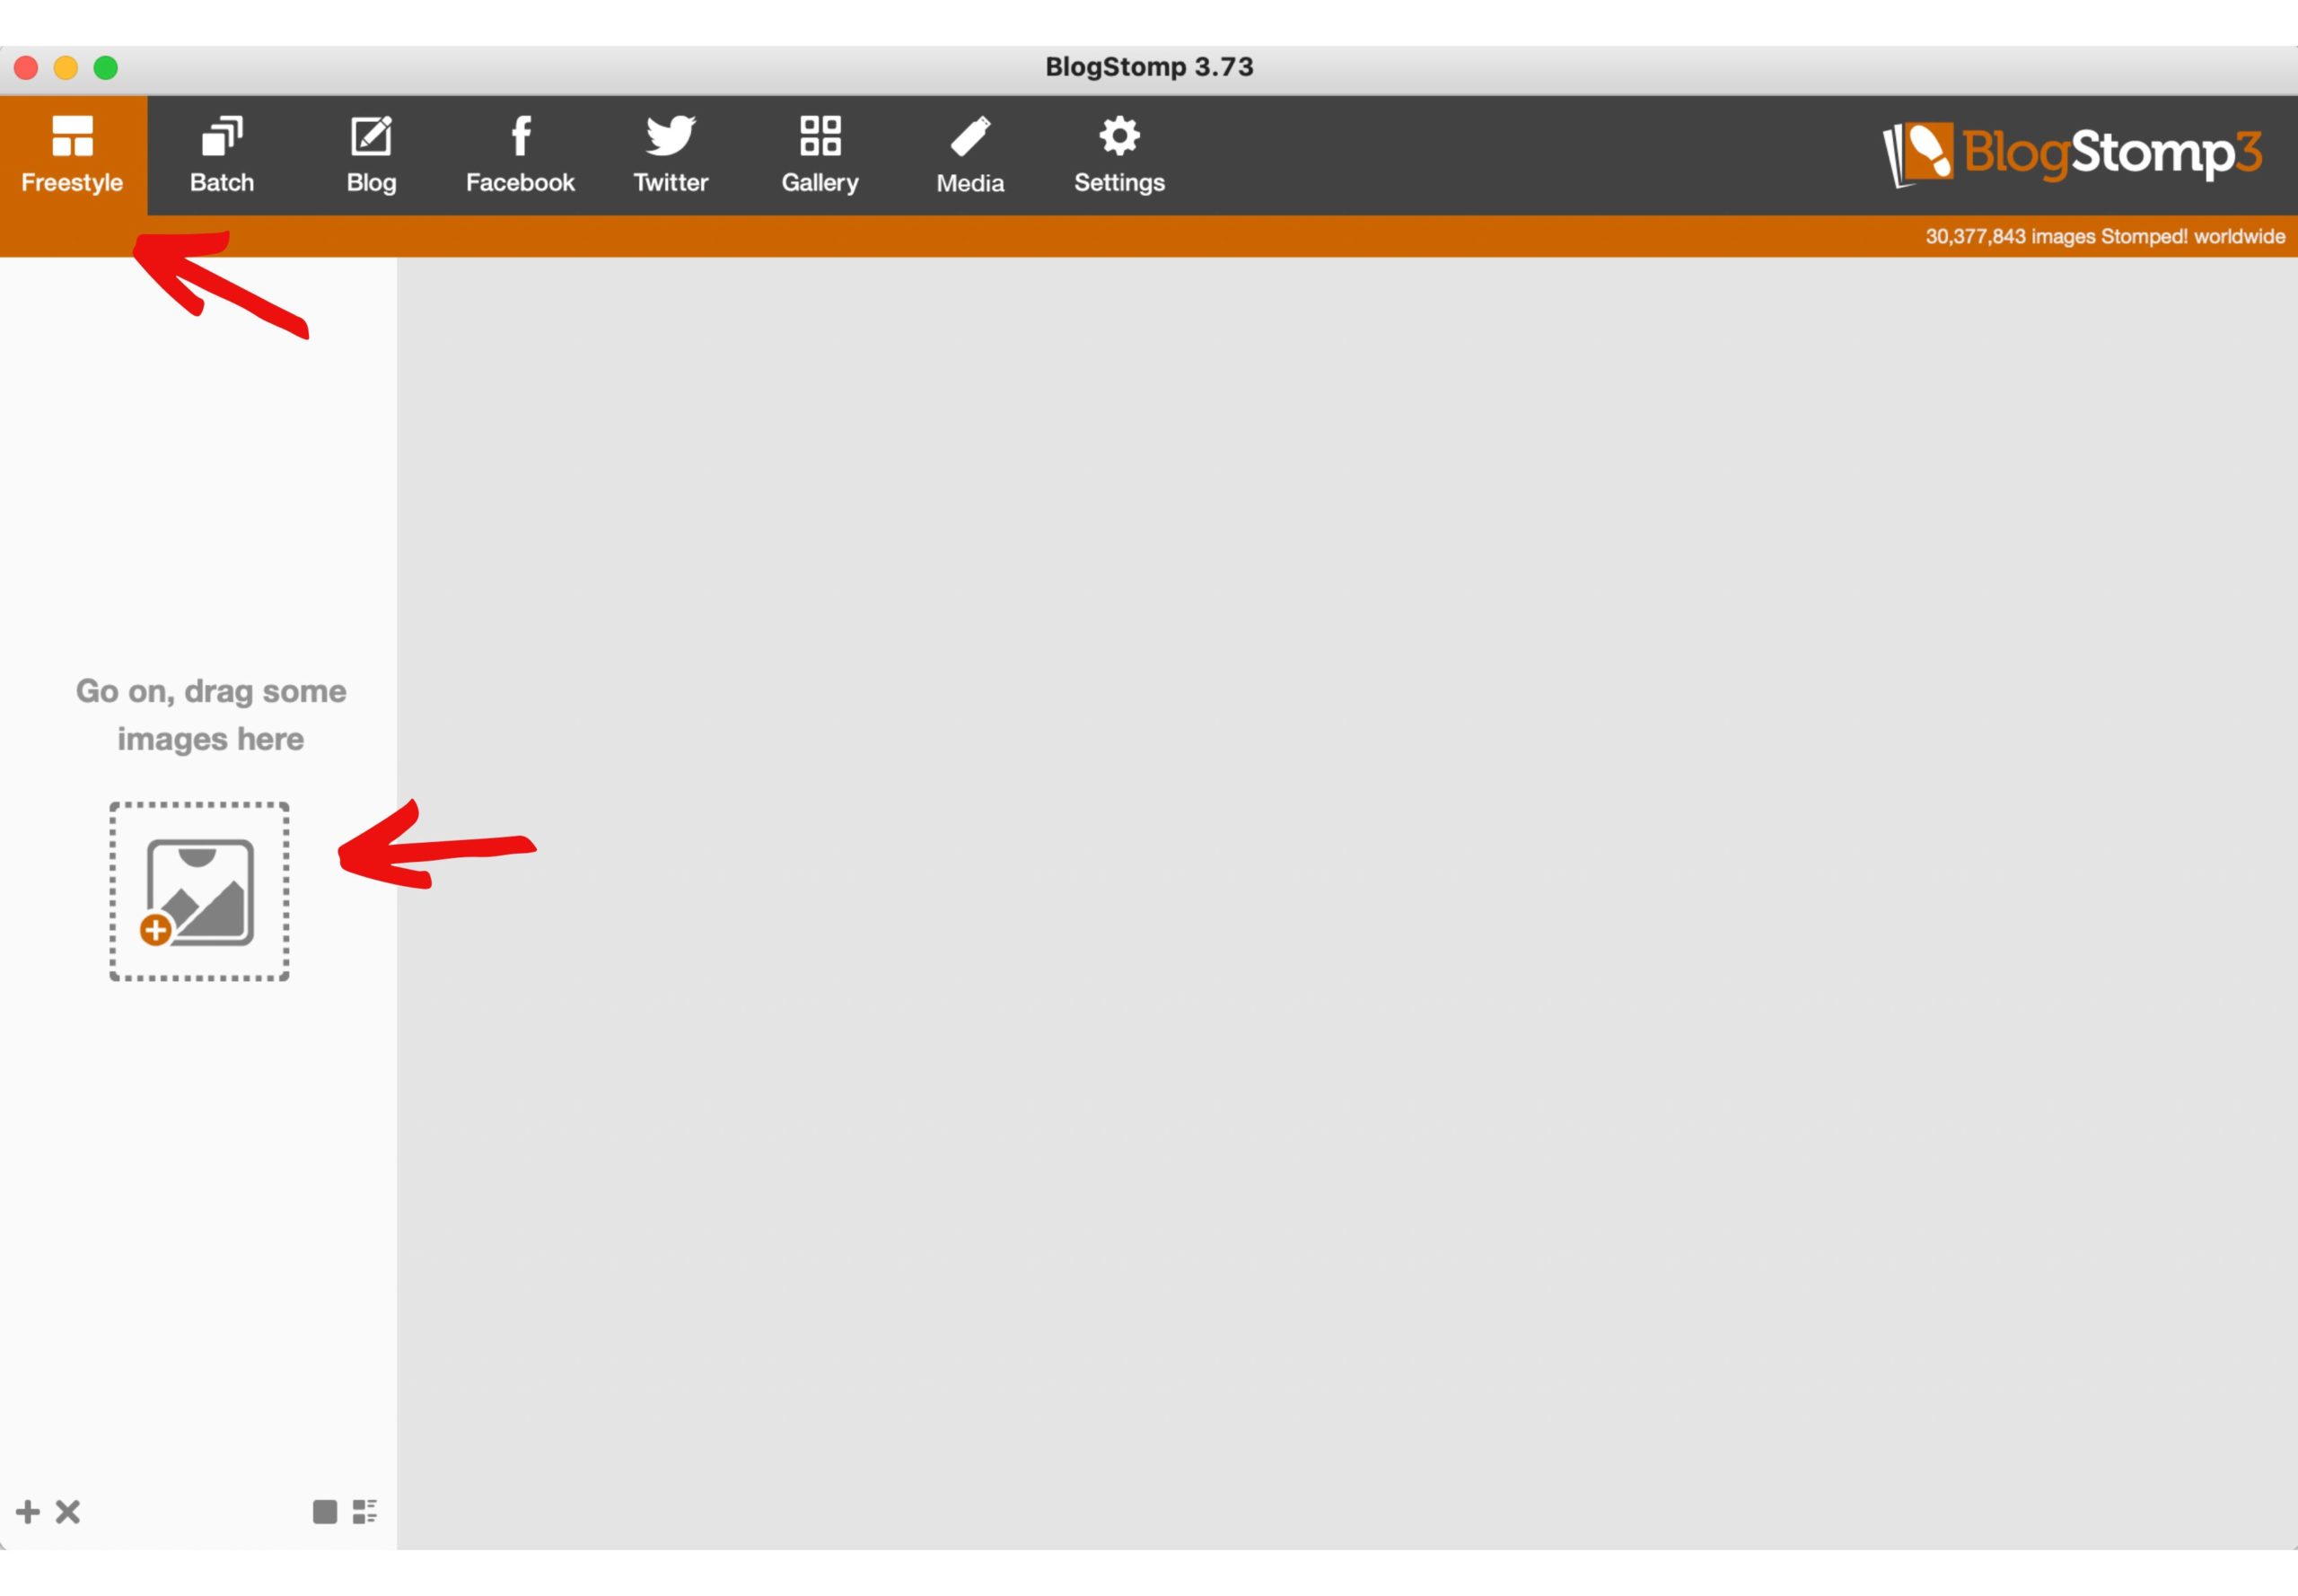
*If you want to learn how to curate the images for your blog, make sure to check out this blog post: How to Decide which Images to Post on the Blog.
Next, you’re going to pair up 2 or more images together to create your collage. In order to create an elevated viewing experience, I like to pair two vertical images together. When I do this, I also make sure that I always pair one far away image with one close up image. This creates more visual interest for the viewer.
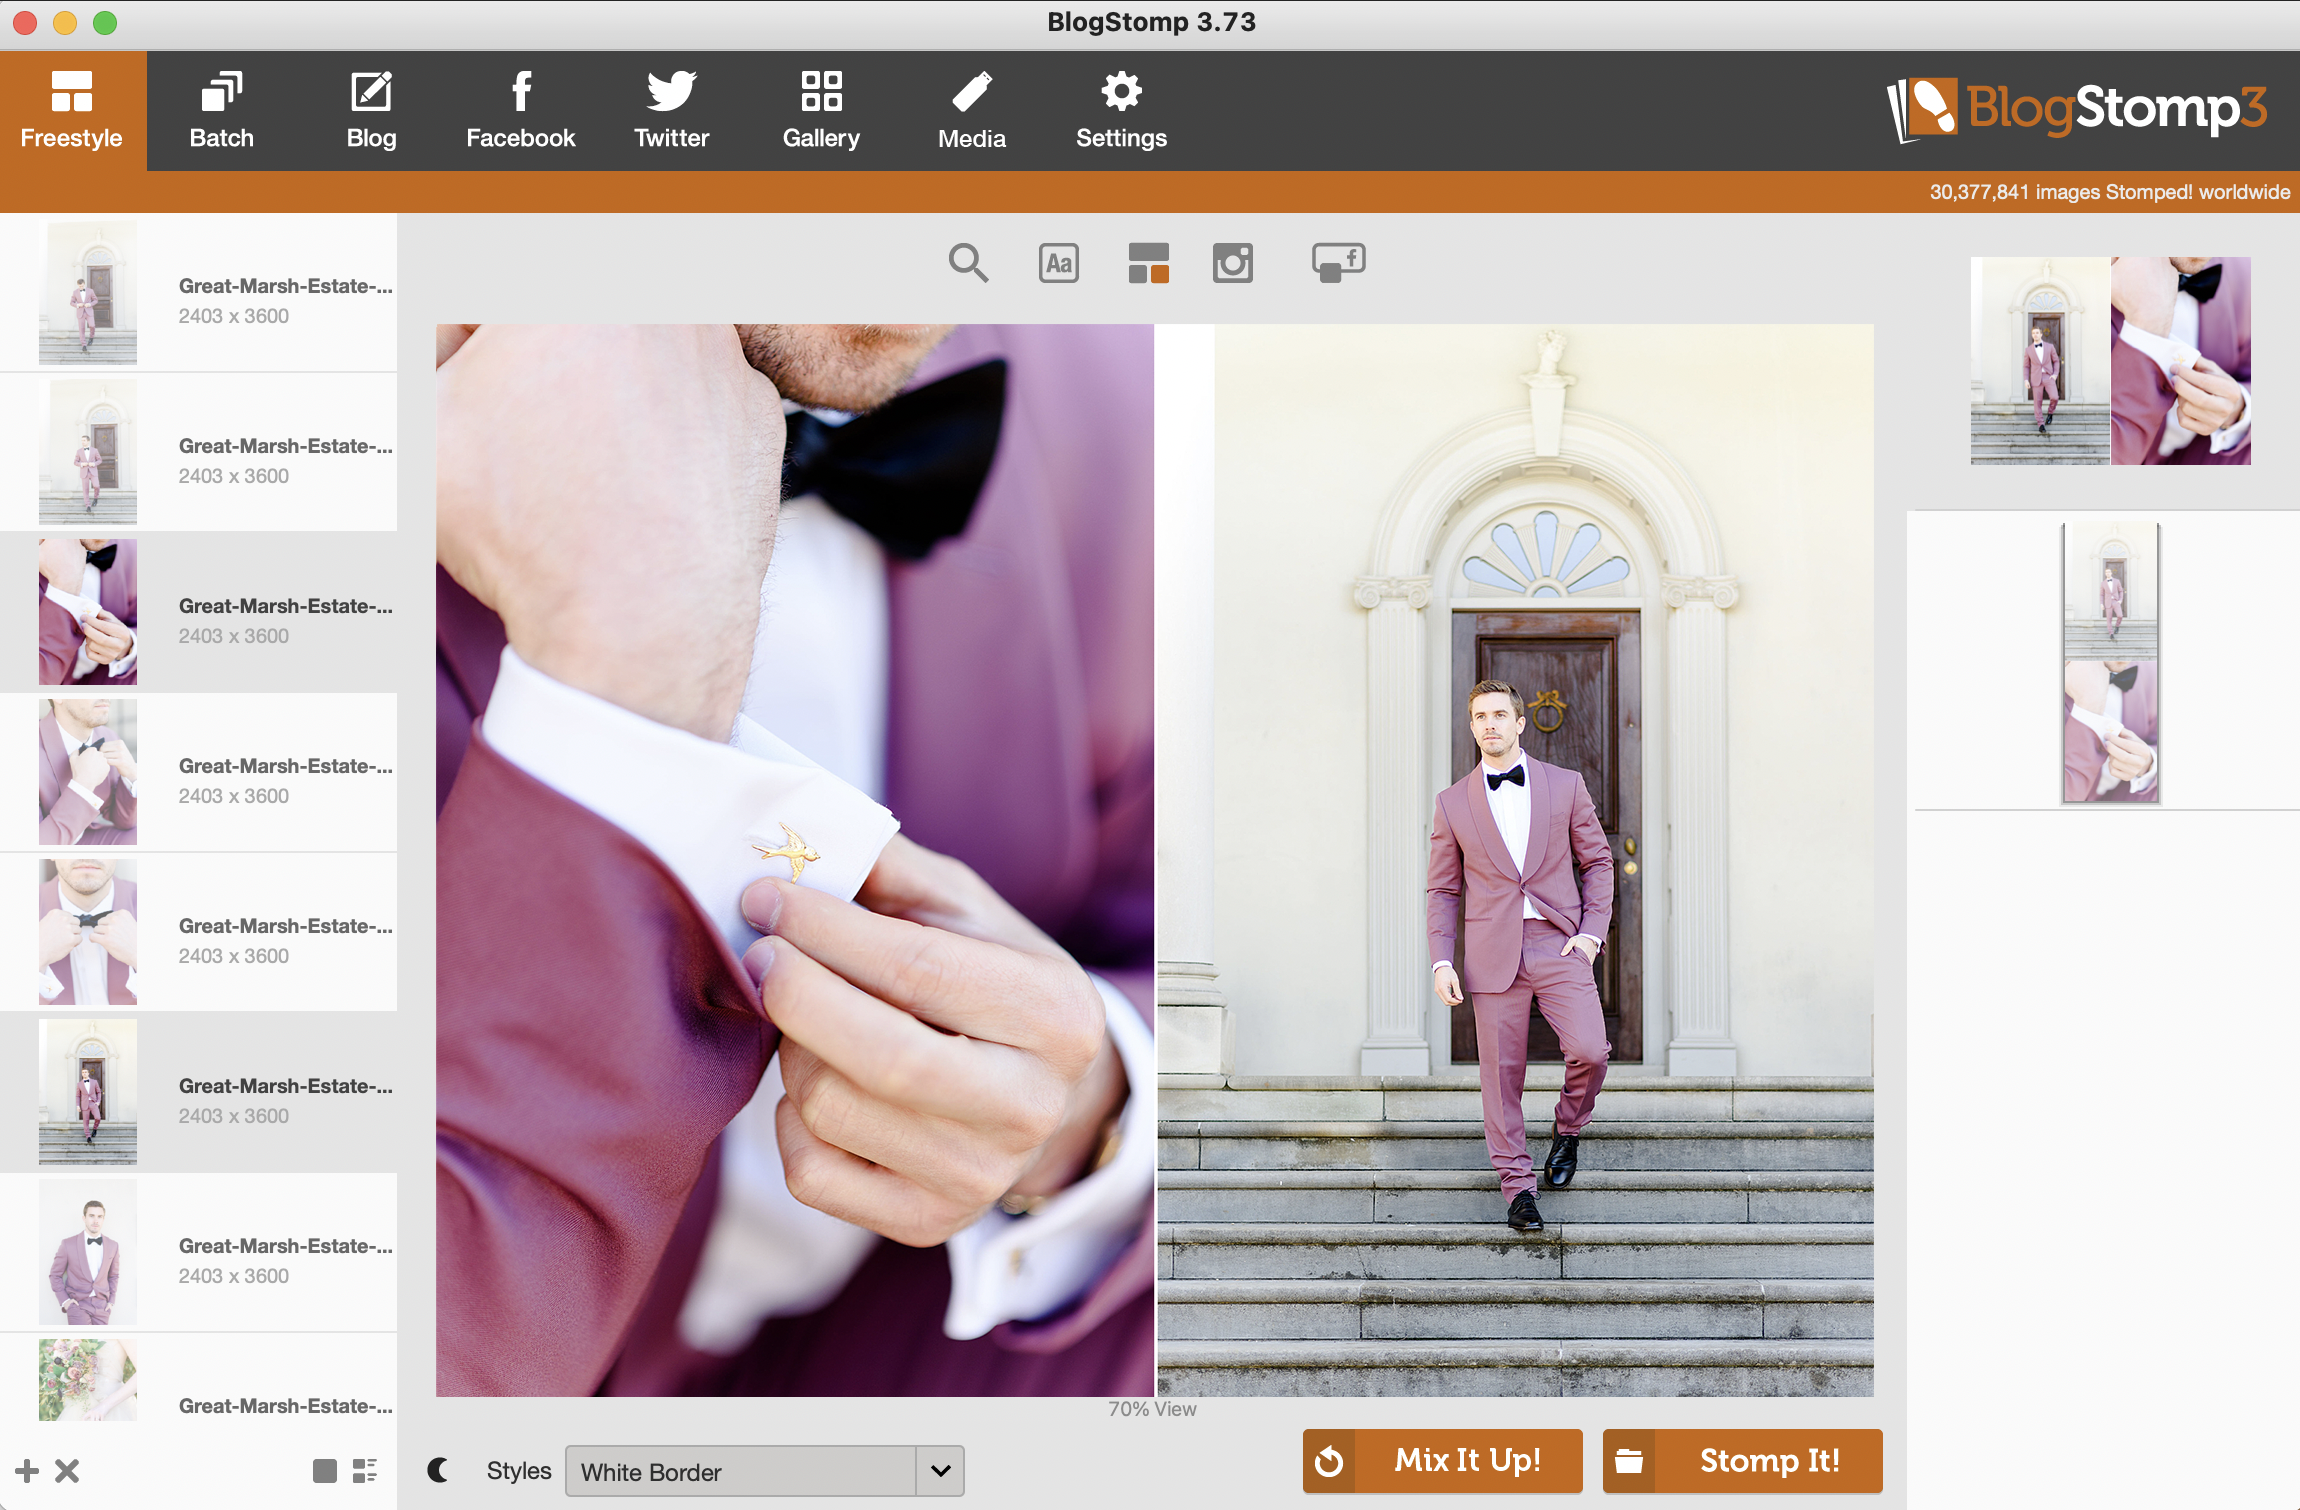
I also like to sprinkle in some horizontal images throughout the blog. To quickly resize and rename a horizontal image for the blog, I simply select it in the left column and click the “Stomp It” button.

Also, you can use as many images as you want in a collage. I wouldn’t do that for a blog post, but it can work really well for social media. In a blog, I’ll only use more than two images together if I want to showcase a sequence of events (like a first look), details shots, or reception shots. You can also click the “Mix It Up!” button to reorder the images.

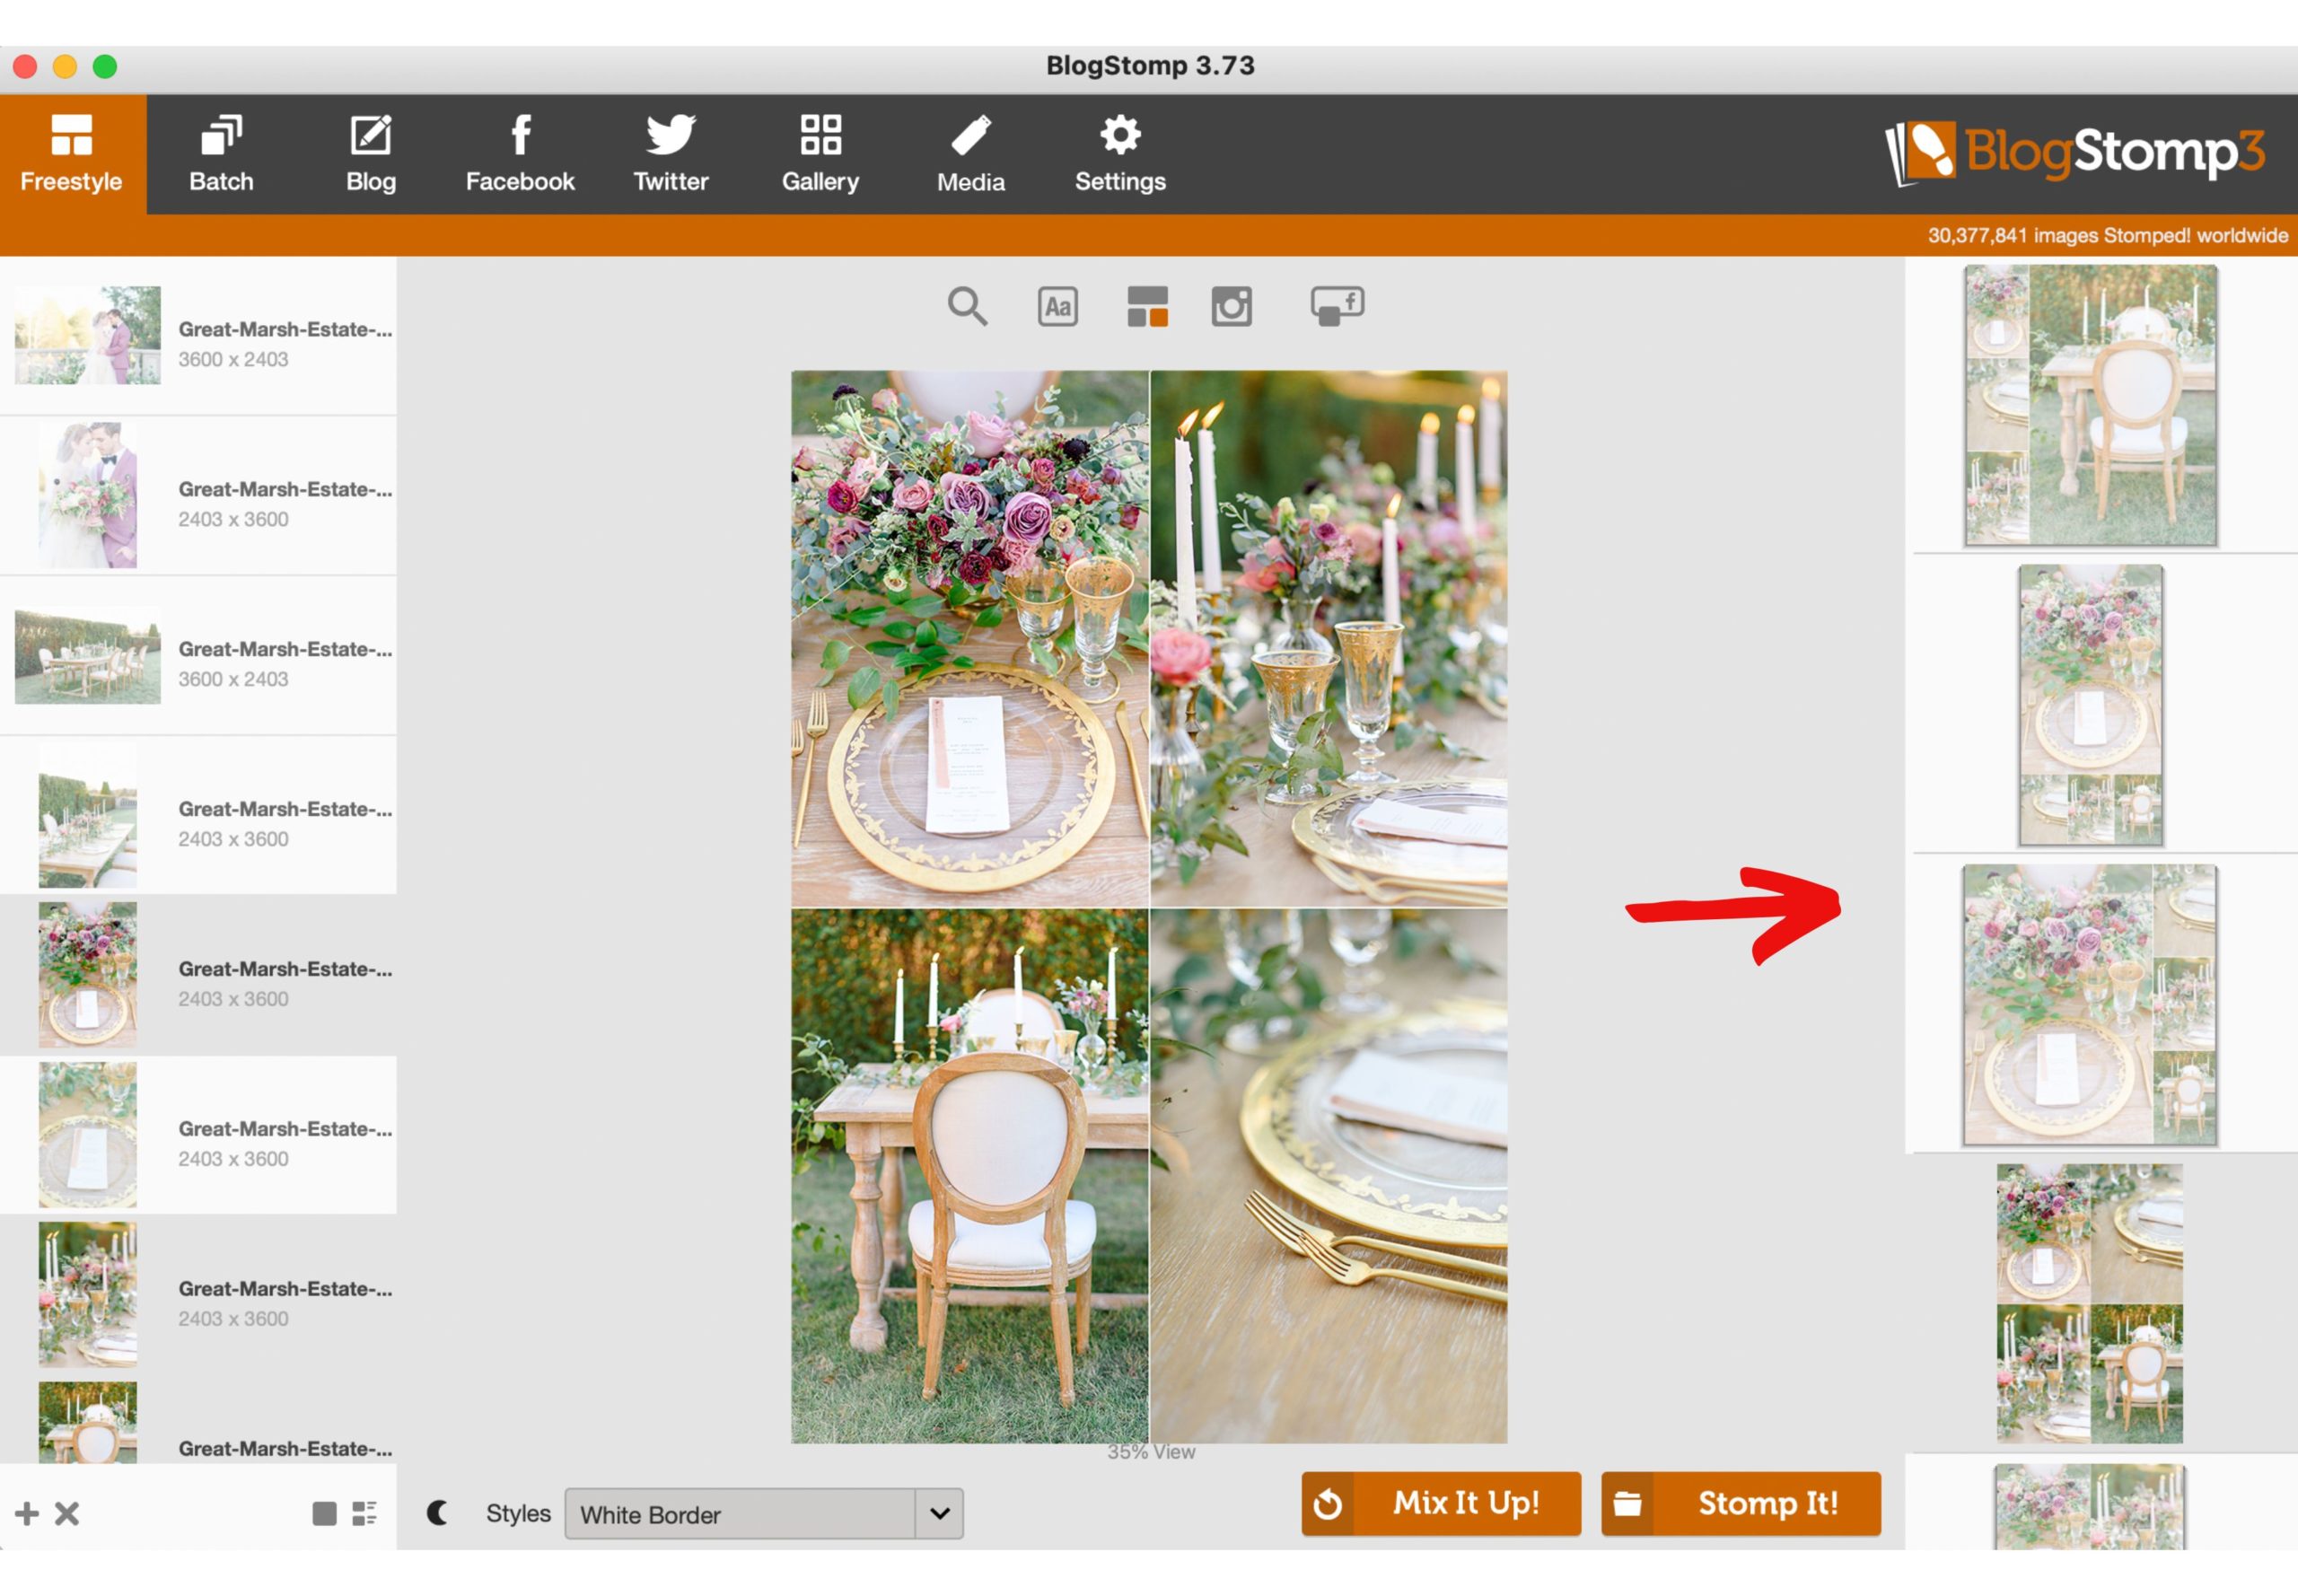
You also have multiple collage options to choose from in the right column.
And this, friend, is how I use BlogStomp to pair images for the blog. Do you have any questions for me? Are there any topics that you’d like to see covered in future blog posts? You can ask me anything HERE! I look forward to hearing from you!


