Do you want to know how to create launch images for your website? Then you’re in the right place. Today, I’m showing you how I created my own launch images for my new website.
Here’s my step-by-step process:
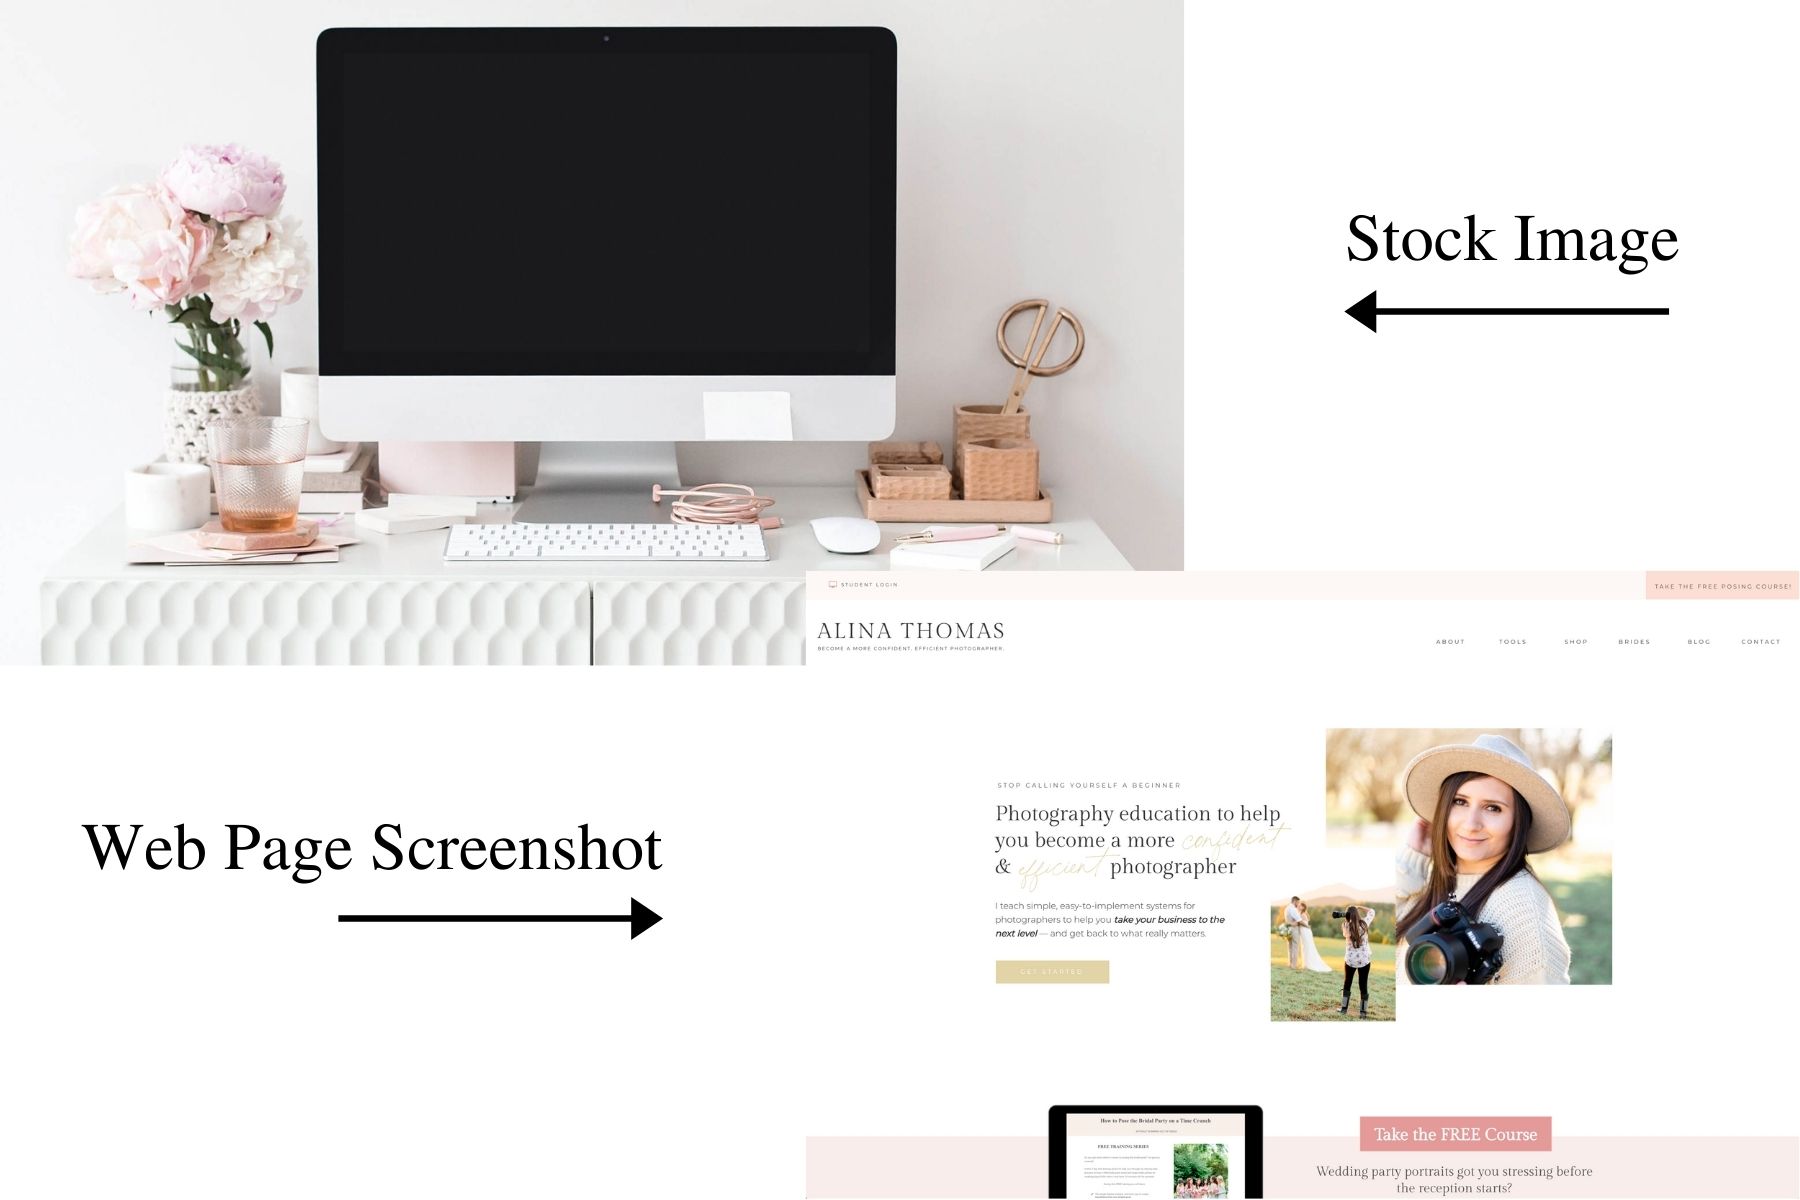
First, you’re going to need a stock image (or an image of yourself holding a laptop if you want to take it a step further). Then you’re going to need a screenshot of your website. Once you have these two things, you’re going to open your desktop/laptop image in Photoshop.
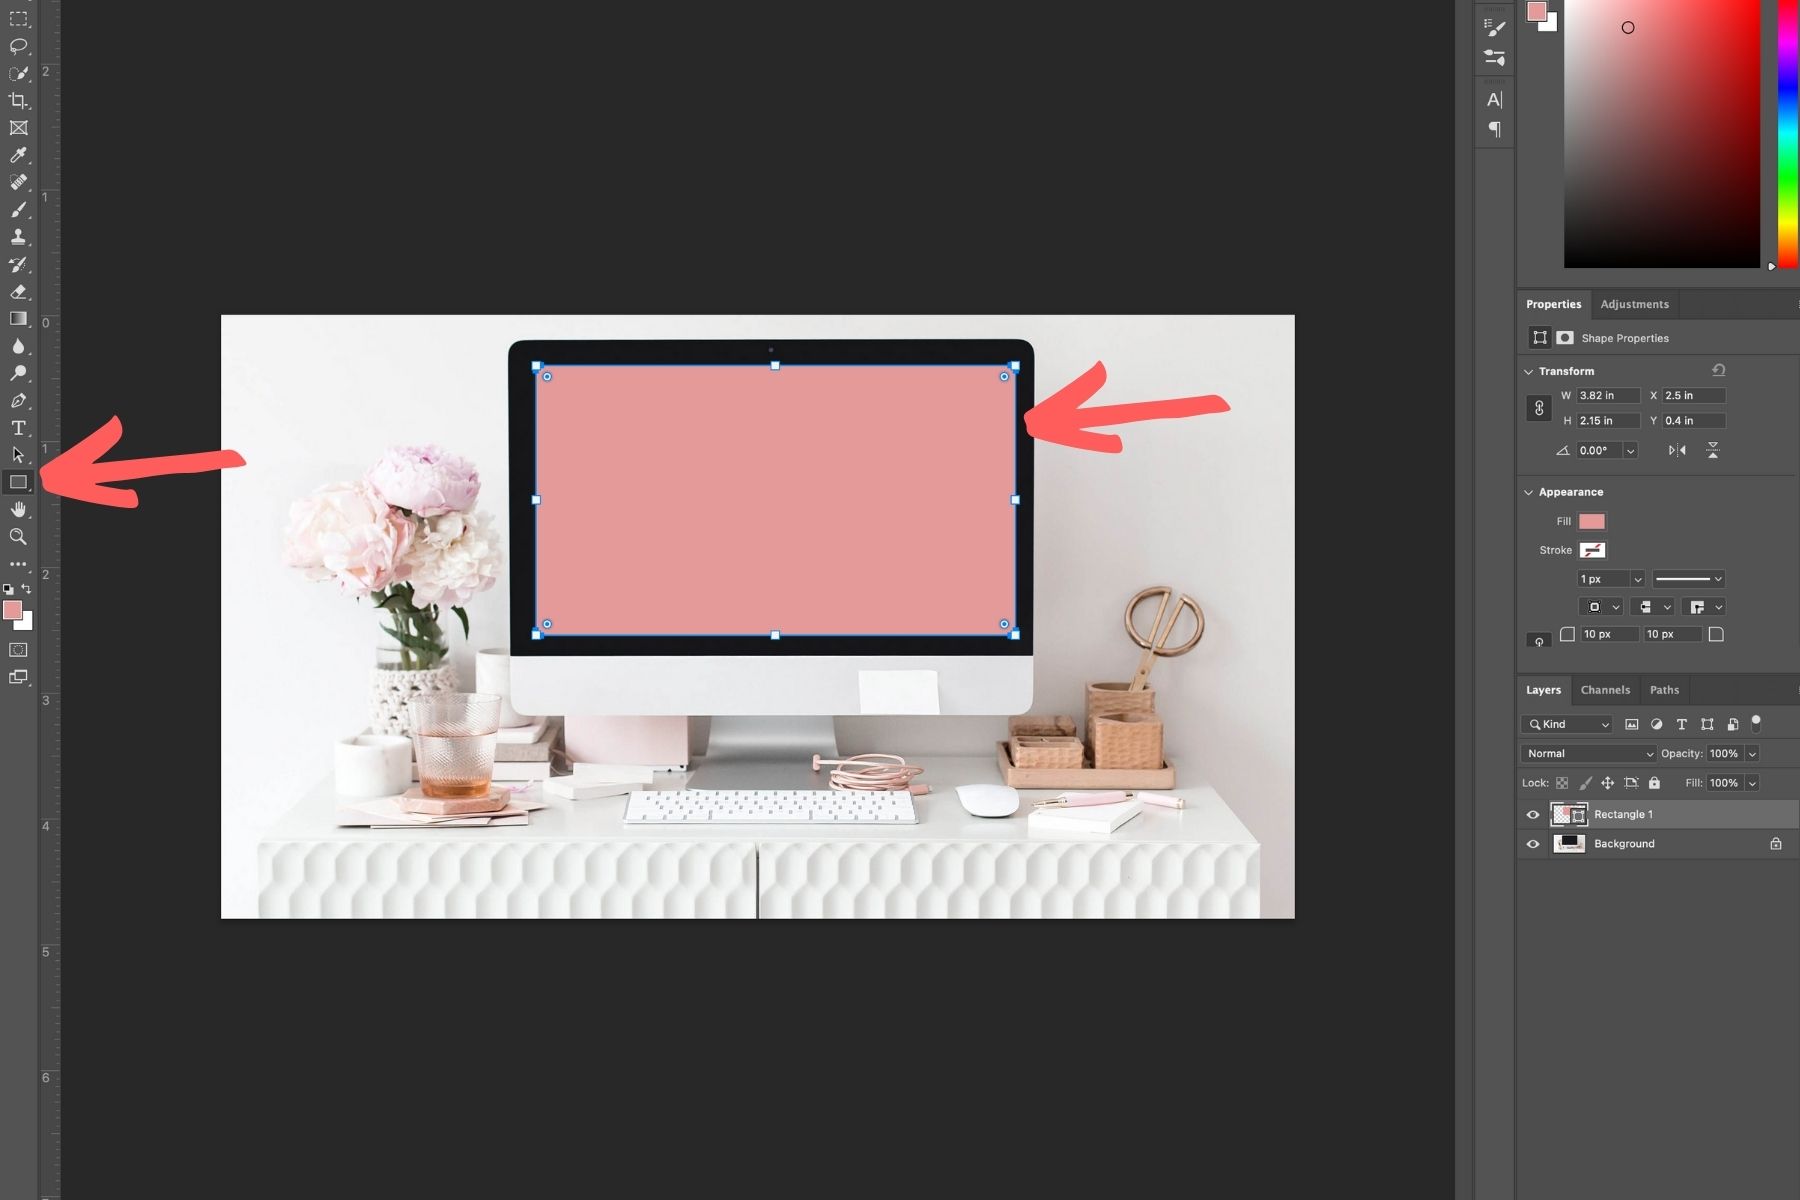
Next, you’re going to use the rectangle tool to draw a rectangle over the screen of your laptop/desktop.
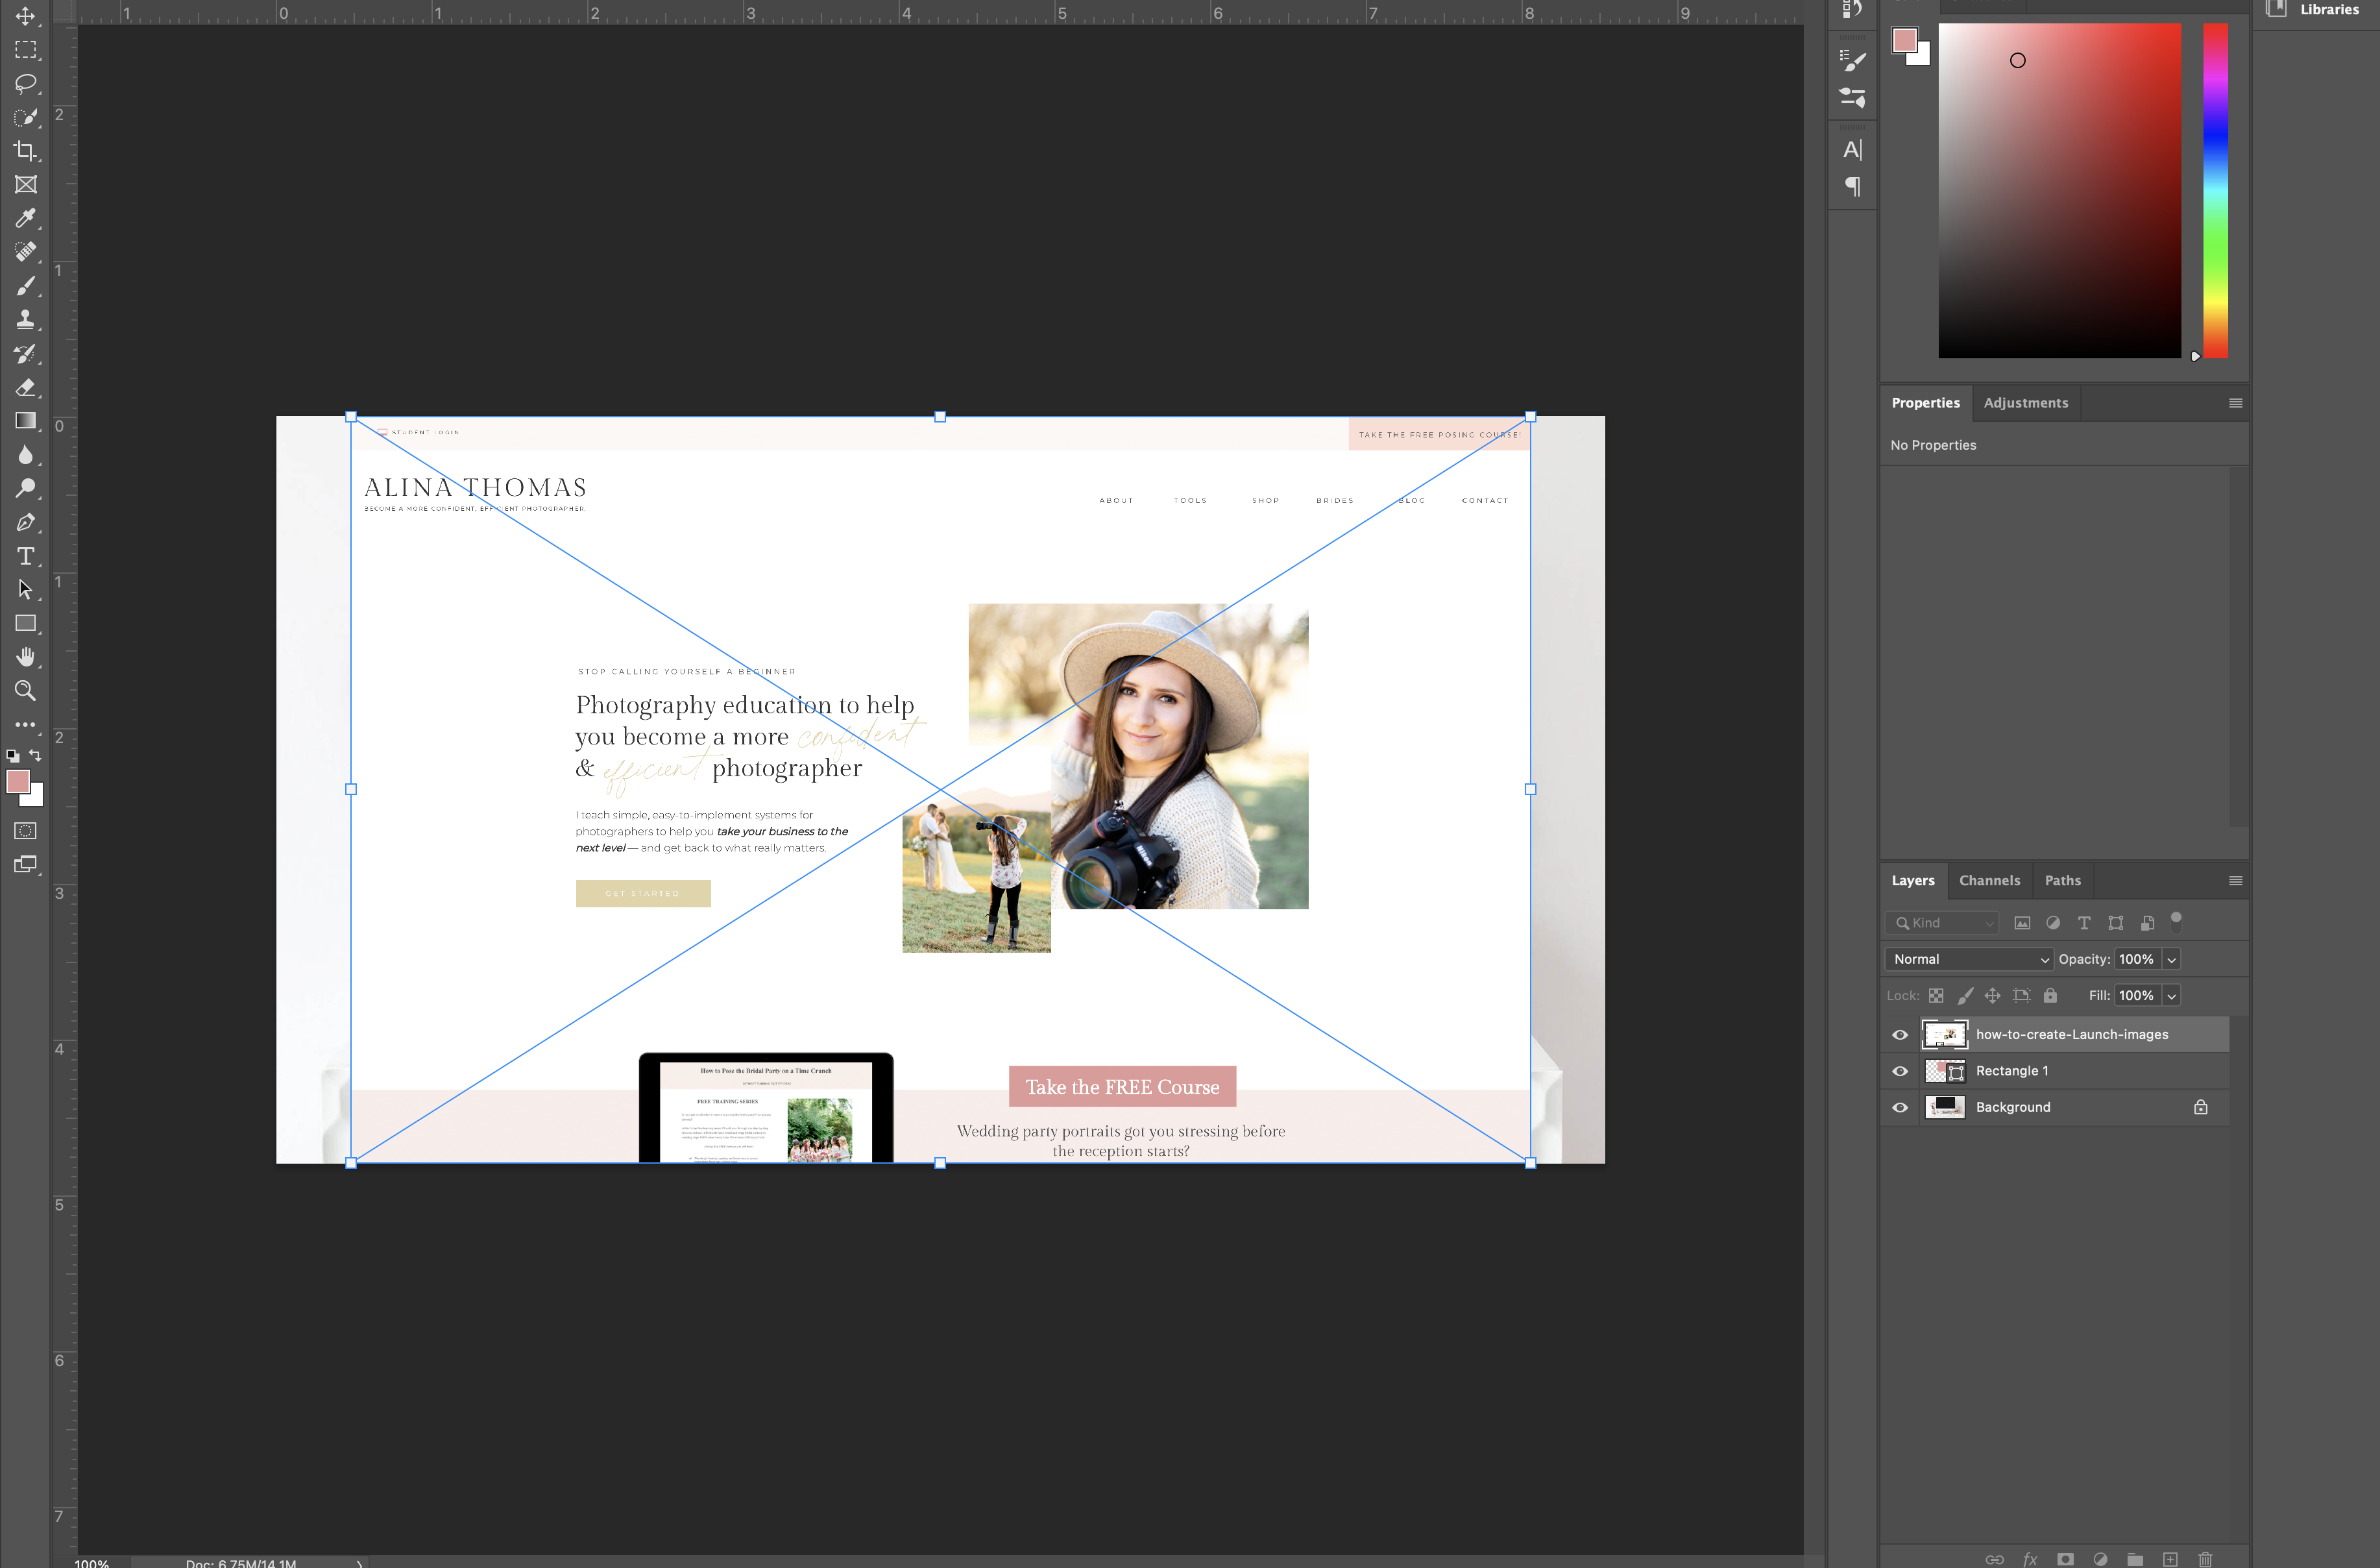
Once you’re done, you’re going to drag your screenshot on top of your desktop/laptop image and resize it to fit the rectangle.
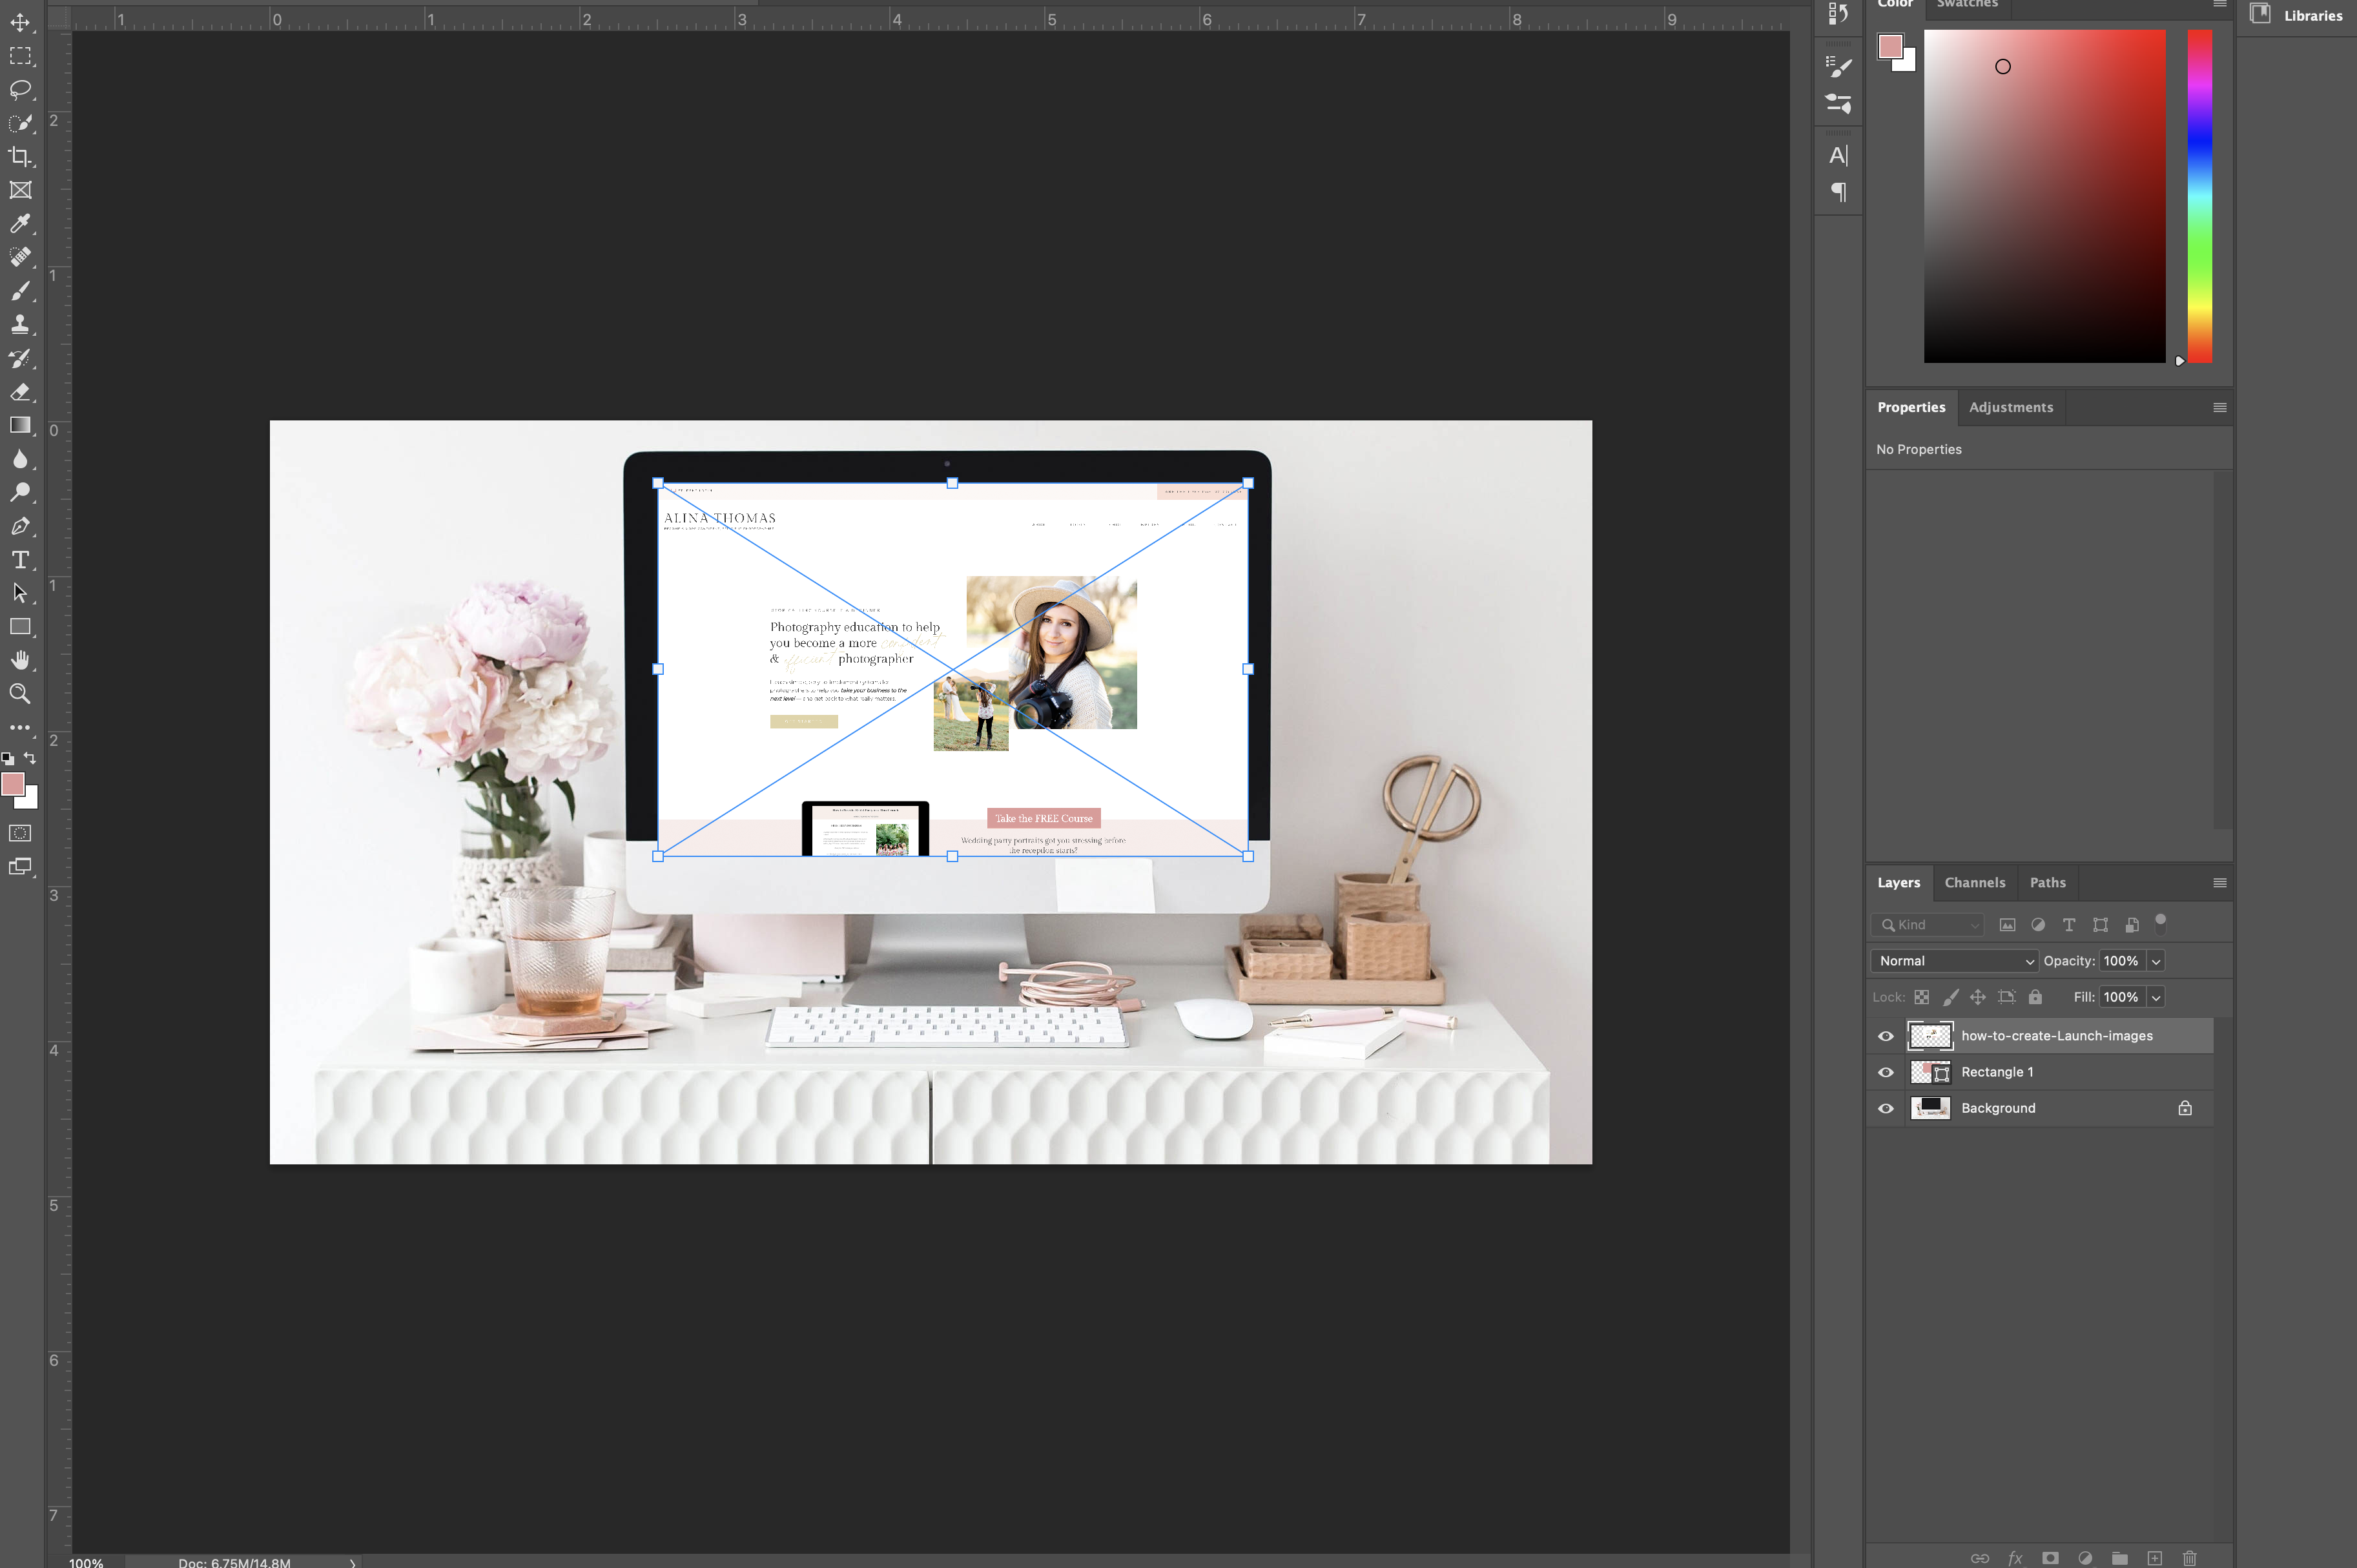
Then, you’re going to position your mouse between the two layers and hold down the option key on your keyboard (alt on Windows) until you see a little arrow and click on it. That’s going to lock your screenshot to your shape. Feel free to adjust your screenshot until it looks perfect for you.
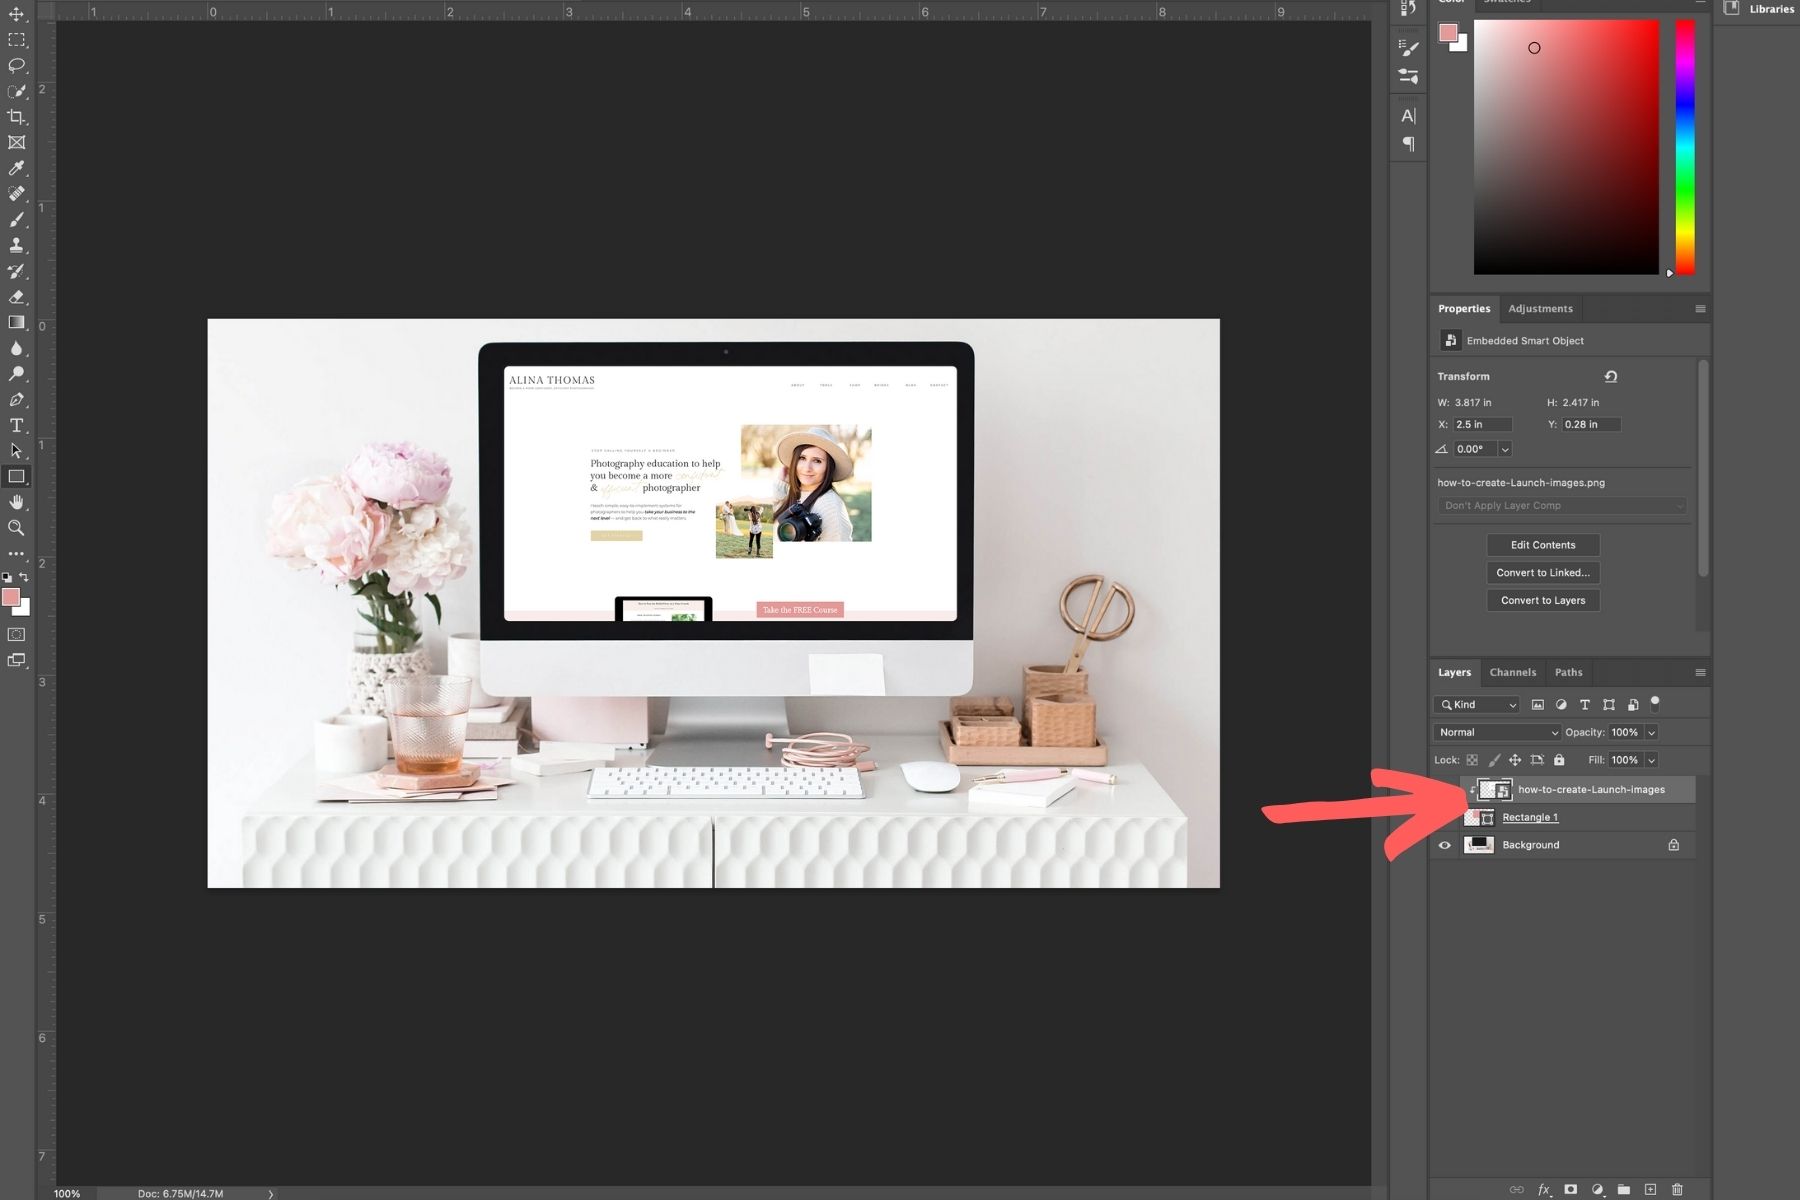
Optional:
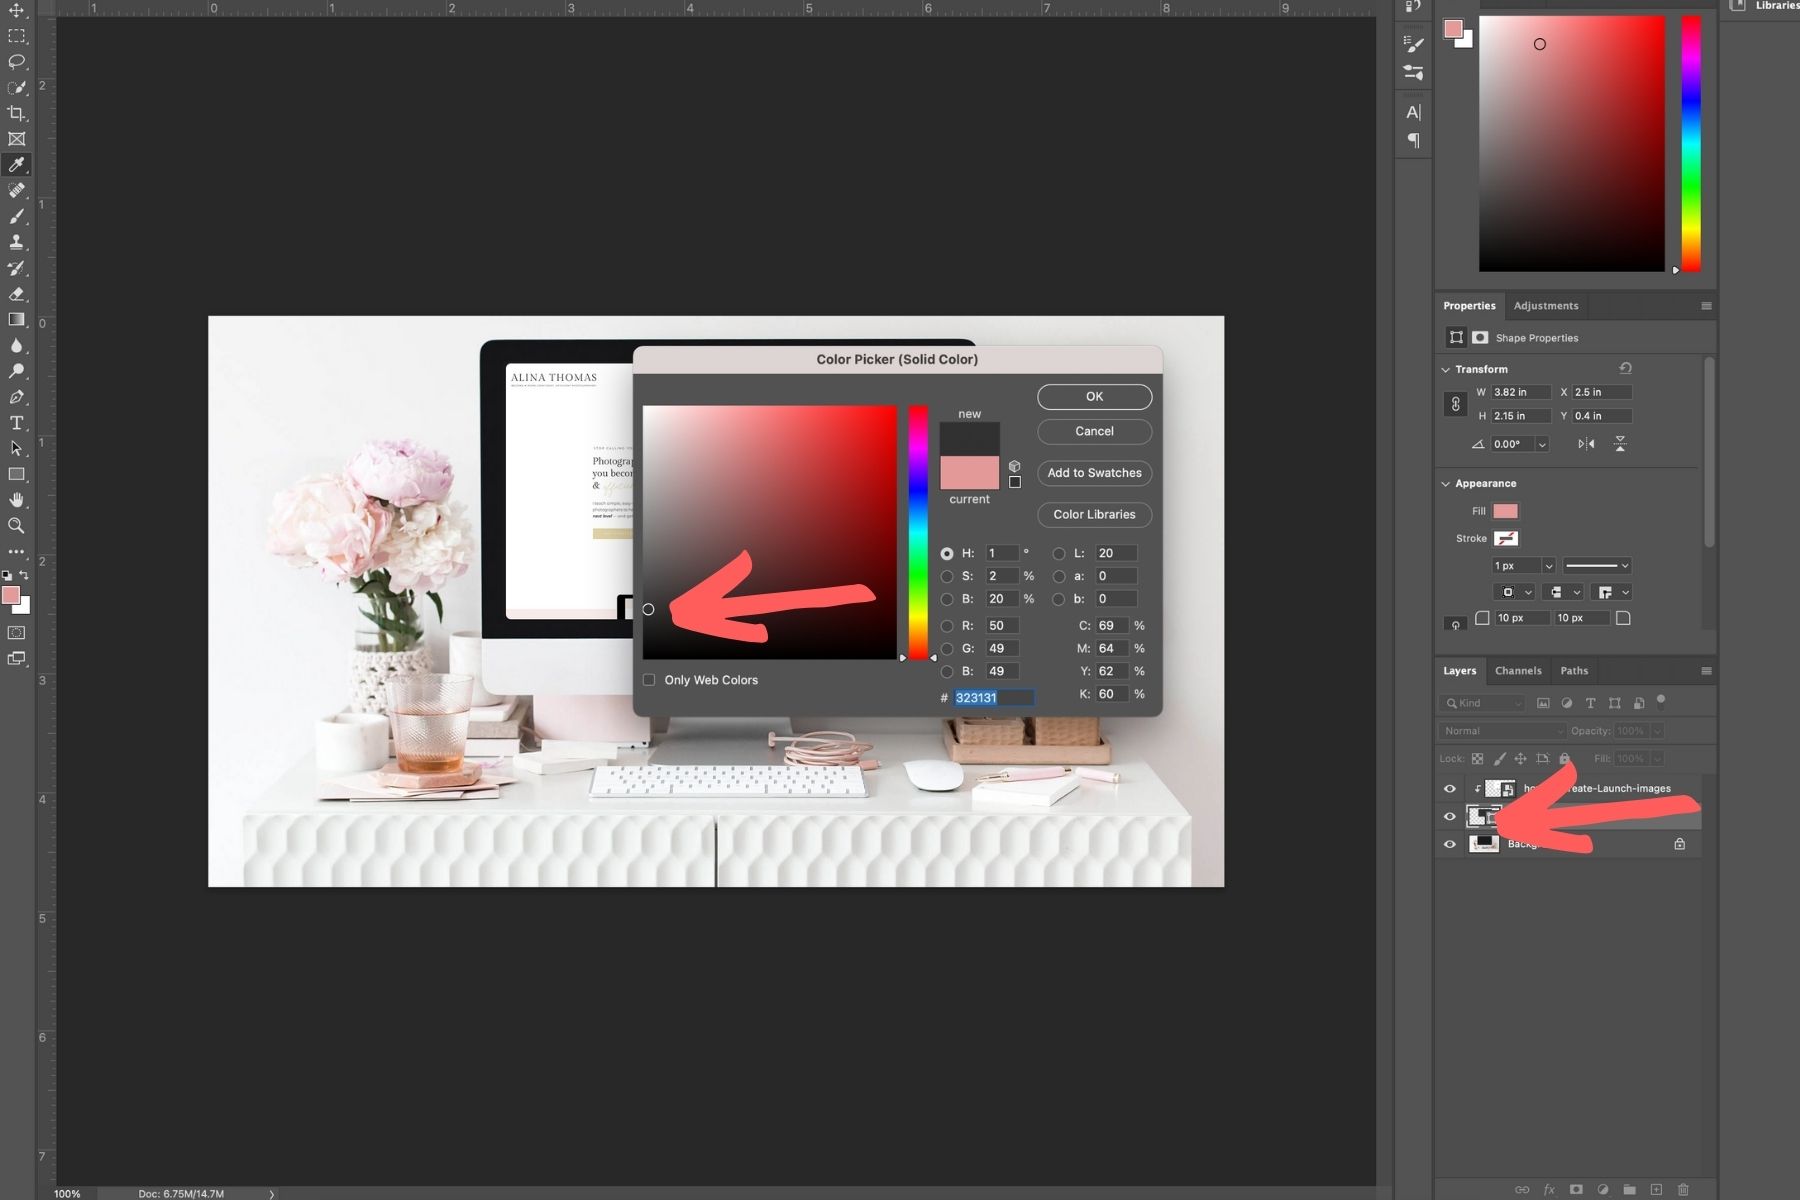
In order to make your screenshot look more like a screen, you can double-click on the shape in your rectangle layer. In the new window, choose a dark grey color.
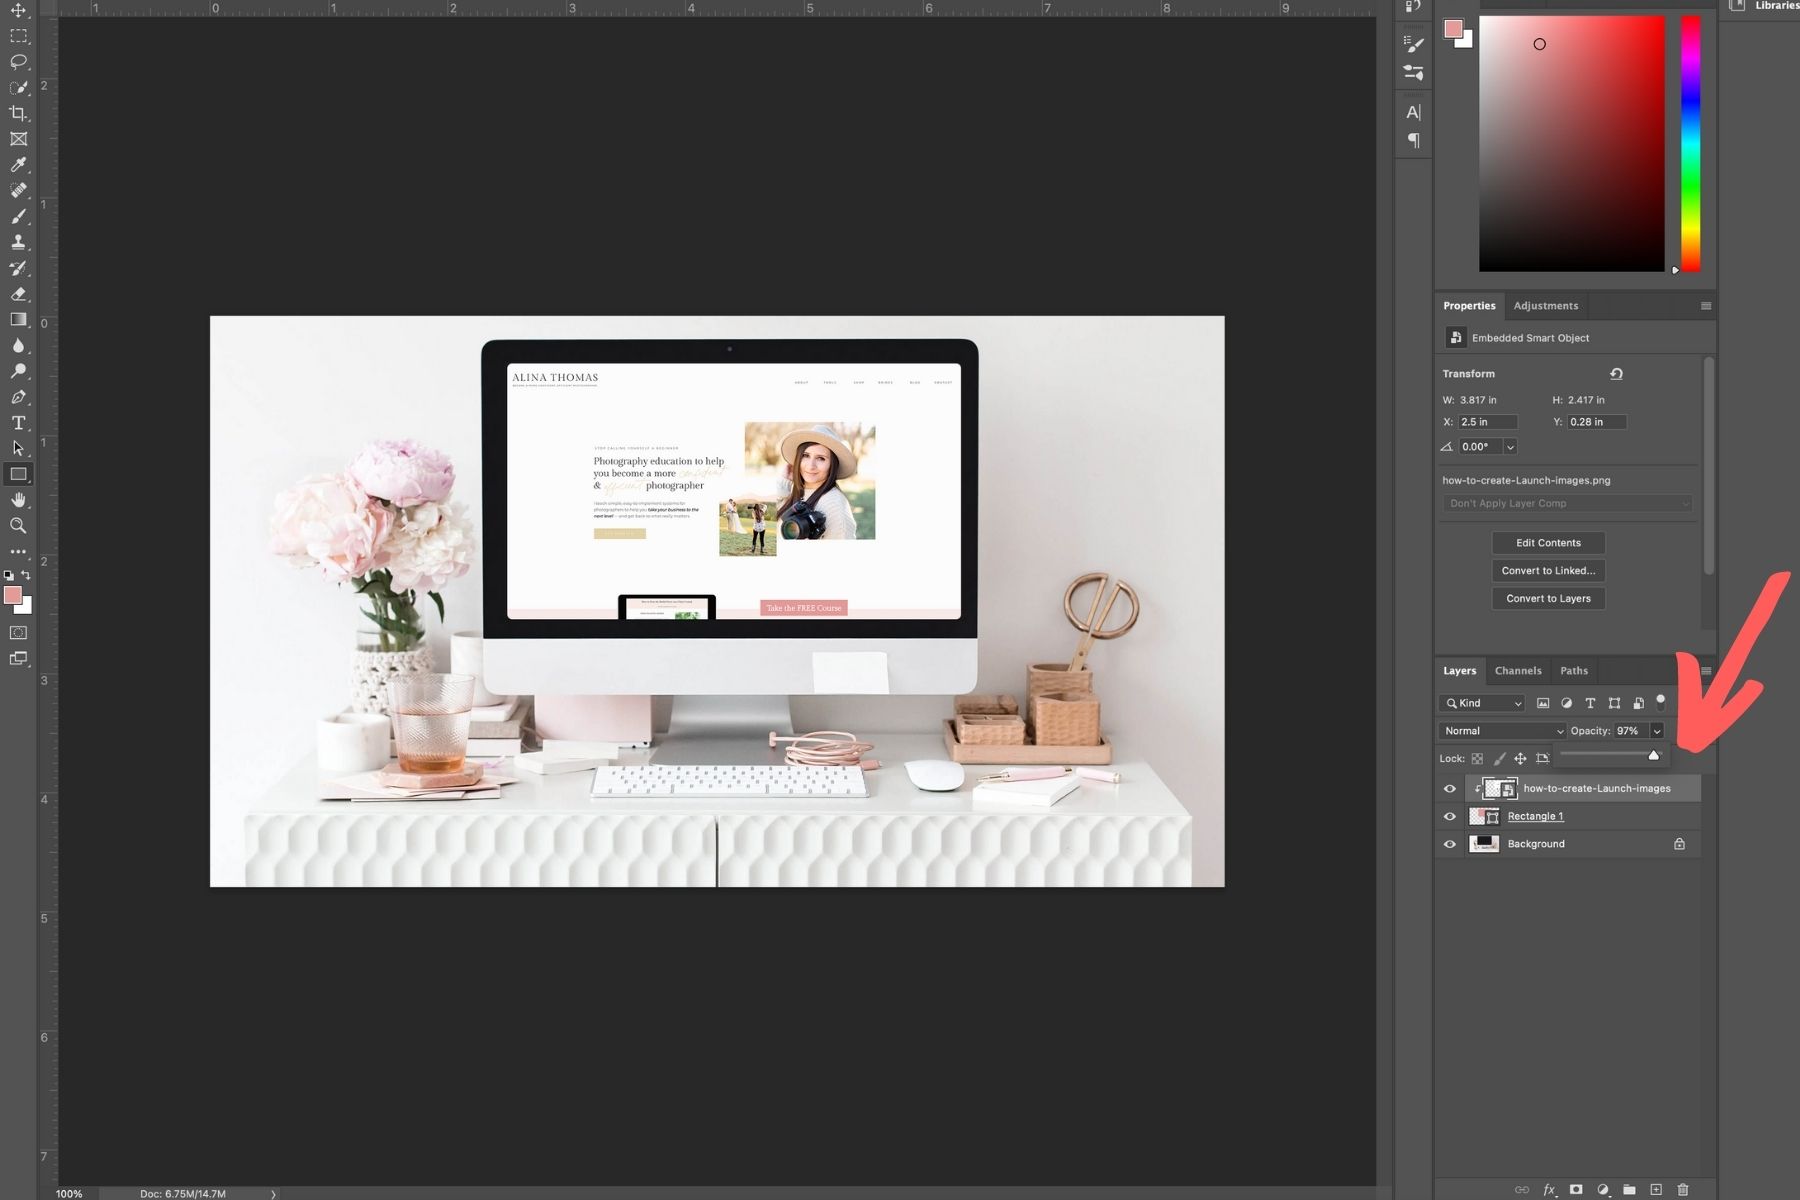
Then click on the screenshot layer and bring the opacity down to 97.
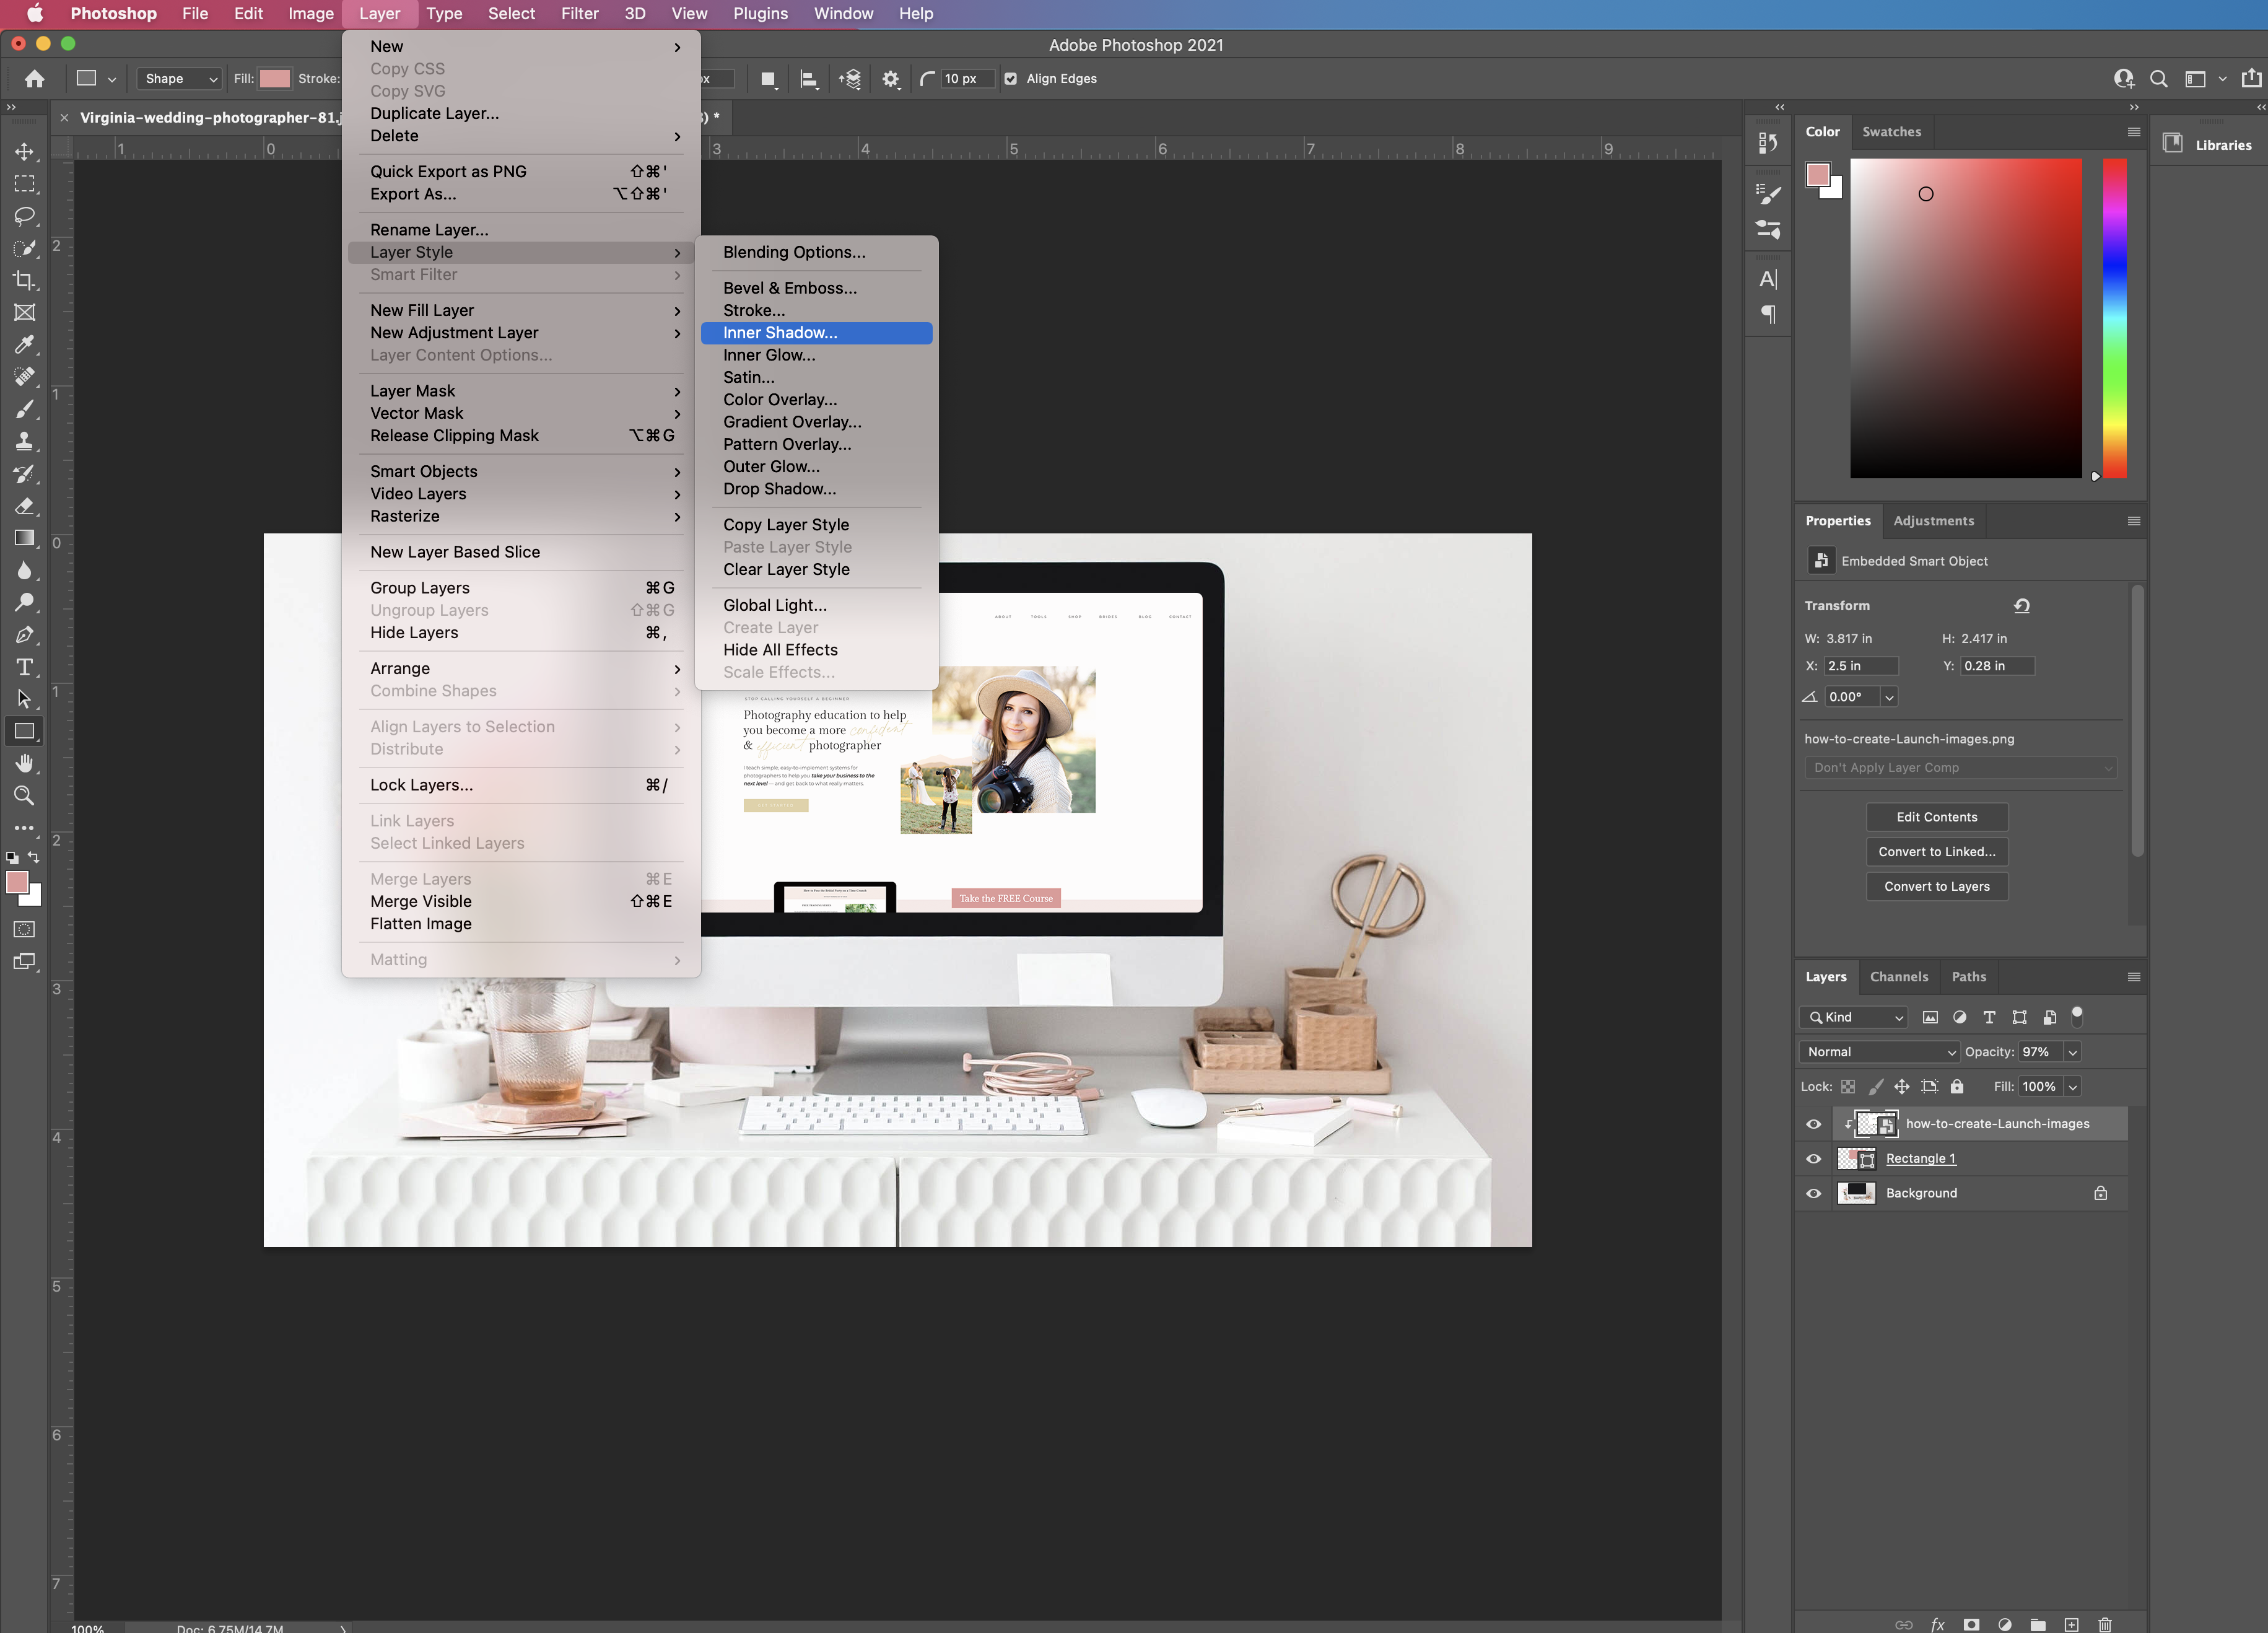
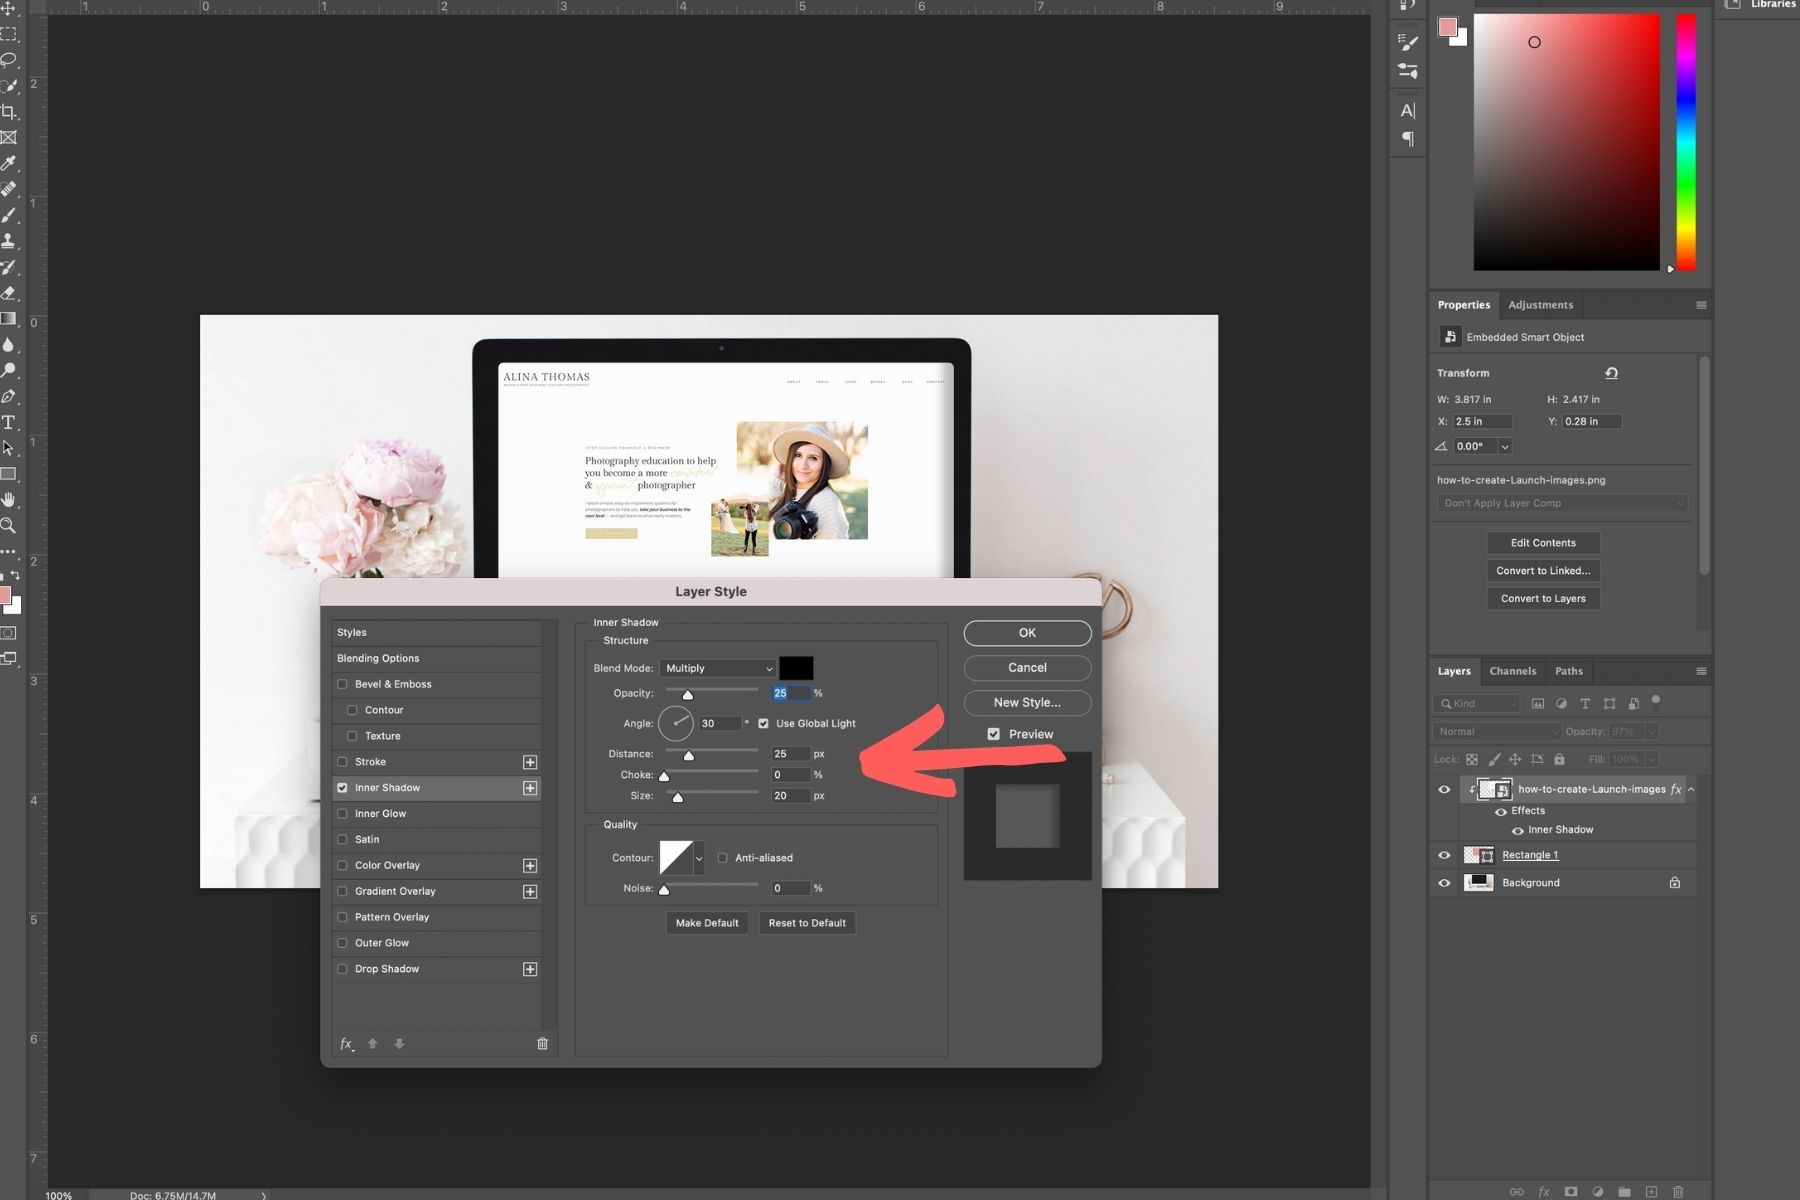
Then, you’re going to add a shadow to give your screen some dimension. To do so, you’re going to select Layer → Layer Style → Inner Shadow.
In the new window, set your opacity around 25, Distance 25, and size 20.
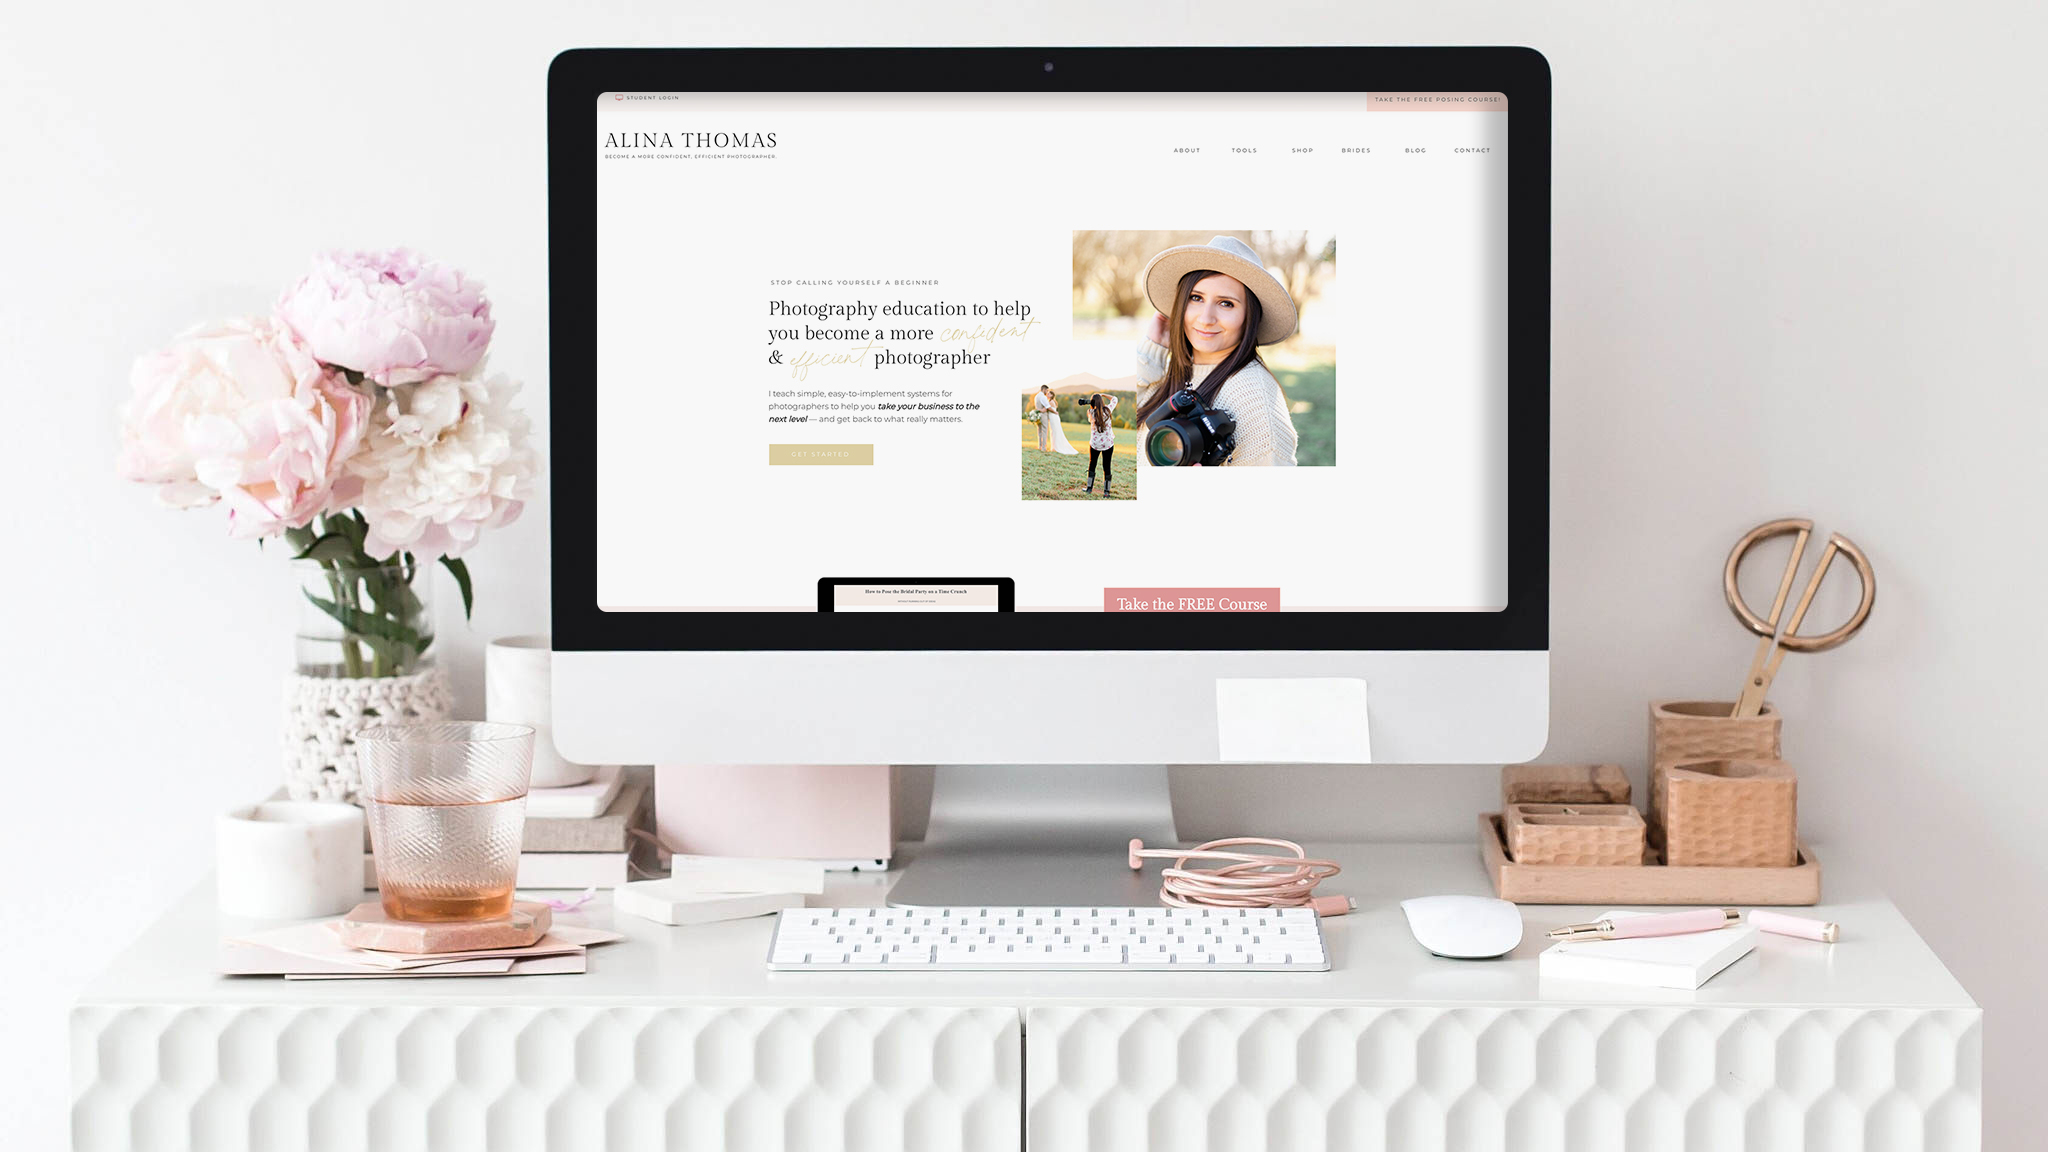
And that’s how you create launch images for your website. Here’s the final result! What do you think? Let me know in the comments below.
You might also like:
How to Achieve a Consistent Editing Style in Every Season
How to Find the Best Light for Your Photos
Instagram Captions for Wedding Photographers