Ever dreamed of taking light and airy images, but instead you end up with dark and inconsistent photos most of the time? Let’s change that, shall we?
I recently had this question pop into my inbox:
“I never seem to be able to get a light and airy look to my photos. I am always kind of on the darker side. I love light and airy, but never can get that look. How does one expose for light and airy images?” – Christine Barry Photography
If you’ve been struggling with the same thing, then these 5 tips to getting light, bright, and airy images will help!
1. Find Even Light
Look for soft and diffused light, such as during the golden hour (shortly after sunrise or before sunset) or on overcast days. Keep in mind that you want the sun to always be behind your subject (or to the side) EXCEPT on overcast days. Have your subject face the sun (covered by clouds) on cloudy days since the clouds will act as a natural diffuser.
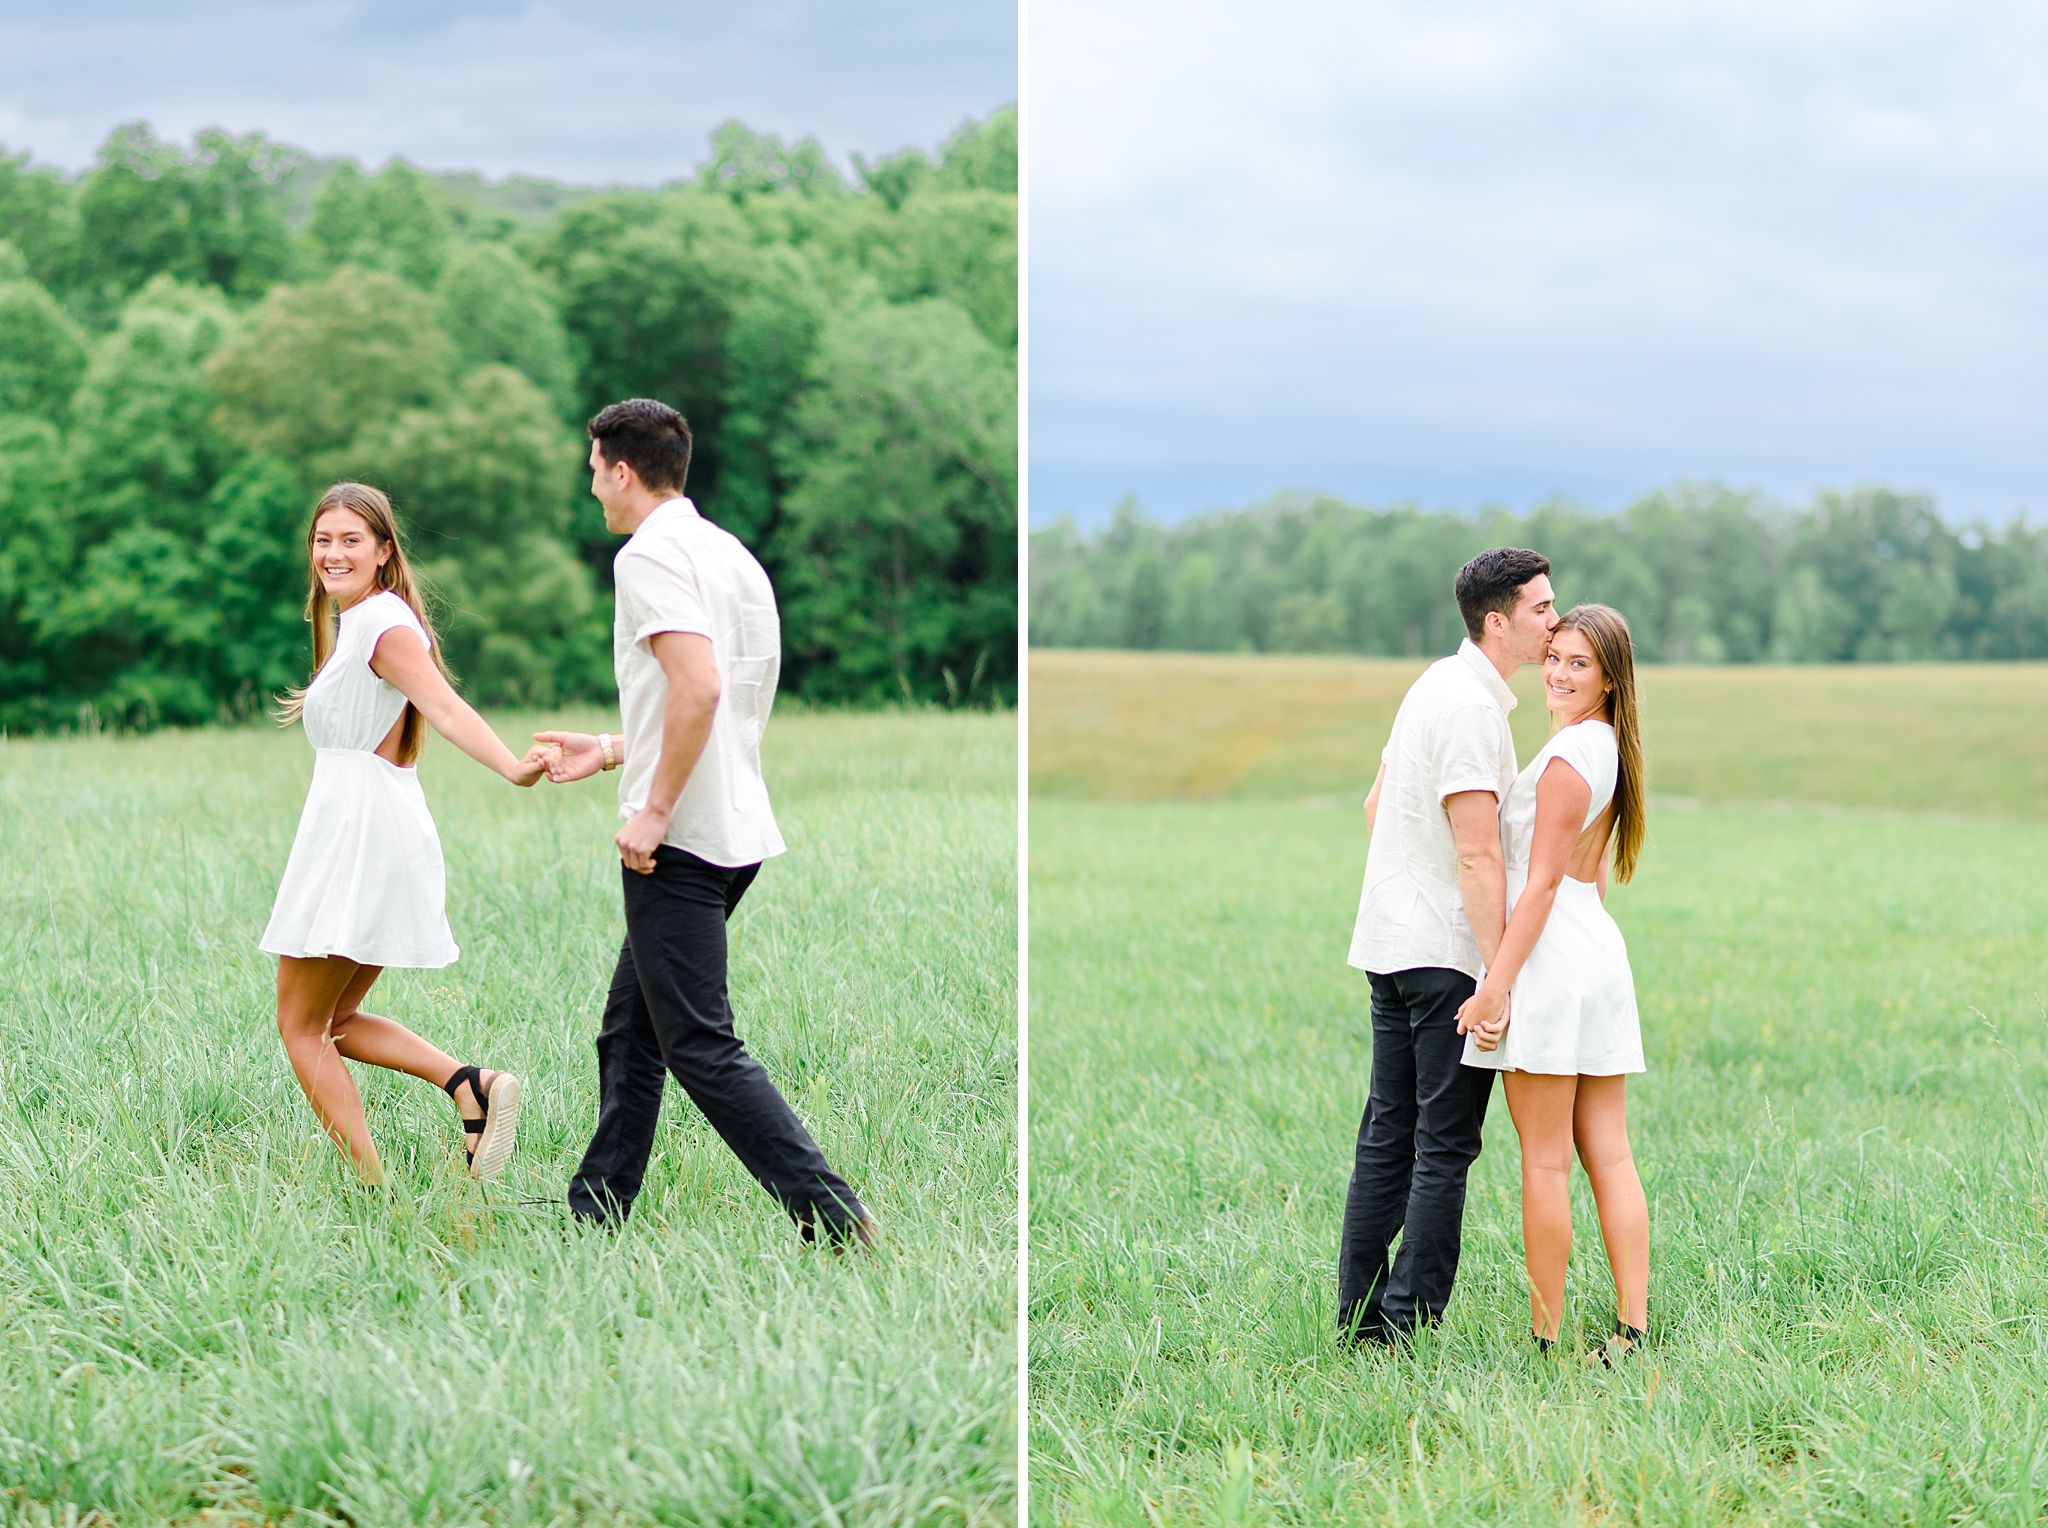
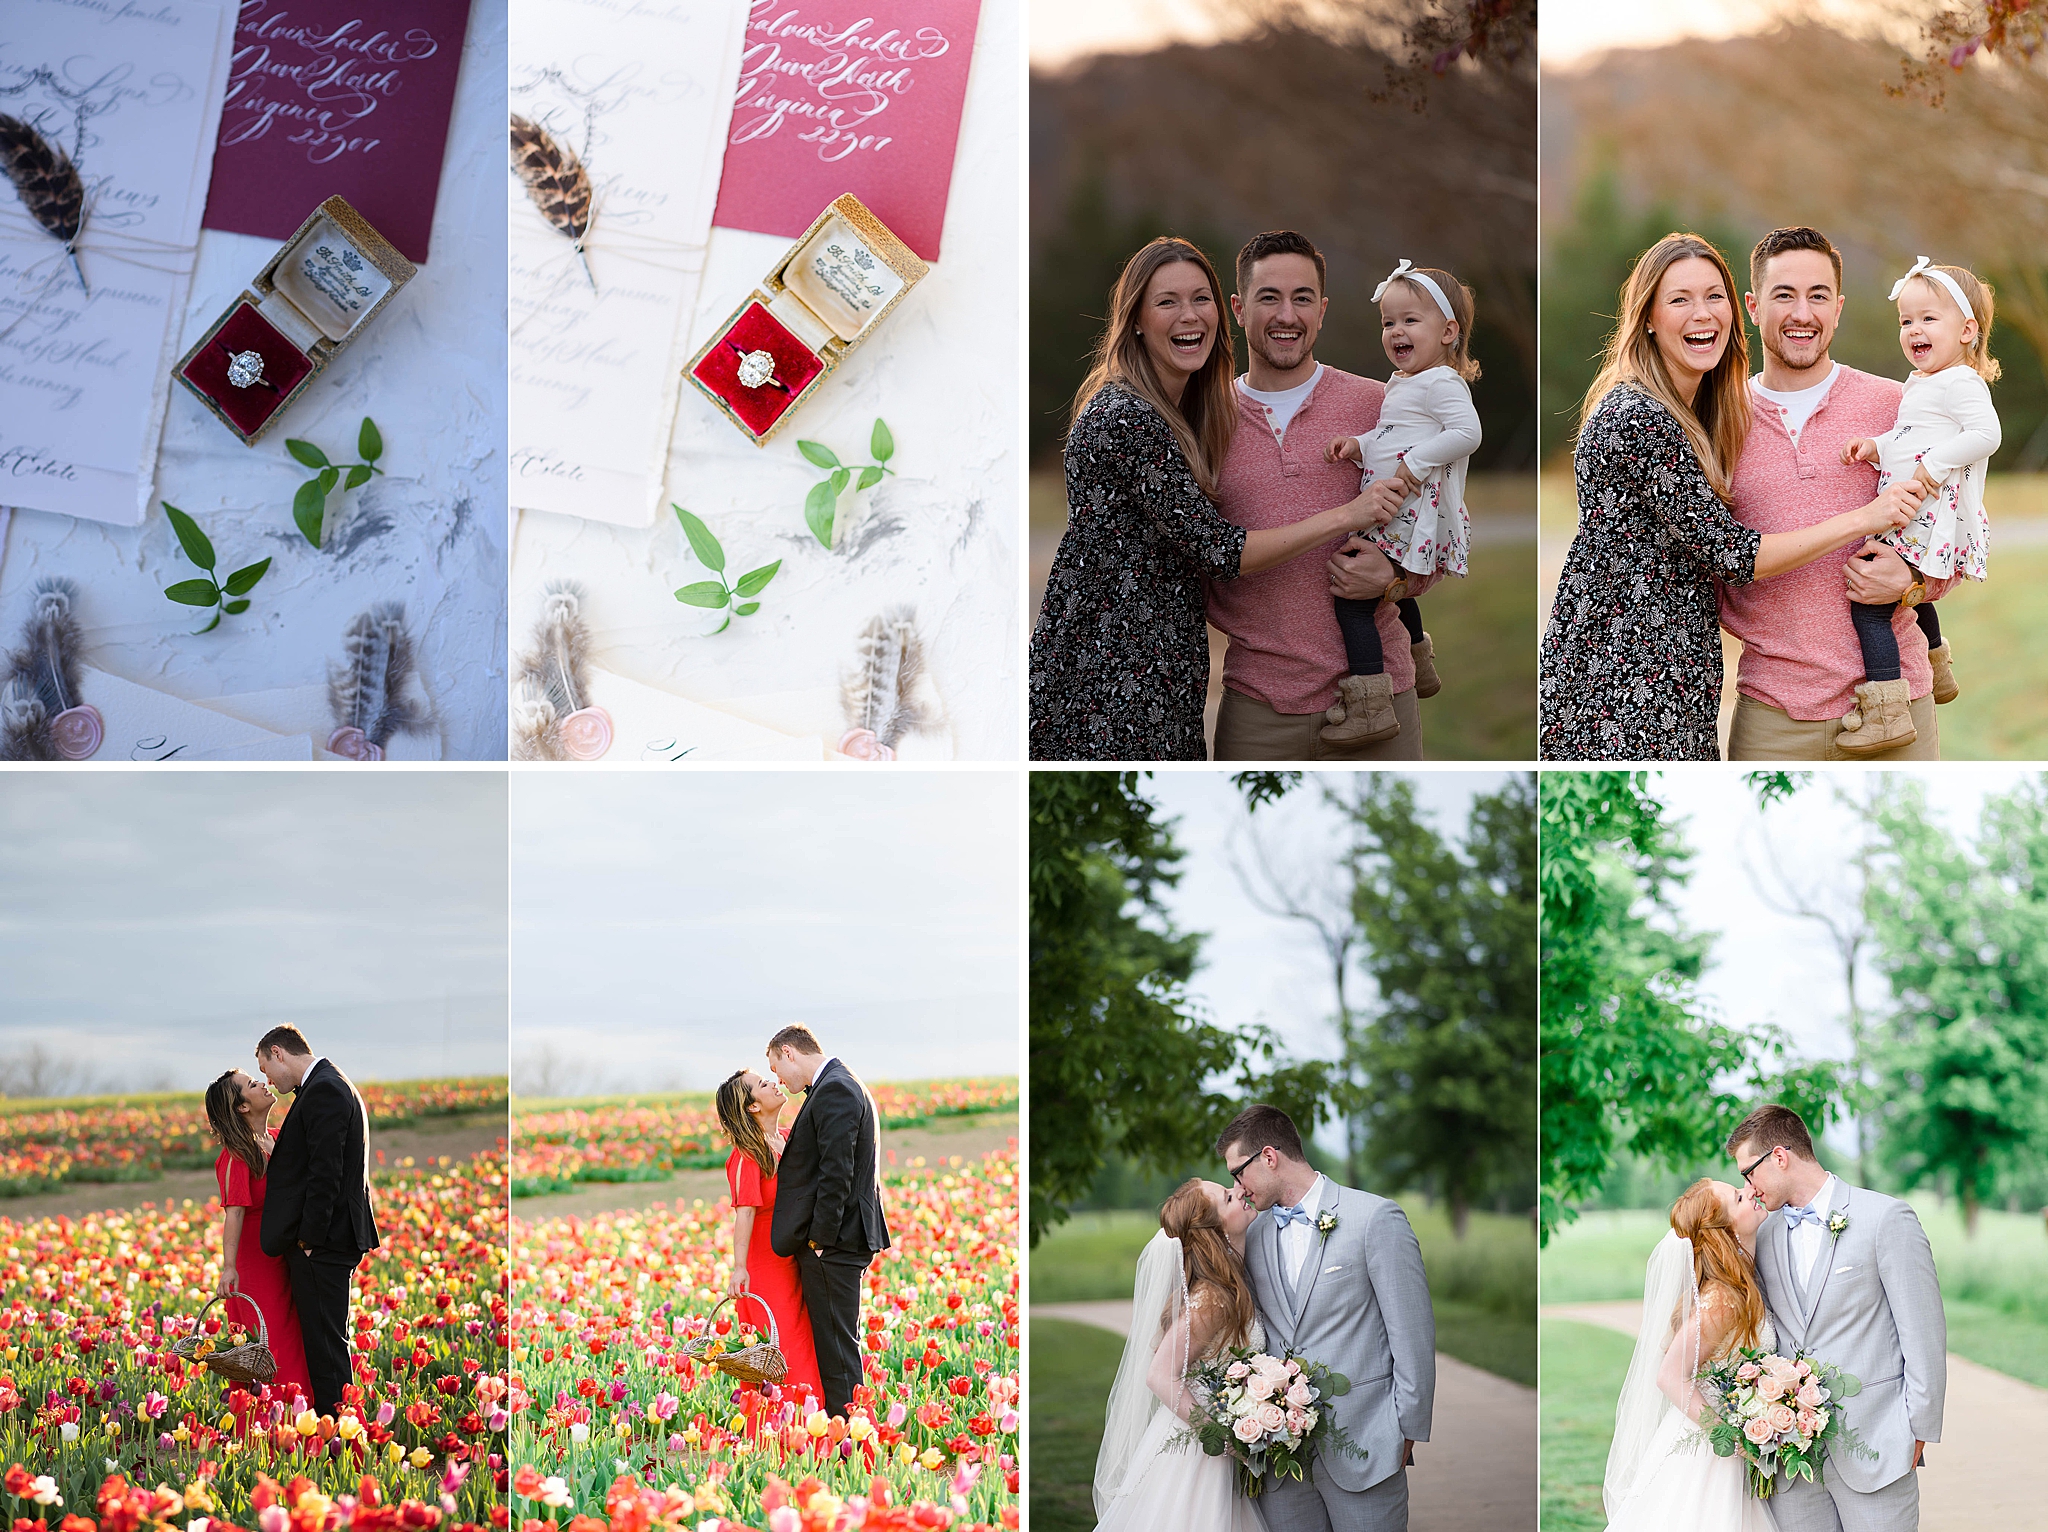
Both of these images were shot about an hour before sunset which provided some beautiful soft light.
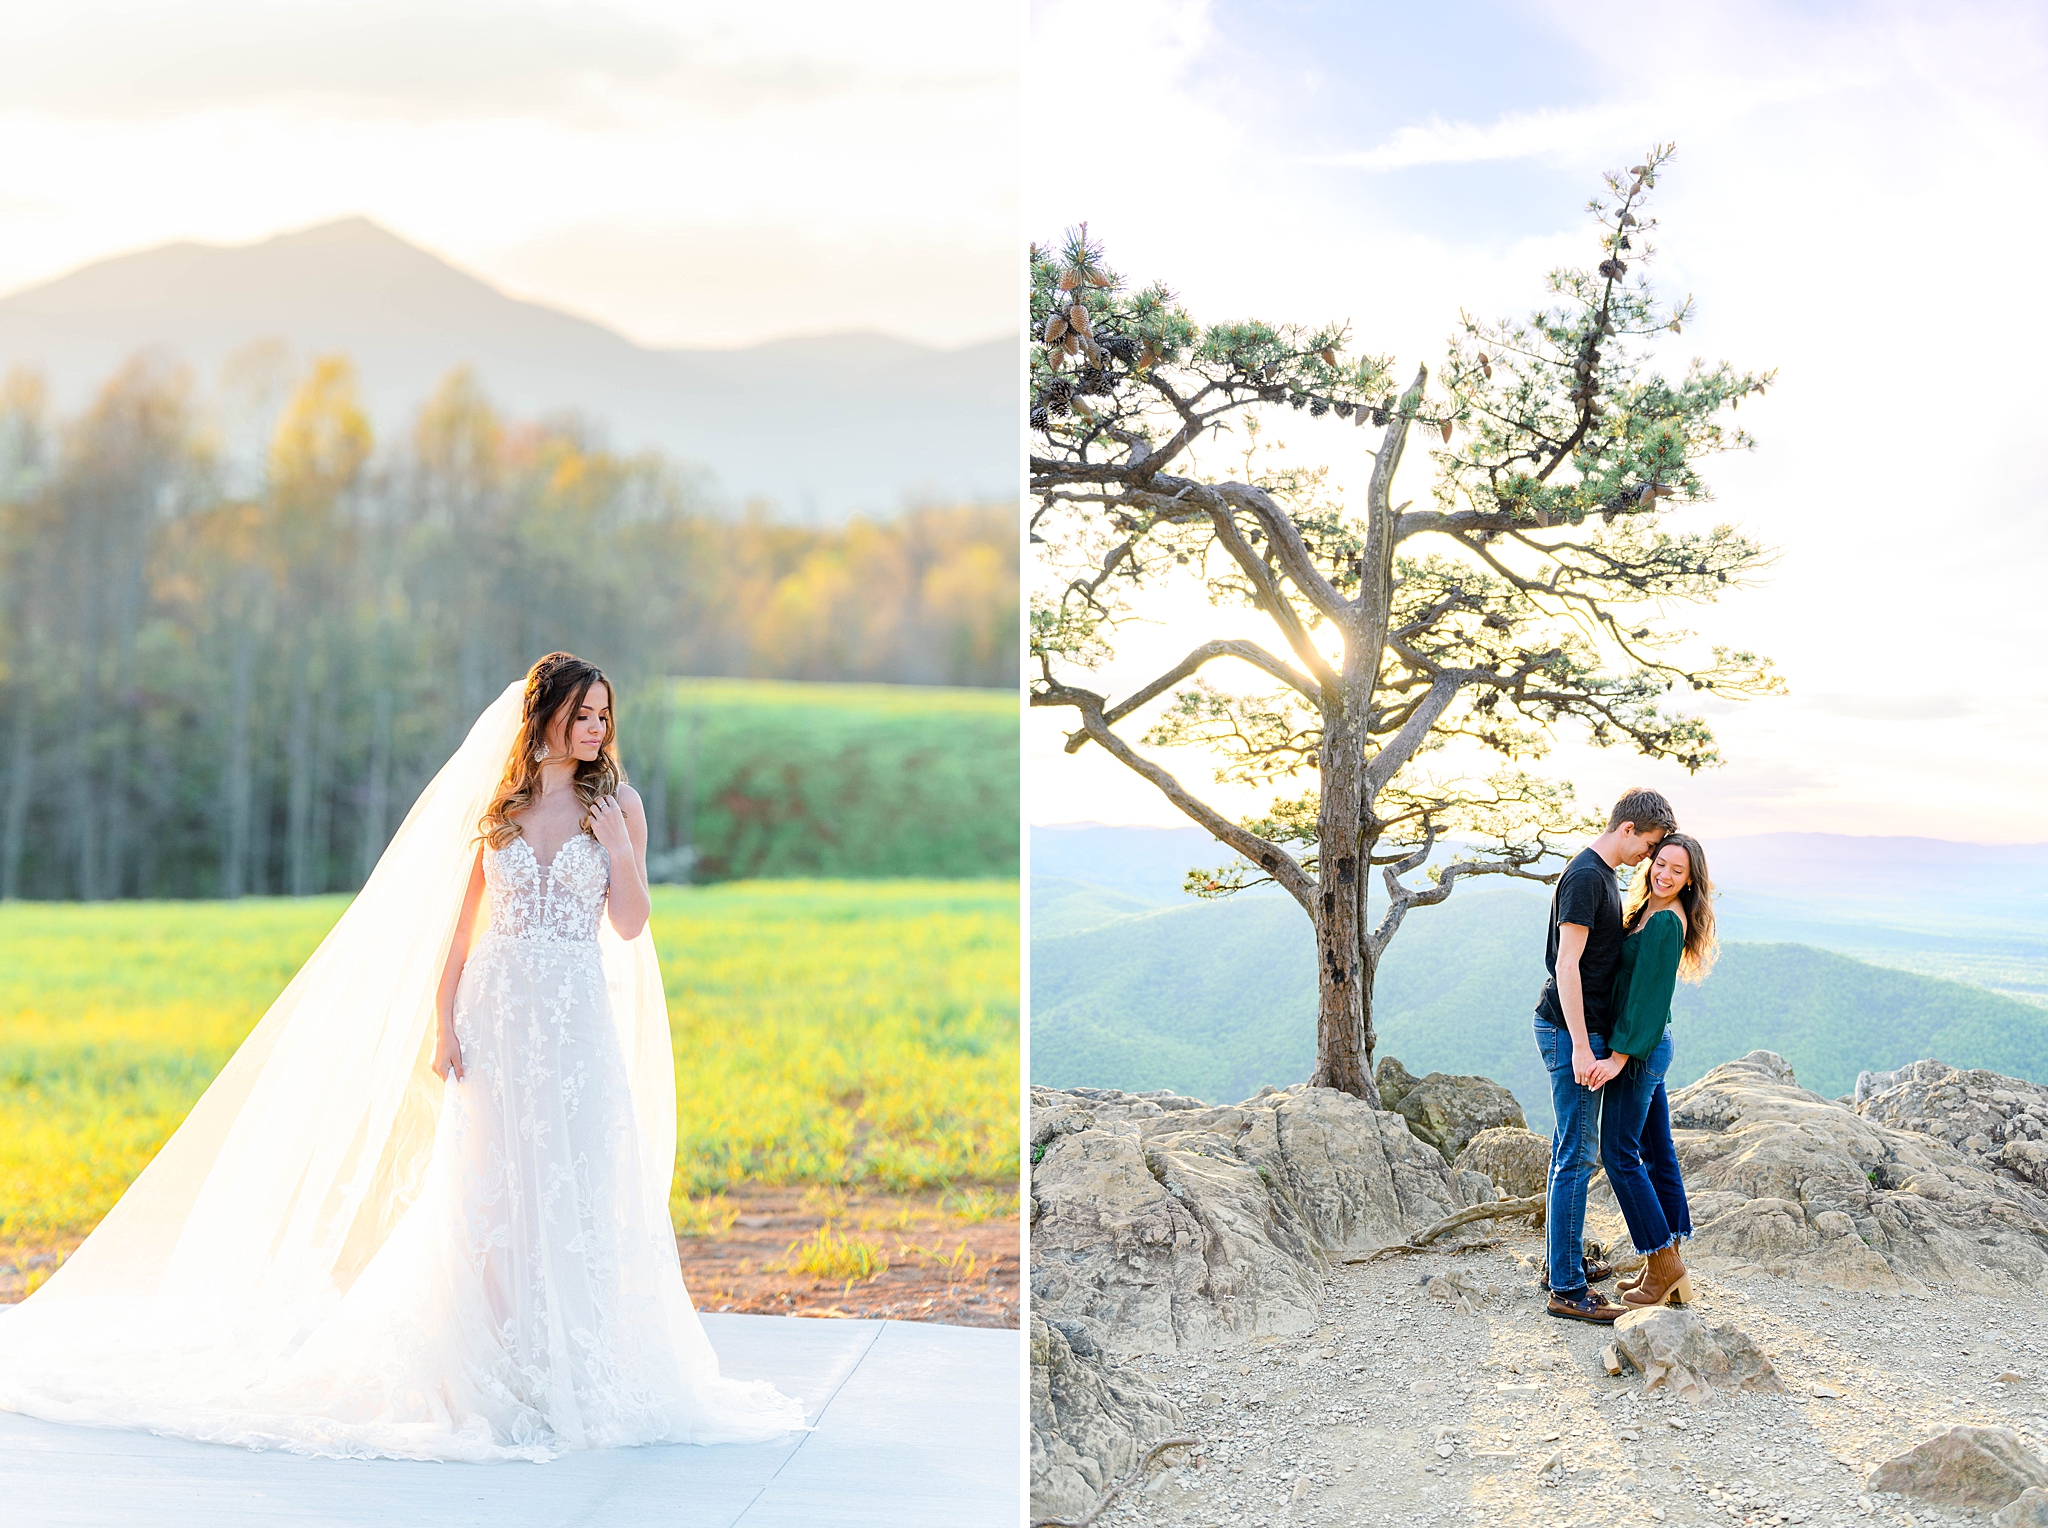
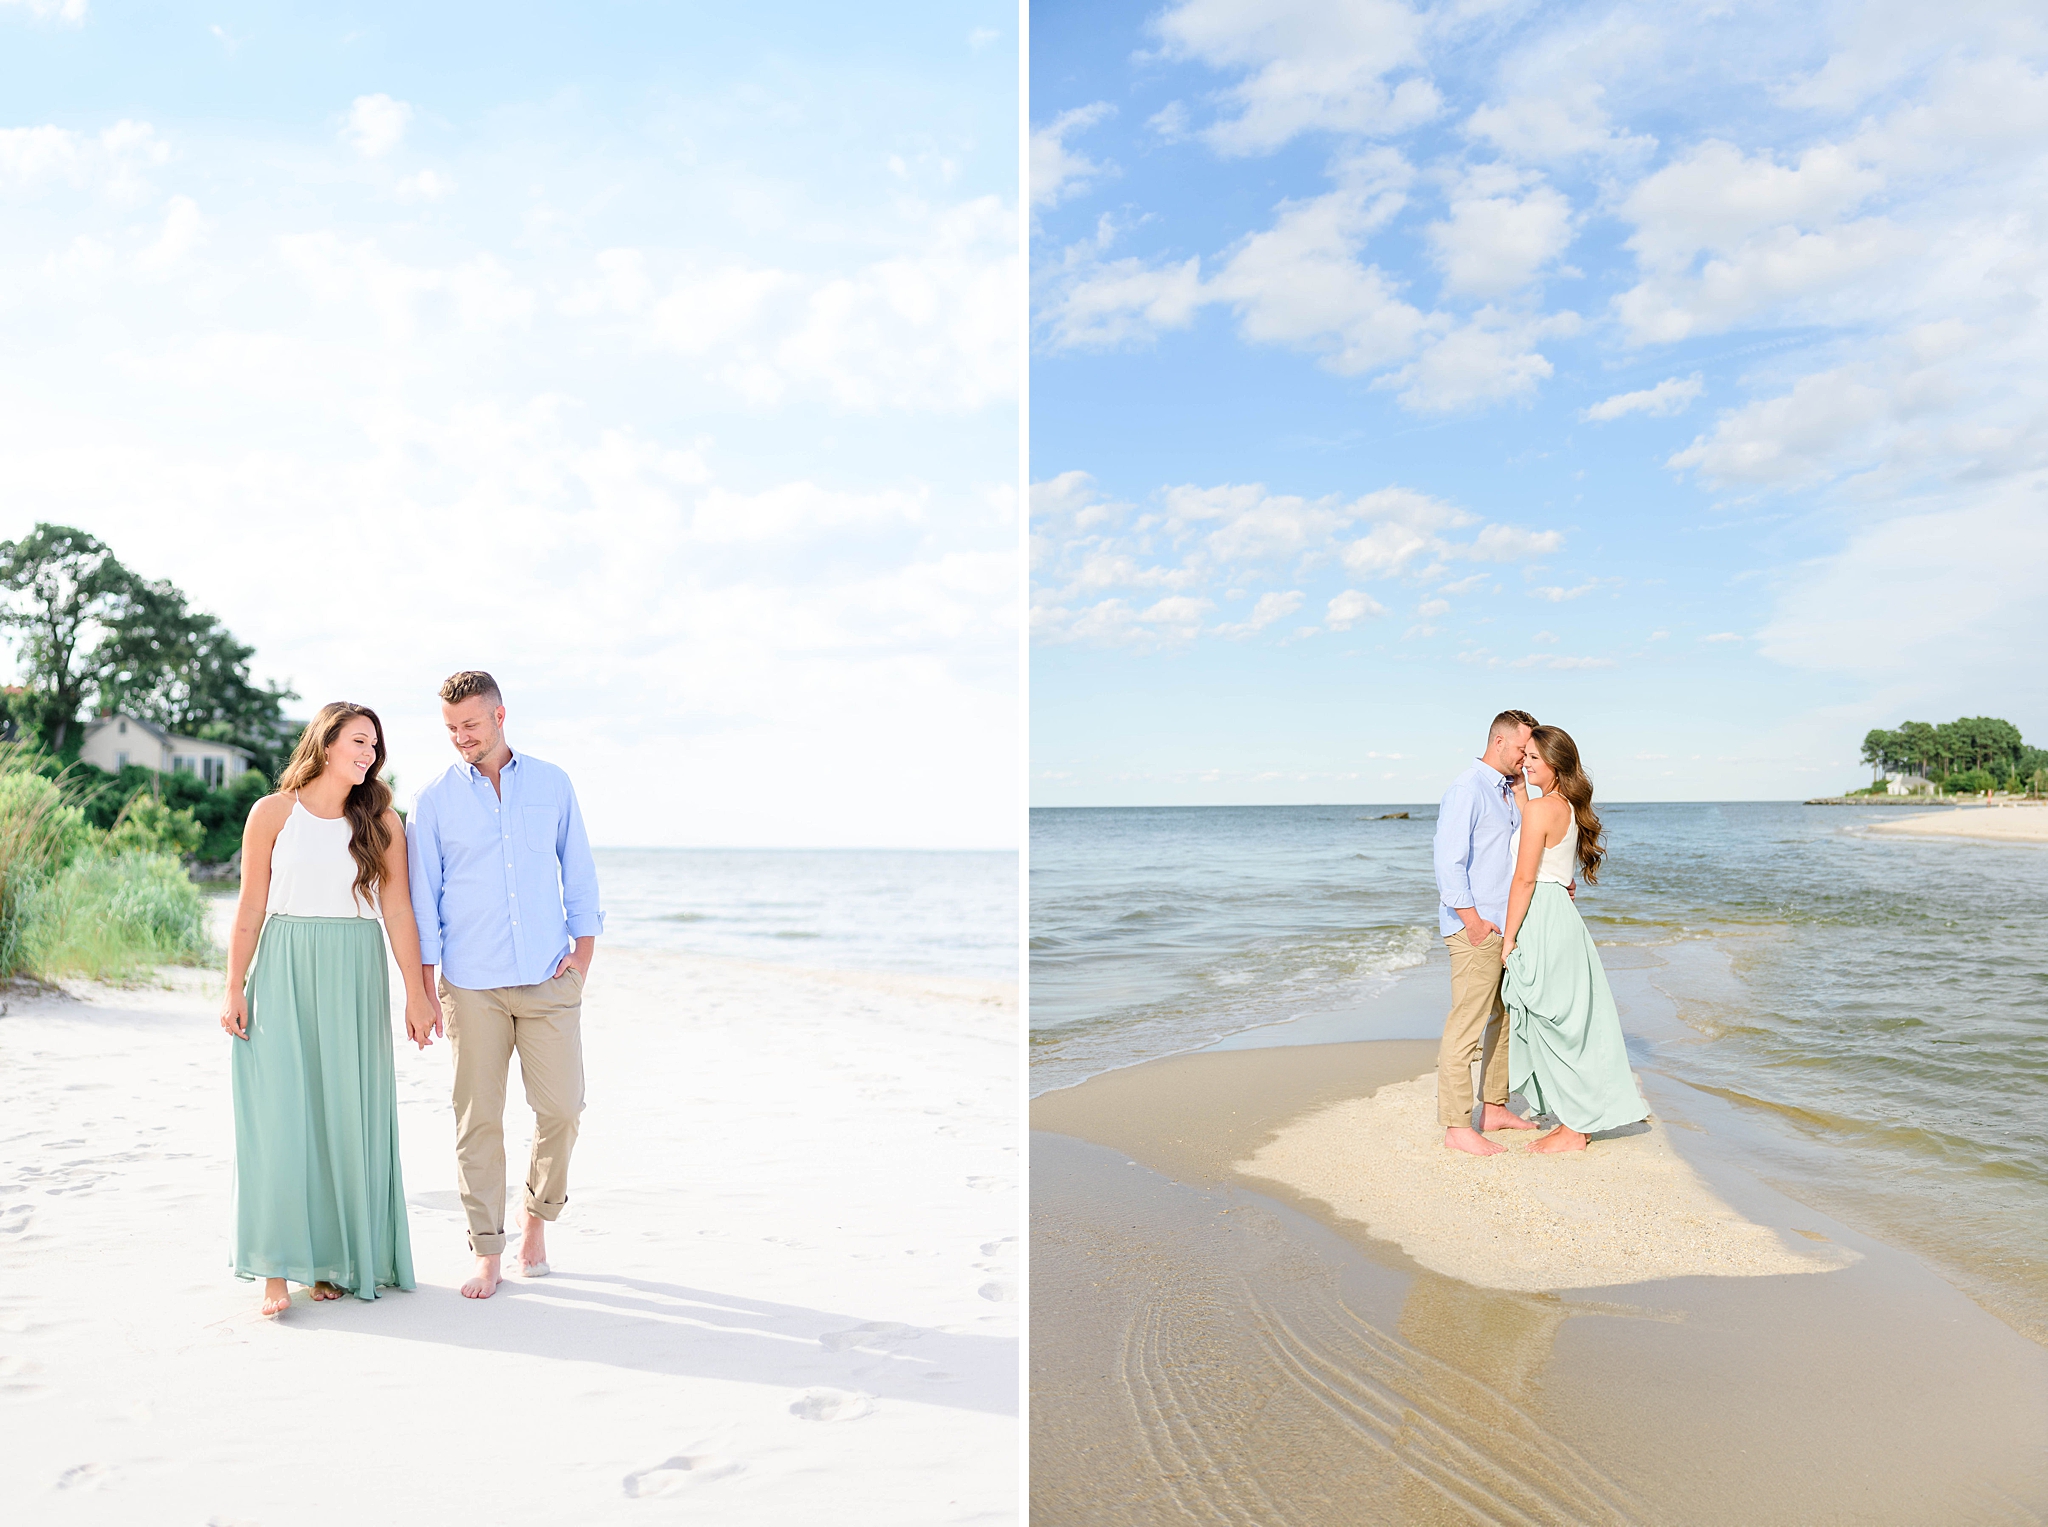
Harsh sunlight can create strong shadows and contrast, making it more challenging to achieve a light and airy look. The images below were shot minutes apart. The only difference is that in the first image, the sun is behind the couple, slightly to the left, while in the second image, the sun is shining on the couple from the front. Can you tell what a huge difference that makes?
The image on the left has soft contrast and natural skin tones, while the image on the right has high contrast and the colors are not as soft.
If you’re shooting on a sunny day, you’ll want to find a tree or a building to diffuse the light.
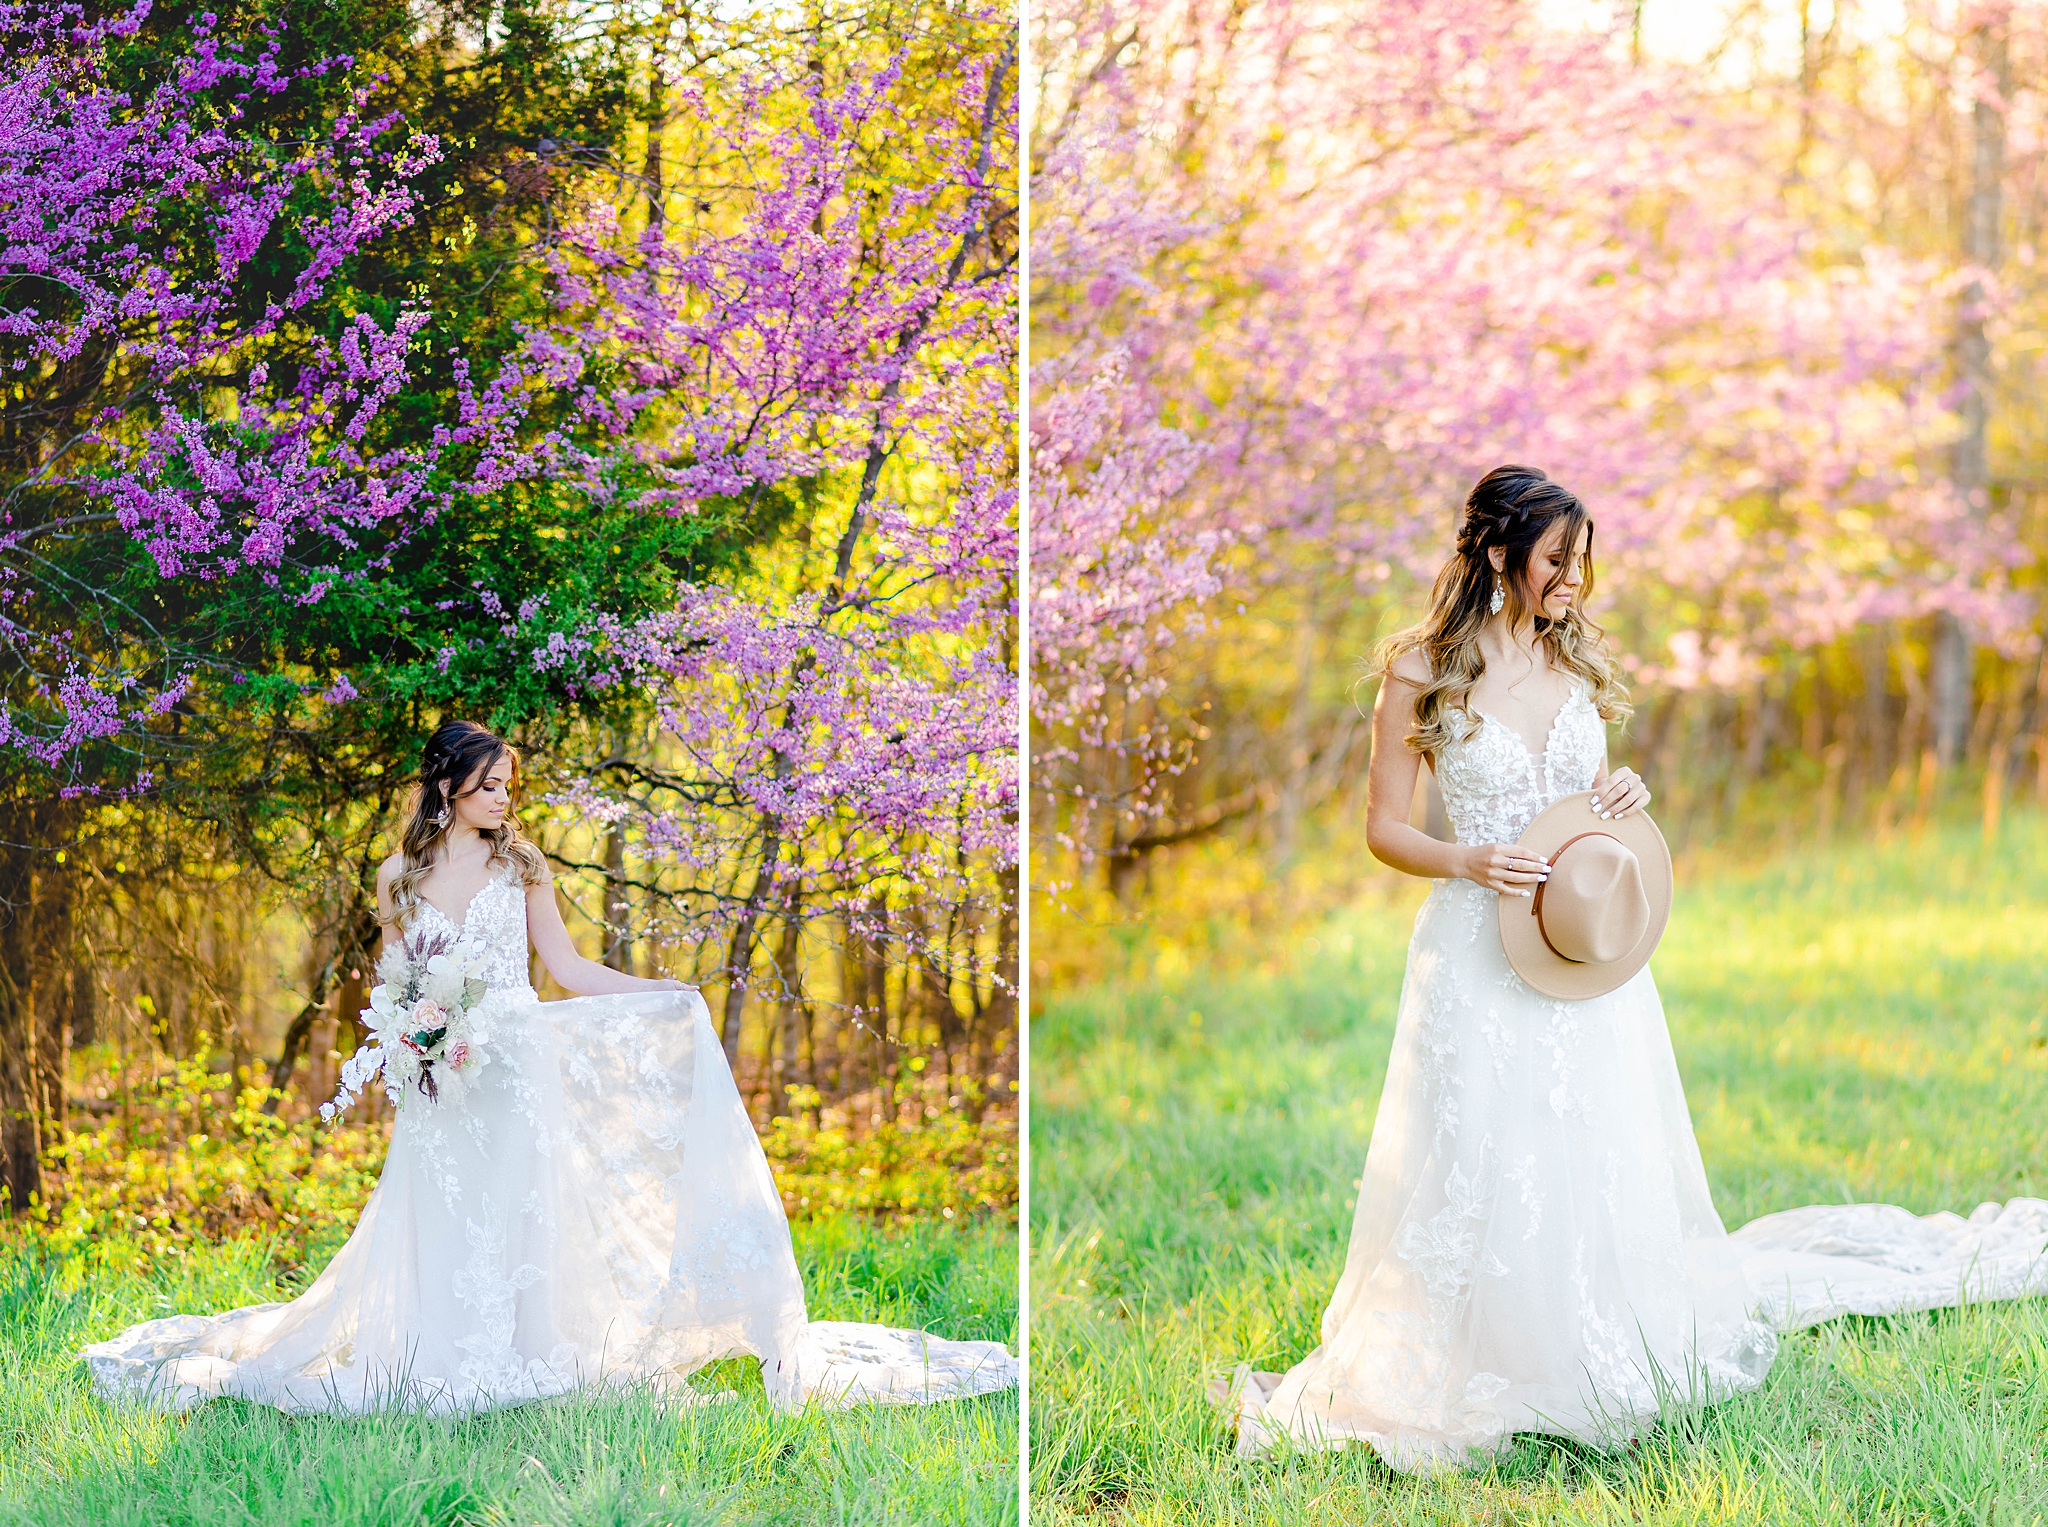
2. Choose a Light Colored Background
The background plays a very important role in how your images are going to look. When you’re choosing your location, look for backgrounds that are naturally light or have a soft or muted color palette. This could include white walls, grey buildings, or light-colored surfaces.
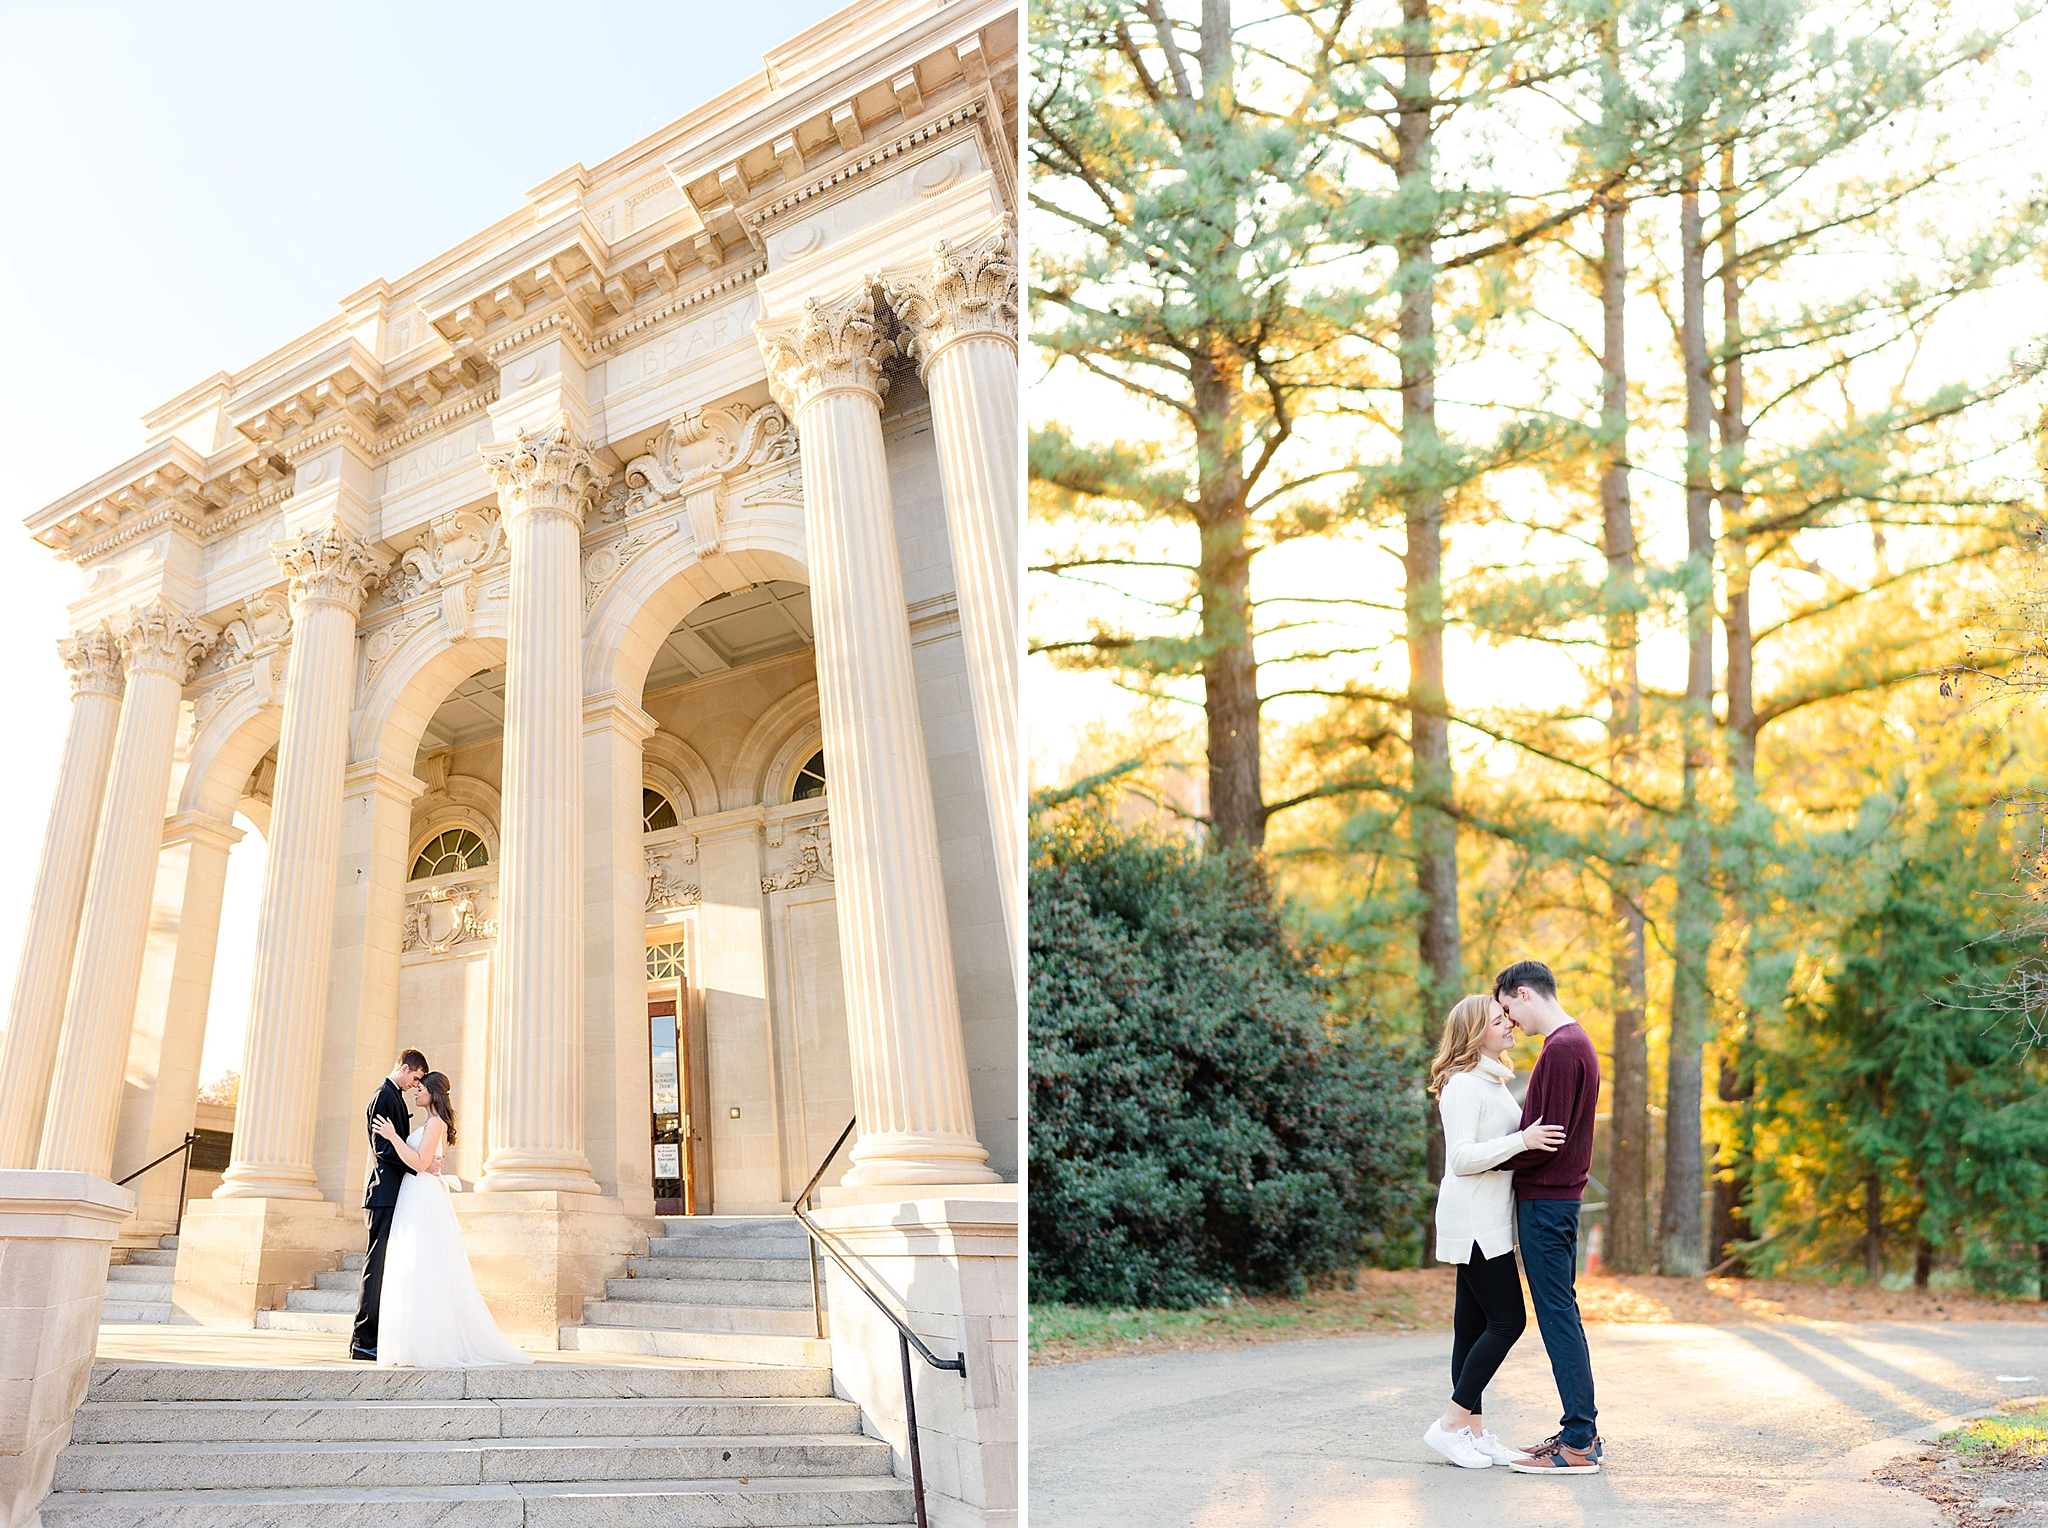
But what do you do when you shoot in an open filed surrounded by tall, green, dark trees? It’s important to remember that the distance between the subject and the background can also impact the overall look of your image. By leaving some distance between your subject and the background, you can still achieve a light and airy look. This allows the background to appear more out of focus and soft, making the subject stand out.
In the example below, see how much lighter and brighter the image on the right is, simply because I placed the couple farther away from the dark green trees?
Pro Tip: If you’re shooting in a location with a lot of trees, look around until you find the lighter colored trees like in the example below. If you only see green trees, then look at the different shades of green and go for the lighter trees available.
Pro Tip: Make sure to avoid dark buildings and tree trunks when choosing your location!
3. Use a Wide Aperture
Shooting with a wide aperture (low f-number) helps you create a shallow depth of field and blur the background, which can contribute to a light and airy feel. I usually shoot portraits at f/2.0 because I love the creamy background it creates (bokeh). A wide aperture also allows more light to reach the sensor, which helps brighten the overall image.
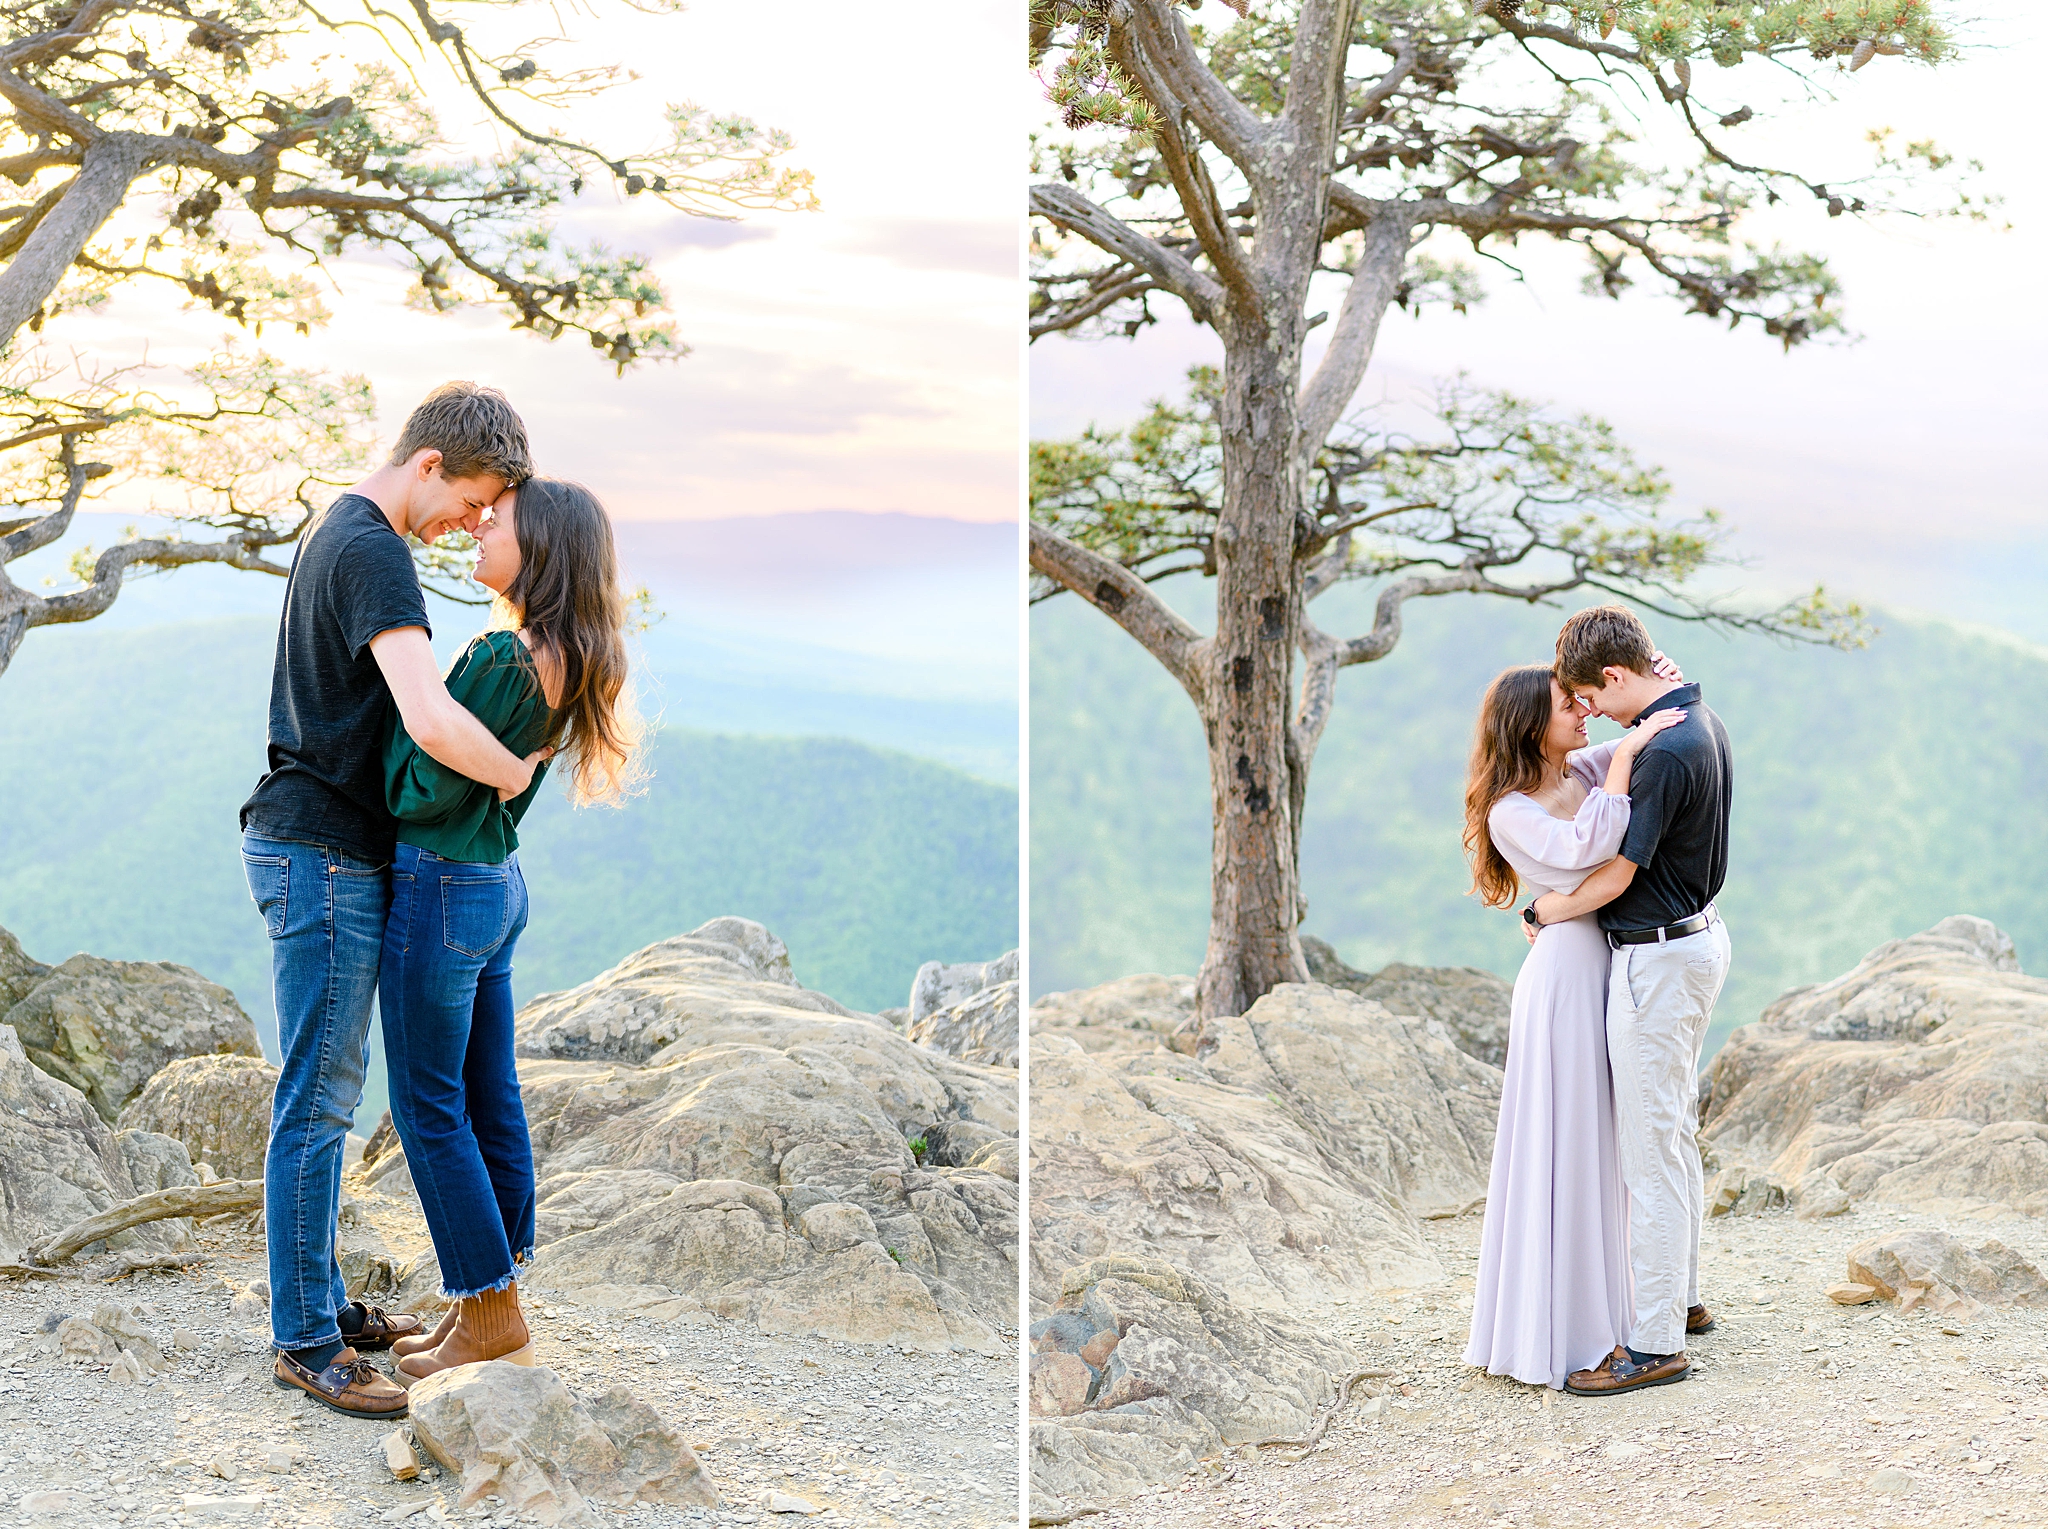
Let’s take a look at the images below. Right away, we notice that we have some dark tree trunks, as well as a lot of green going on. Technically, it would be really hard to take a light and airy image in this location. However, because I used a prime lens (50 mm on the left and 85mm on the right) and a wide aperture (f/2.8 on the left and f/2.2 on the right), both images are beautifully lit and fit the light and airy style.
4. Use a Light Color Palette
In addition to light colored backdrops, it helps a lot to have your clients wear light colored clothes such as whites, pastels, or soft neutral colors. Lighter colors tend to reflect more light, which enhances the overall bright and airy feel of the image.
We took these images minutes apart – same couples, same location, but different outfits. Even though we have a dark tree trunk in the second image, overall, it still appears lighter than the image on the left because the couple is wearing lighter color outfits.
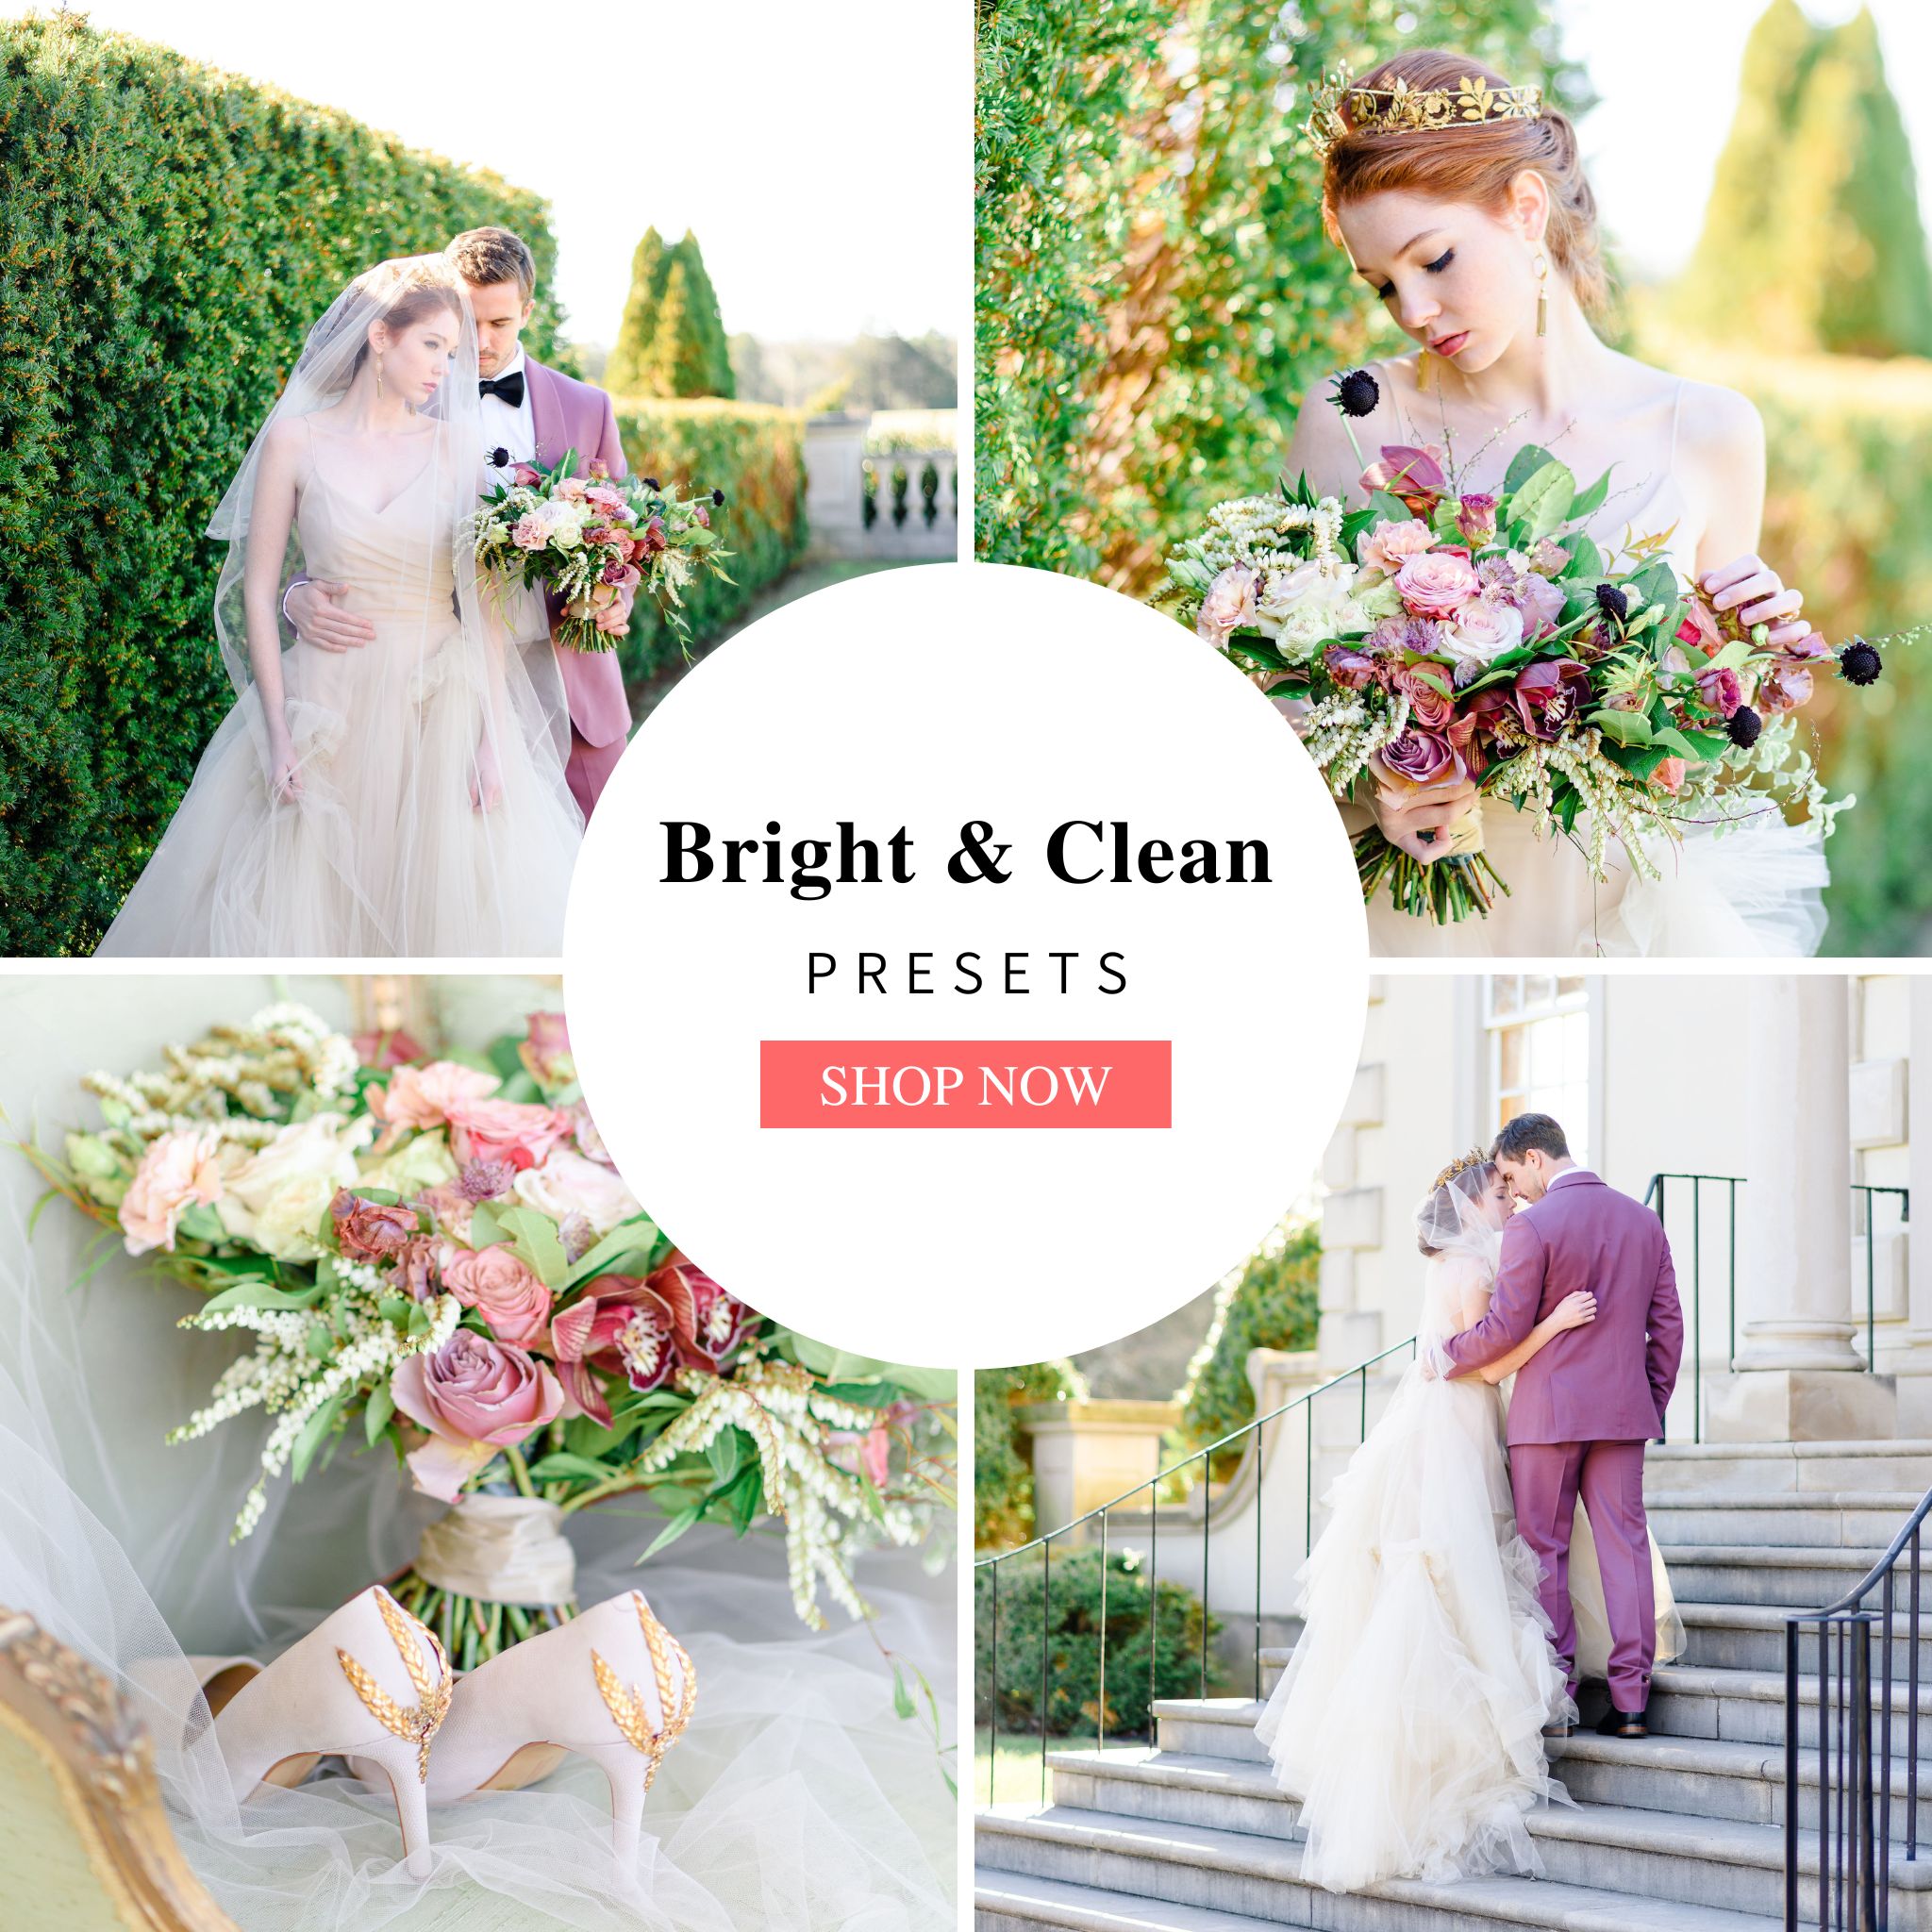
5. Editing with the Bright & Clean Presets
And lastly, my favorite, the editing stage! You have to be very careful not to overexpose your images so that your work doesn’t look washed out. In the past, I tried multiple preset packs but never really found one that produced consistent results for me. And that’s because the same preset will look completely different when applied to multiple images that were shot in different lighting situations.
So I created the Bright & Clean Presets, which are situational presets that are all designed to give you the same light and airy style with a little bit of pop, no matter the lighting conditions.
With the Bright & Clean Presets, I never have to second-guess which preset is right for my edit — no more confusing “creative” names, instead each preset is named for the exact edit it’s made for.
Need to create that glowy, milky light for a gorgeous flat lay? Choose Sweet Details.
Shot in bright sunshine? Use the Sunny Days preset.
Need brightness in your photo? Choose More Light.
And repeat the simple process with ten reliable presets over and over again — getting the same gorgeous results every time.
Here’s what other photographers are saying!

Did you know that you can get your questions answered as well? Click the button below to ask me anything!