

I’ve been looking for a new photo culling software and recently came across FilterPixel. After trying it out on a few different sessions, I was sold, so I knew that I had to let you know about it!
So, how is FilterPixel different from all the other photo culling softwares?
FilterPixel actually uses AI (Artificial Intelligence) to cull for you. Yes, it literally does the culling for you. It’s pretty amazing and it saves me SO much time!!
One of my biggest “flaws” is that I overshoot. That’s not necessarily a bad thing though — studies have shown that overshooting helps you produce better work each time, so I’ll take that as a positive thing haha. However, the downside is that it takes longer for me to cull and edit. 😔
My normal workflow is that I go through all of the images once and pick the best ones. That might take me well over an hour to do. Then, I would ideally go through the culled images again and pick the very best ones to edit for the blog. Most of the time though, I’m anxious to start editing right away and just import all the images from my initial cull into Lightroom. That’s usually around 1,300 photos. Yikes!
Now, as I’m editing, I might notice some duplicate shots, images that have missed focus, etc. and delete them. So let’s say, now I’m down to 1,100 images. After I finish editing, I like to go through the entire gallery in Lightroom one last time to make sure that everything looks exactly how I want. This last culling process takes longer because I’m doing it in Lightroom, and on top of that, I’m getting rid of images I’ve already spent time on editing. My wedding galleries usually range between 700-900 images. This means that I’m spending time editing roughly 400-500 extra images that just end up being discarded. That is a LOT of wasted time!!
Since I’m always looking for ways to improve my workflows, here is how I’m able to save time with my new favorite photo culling software, FilterPixel!
1. Effortlessly Organize and Manage Your Selection
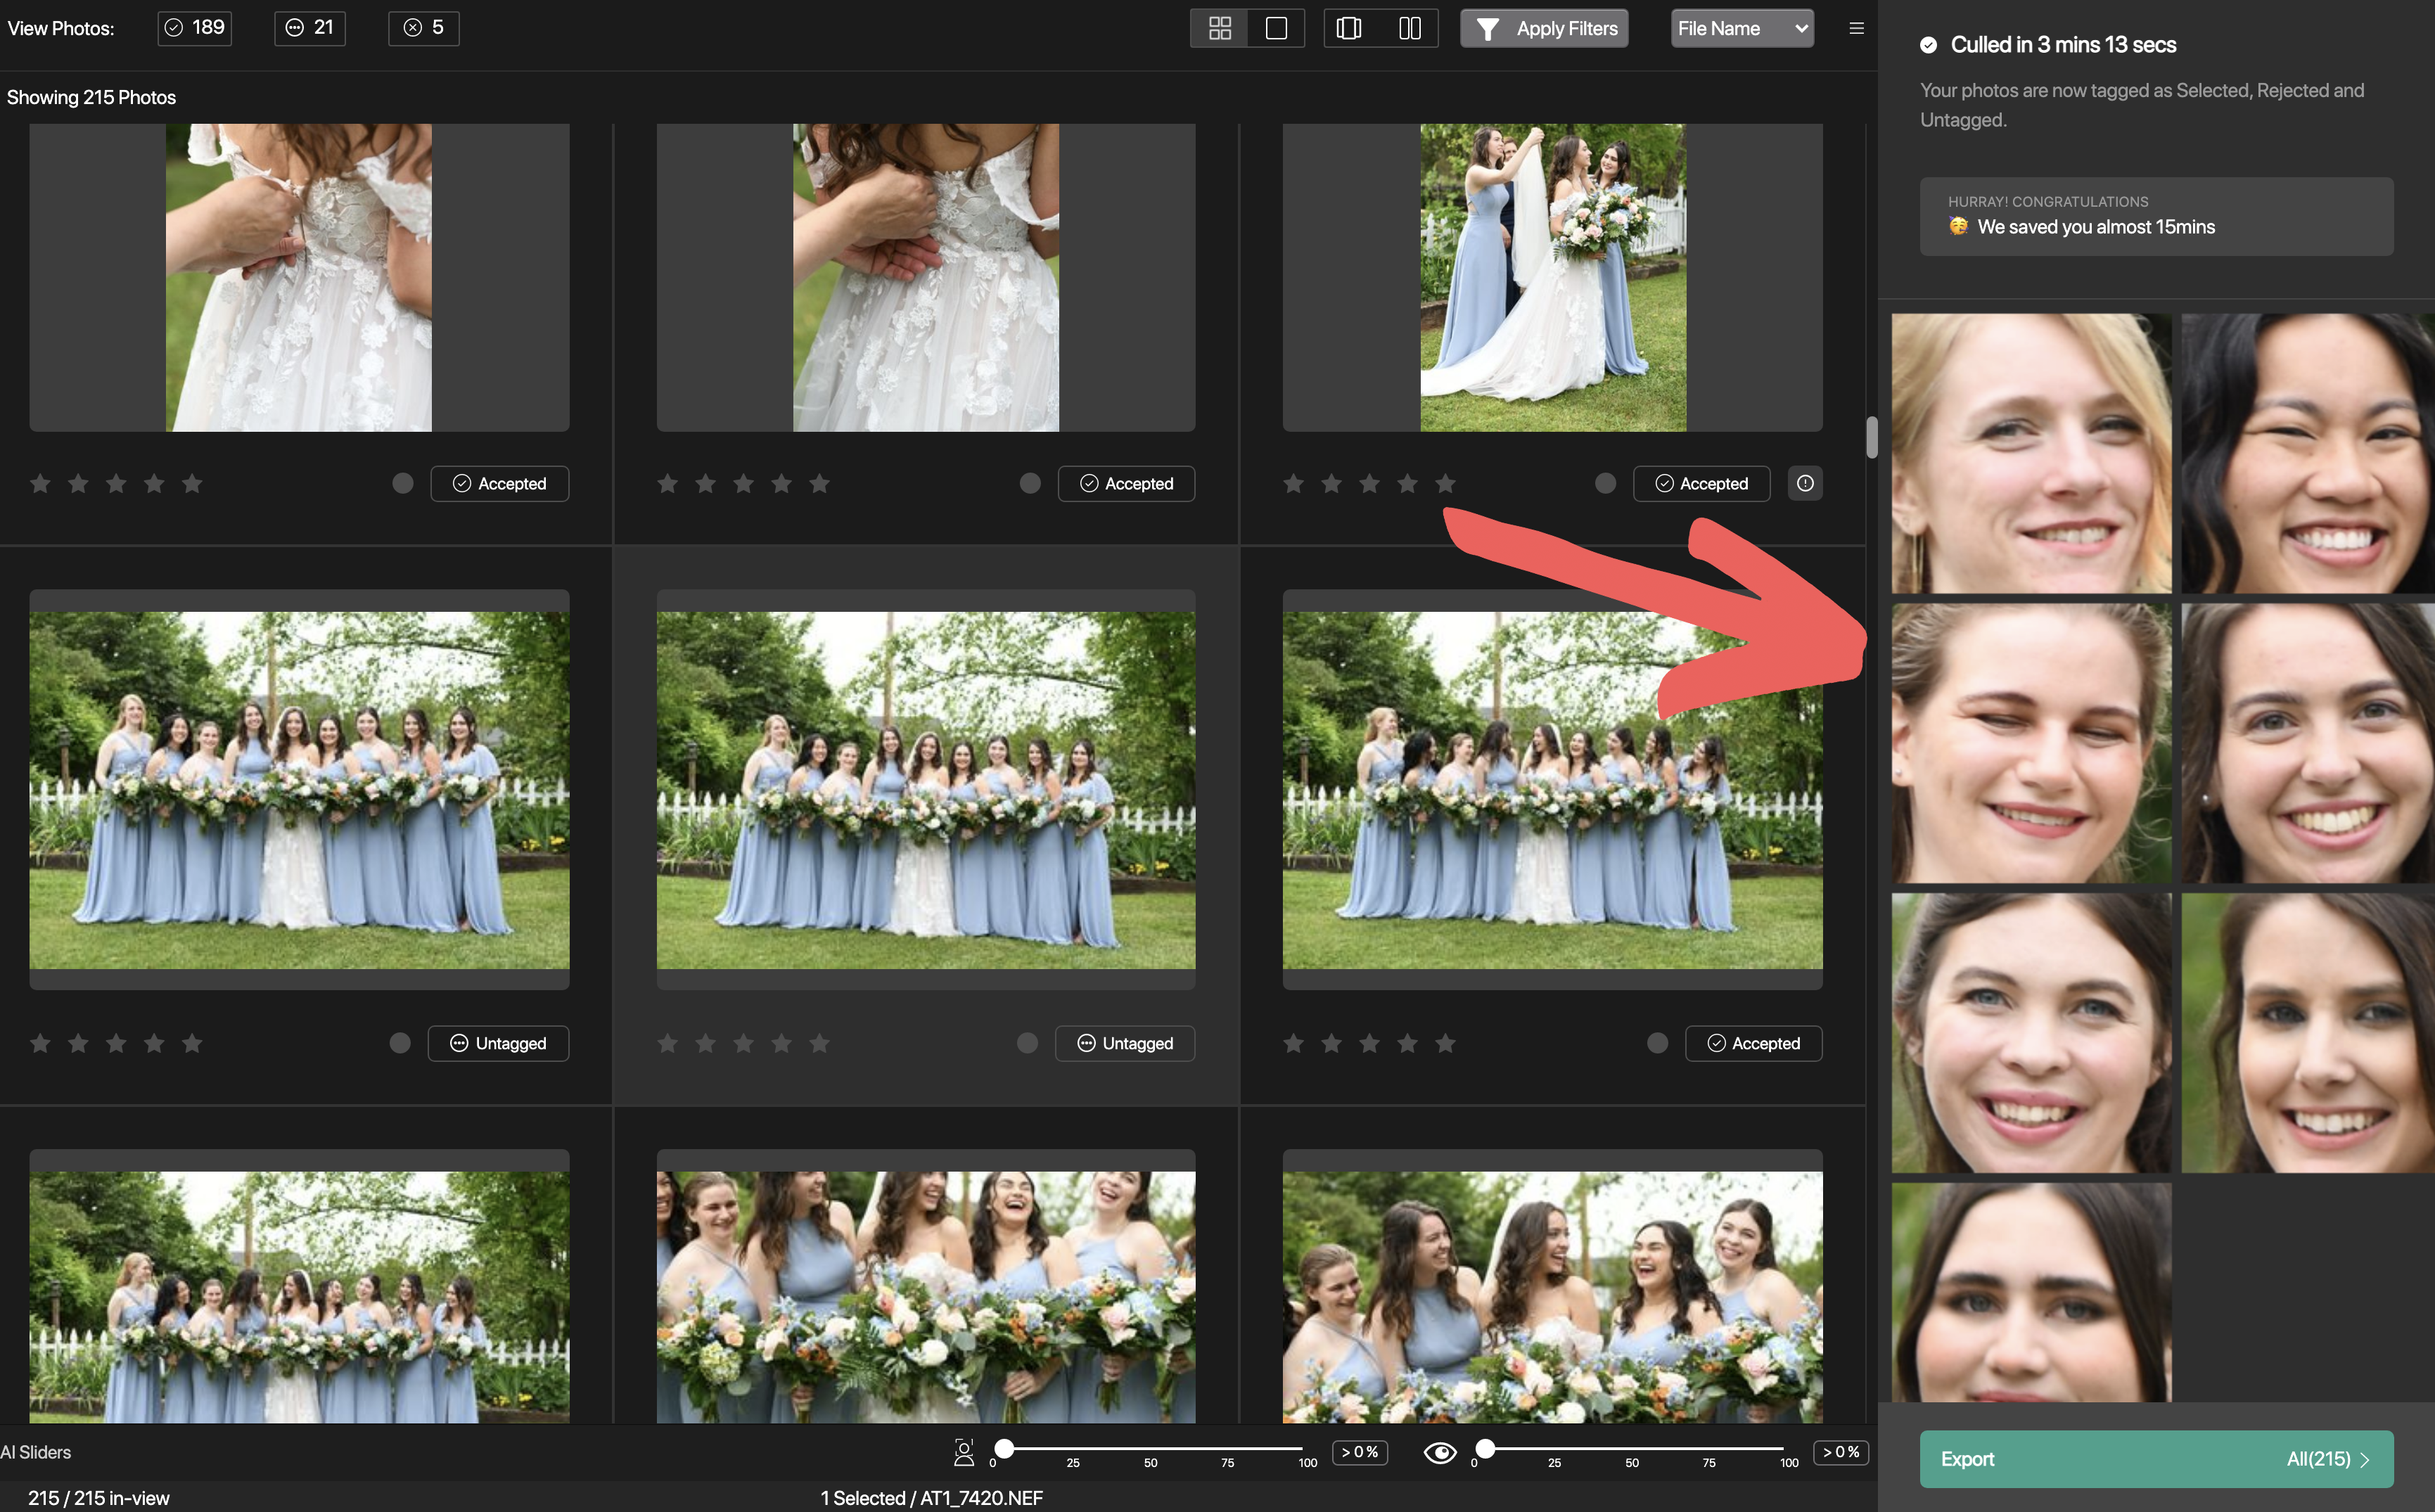
What I love the most about FilterPixel, is that it does the initial culling for me in just minutes. What that means is that it looks at all the images and categorizes them as “accepted, untagged, and rejected”. It basically keeps all the good images in one tab, and flags all the images that are not technically correct (overexposed, underexposed, missed focus, etc.) so you can easily go through them and decide if you’d like to keep any for whatever reason. This step alone is such a time saver for me!
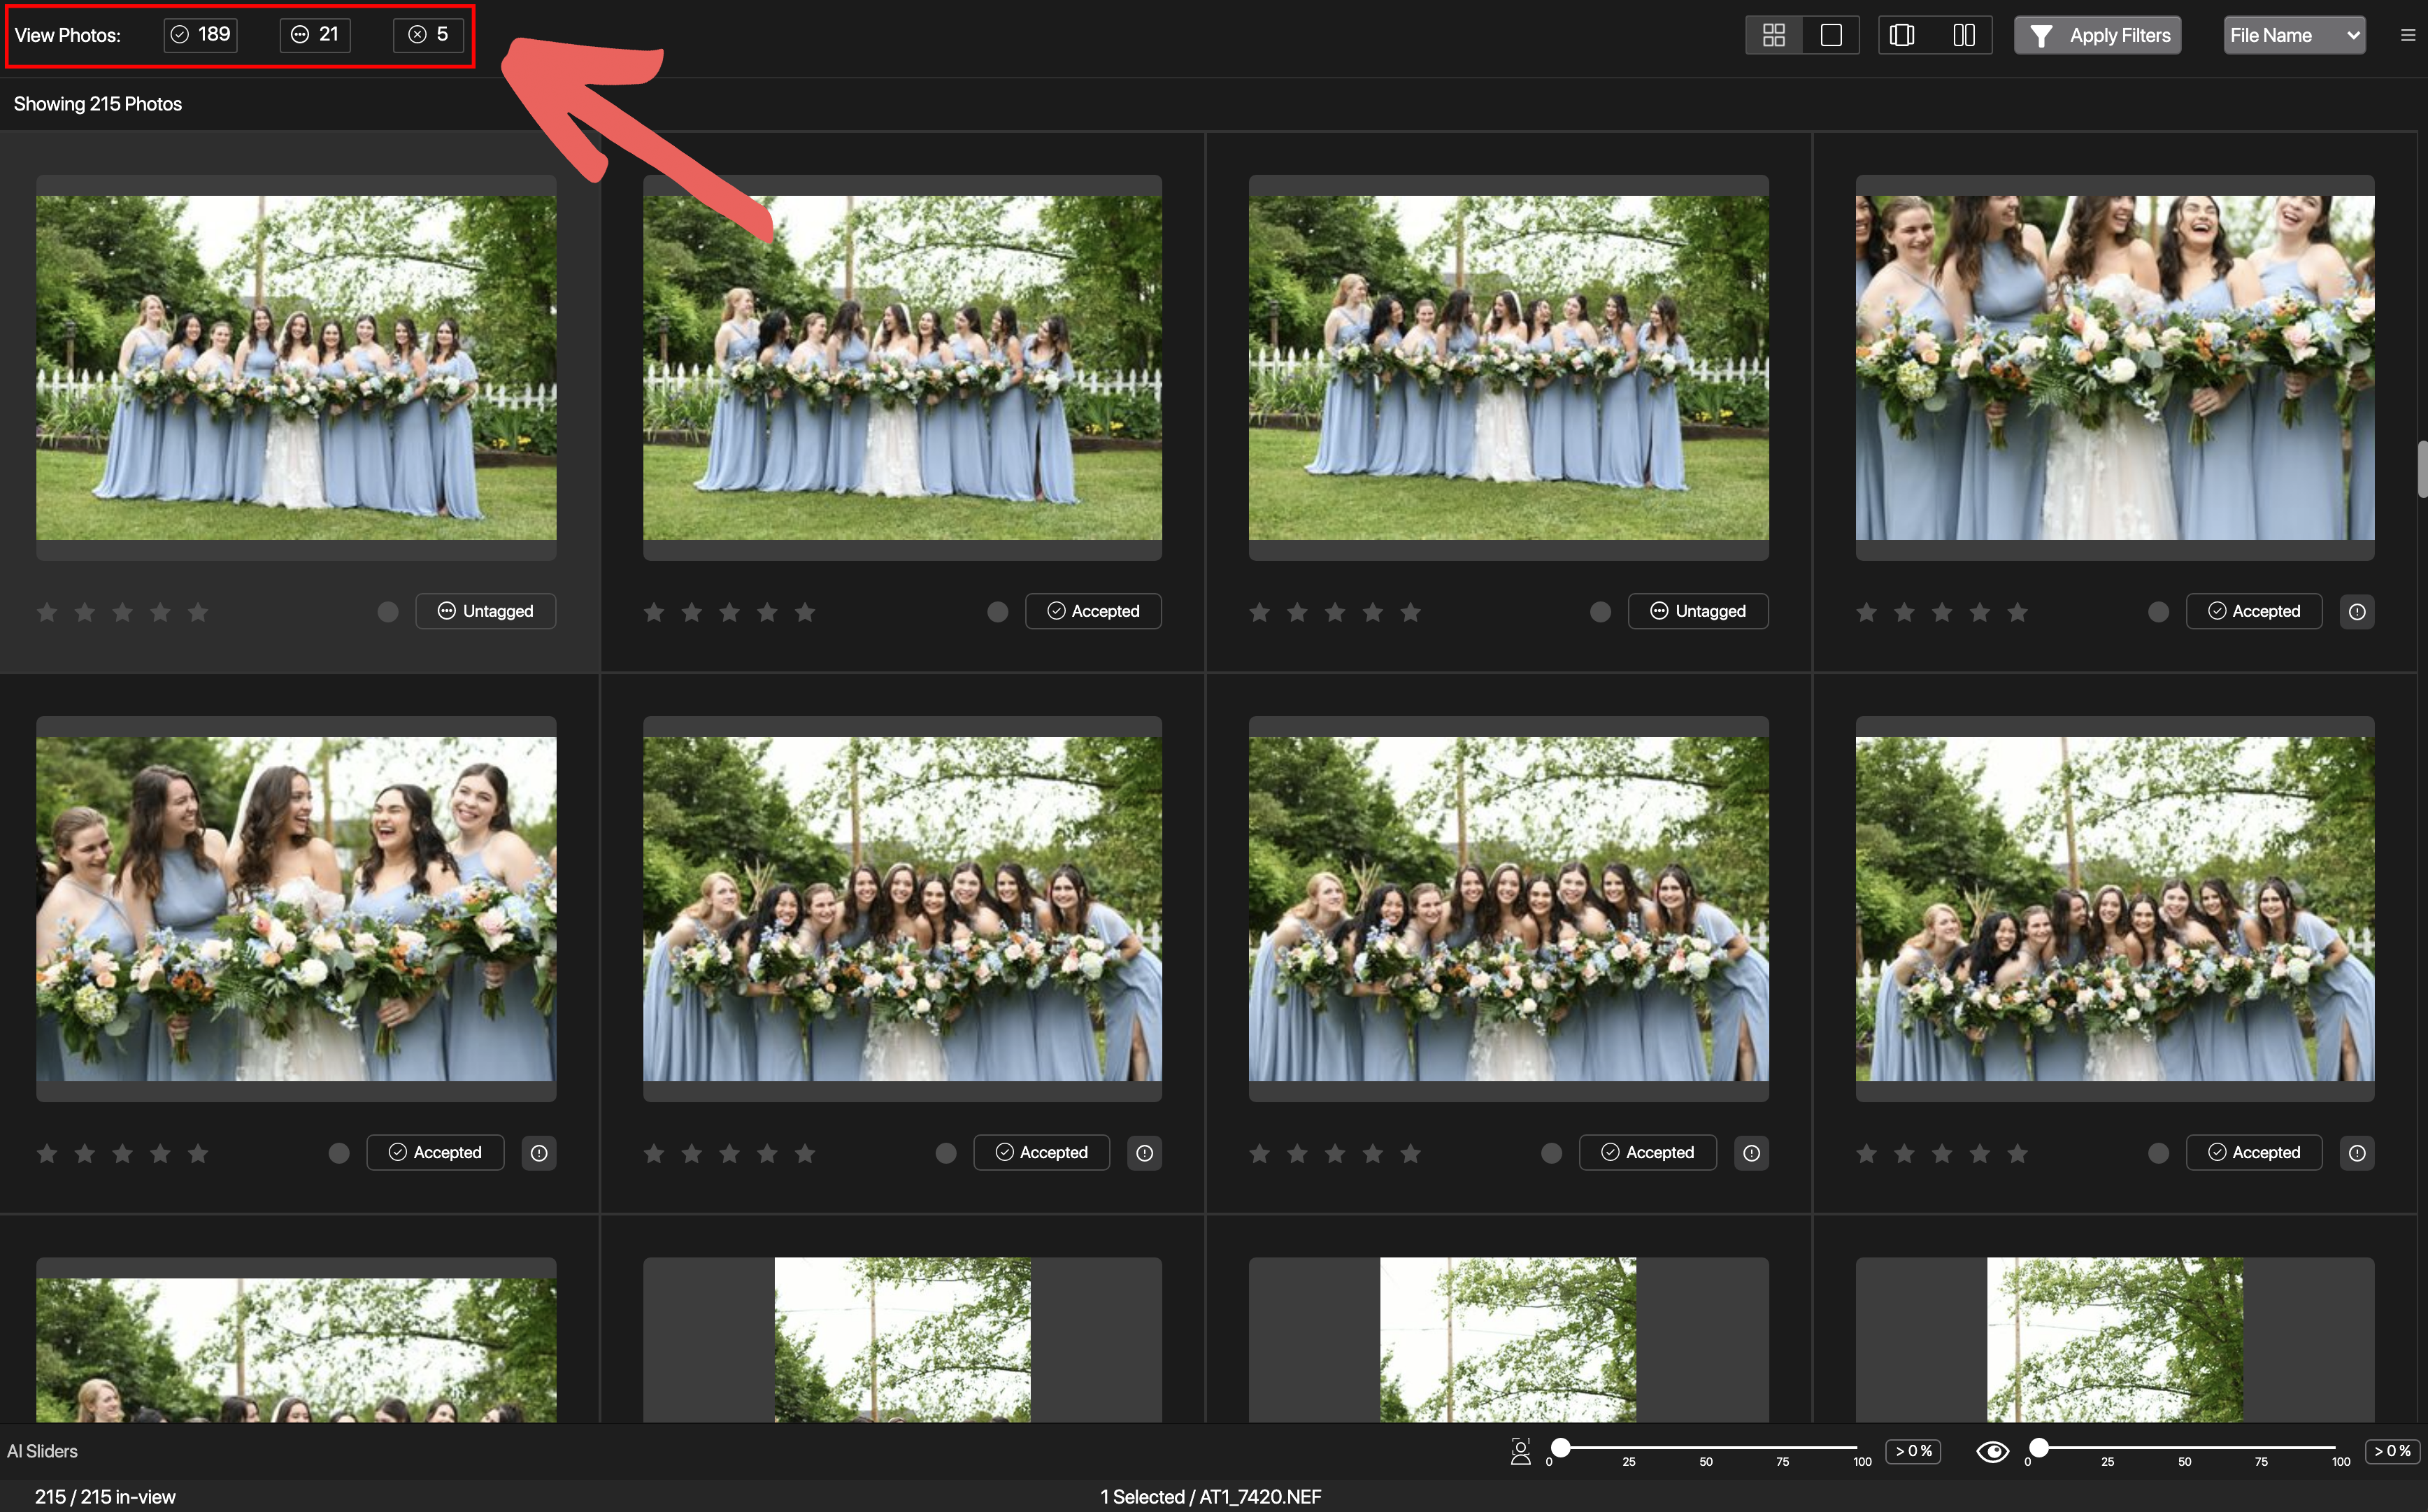
In the top left corner of the FilterPixel interface, you’ll find the View Photos option, which categorizes your images into accepted, untagged, and rejected. With this feature, you can easily navigate through the different categories and decide if you’d like to make any changes, like set some of the rejected images as accepted and vice versa. The untagged folder contains the images that are not your best, but they are also not bad enough to be rejects. So you can choose to keep or discard them as you’d like. I have to say, this image organization system might just be my favorite feature in FilterPixel!
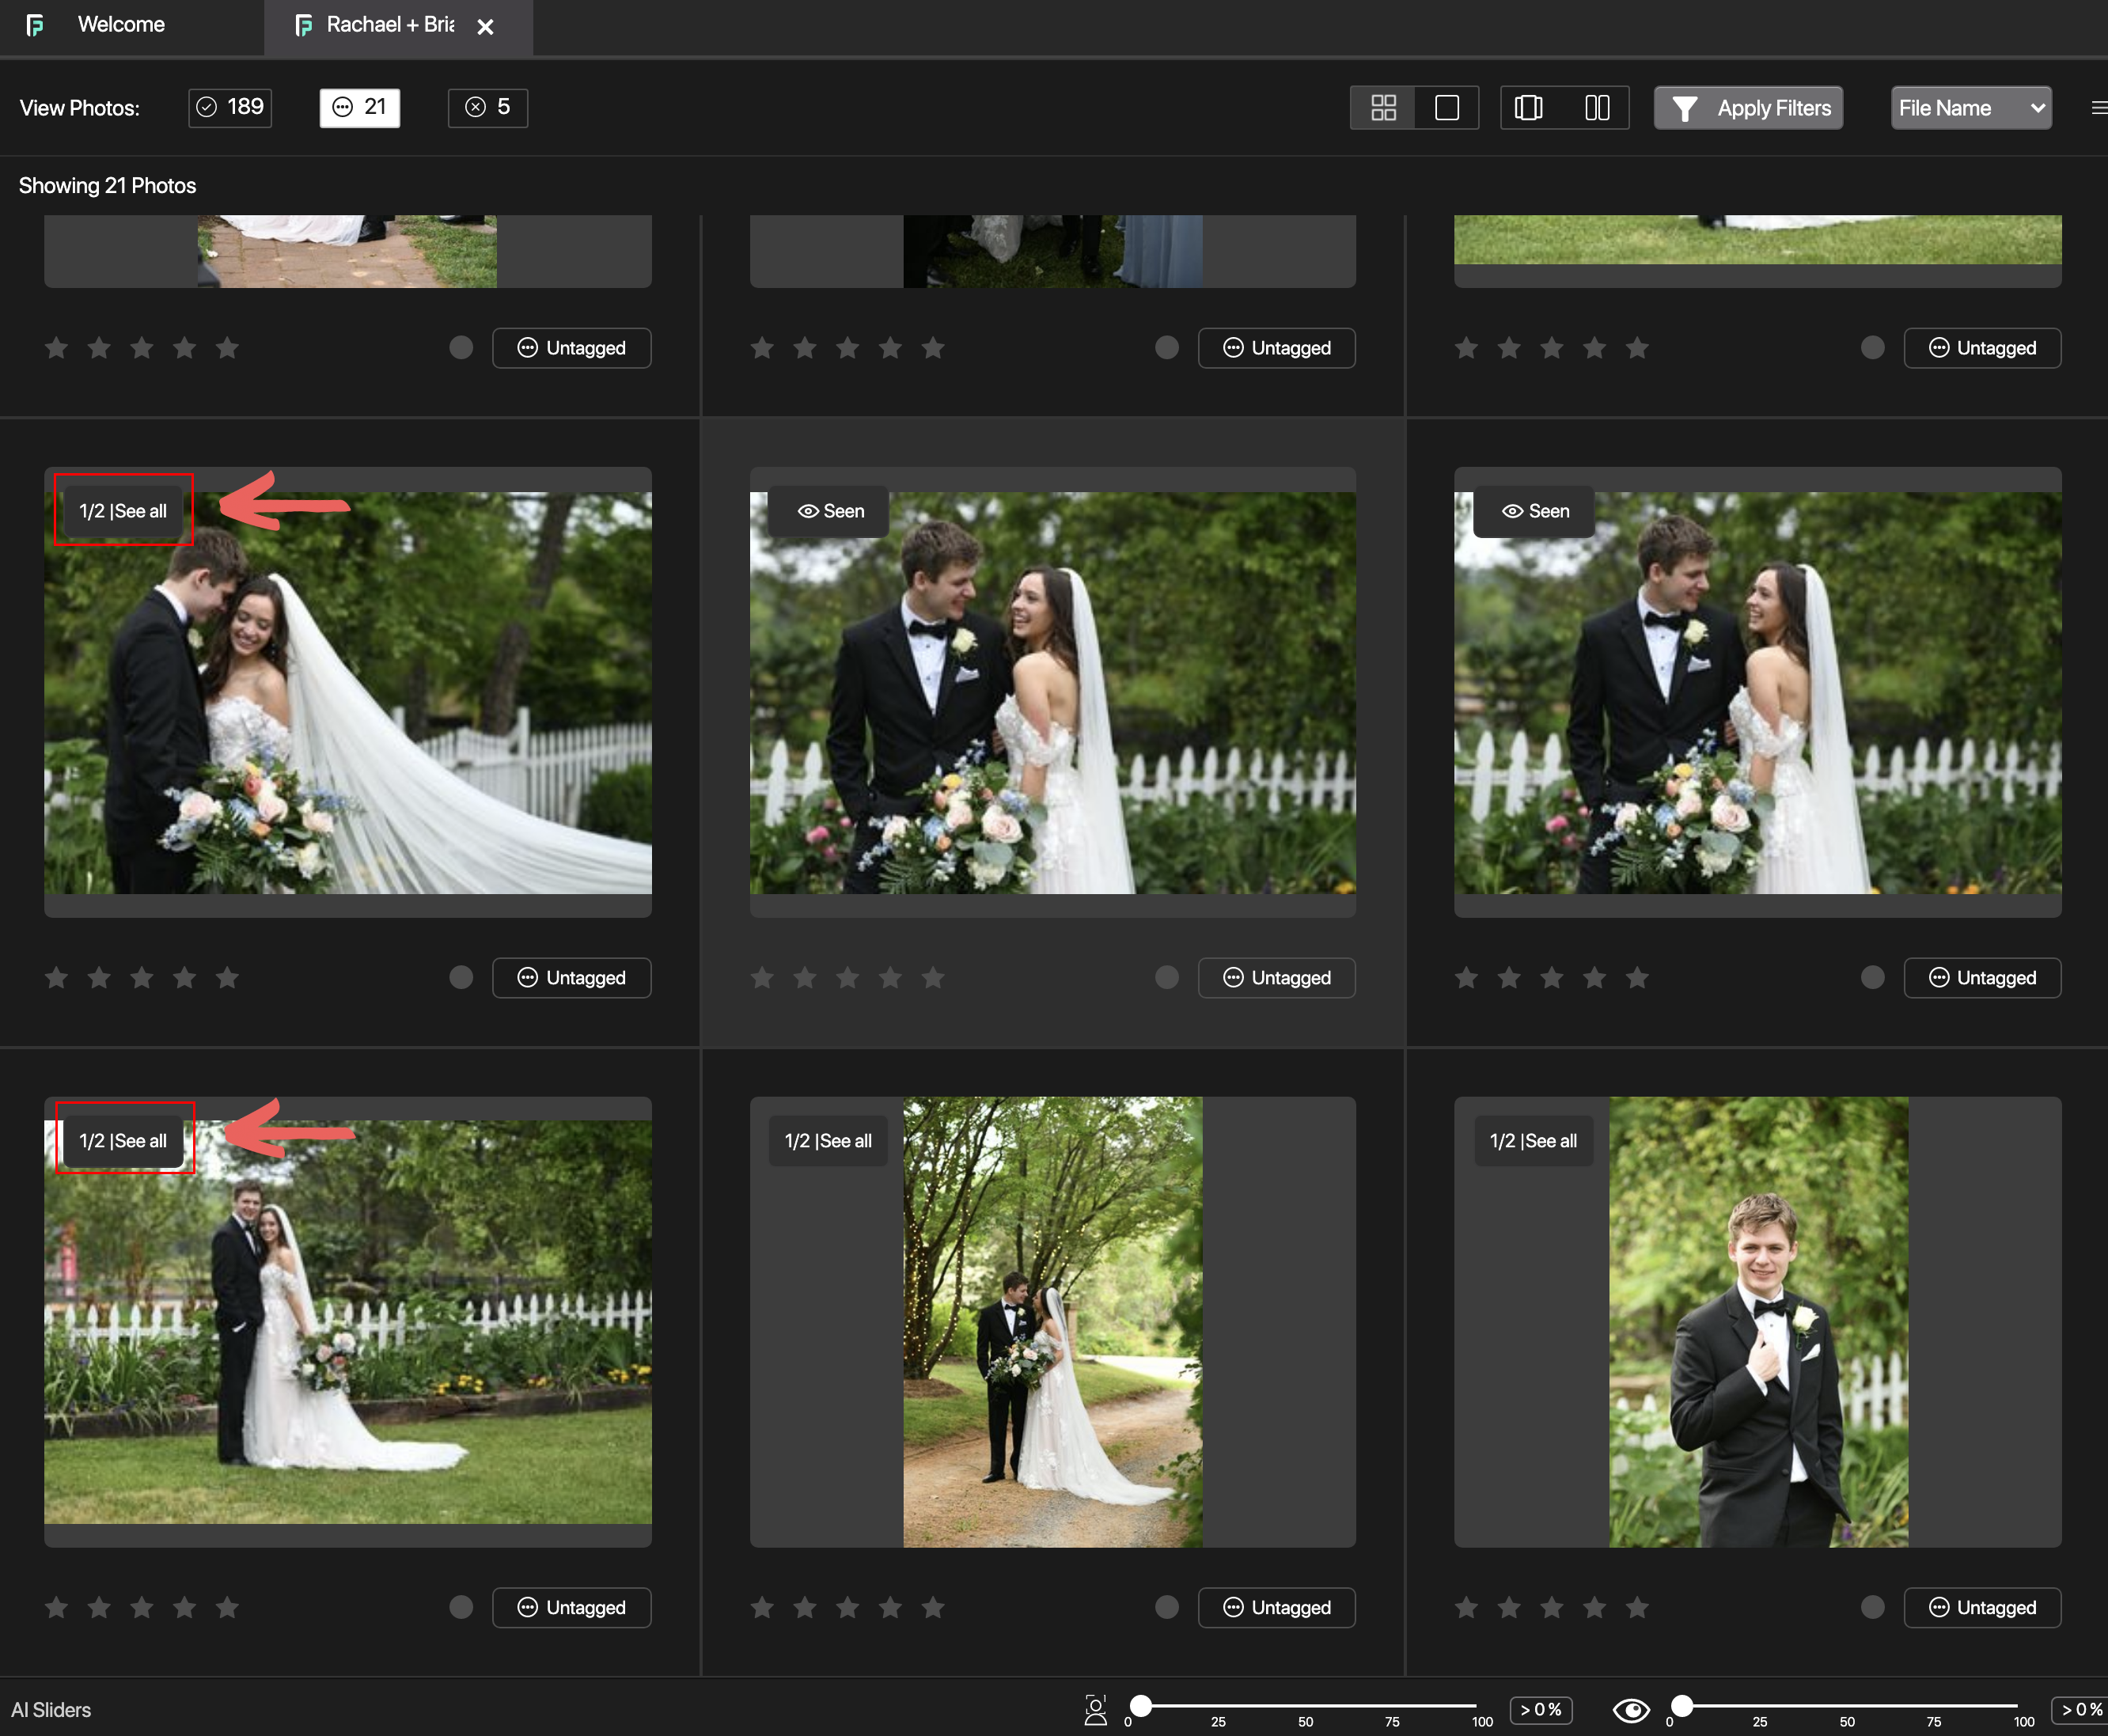
Here’s an example of the images I picked for my blog:
2. The Face Panel
The zoomed faces feature is literally a game changer! I always take tons of bridal party photos because people blink. So with the zoomed faces panel I can closely examine the facial details and ensure that my final selection includes the best shots… and no blinking!
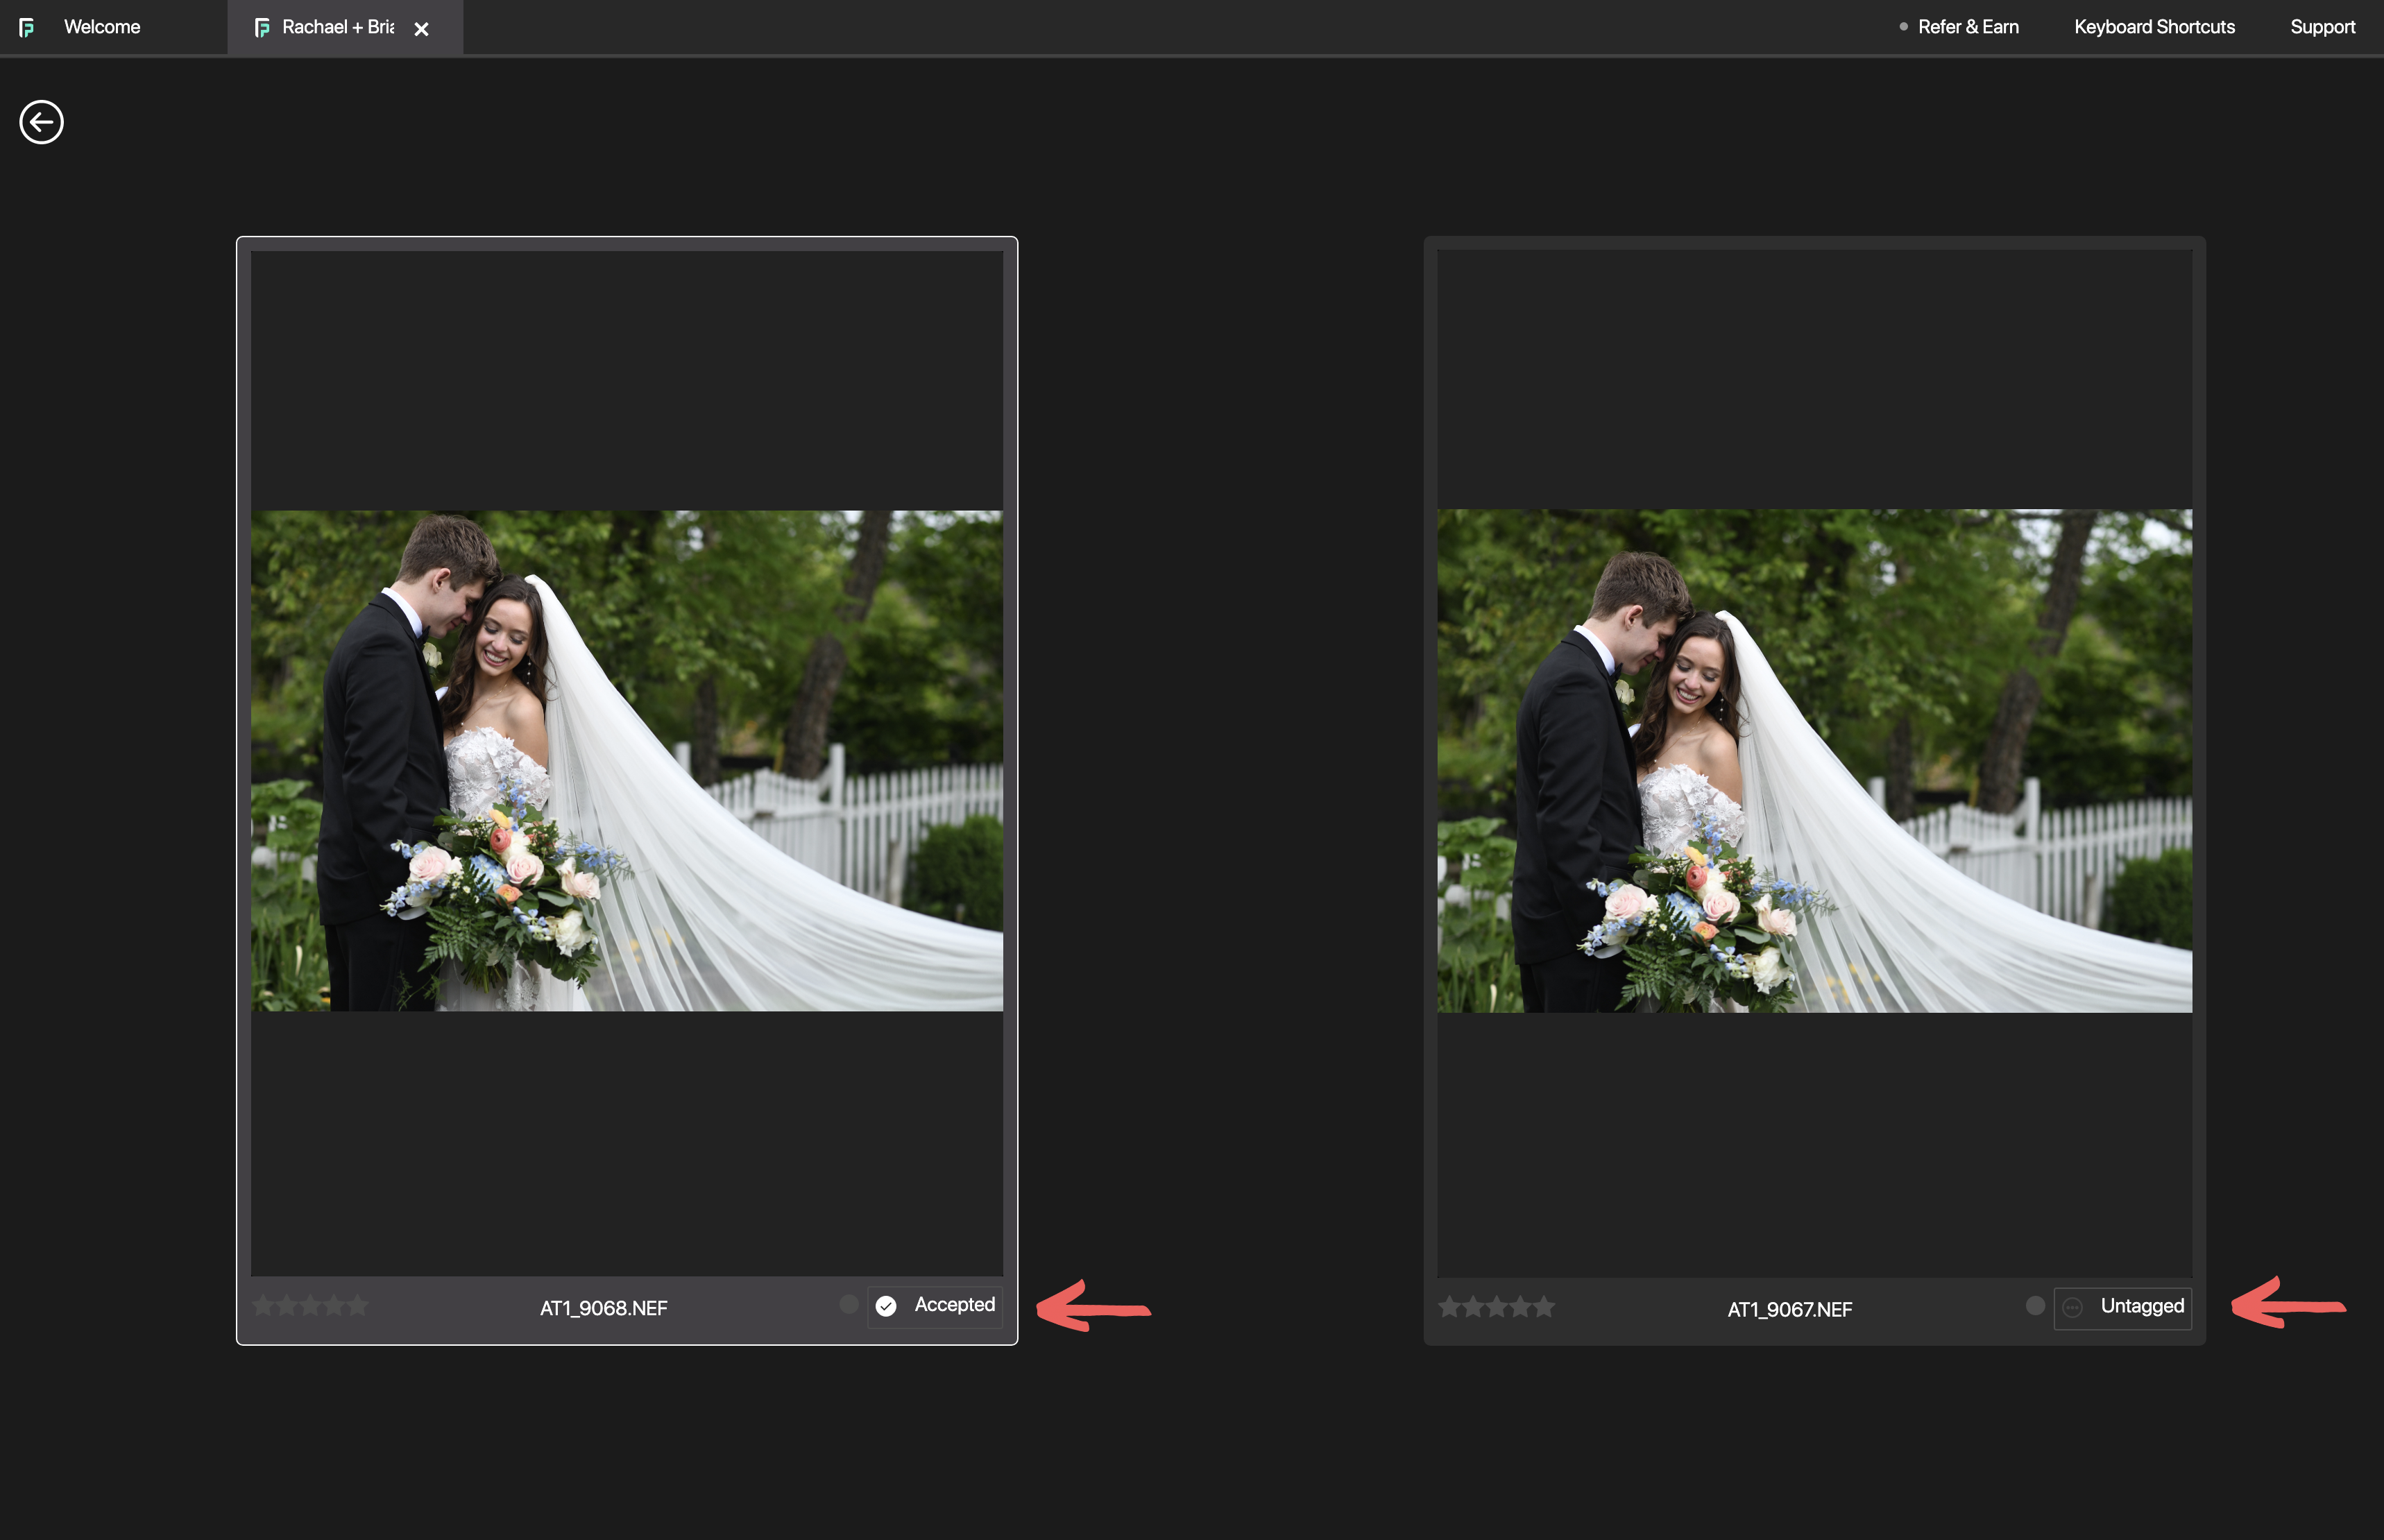
3. The Similar Panel
FilterPixel automatically groups similar photos together and marks as accepted the best one of the bunch. In the example below, it grouped together the 2 images that looked almost identical, but kept the one that was best.
I have to admit, it did a pretty good job and I would have selected the same. Don’t worry though, if you don’t agree with the selection, you can use the P key on your keyword to “pick” one or more images from the bunch and mark them as accepted.
FilterPixel is a must-have photo culling software! These are just some of my favorite features that it has to offer that have helped me so much in my culling workflow. If you’d like to give it a try and test out some of these incredible features, you can use my link and save 15% if you decide to join. The trial is free, so go ahead and check it out!
![]()


