

Lightroom export settings can be a little confusing, which is why I always get a lot of questions about the exact settings I use to export my images for wedding clients and social media.
So how do you export high resolution images? Or how do you export for Instagram, Facebook, or other social media outlets?
If you’re curious about the process I use, I’m going to break everything down for you here so that you don’t have to second guess your Lightroom export settings ever again.
How to Export One or Multiple Images at the Same Time
From the Develop Module in Lightroom, simply select all the images that you’d like to export, then click File → Export in the top left corner. In the new window that pops up, I’m going to walk you through all of the different options that I use to export my images.
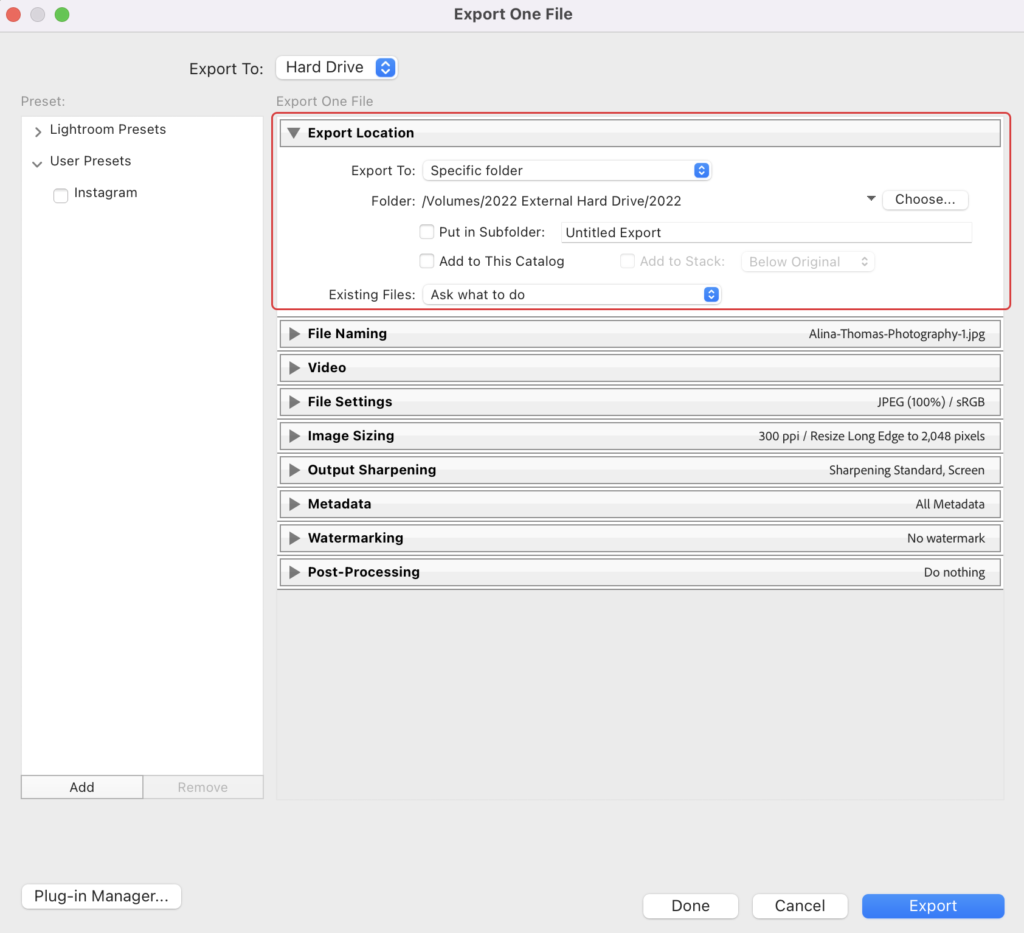
Export Location
The first thing you have to decide is where you want your images to live after you export them. I always save my images on an external hard drive. I have an entire system for naming my folders that I can share in another blog post if you’re interested.
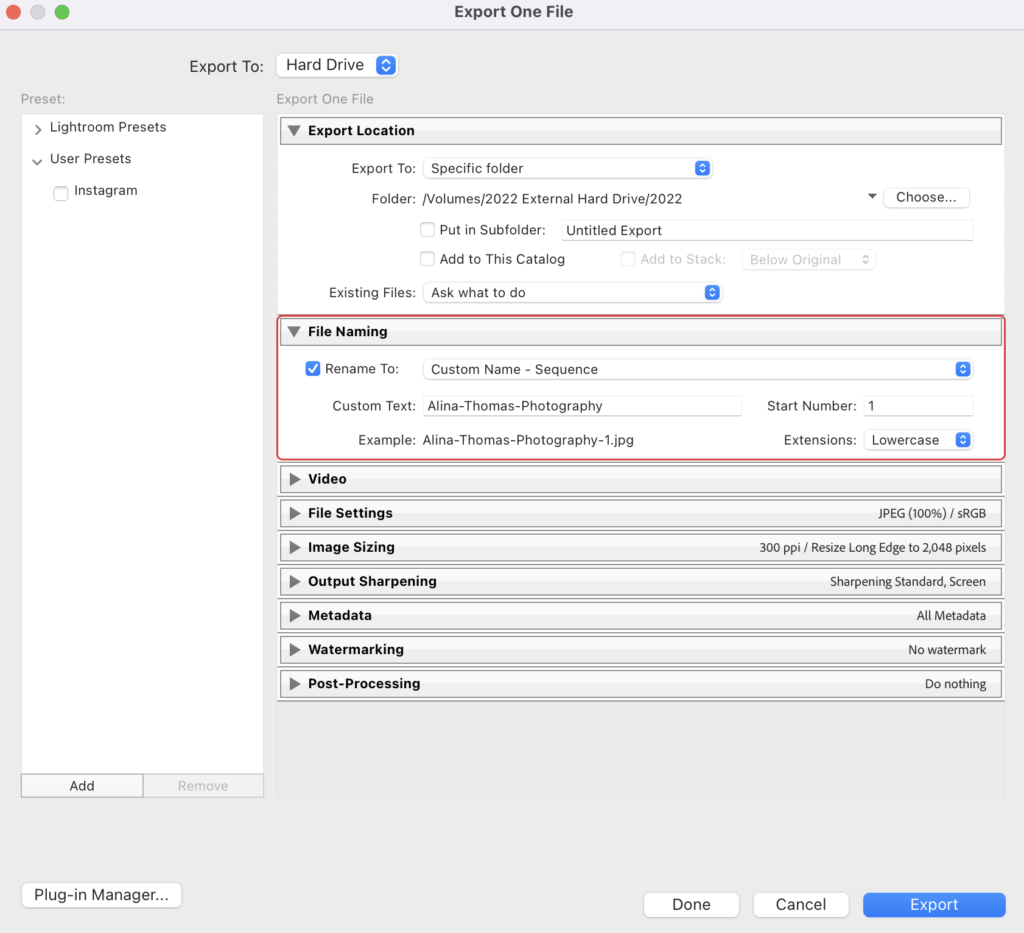
File Naming
I always choose “Custom Name – Sequence” from the drop down menu. This is very important if you’re planning to use your images on your website or in a blog post. You’ll want your image name to be search engine friendly. What does that mean? Instead of naming your images something like “Bride and Groom Name” you’ll want to use a keyword (or phrase) that people would type into Google when they are searching for a photographer.
Pro Tip! For weddings, I always use the venue name so that my pictures will pop up in Google searches when someone is looking for that particular venue.
File Settings
You’ll want your Image Format to be JPEG, and the Quality 100. Regarding the Color Space, you’ll want to always set it to sRGB because it is the standard color space used by most web browsers to display images on the web.
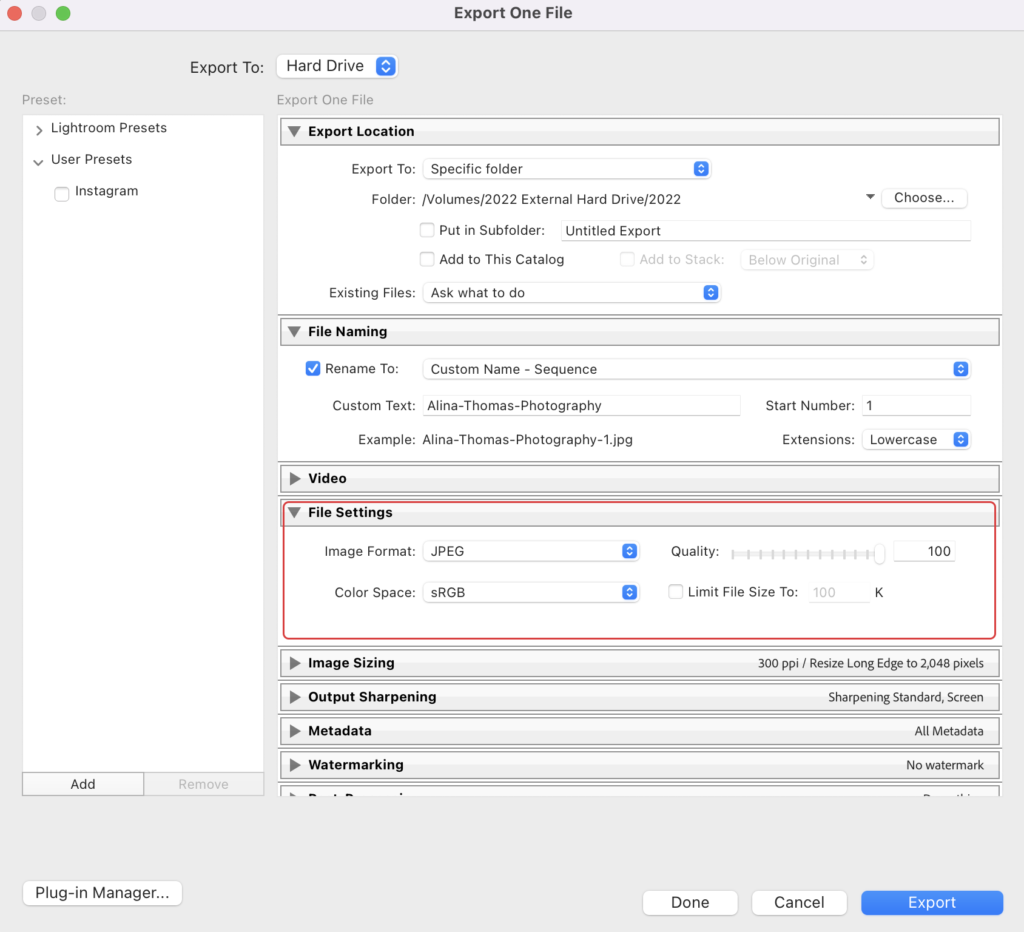
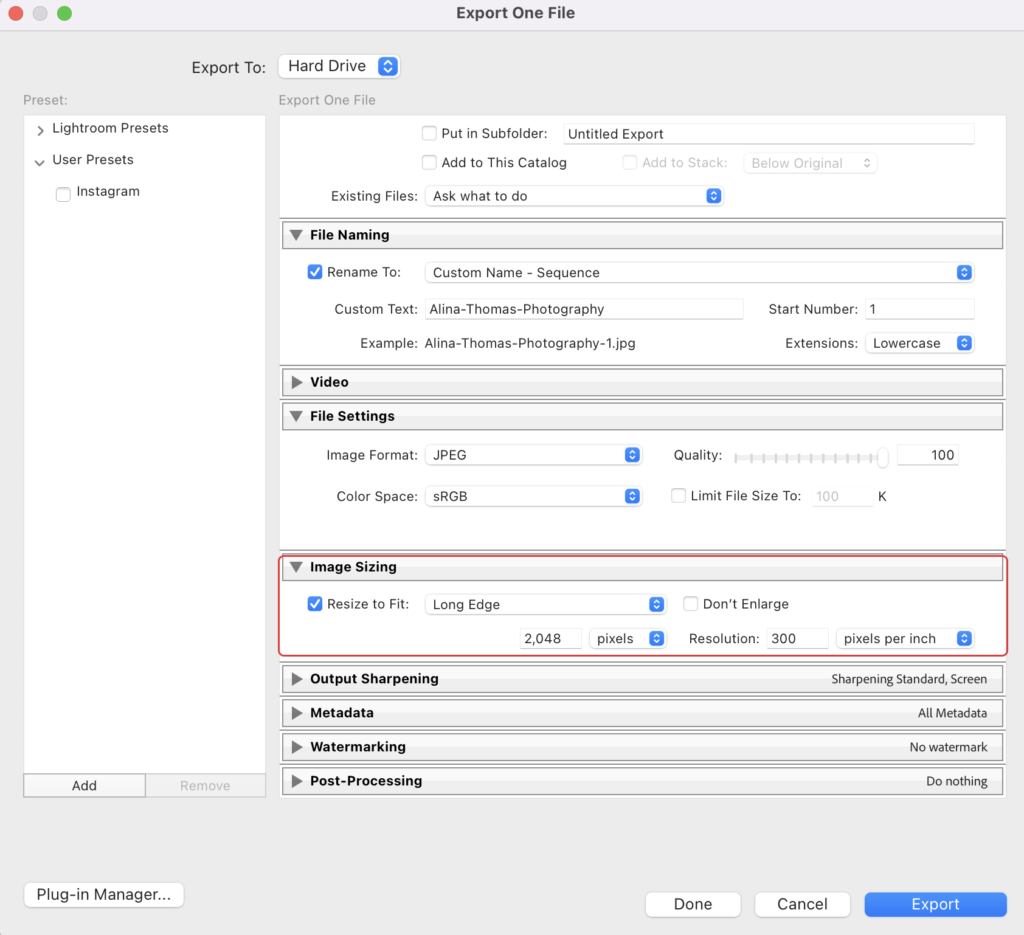
Image Sizing
The only time I use the “Resize to Fit” option is if I resize the images for blog or social media. I normally export 2048 pixels on the long edge and use this for Facebook, Instagram, etc.
When exporting for my wedding clients, I leave the “Resize to Fit” box unchecked and choose “Resolution 300 pixels per inch” to ensure that I get the best high resolution image possible.
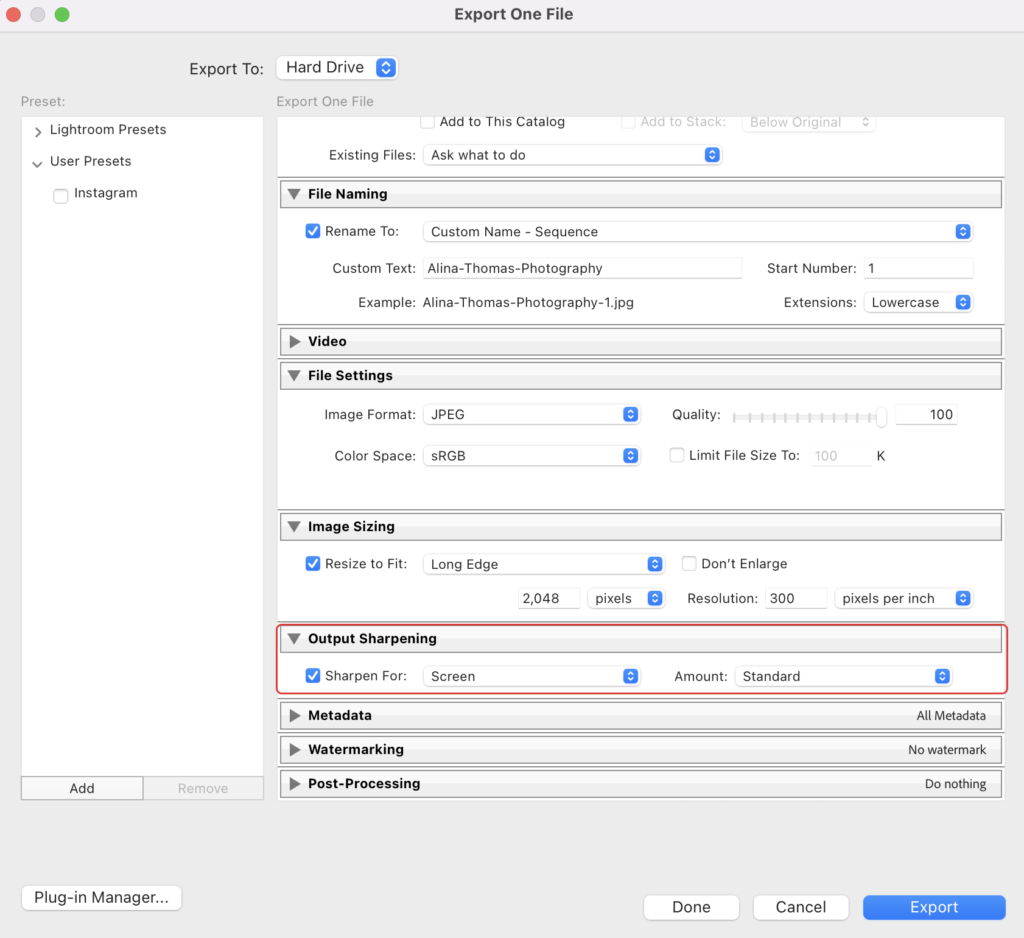
Output Sharpening
I always choose “Sharper For: Screen” and “Amount: Standard”.
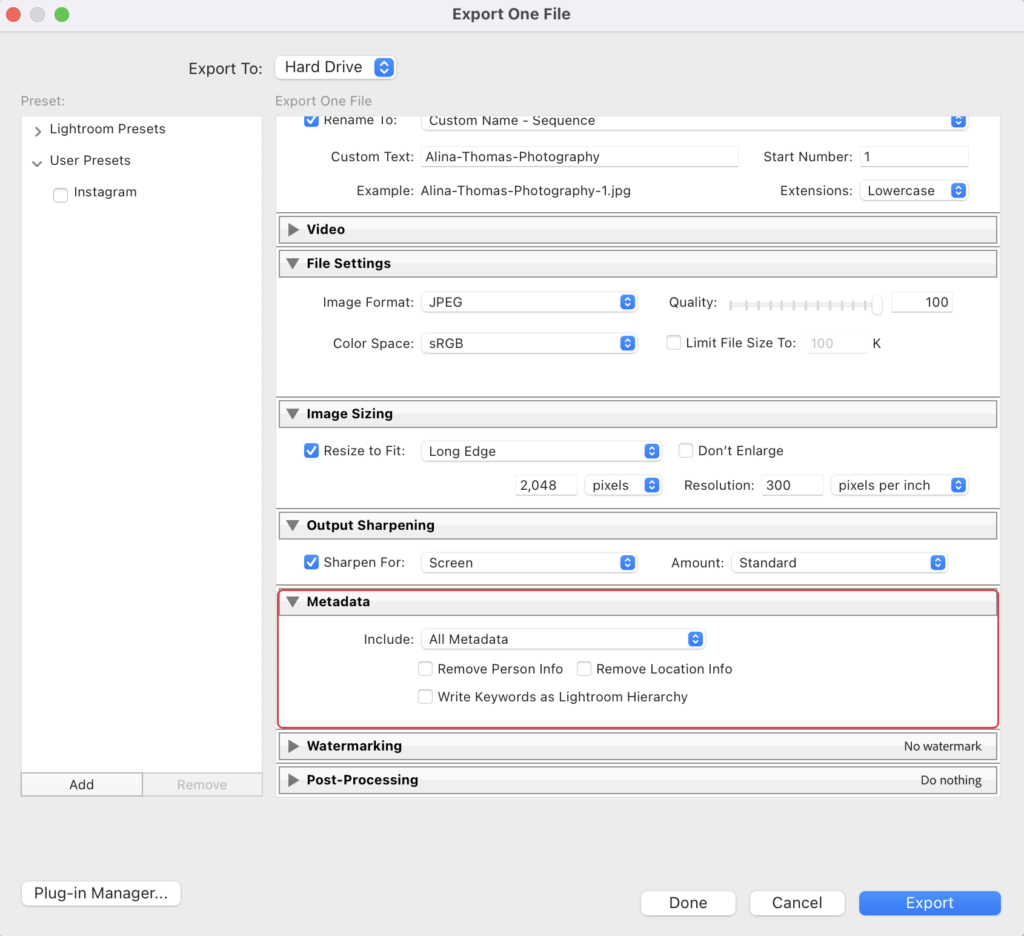
Metadata
I select “Include: All Metadata” and leave everything else unchecked.
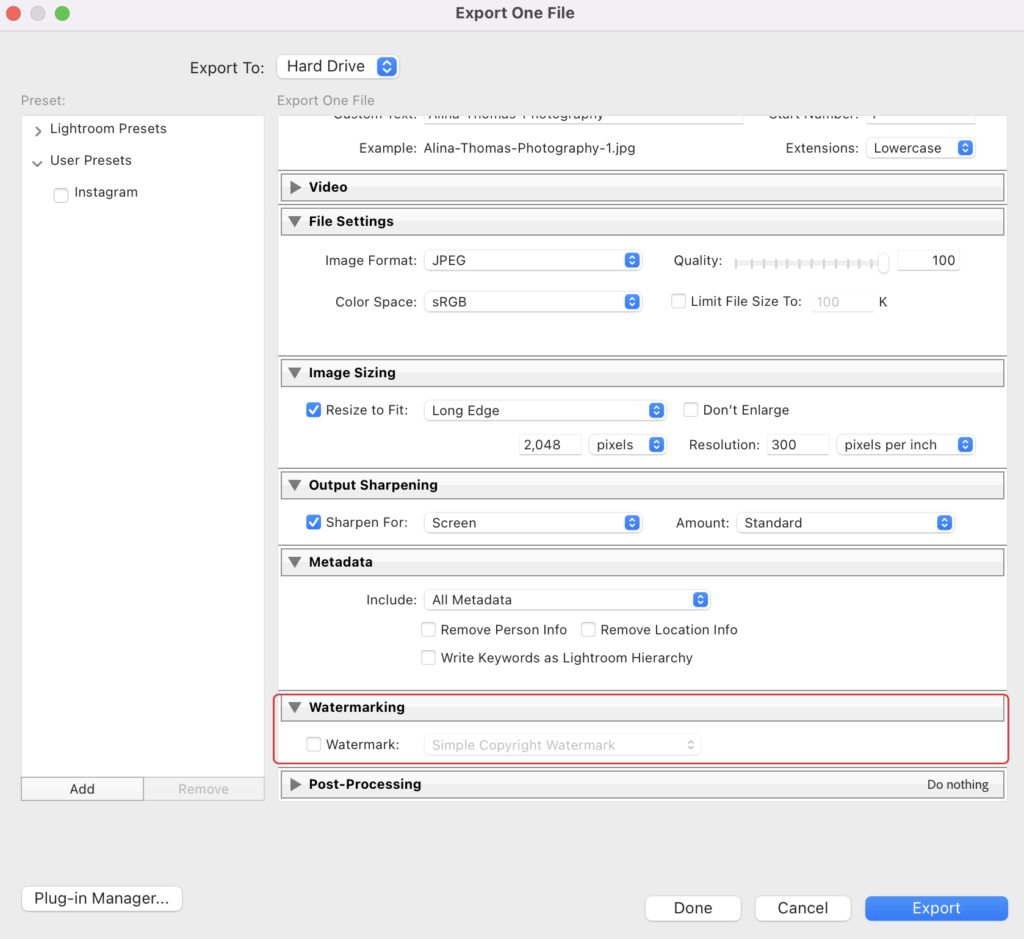
Watermarking
I don’t watermark my images because my copyright information is all in the metadata so I usually just skip this step.
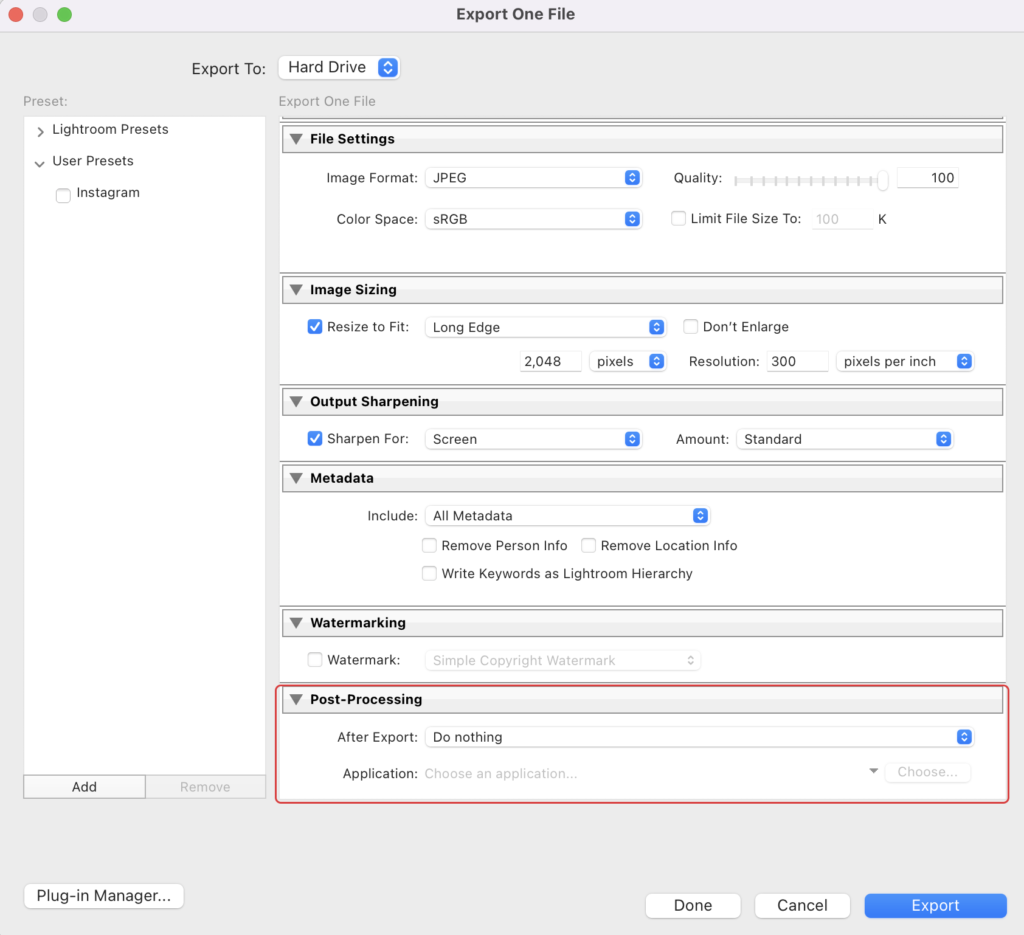
Post-Processing
I always select “After Import: Do Nothing”.
Lastly, all you have to do is hit “Export” and you’re done. If you want to take it one step further, you can save all of these settings into a preset, and when you’re ready to export your images, you can just click File → Export with Preset. That’s it! You can read more about this feature in my blog post: 5 Tips for a Faster Editing Workflow.
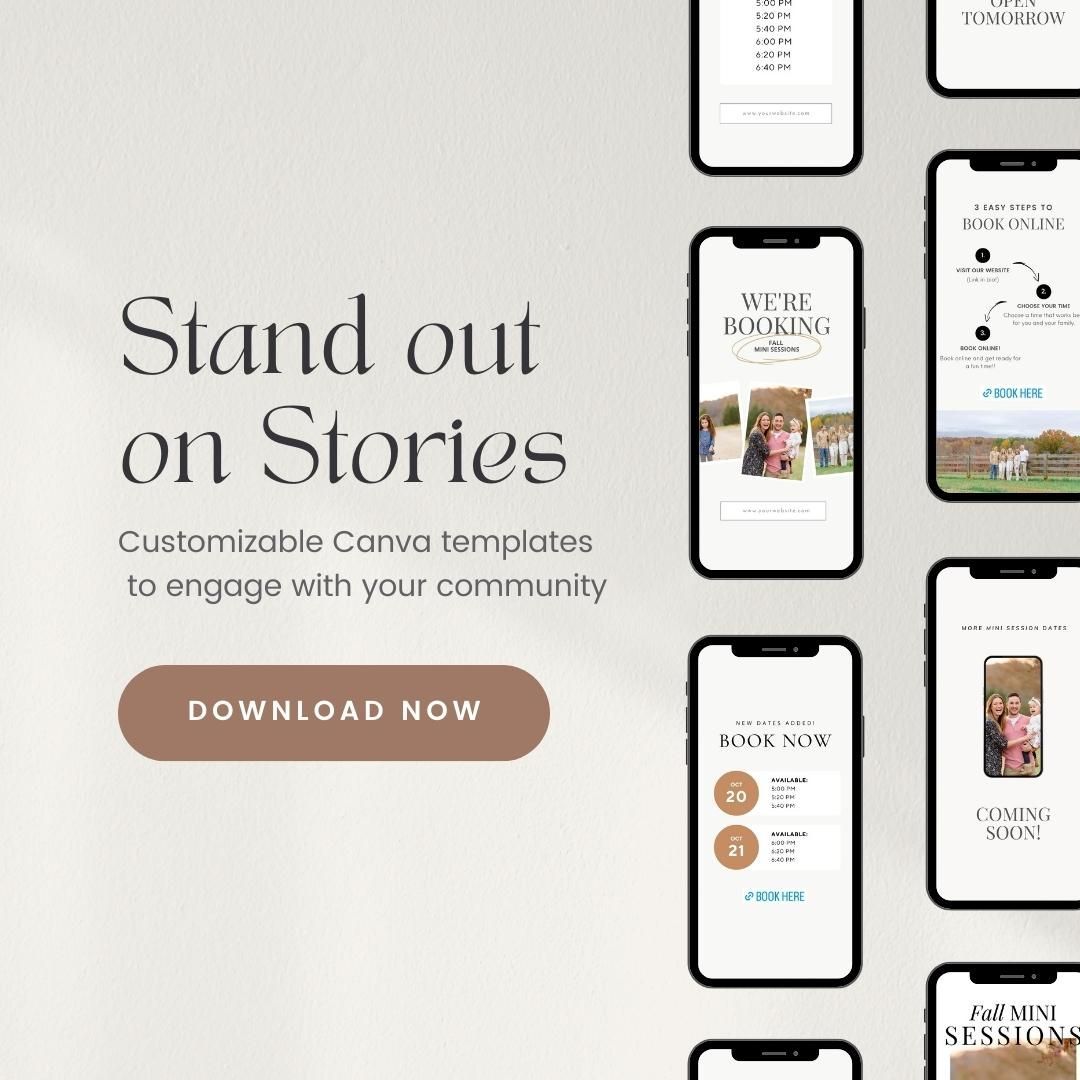
Want to stand out on social media? Get our customizable Canva templates for photographers – they’re absolutely FREE when you start a Caption Collective trial. (Don’t love Caption Collective? Cancel anytime!)


