

Want to learn how to make every photo pop with vibrance? Well, I’m here to help you! I know that everyone LOVES a good editing hack, right?! Today, I’m going to be sharing some quick editing hacks to help you make your images pop with vibrance! These easy tips will make your editing process so much easier.
One of the biggest mistakes I see light and airy photographers make is that they don’t add enough contrast to their images. As a result, their edits look dull and washed out. But did you know that there is more than just one way to add contrast (or pop) to your images in Lightroom? If you’re used to only adjusting the “Contrast” slider in the Basic Panel in Lightroom, these tips will help!
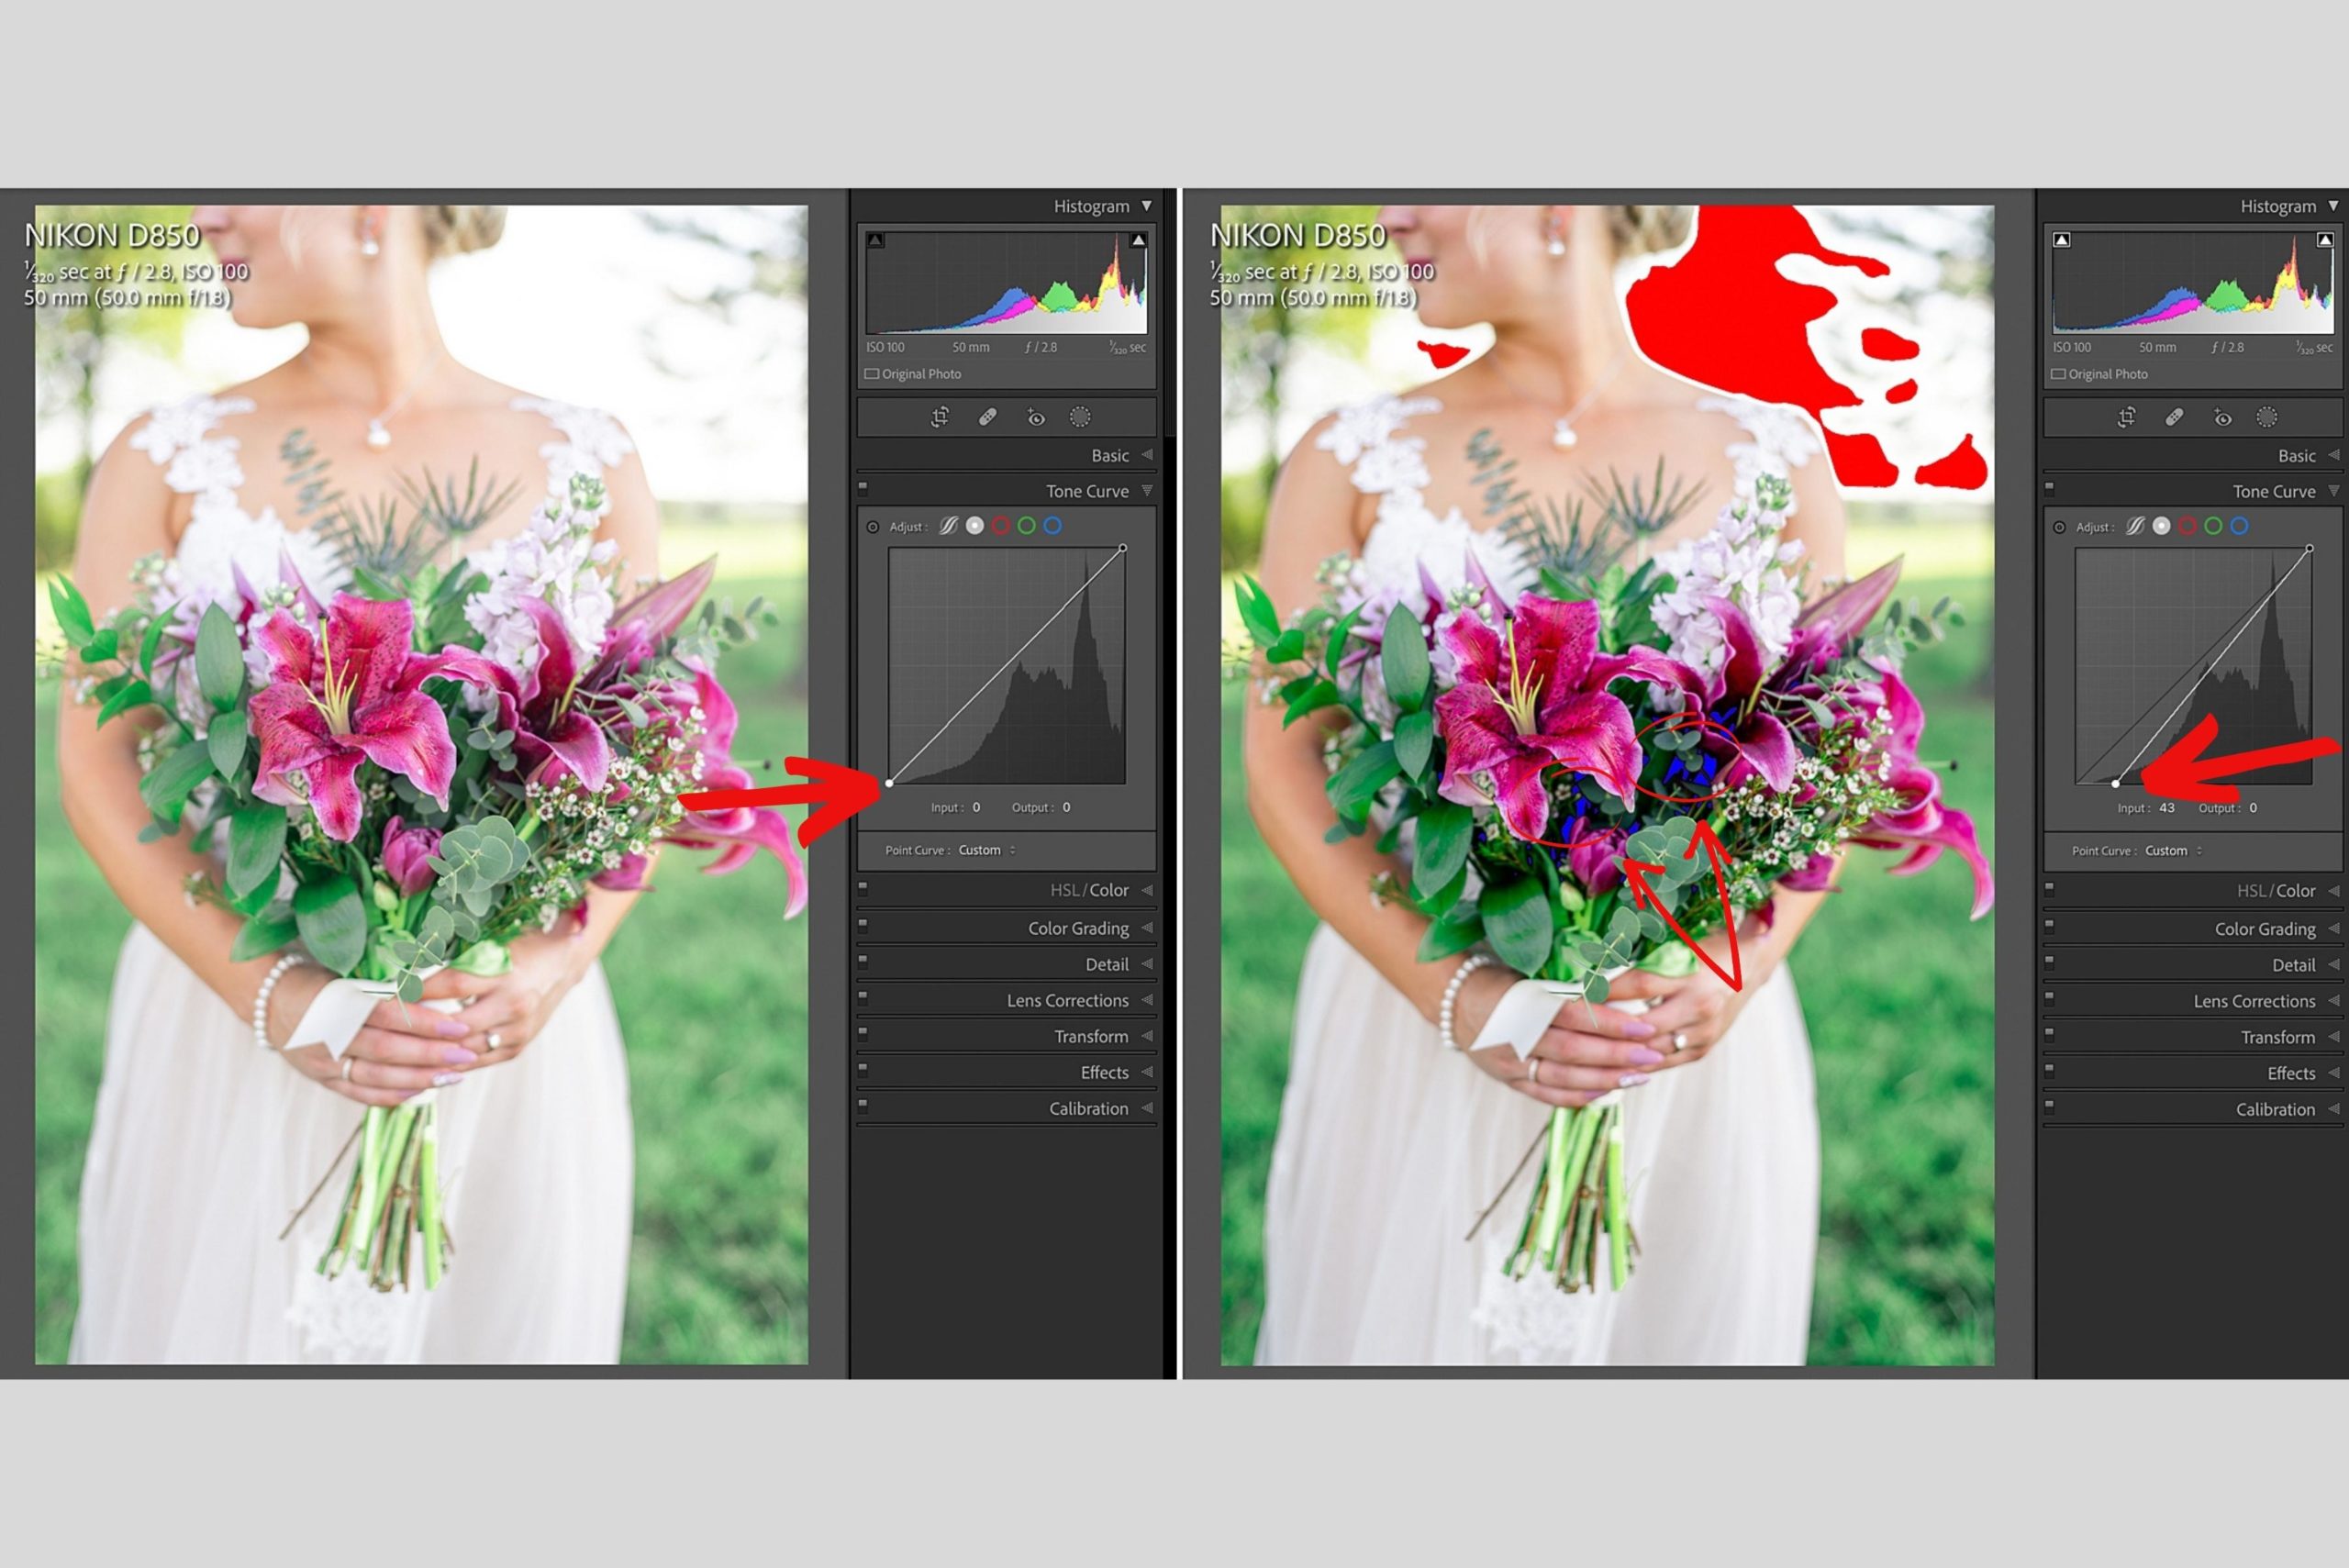
1. Decrease the Shadows in the Tone Curve Panel
When adding too much contrast by moving the “Contrast” slider up in Lightroom, the image can become dark and heavy. One way I like to ensure that my images stay light and airy, is by upping the darks and lowering the shadows in the Tone Curve Panel. This is one of the first things I do when I need to add more pop to my images. The second thing I do is use the “J” trick while still in the Tone Curve Panel (see tip #2).
2. The “J” Trick
Next, I like to go down to the Tone Curve panel and click on the Point Curve. Then, while pressing “J” on my keyboard, I drag the bottom corner to the right until I see blue in the shadows of my image. You’ll want to let go when the color blue starts peeking in. Press the “J” key again to make the blue go away. And just to let you in on a little secret, when I edit my images in the Basic Panel, I increase the exposure and shadows until I like the way my skin tones look (even though the overall image might lack in contrast), and then I make the image pop with contrast by using the “J” trick. It works every single time!
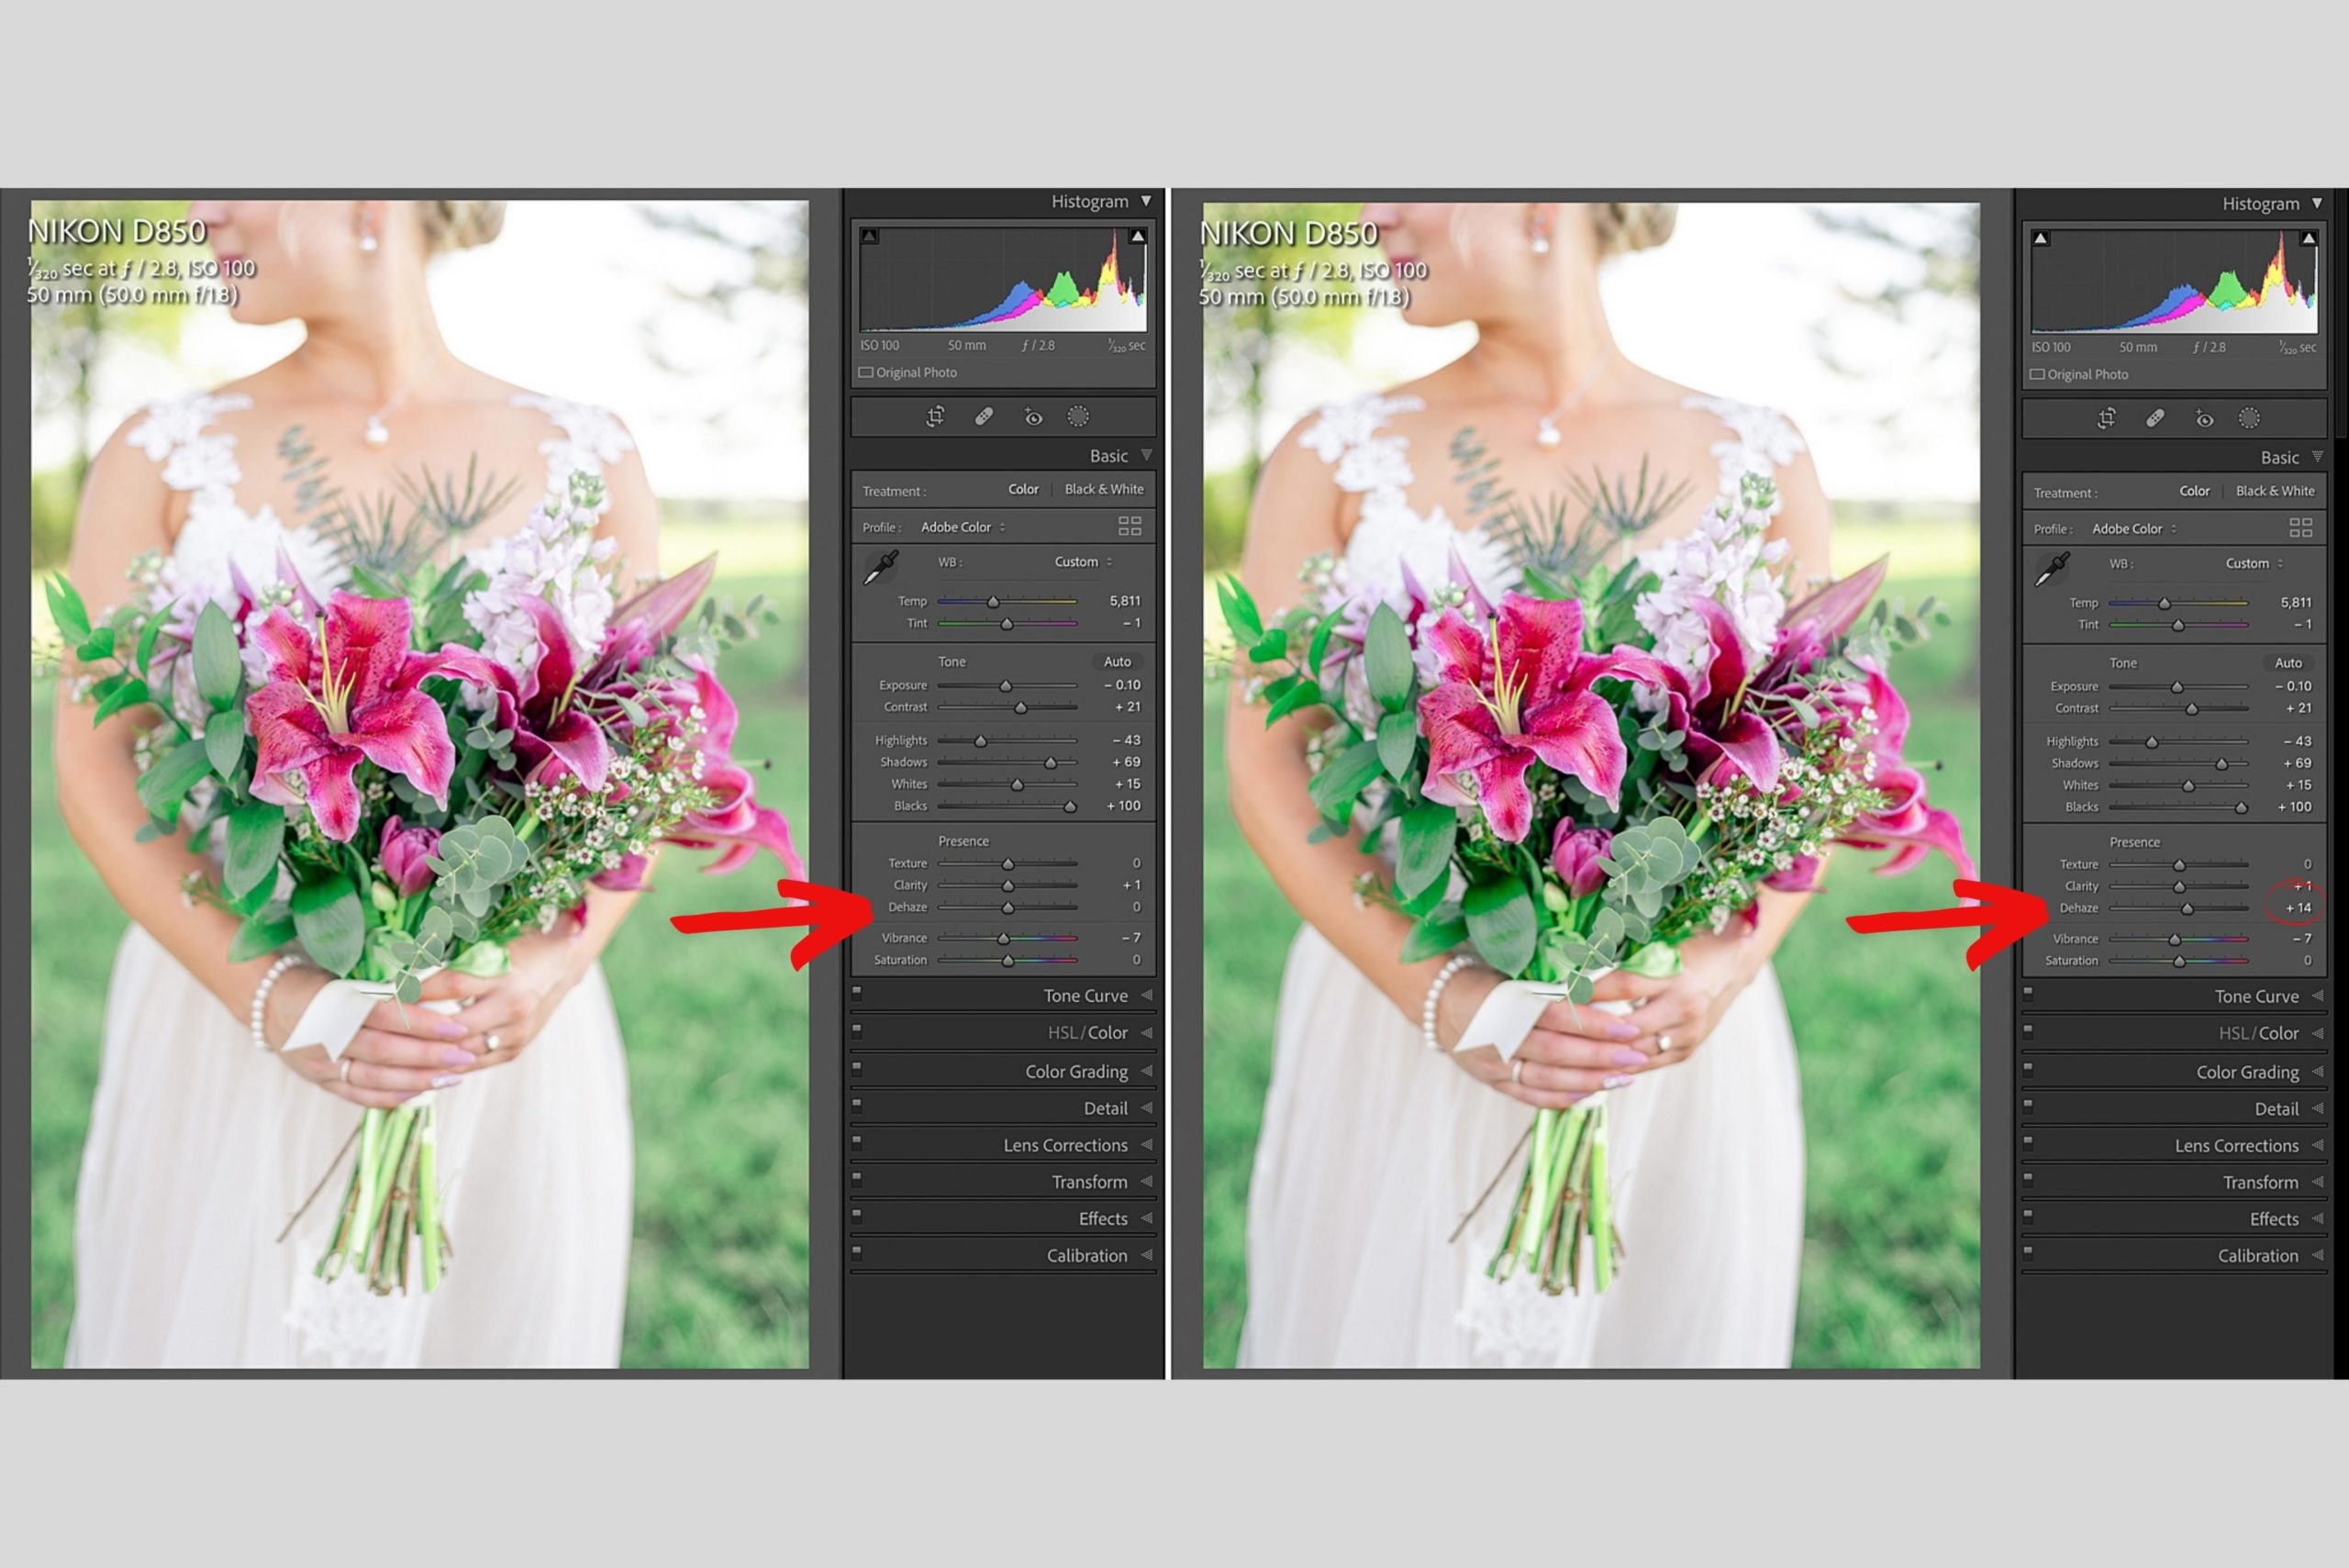
3. Use the Dehaze Slider
If you’re still needing some pop after using the “J” trick, you can add more contrast by using the Dehaze slider. You can find the Dehaze slider in the Basic Panel, under Clarity. I use Dehaze primarily if I have lens flare in my images, but it’s also a great way to add contrast if you need to.
Alright, these editing hacks will speeeeeeeed up your workflow and help you add contrast to your images without making them dark and heavy. I hope that you’ve found this blog post to be useful. Please feel free to leave a comment below or send me a DM on Instagram if you have anything that you’d like to see me discuss in a future blog post.


Wow! These are great Lightroom tricks!!! Thanks so much for sharing!
You’re very welcome! So happy you found them helpful!