

Here’s a fresh look at Pic-Time 2.0 (and why I’m excited about it)!
If you’ve been around here for a while, you probably know that I care a lot about the experience my clients have after their wedding or session is over. For me, taking the photos is only part of the story. The way those images are delivered matters just as much.
That’s why I was really excited when my favorite gallery delivery platform launched its brand new update, Pic-Time 2.0.
I’ve been a fan of Pic-Time ever since I discovered it last year (you can read my full Pic-Time review here). In addition to all the amazing features I talked about in the review that my previous online gallery platform didn’t have, they’ve released so many NEW updates. The biggest one that stood out to me right away was the new Design tool.
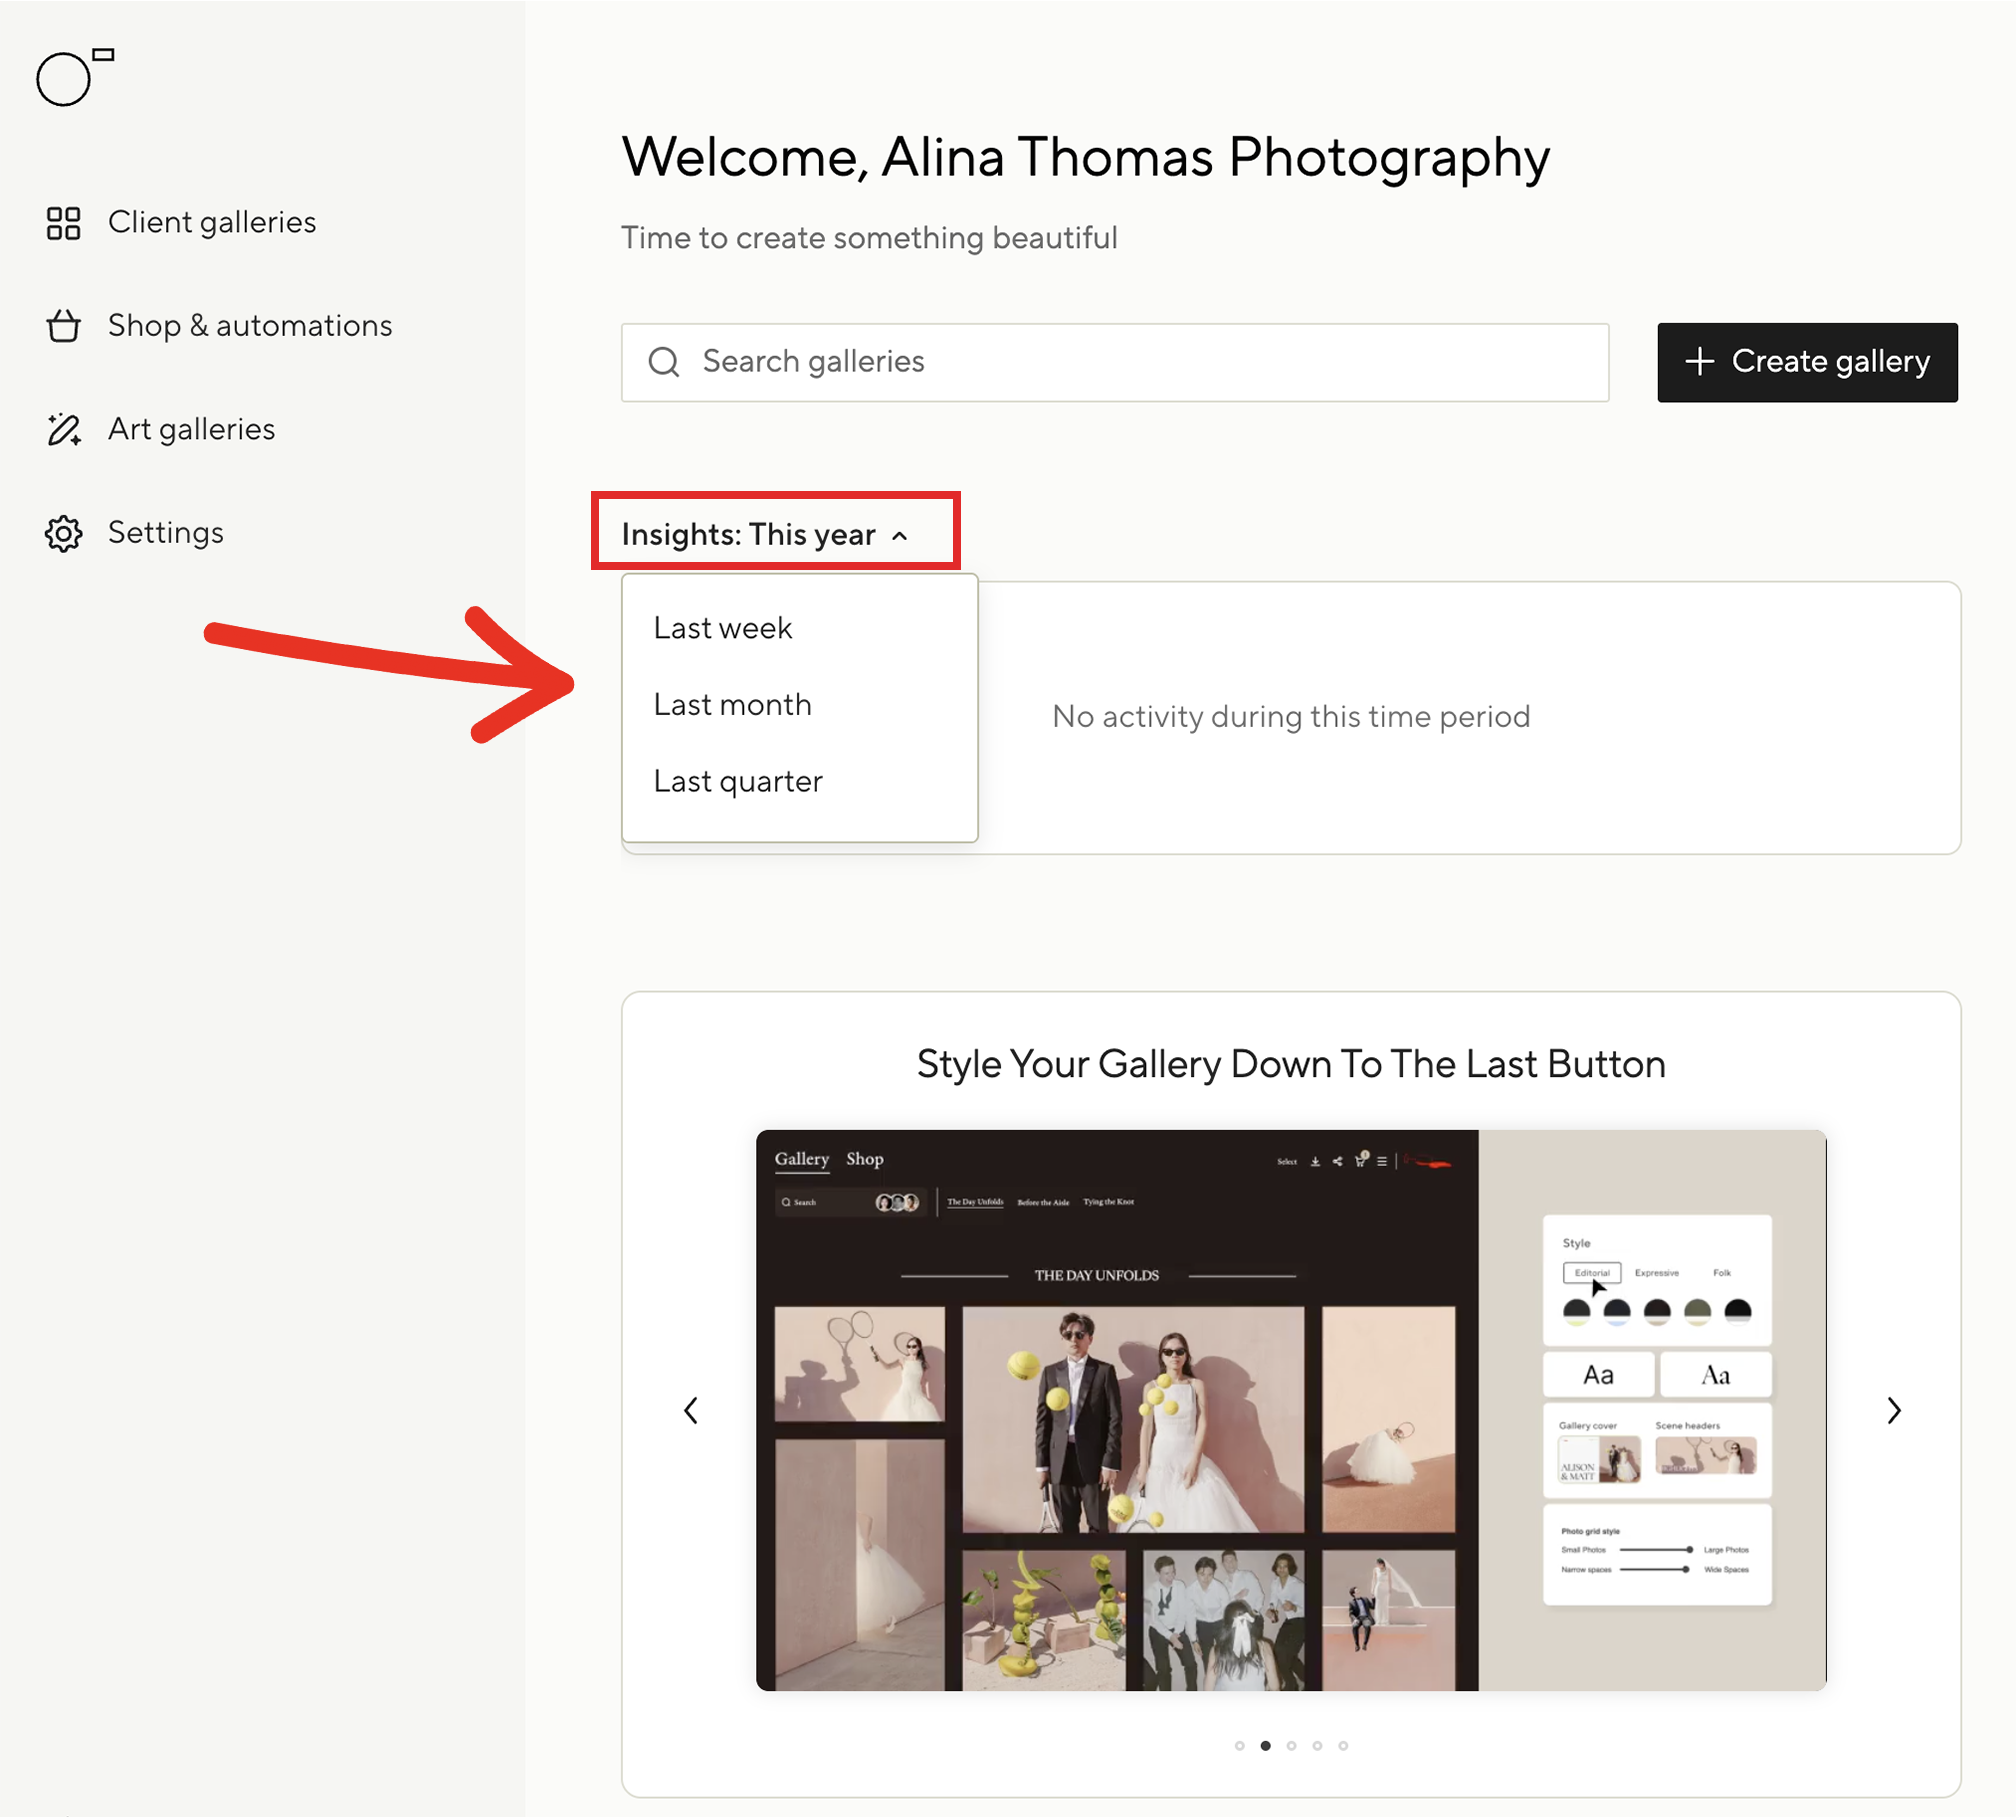
Here’s what the new dashboard looks like. 👇 At the very top, you will see your insights for the year. You can break that down by week, month, and quarter. One the left hand side, you can access all your client galleries, shop, art galleries, and settings. Everything feels cleaner, more modern, and much more customizable.
Why Gallery Design Matters
When a couple opens their wedding gallery for the first time, I want it to feel emotional and intentional. I want it to feel like opening a beautifully wrapped gift, not just clicking through a folder of files.
One of my favorite parts of Pic-Time 2.0 is how customizable everything feels now. There are 14 different color palettes, new font combinations, updated layouts, and even different button styles so your galleries can actually MATCH your brand. I also love the new gallery themes because they make everything feel cohesive without spending hours designing everything from scratch. Moreover, with Pic-Time 2.0 you can now customize your galleries for each client.
To create a new gallery, go to Create Gallery in the top right corner. From there, you get to name your gallery, then click Next.
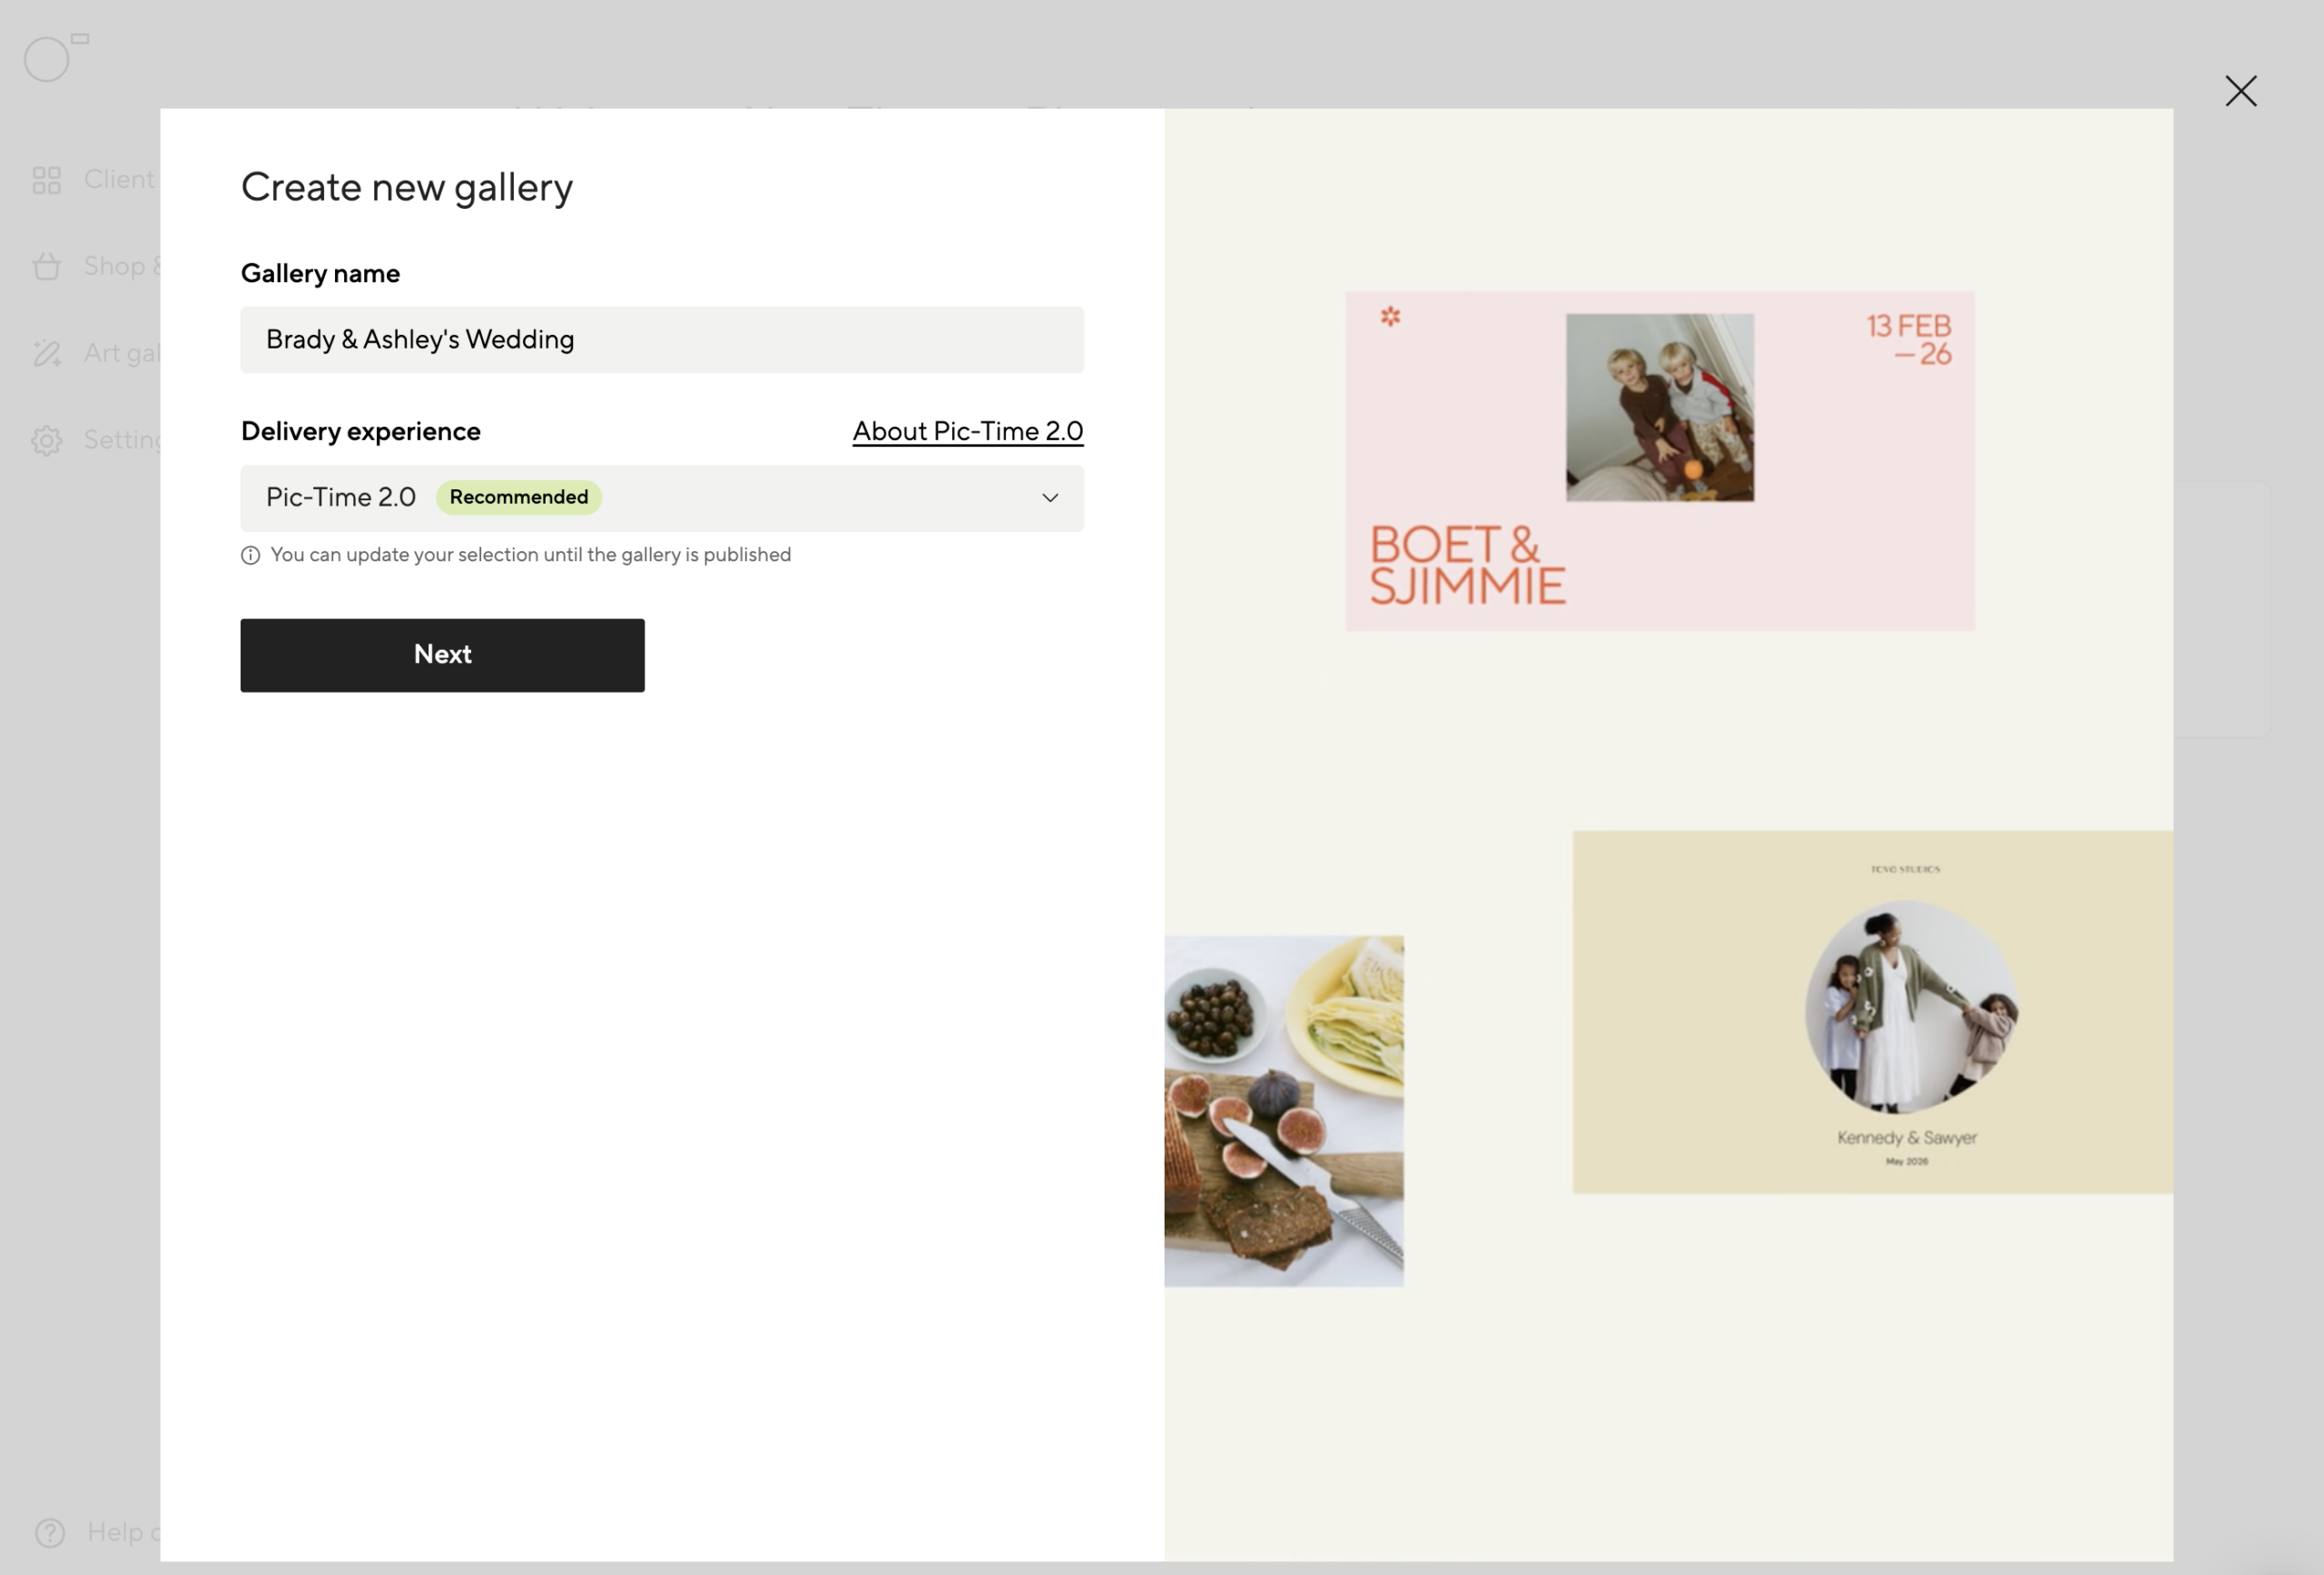
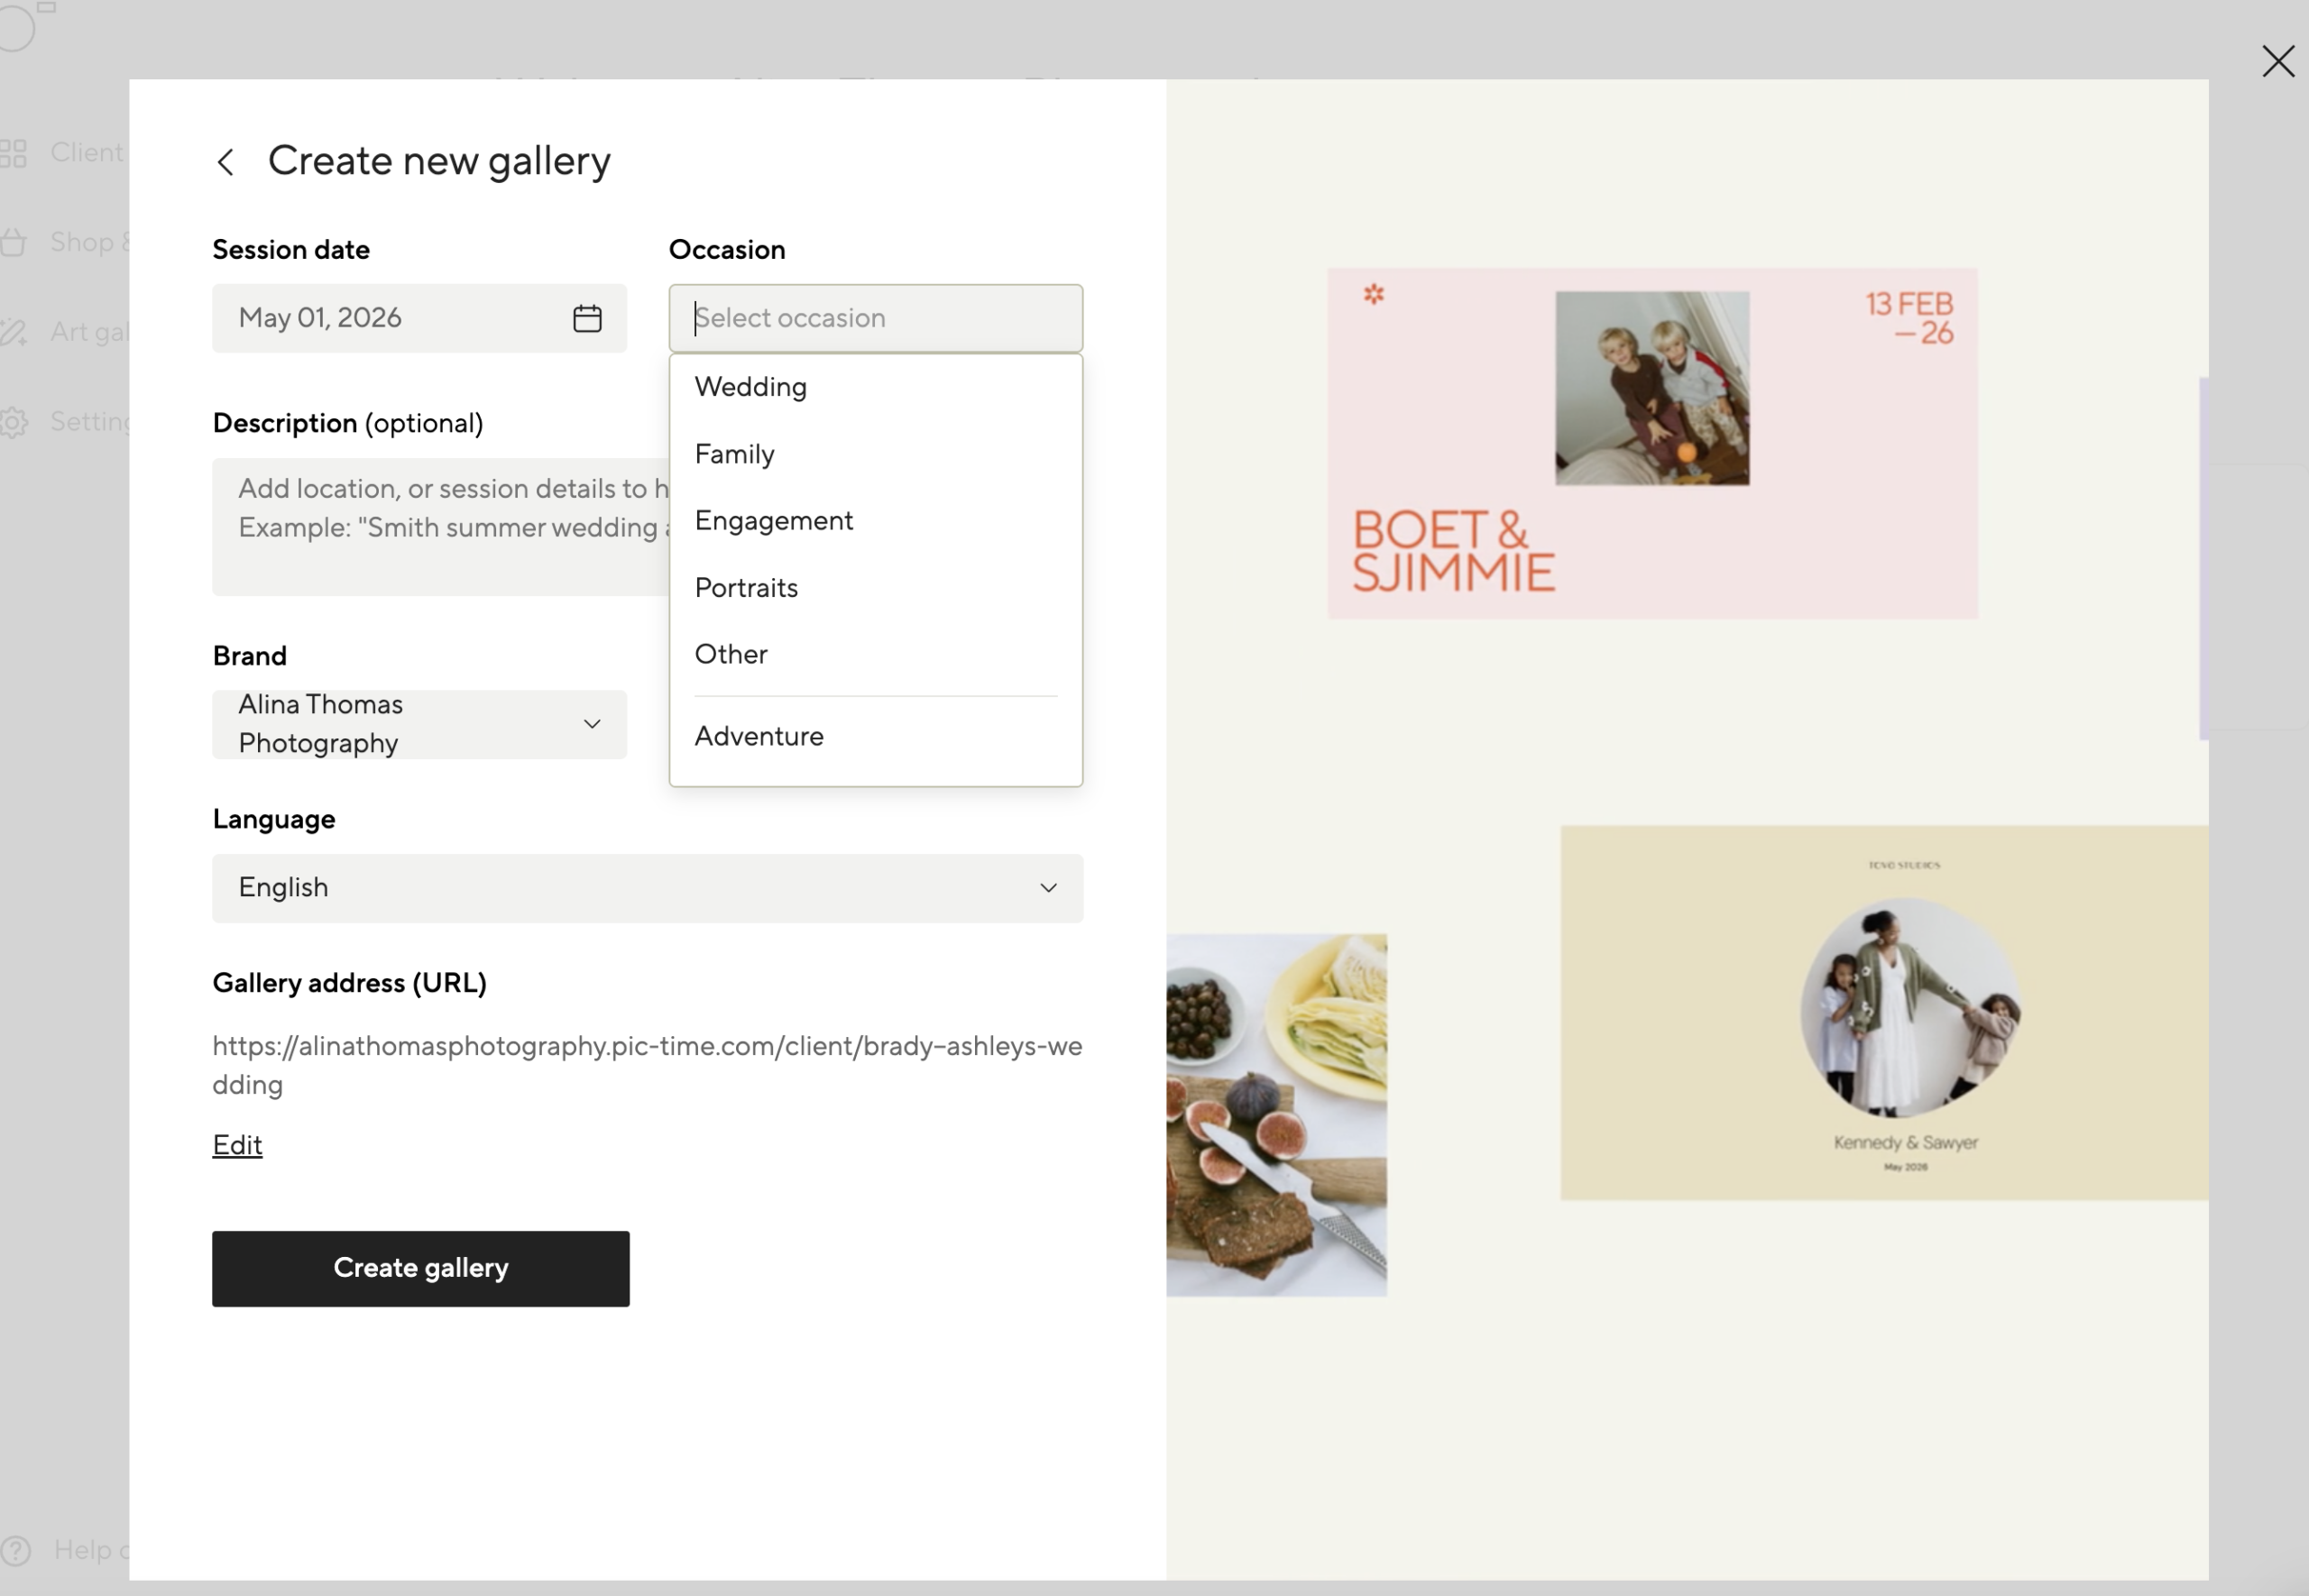
Make sure you add your information, then click Create Gallery.
In this new window, you’re going to have access to the new Design options within Pic-Time 2.0. This is where you make the changes to how your gallery looks and feels. And, if you want to customize a design even further, you have the ability to do that under “customize”.
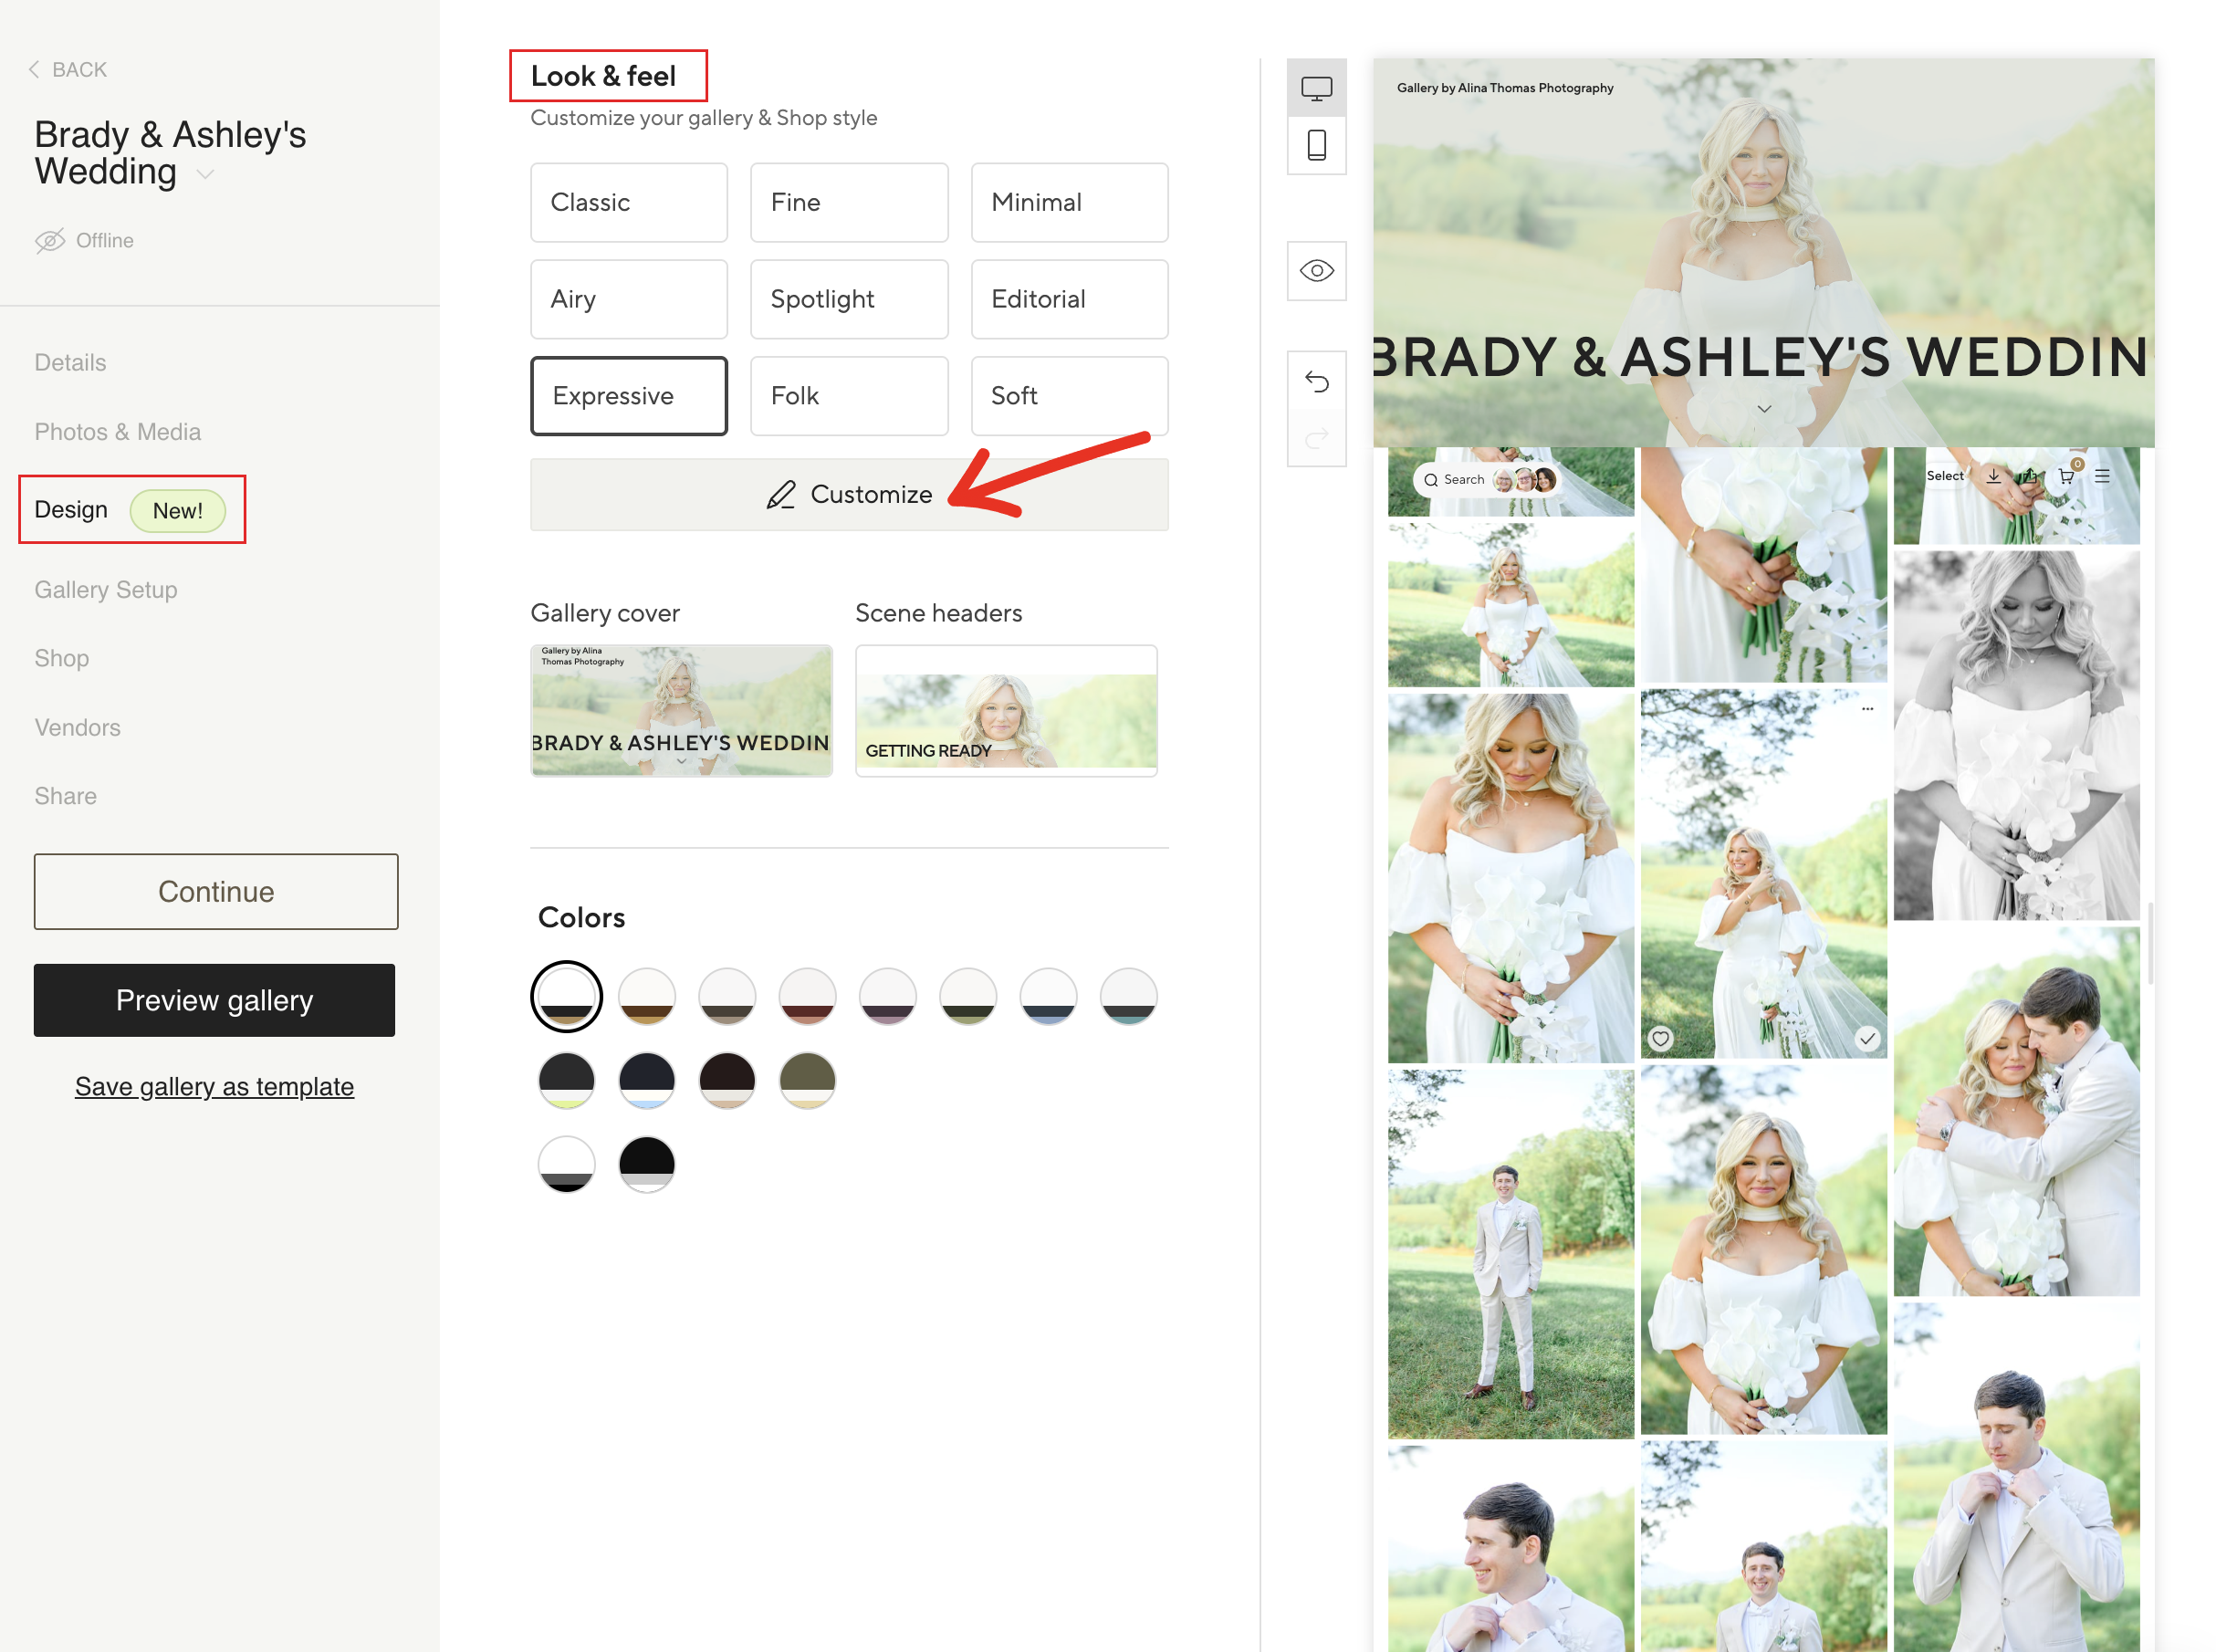
Here you can change the font set, icons weight, button shape, etc.
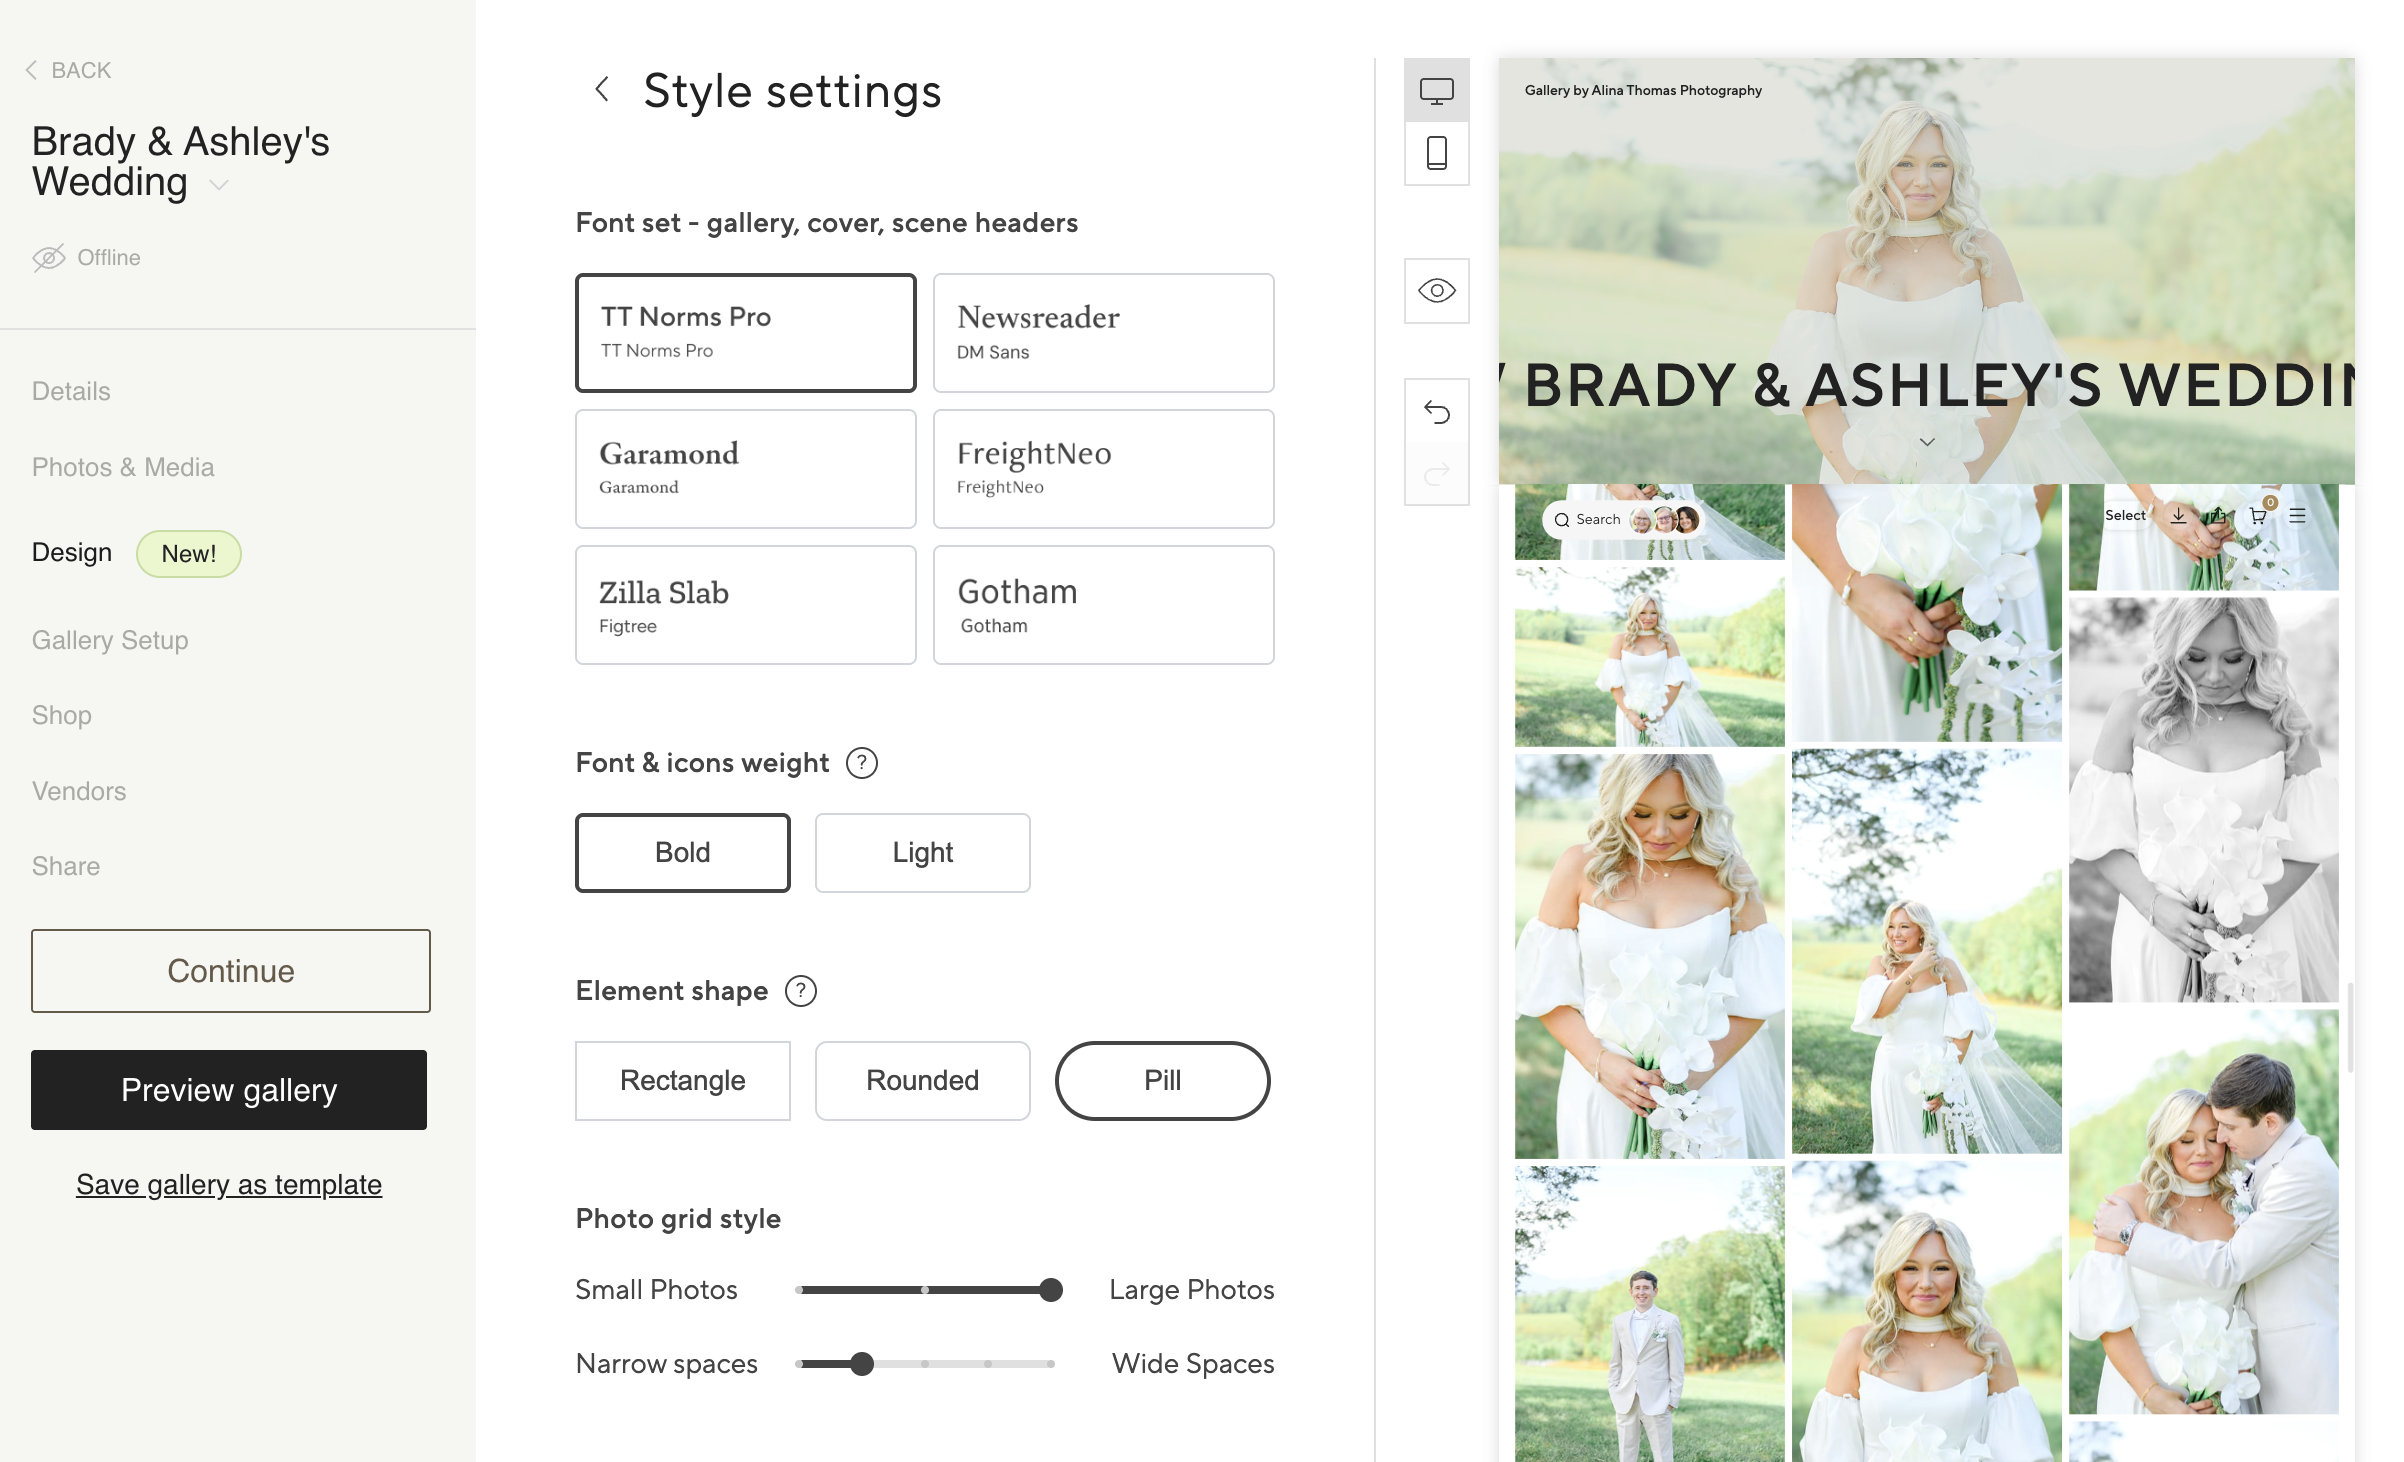
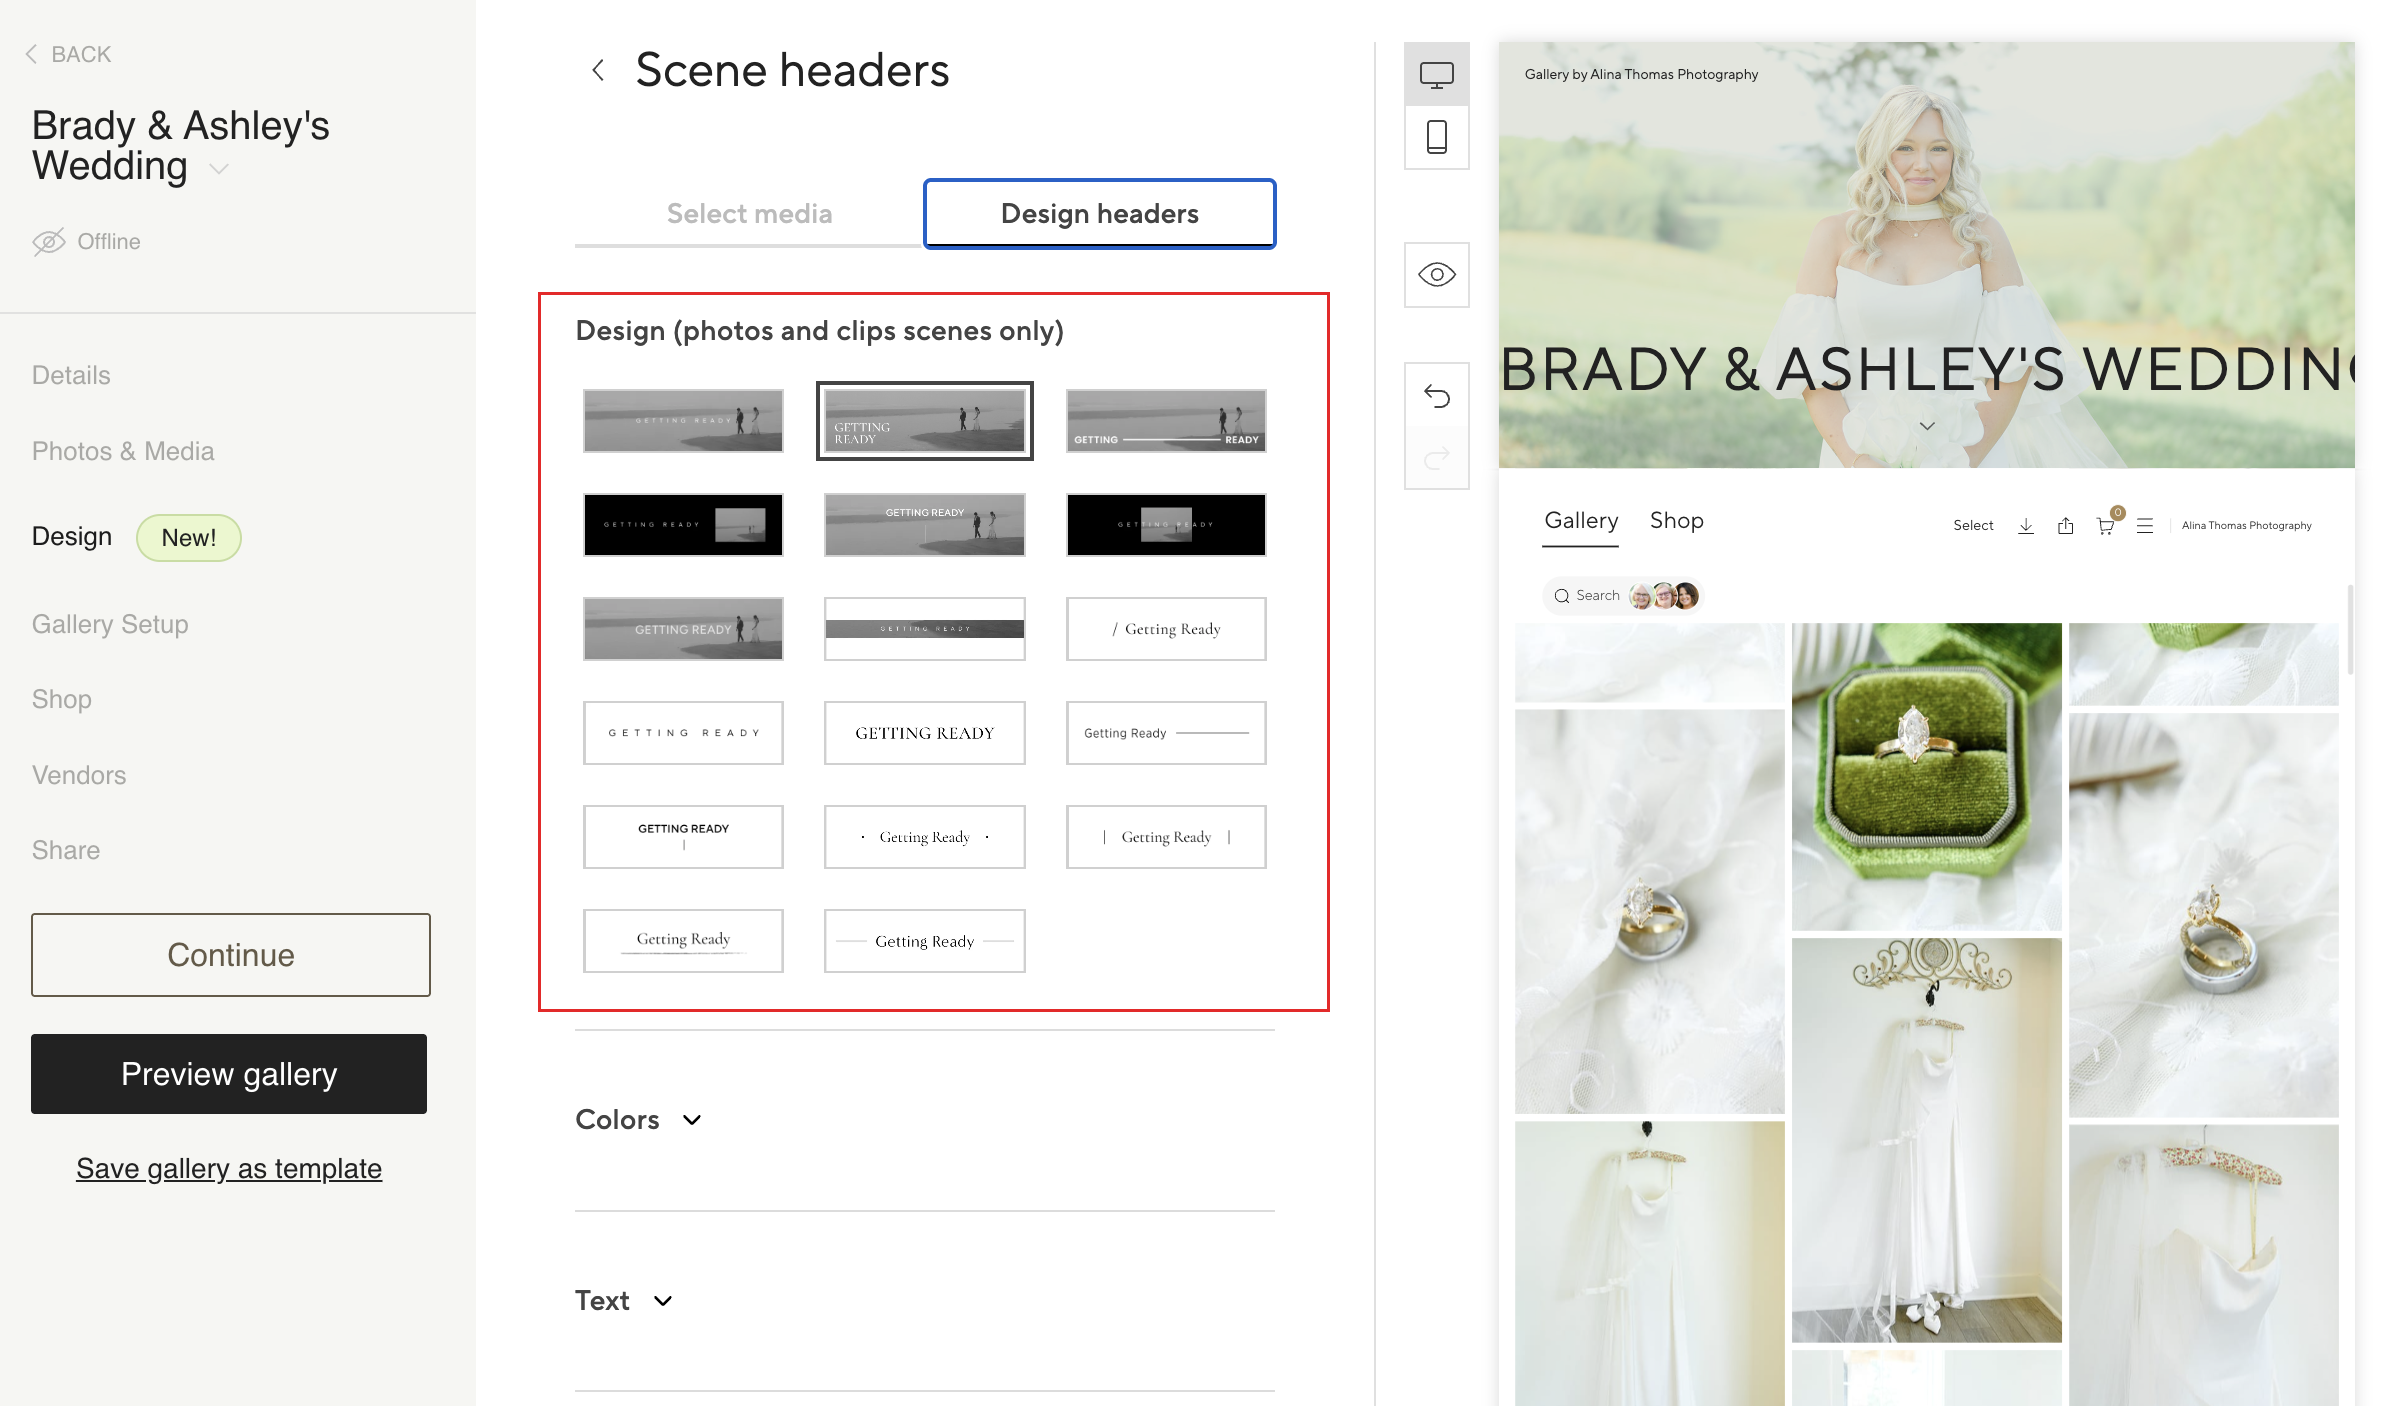
Next, you can change the gallery cover and scene headers.
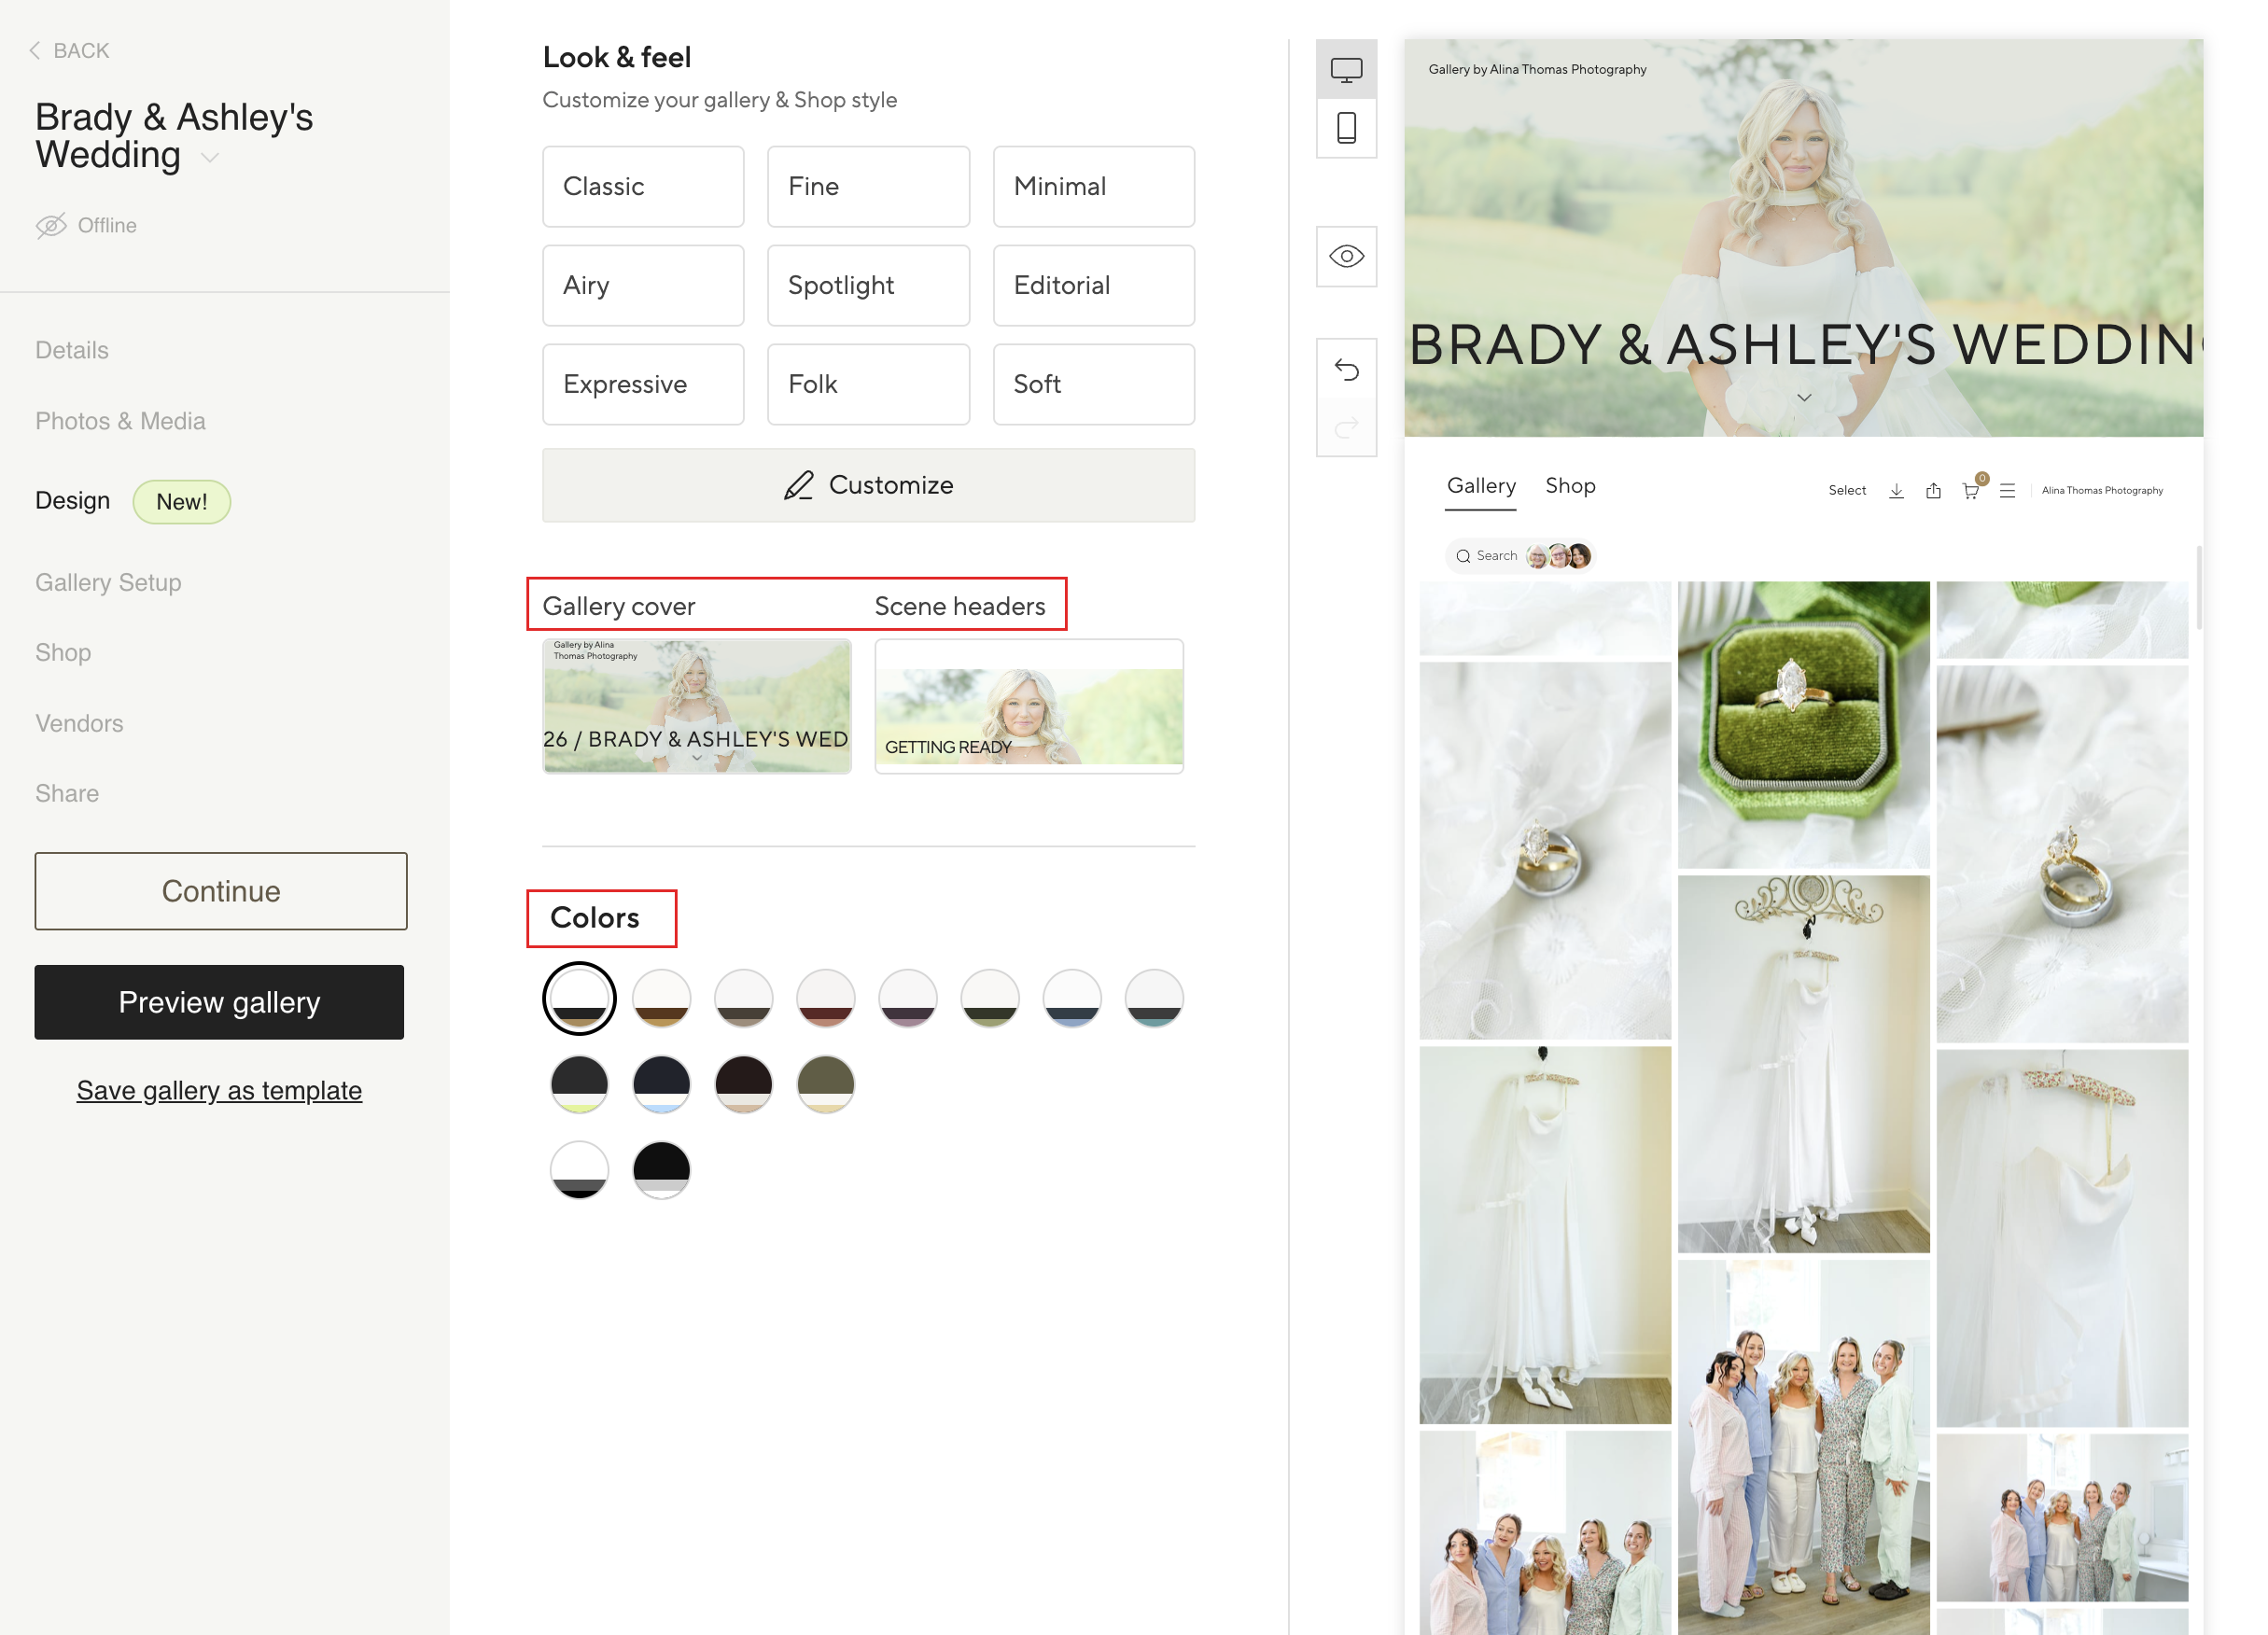
If you are like me and break a gallery into multiple sections (getting ready, ceremony, reception, etc.), you can now customize the header of each section. You can choose an image or plain text. You can change the colors and text, etc. Plus, if you are a videographer, you can now upload videos for your headers. How cool is that?!
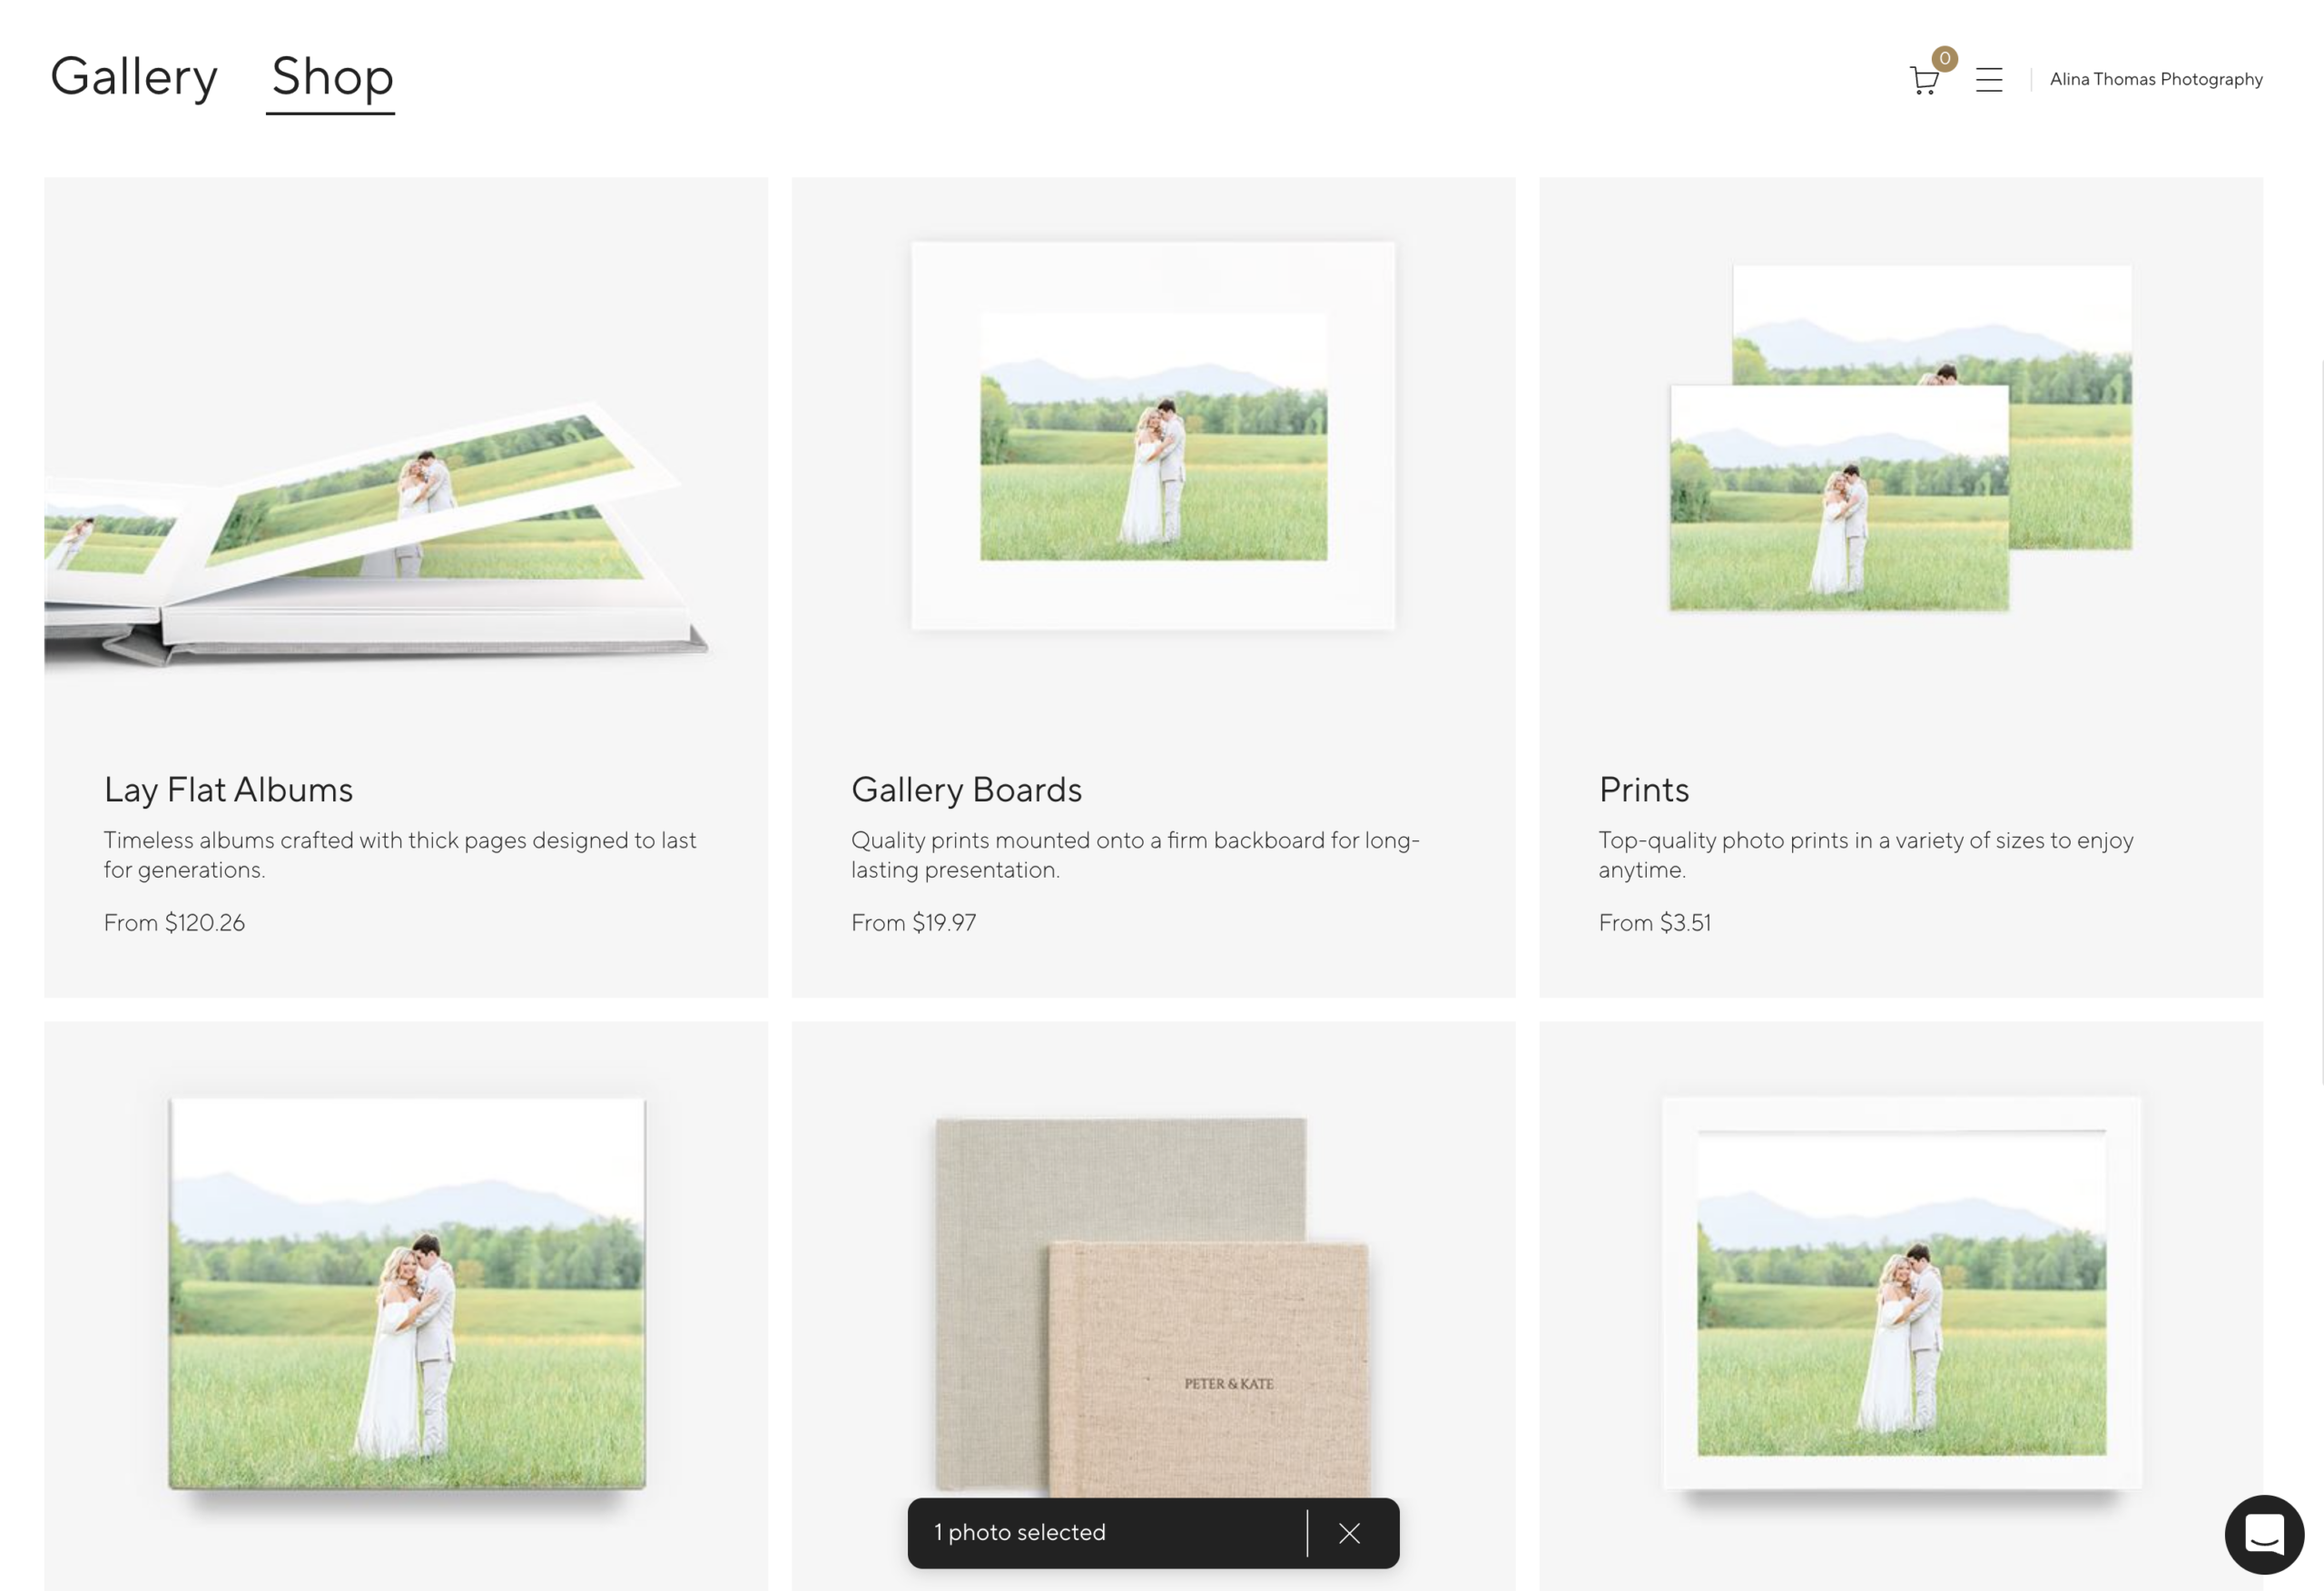
Another amazing update is that when your client selects an image inside their gallery, they can see exactly what it would look like if they were to order albums or prints from the shop. Pic-Time shows the photos on the products which elevates the experience and your clients can see exactly what they are getting.
To celebrate the launch of Pic-Time 2.0, new annual subscribers can migrate up to 200 galleries from your current platform at no extra cost. Honestly, that’s a pretty big deal. One of the hardest parts of switching platforms is the thought of moving years of client galleries over to the new platform. Pic-Time will handle this for you at no extra cost!
If you don’t use a gallery delivery platform in your business and rely on Dropbox folders to deliver your photos, now is the time to elevate your client experience.
Click here to sign up for Pic-Time and try all the new and improved features!
Make sure to use the code 2NGTV2 at checkout to receive an extra free month when signing up for a yearly subscription. (No credit card required when using this link!)
*For your convenience, this post contains affiliate links. When you use these links we may earn a small commission at no additional cost to you. This helps us continue sharing free photography tips and resources like this with you.


