

The HoneyBook scheduling tool is one of my favorite features.
There’s nothing more frustrating as a business owner than juggling multiple tools just to book one client. 😬
Calendly for scheduling your sessions, a separate invoice system, PDF proposals, email reminders, session reminders… you get the idea.
Managing it all is messy, time consuming, and honestly, a little stressful.
That’s why I love HoneyBook’s bult-in scheduler. Now, clients can pay and book their session in one step. ❌ No third-party tools required. ❌
It even integrates with your Google calendar so you won’t ever double book. And the best part… you’re now able to have your clients pay and book a session in one step.
(And yes, you can use it for mini sessions too!)
How does the HoneyBook scheduling tool work?
Step 1: Create a New Session Type
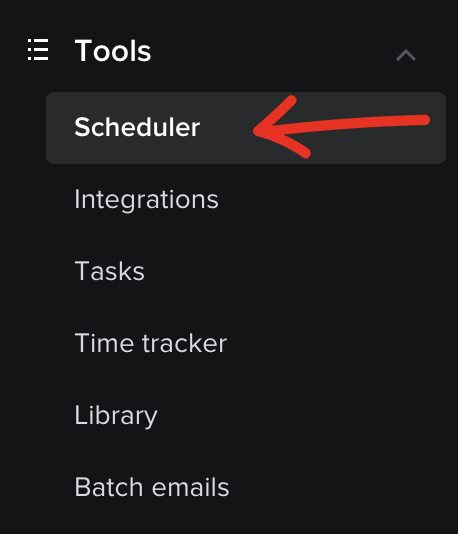
First, in your account click on Tools → Scheduler.
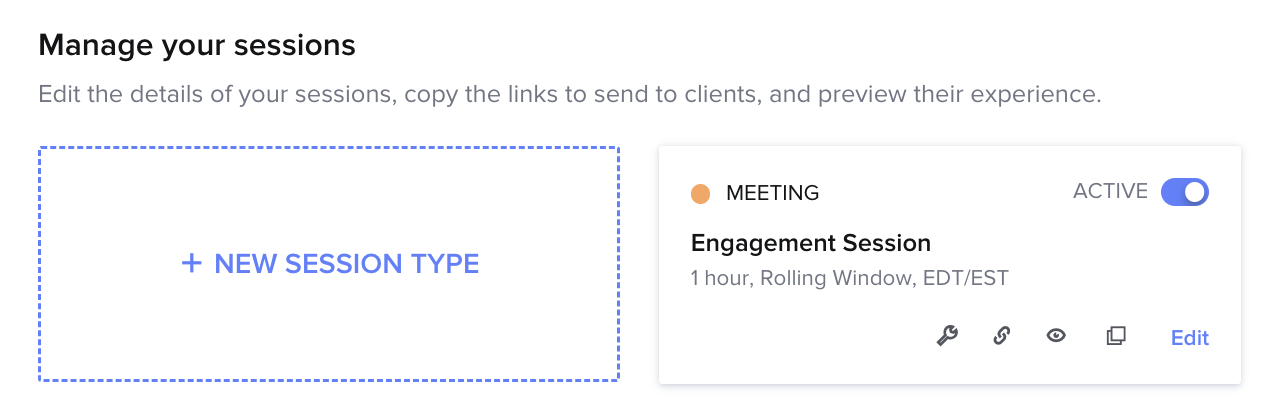
Next, it’s time to create a new session type. All of your other session types that you create will appear on this page as well.
Step 2: Fill Out the Details
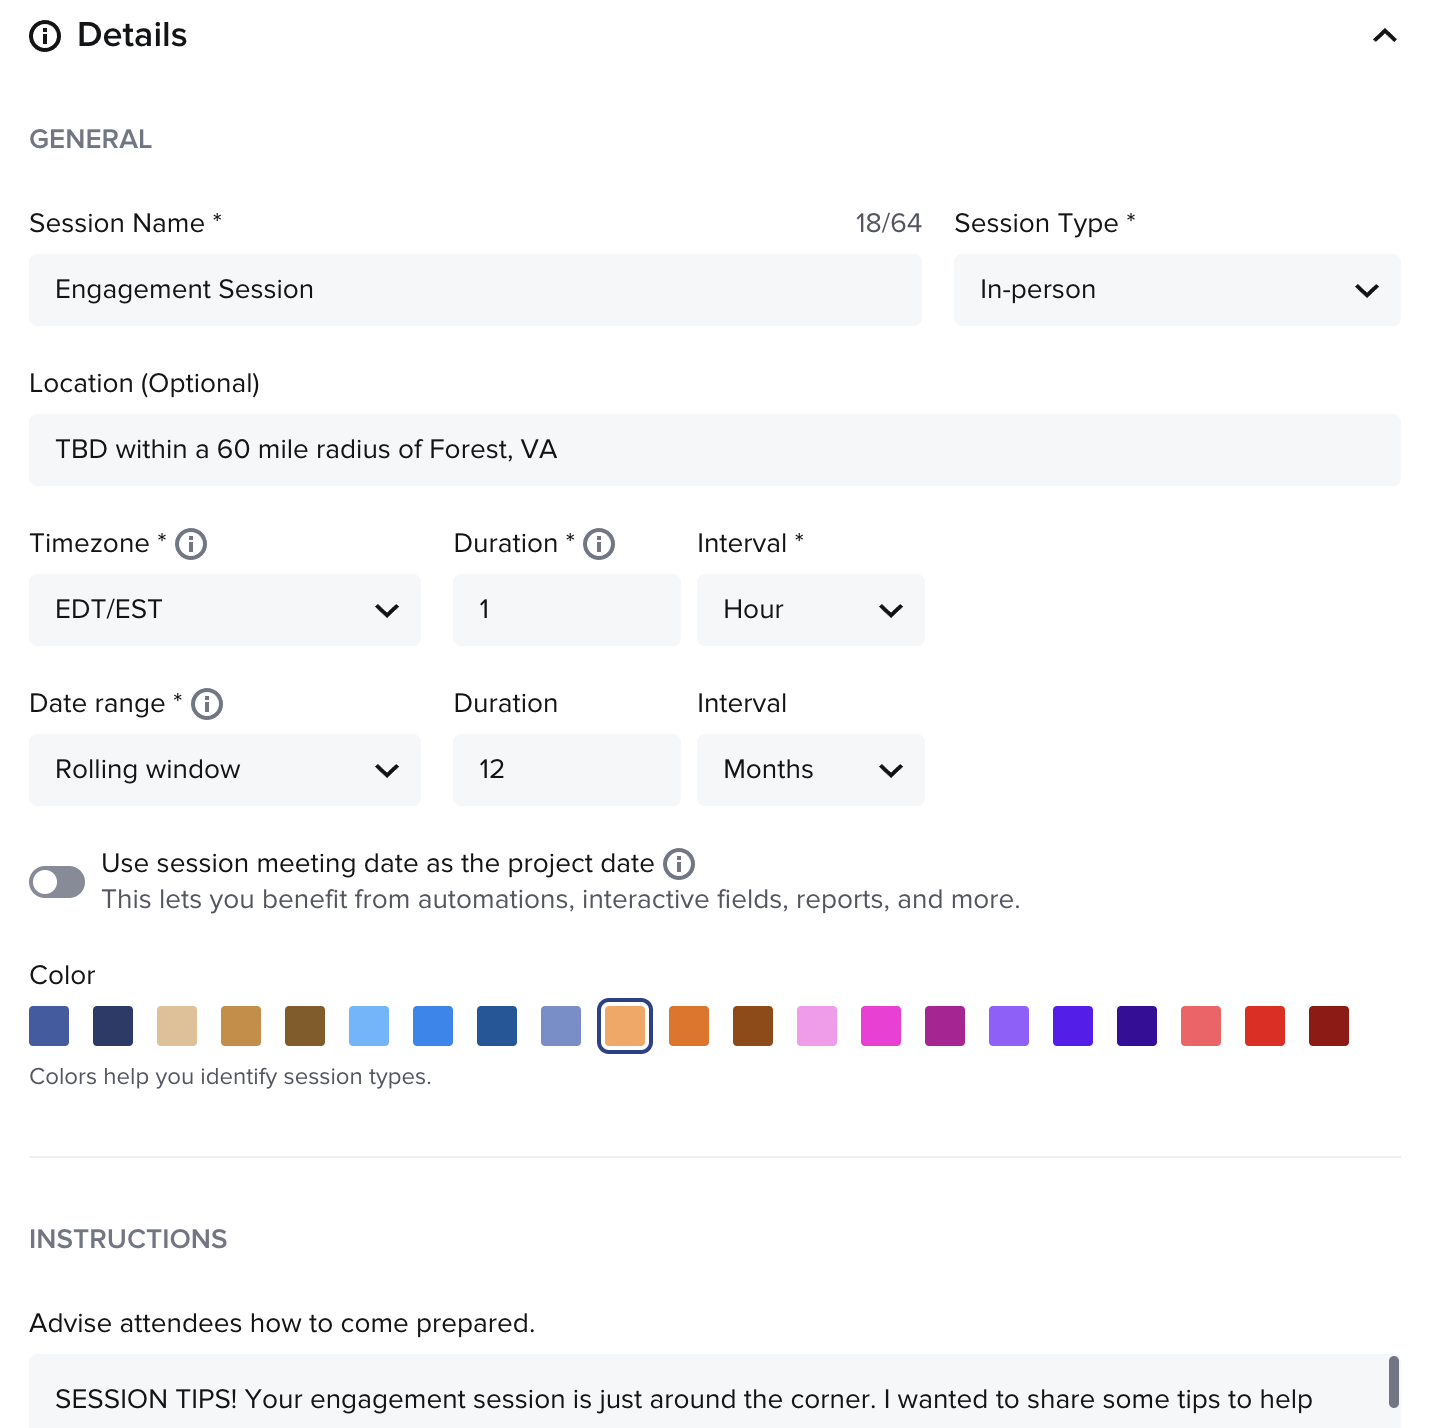
This new page will allow you to set up things like location, the duration of the session, as well as how long in advance it can be scheduled.
For my engagement sessions, I chose a general location based on the distance I’m willing to travel (“TBD within a 60 mile radius of Forest, VA”).
You can also choose WHEN the sessions can be scheduled. 👉 For example, if you’re hosting mini sessions, you would choose a “fixed date range”, but for regular sessions, you might want to go with the “rolling window” option.
Moreover, you can also color code your sessions so that your calendar is nice and organized.
And lastly, you can provide any additional instructions for your clients that they would need to know before their session. 👉 I chose to utilize this section for my “how to choose your outfit” tips.
In the past, I would send out a separate email, but now this will appear in their confirmation email which is done automatically and saves me time.
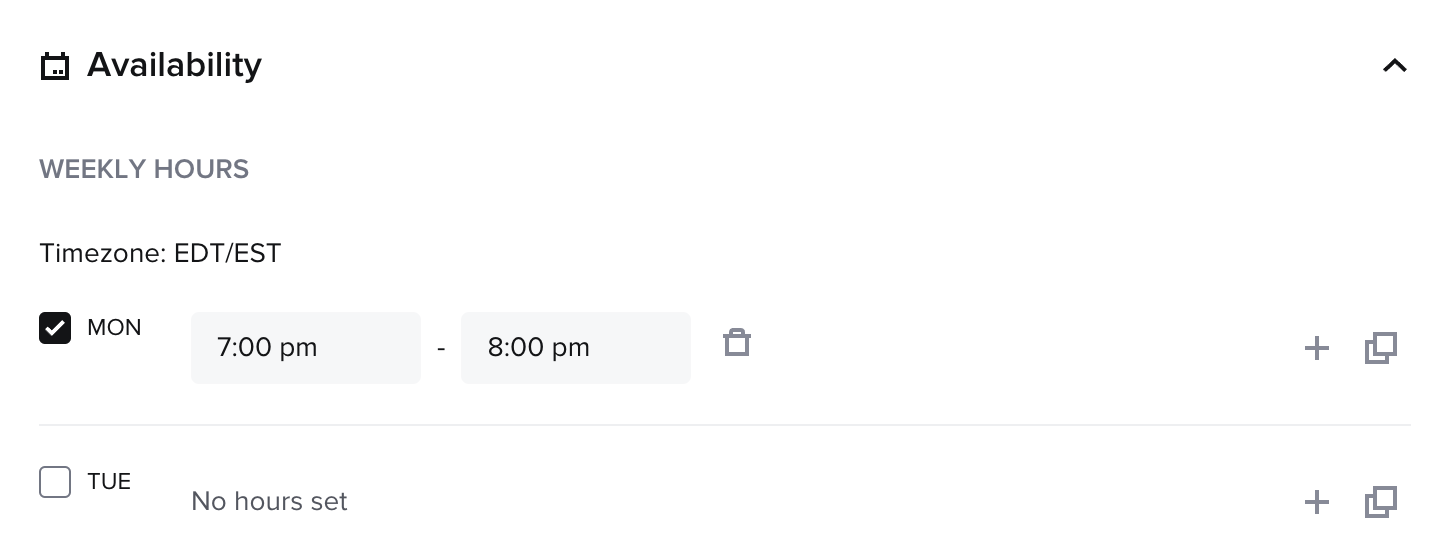
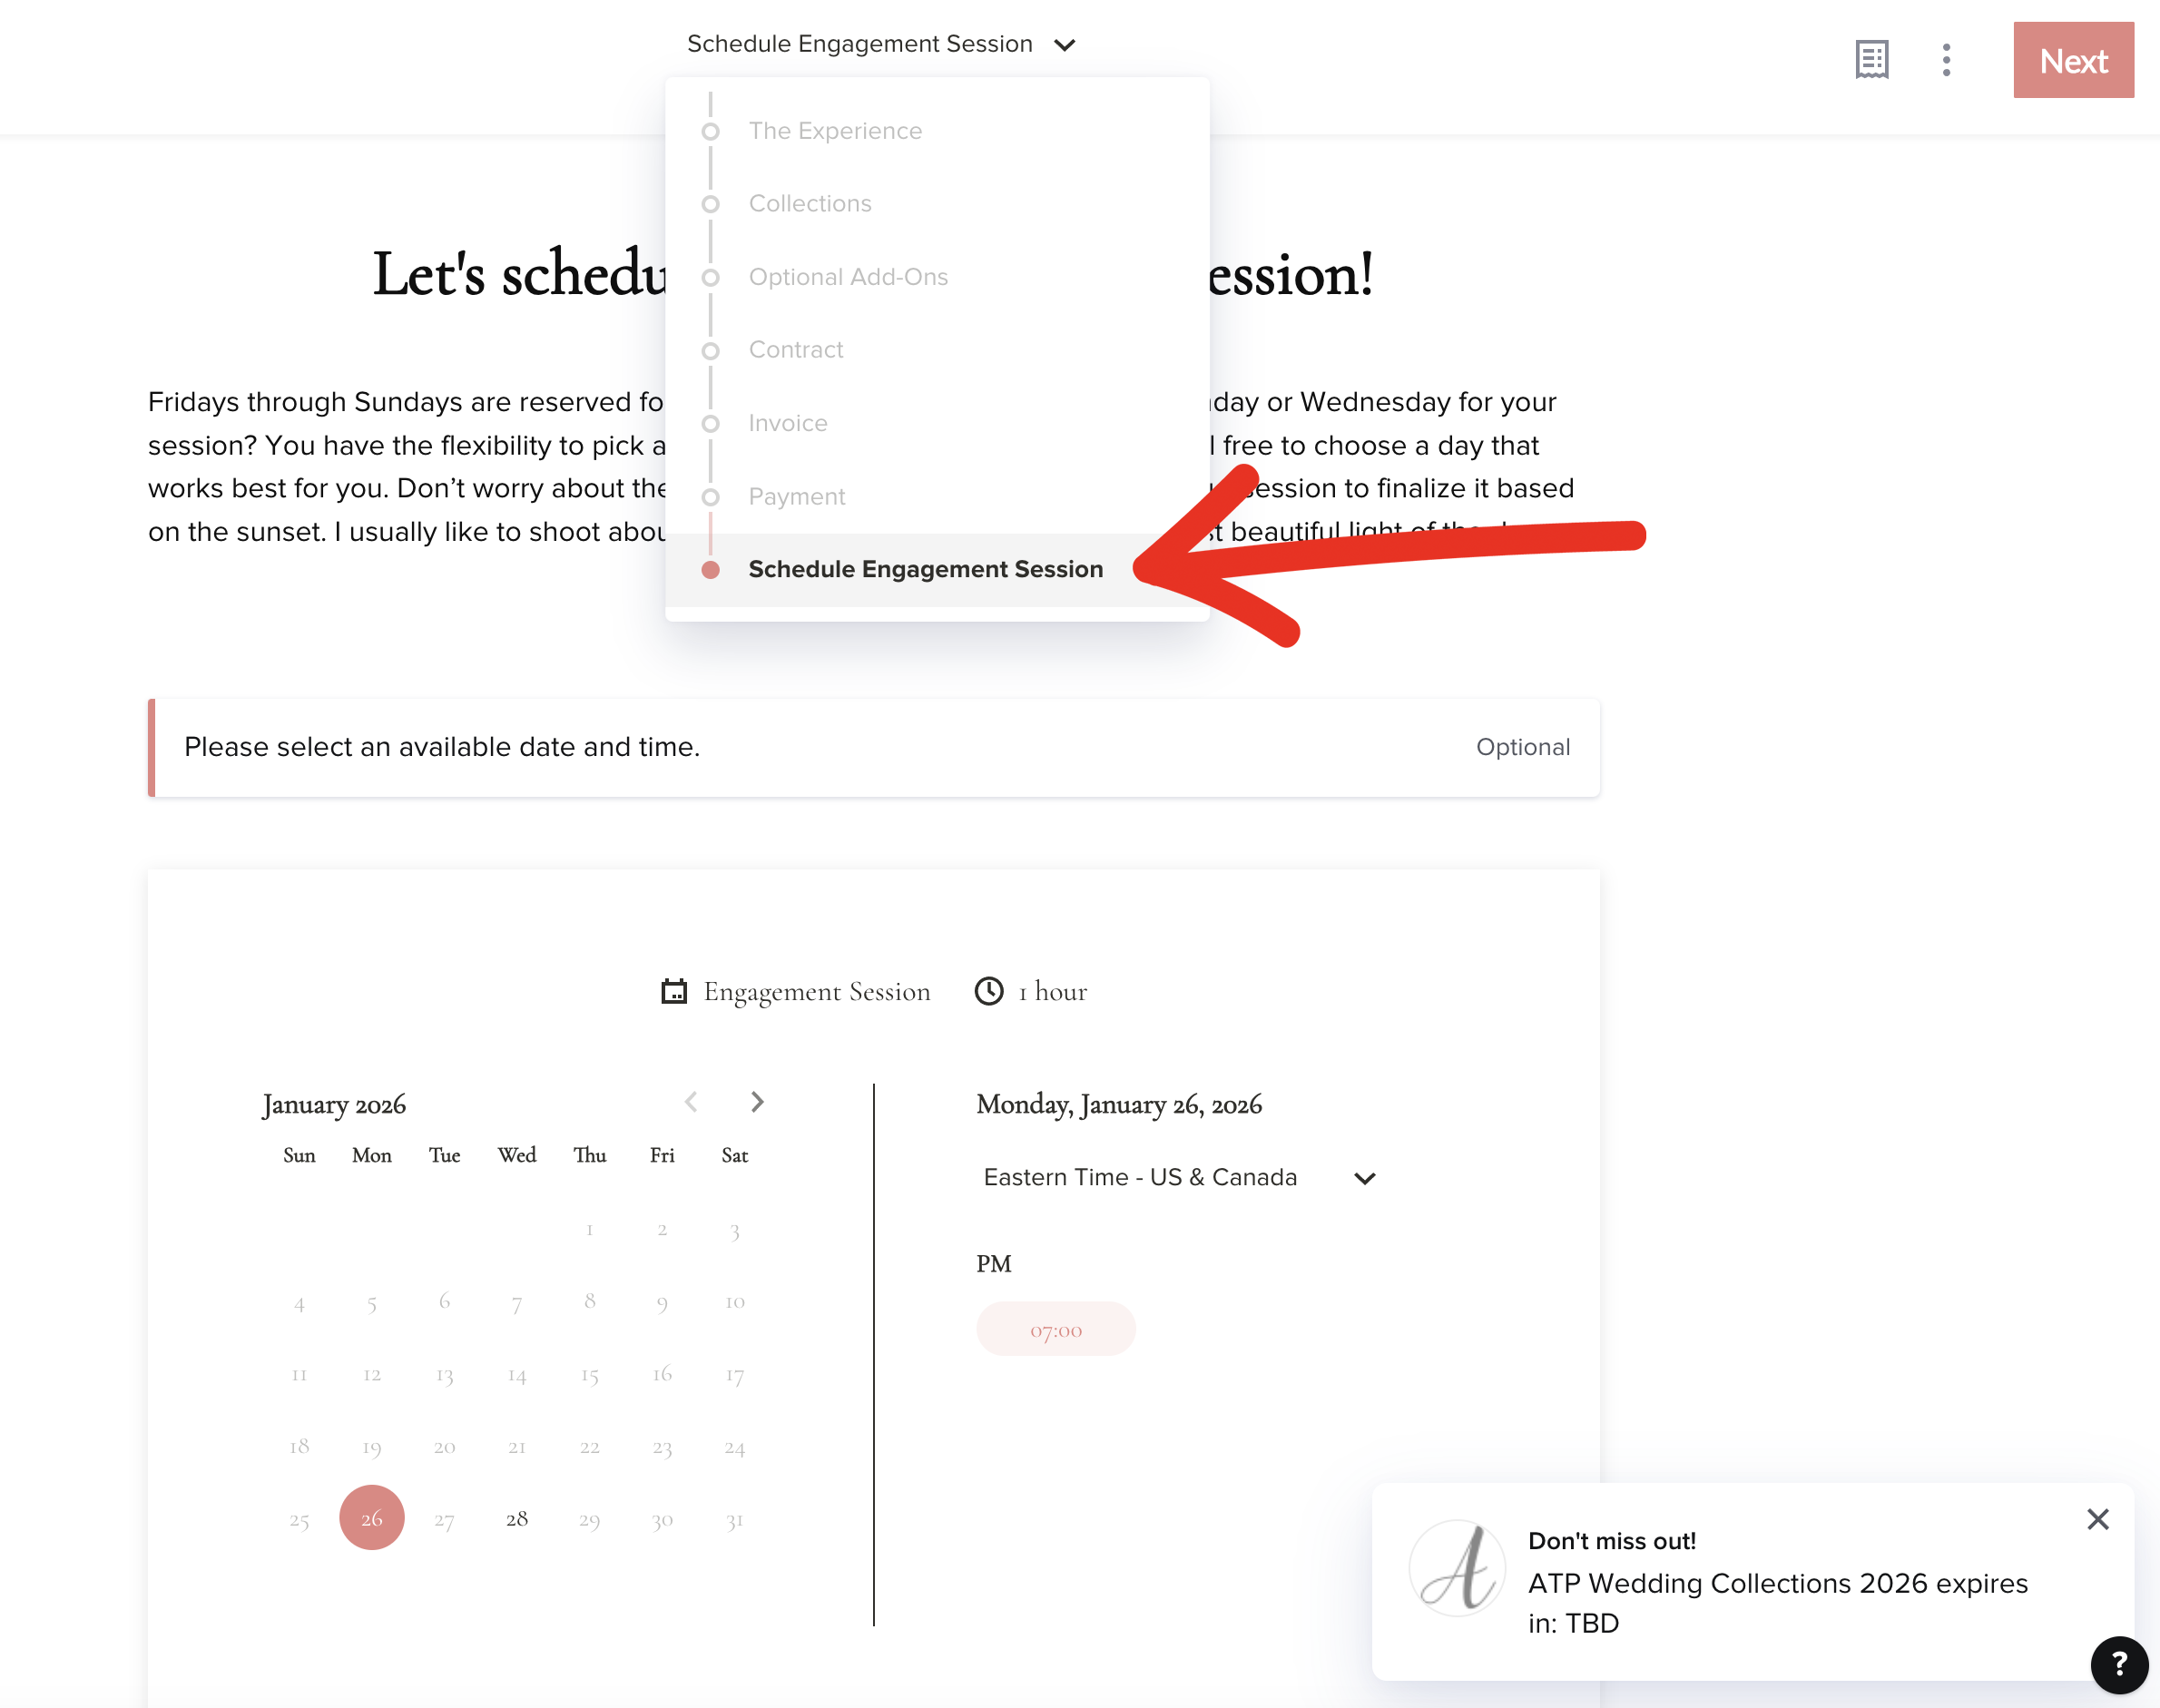
Step 3: Set Your Availability
For example, I only photograph engagement sessions on Mondays and Wednesdays since Fridays-Sundays are reserved for weddings. So, I only set my availability for Mondays and Wednesdays.
If you’re using the scheduler for mini sessions, you can select the day of your mini sessions and set up the time slots you’d like your clients to book.
Step 4: Share Your Calendar Link with Clients
Once you’ve created your session type, you’ll also get a custom link that you can share with your clients.
You can use this link in emails, on your website, or social media. Your clients will be able to review your availability and book your services with one simple click.
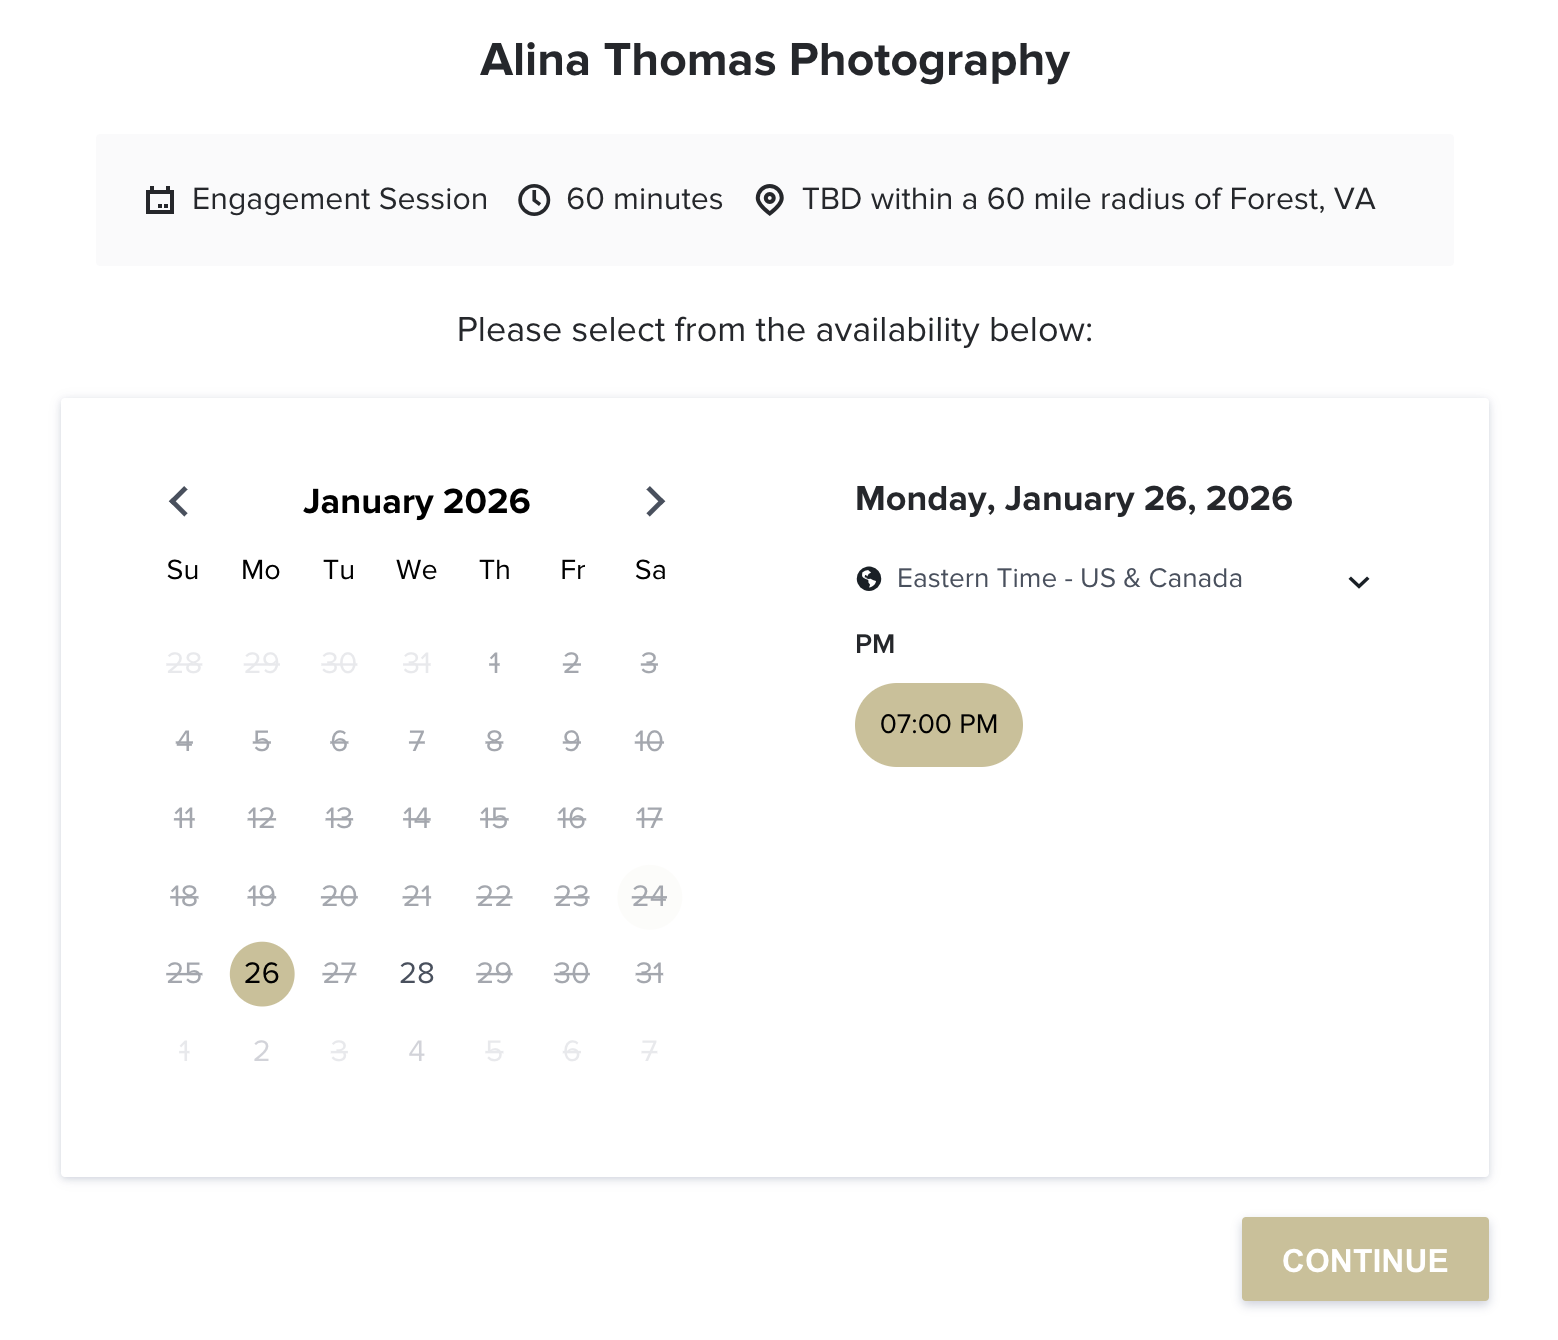
Once scheduled, your calendar will get updated in real time so that you’ll never get double booked. Here’s what your clients will see!
Step 5: Customize Your Calendar Page
Now that you have created your session type, you can also customize your calendar page in a few different ways.
How to Use the Scheduling Tool
There are two different ways that you can use the scheduling tool.
1. Lead Forms
You can use lead forms to schedule a consultation meeting, mini sessions, engagement sessions, offer lead magnets (freebies), and even sell digital products.
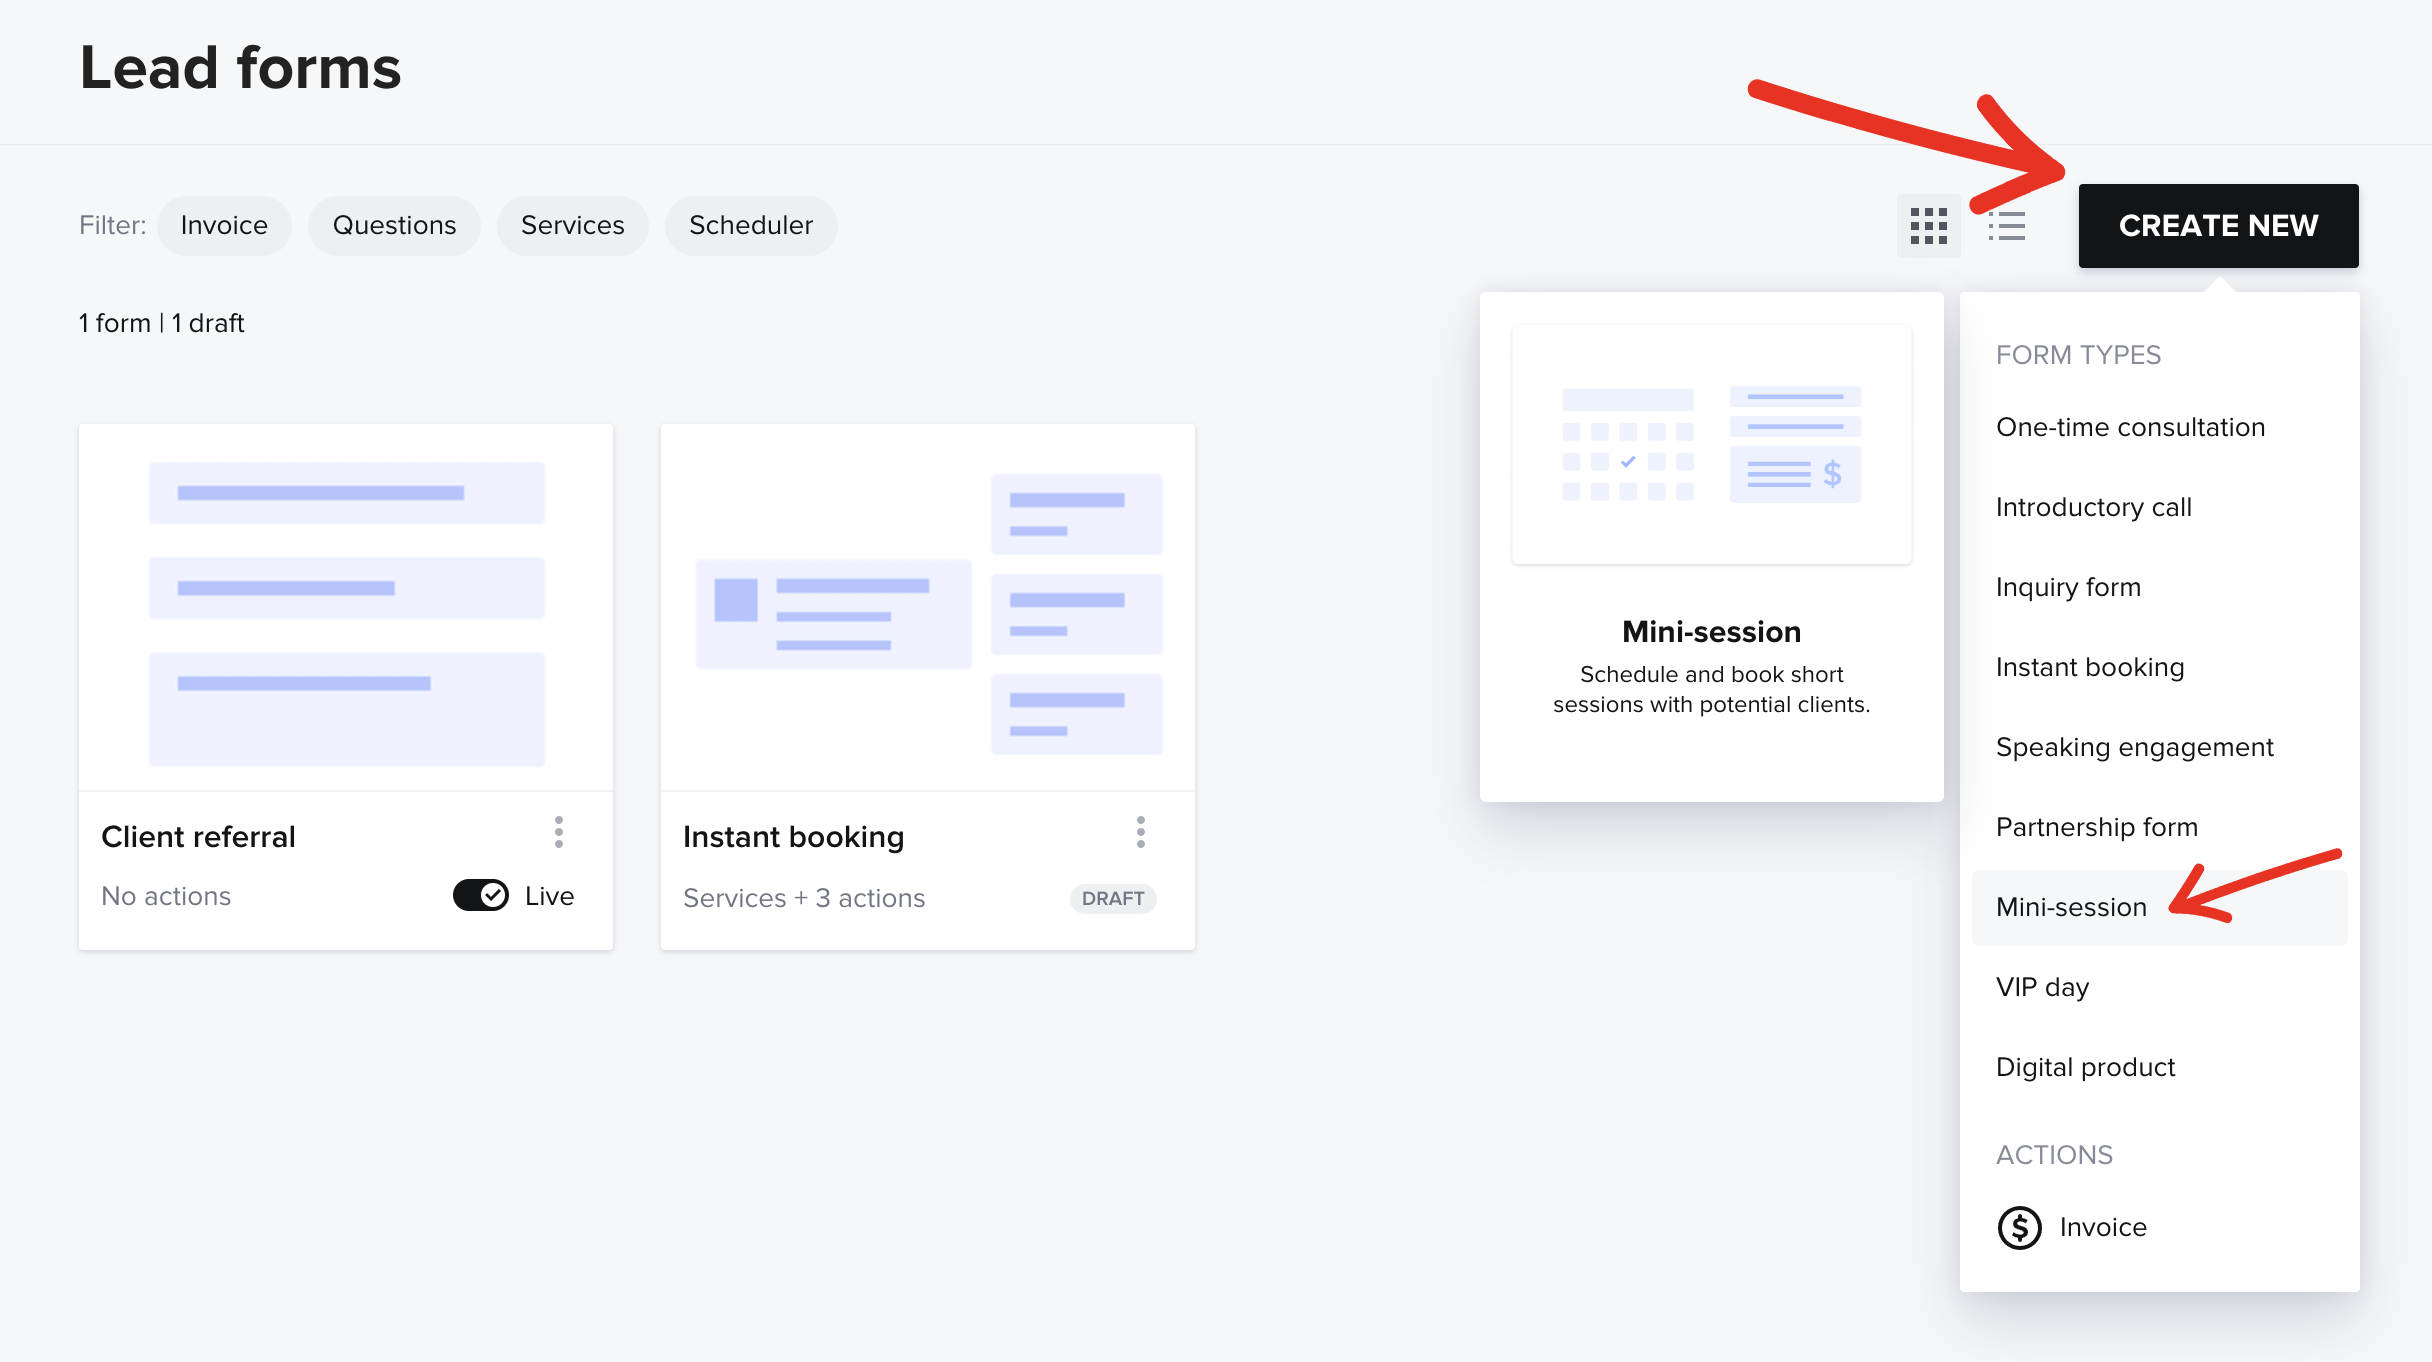
To create a lead form, go to Lead Capture → Lead Form.
Here, you’re going to find a lot of options depending on the type of lead form that you’re looking to create. My personal favorite is the Mini Session lead form.
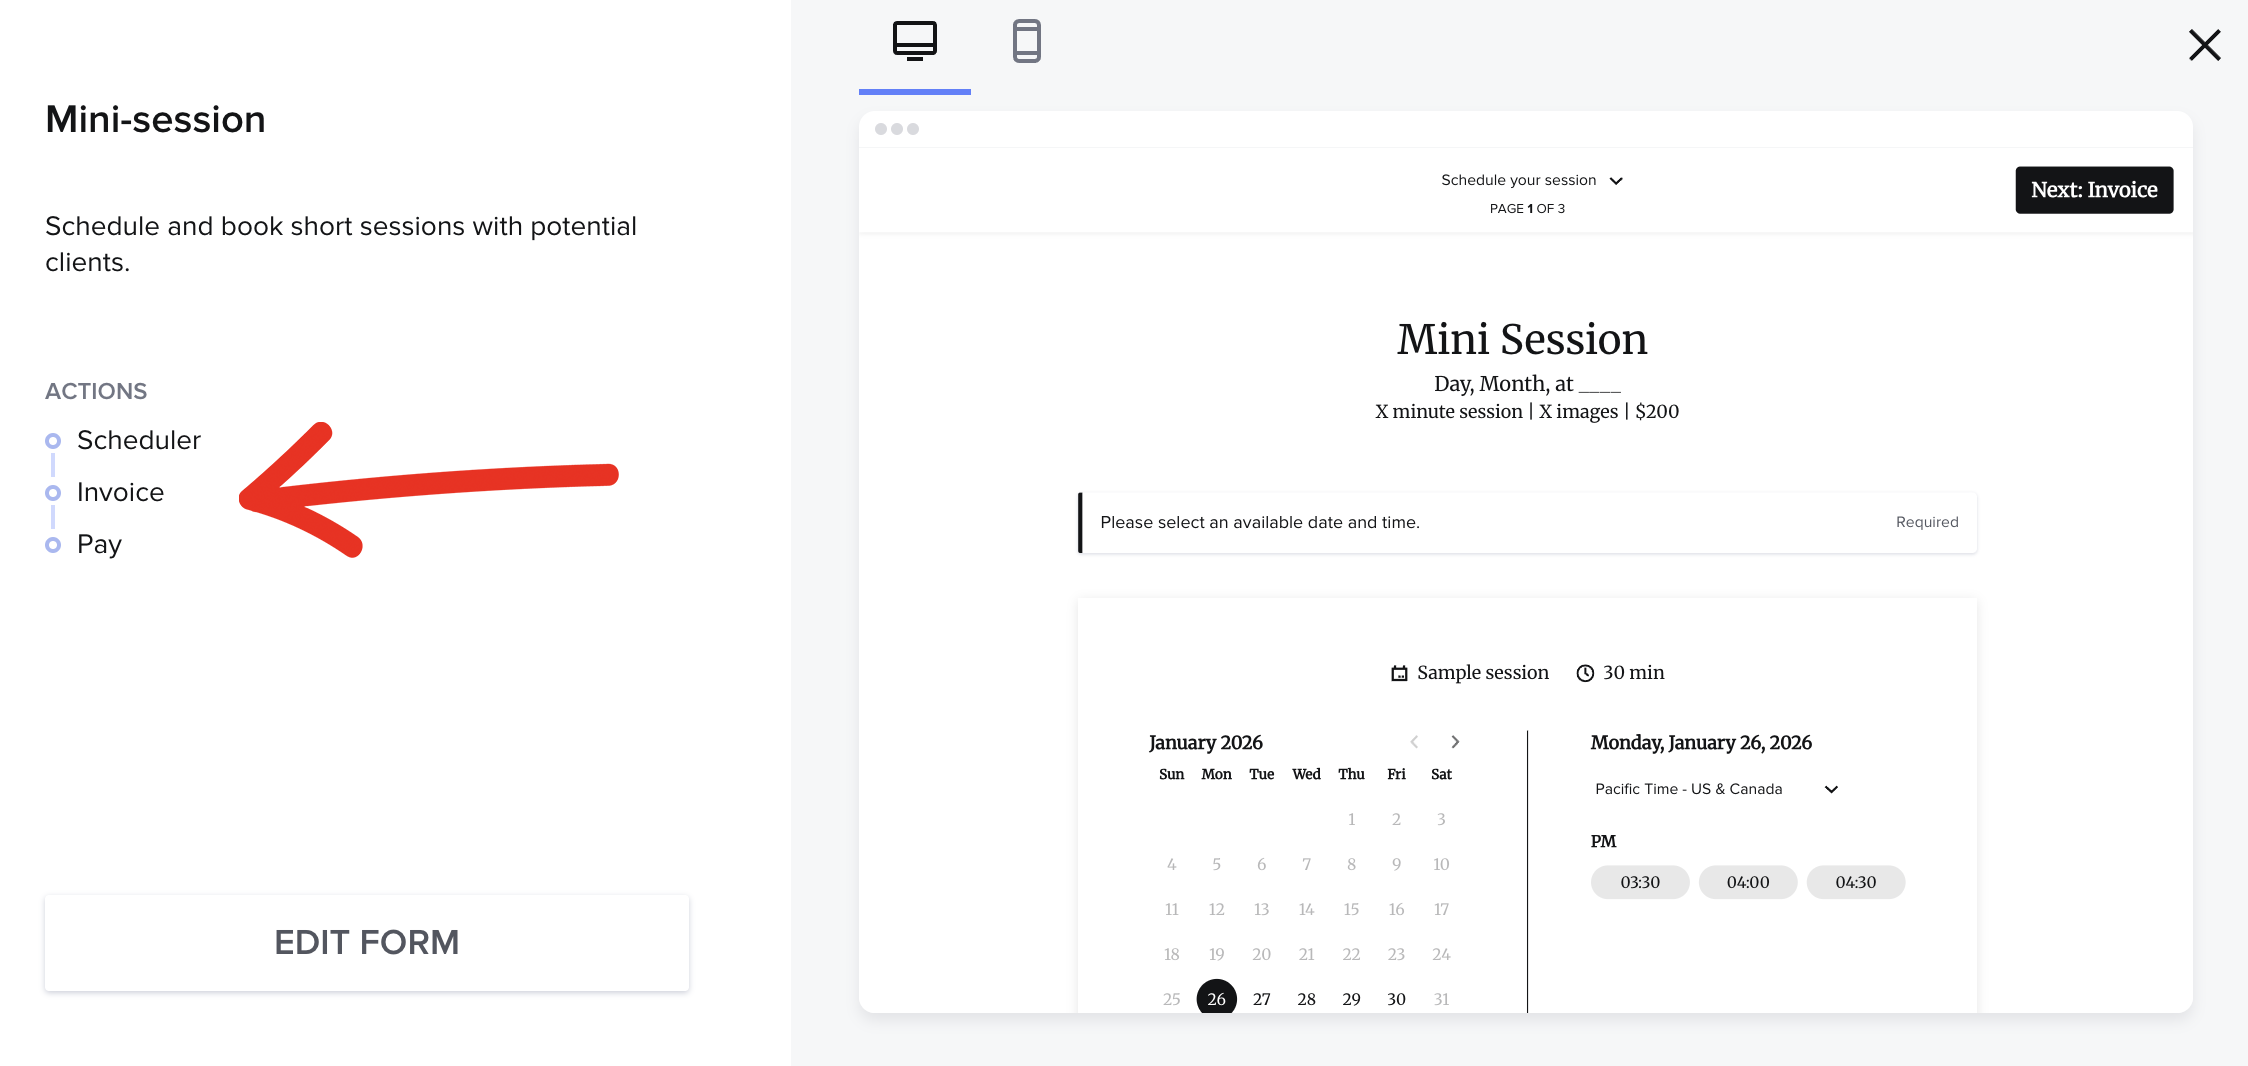
This template is already great as is. You can customize it by adding or removing any of the pages. As you can see, this particular template includes the calendar, invoice, and payment. The only thing I would add to this is a contract.
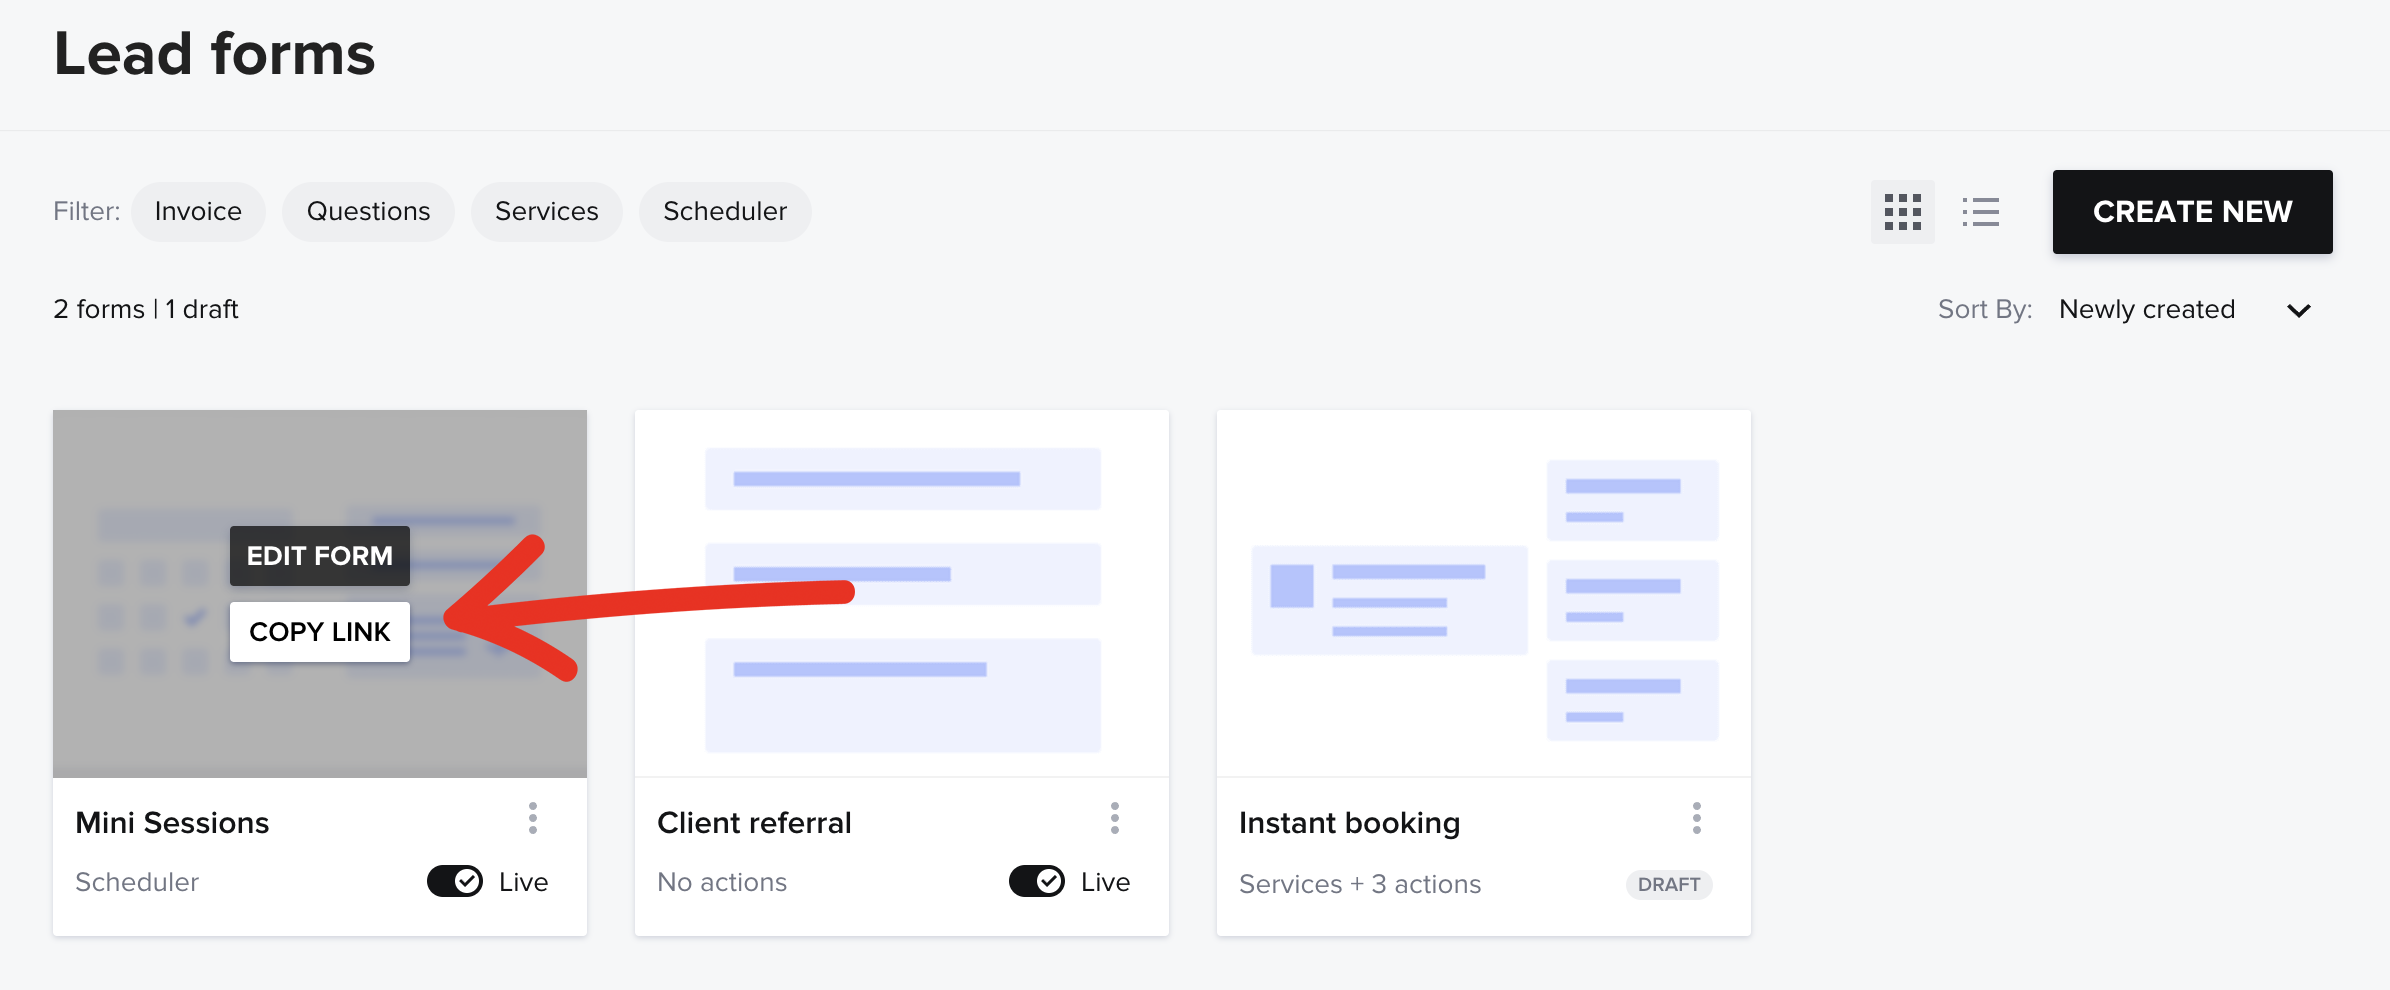
Once you publish your lead form, you’re going to receive a link to share with your clients. Here’s what that looks like.
2. Smart Files
I use HoneyBook’s Smart Files to make this the final step in my wedding booking workflow.
Clients:
- Choose a collection
- Sign the contract
- Pay the retainer
…and immediately schedule their engagement session.
This is a step I removed from my workflow! No more chasing for session scheduling, no extra tools, no extra emails. Everything happens in one system.
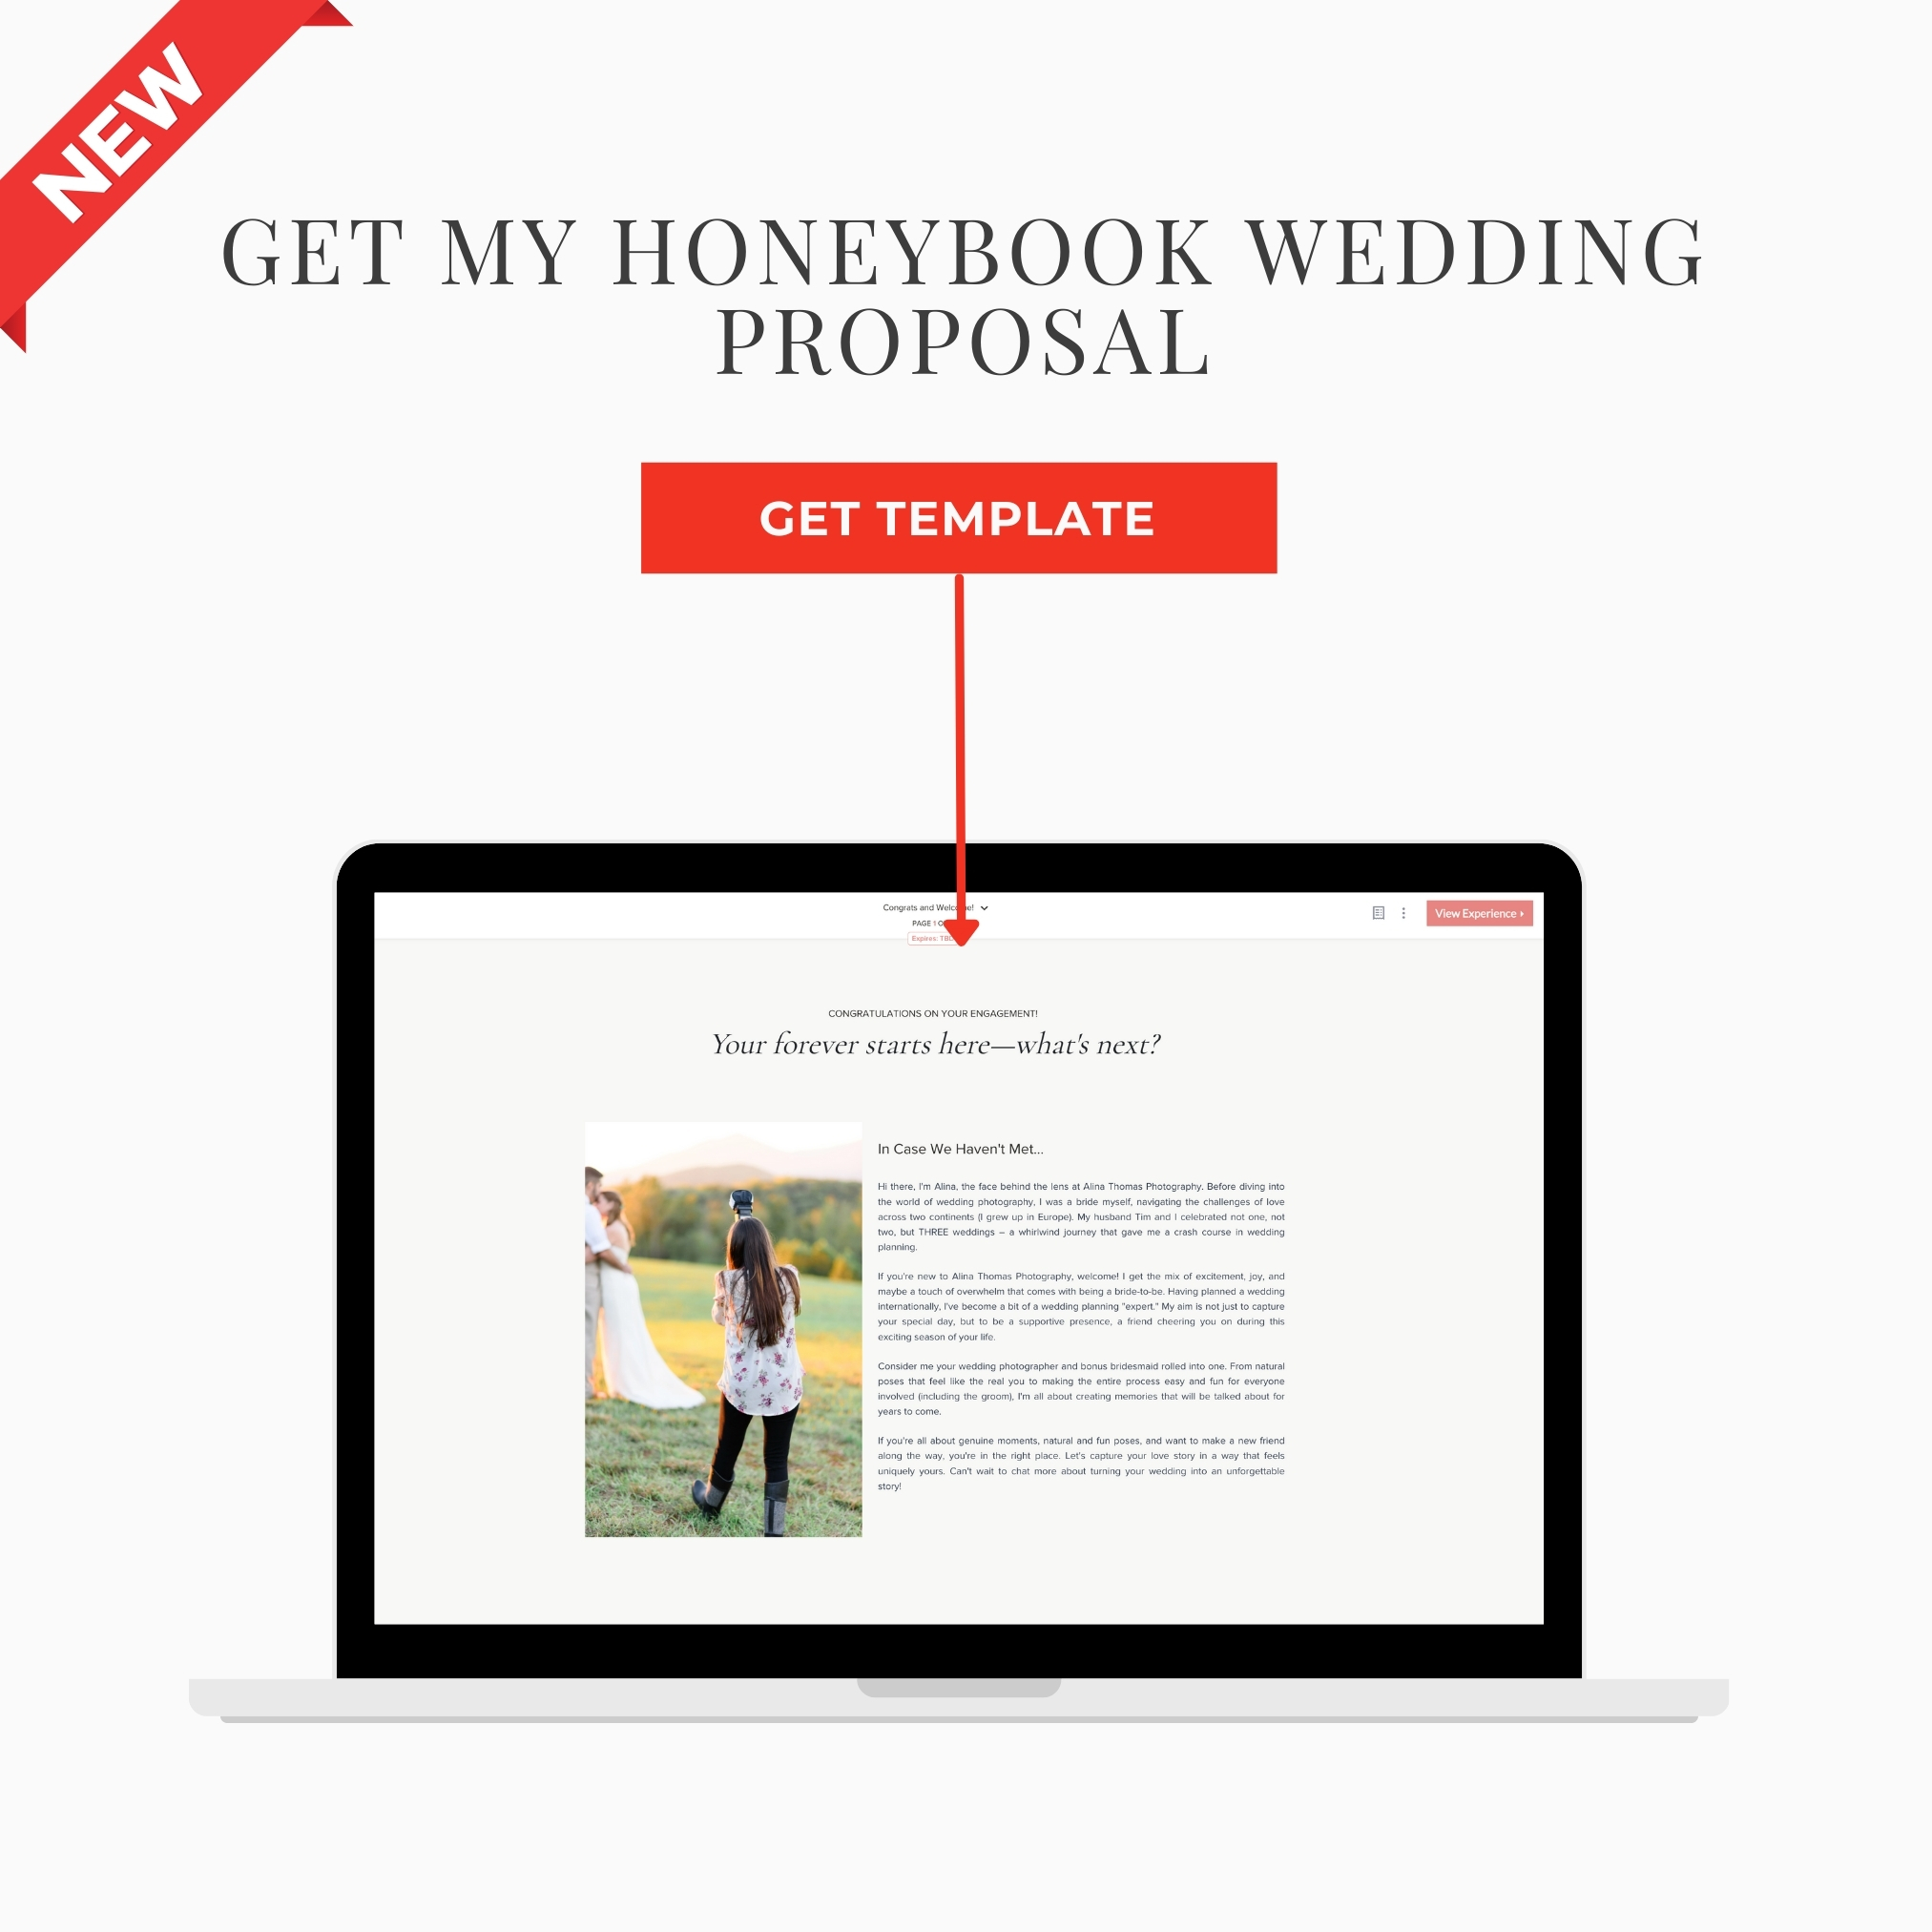
And here’s the best part: I’ve created ready-to-use proposal templates that plug right into HoneyBook.
Instead of building your smart file from scratch, you can:
- Use my proven wording that converts inquiries into booking
- Include collections, add-ons, invoices, and contract
- Set it up to automatically let clients schedule their session
Basically, you get the entire booking workflow pre-built, so you save hours of setup time and get your clients moving through your process automatically.
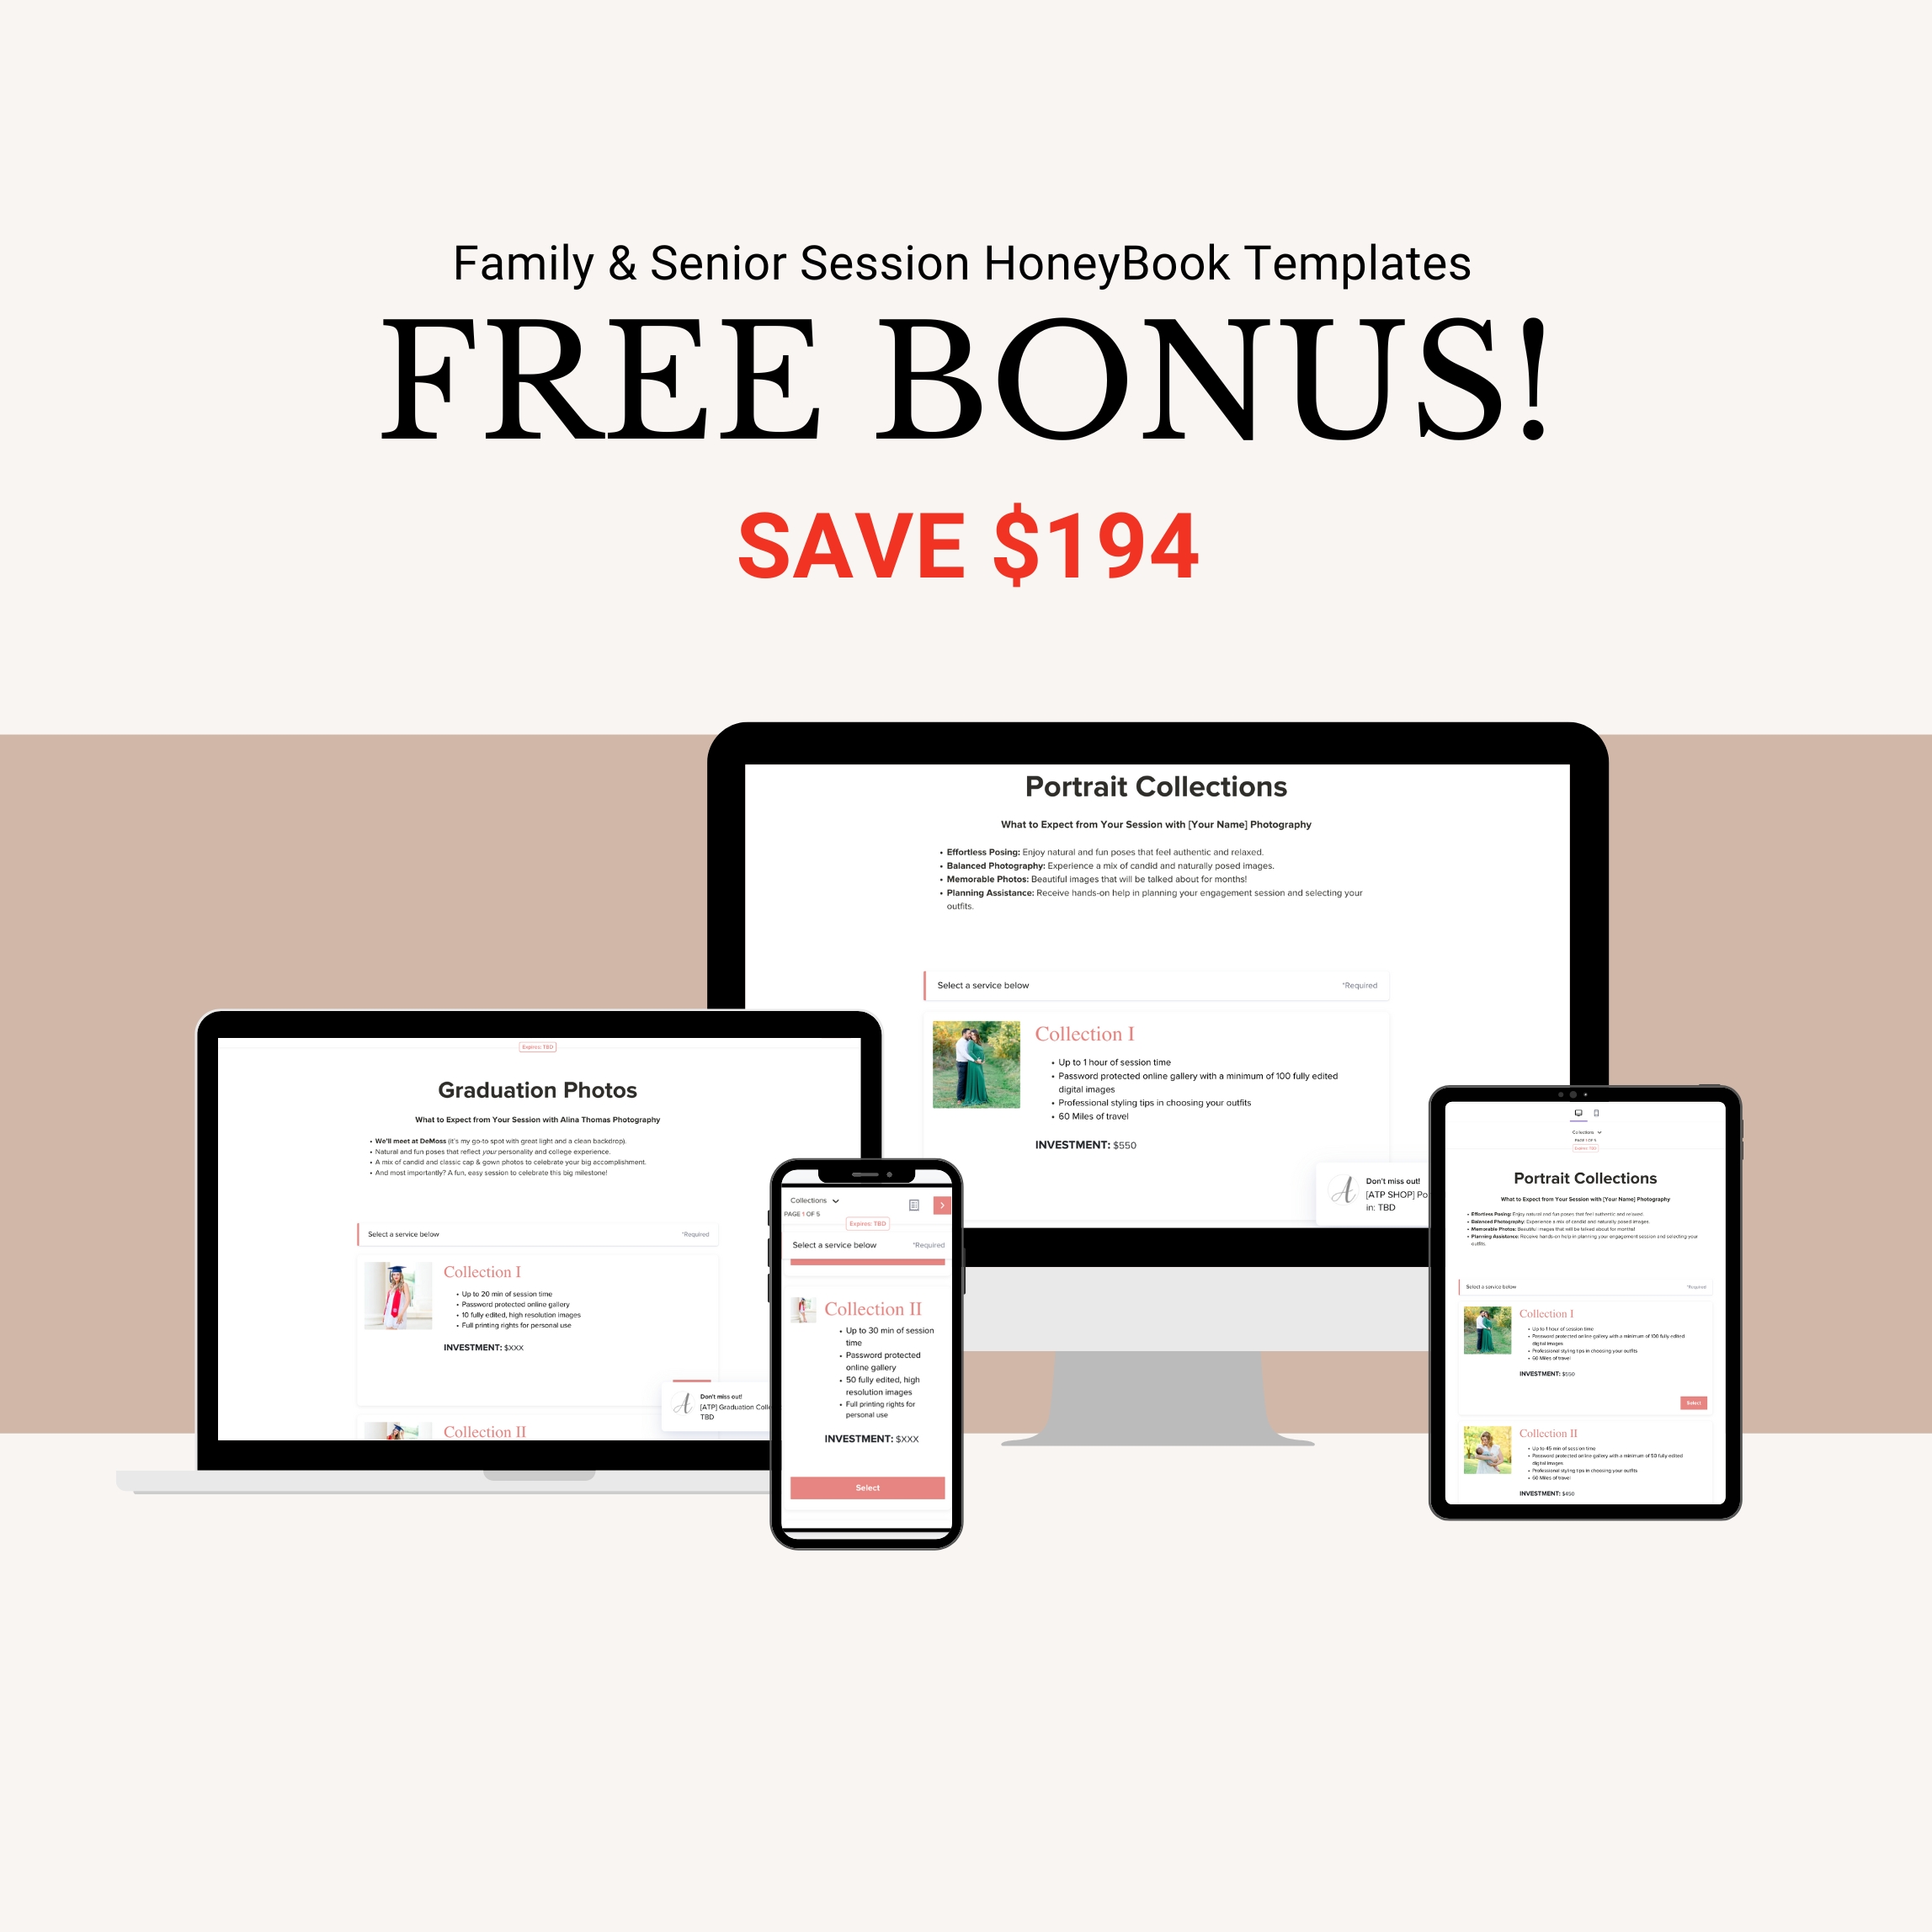
Plus, I’ll include the Family and Senior Session Templates for FREE! >>Download NOW!
Simplify Your Business
With HoneyBook, I replaced multiple subscriptions like:
- Calendly
- Session
- Separate invoicing software
👉 Now everything lives in one system: proposals, contracts, invoices, payments, questionnaires, and session scheduling.
If you want HoneyBook and simplify your workflow, start a free trial here – no credit card required.
Disclaimer: For your convenience, this post contains affiliate links. When you use these links we may earn a small commission at no additional cost to you. In fact, you’re likely able to save money through special discounts I get to extend to you. This also helps us to be able to continue sharing free photography tips and resources like this with you.


