Here’s how to use HoneyBook in 2026! I just updated my client booking workflow for 2026, and wanted to give you a sneak peek into how I’m using HoneyBook this year.
What is HoneyBook?
HoneyBook is an all-in-one client management software for creative entrepreneurs. It handles:
- Inquiries
- Proposals
- Contracts
- Invoices & Payments
- Questionnaires
- Scheduling
- And so much more!
If you’re new to HoneyBook, you can click here to start a 7-day free trial. (No credit card needed when you use this link).
Recently, HoneyBook introduced a new feature called “smart files”. This allows you to automate your entire booking process, which is a total game changer!! Let’s take a look at what my booking process used to look like vs. what it looks like now.
THE OLD WAY:
Inquiry: Upon inquiry, I would send my clients a link to a page on my website that contained my wedding collections and pricing. I always preferred this over a standard PDF because it allowed me to update my pricing as my business grew, and I wasn’t tied to a specific price point.
Then the waiting game started. If they decided to book, they’d email me and I’d send them a wedding proposal (contract and invoice).
Contract: Once a client was ready to book, I would send them a contract through HoneyBook. I highly recommend checking out The Lawtog for the best photography contracts and legal tools.
Invoice: After signing the contract, the next step in the process was to pay the retainer fee in HoneyBook.
From here on, there would be a lot of back-and-forth email communication to schedule the engagement session and all the things in between.
THE NEW AND BETTER WAY:
Here’s where it gets really good! With HoneyBook, I was able to combine all of those steps into ONE smart file that allows me to:
- Introduce myself.
- Talk about the wedding experience.
- Let clients select their preferred wedding collection.
- Offer additional a la carte add-ons.
- Let clients sign the contract online.
- Invoice the client.
- Collect payment for the retainer fee.
- Book their engagement session automatically. (More about this later!)
So, instead of all the back-and-forth communication about collection choices, proposals, contract signing and more, I simplified the process. Now, I only send them one email with a smart file. At the bottom of the email there is a button that says “Get Started”. This button leads them through all the necessary steps to book their wedding date on my calendar.
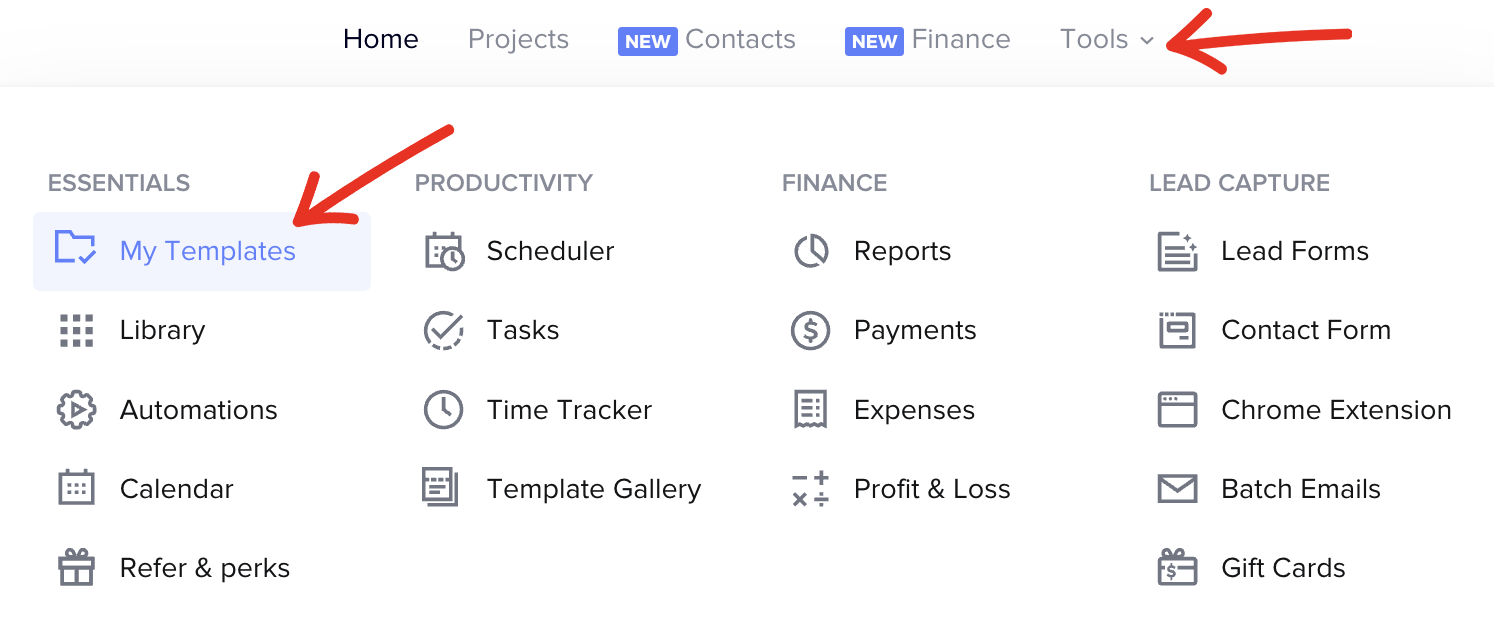
If you’re curious about how I created my smart file, here’s how I did it. To create a smart file in HoneyBook, simply go to Tools → My Templates.
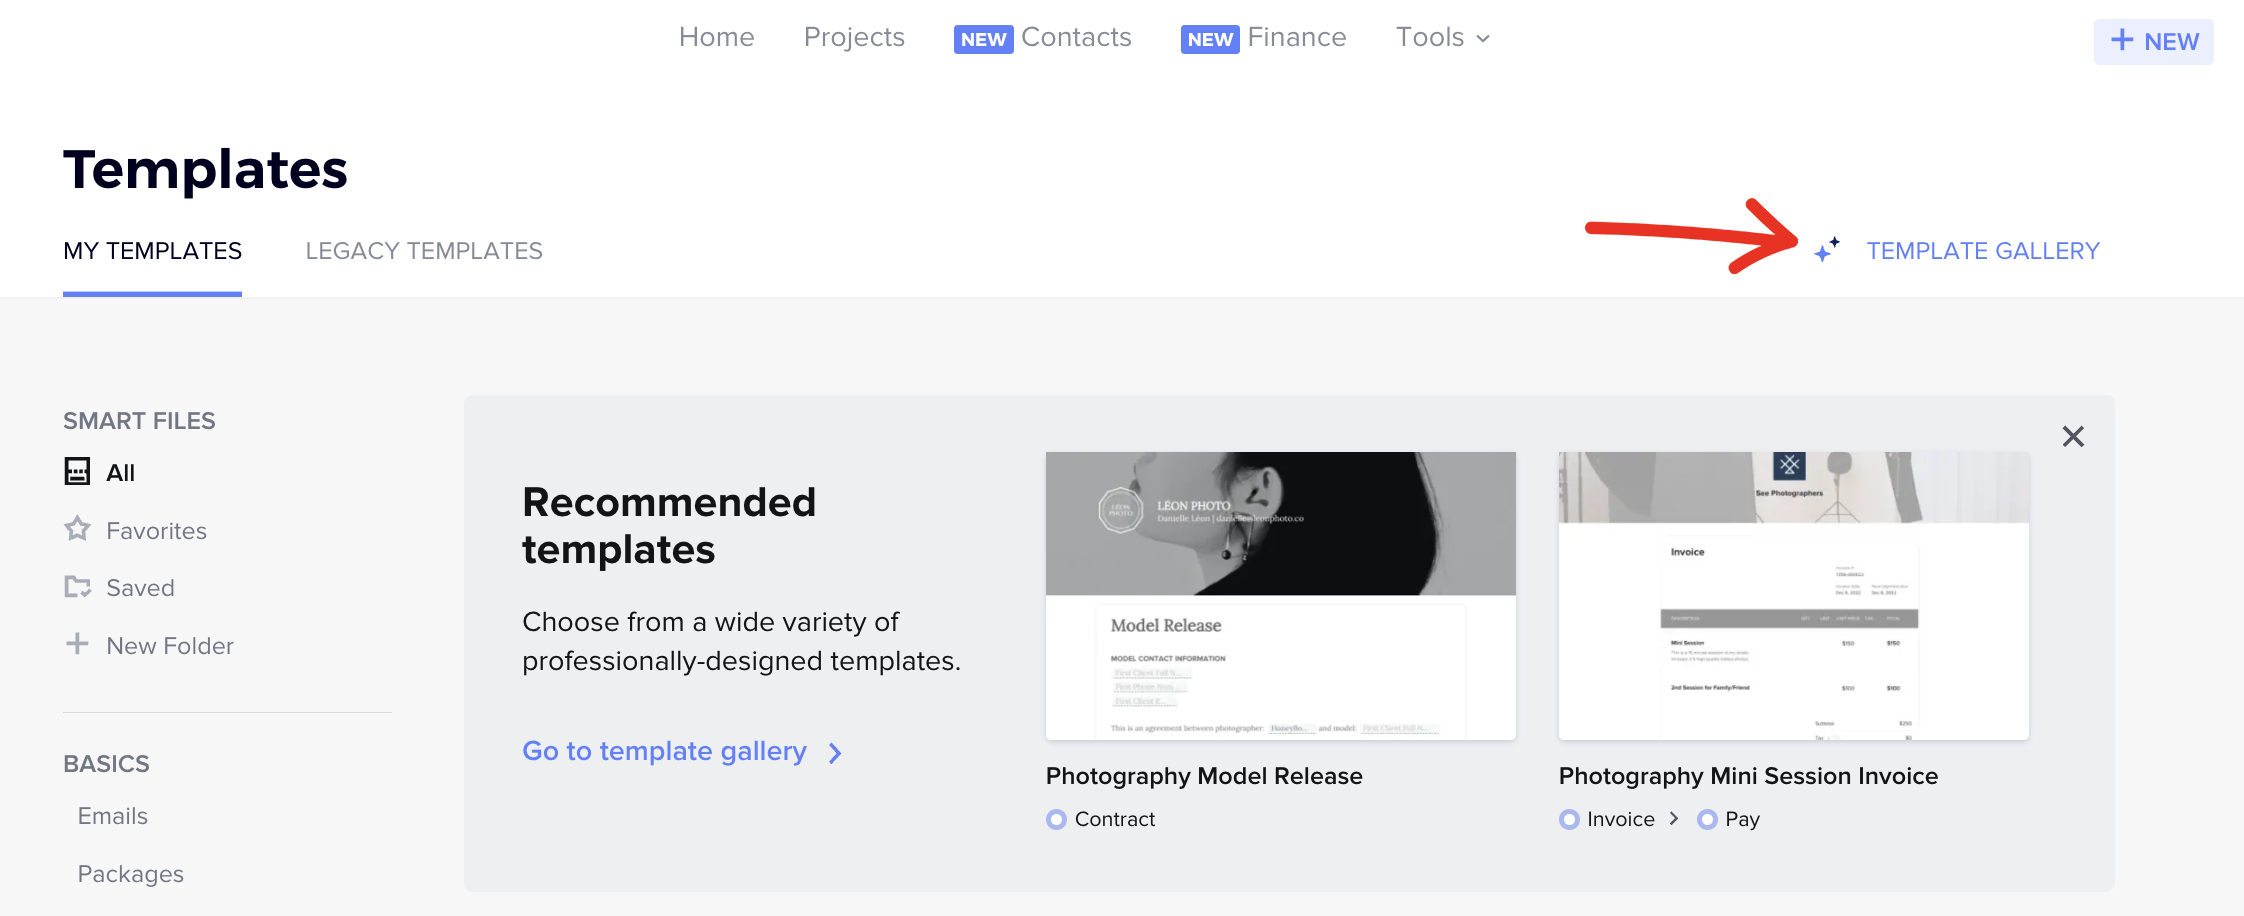
Next, click on Template Gallery.
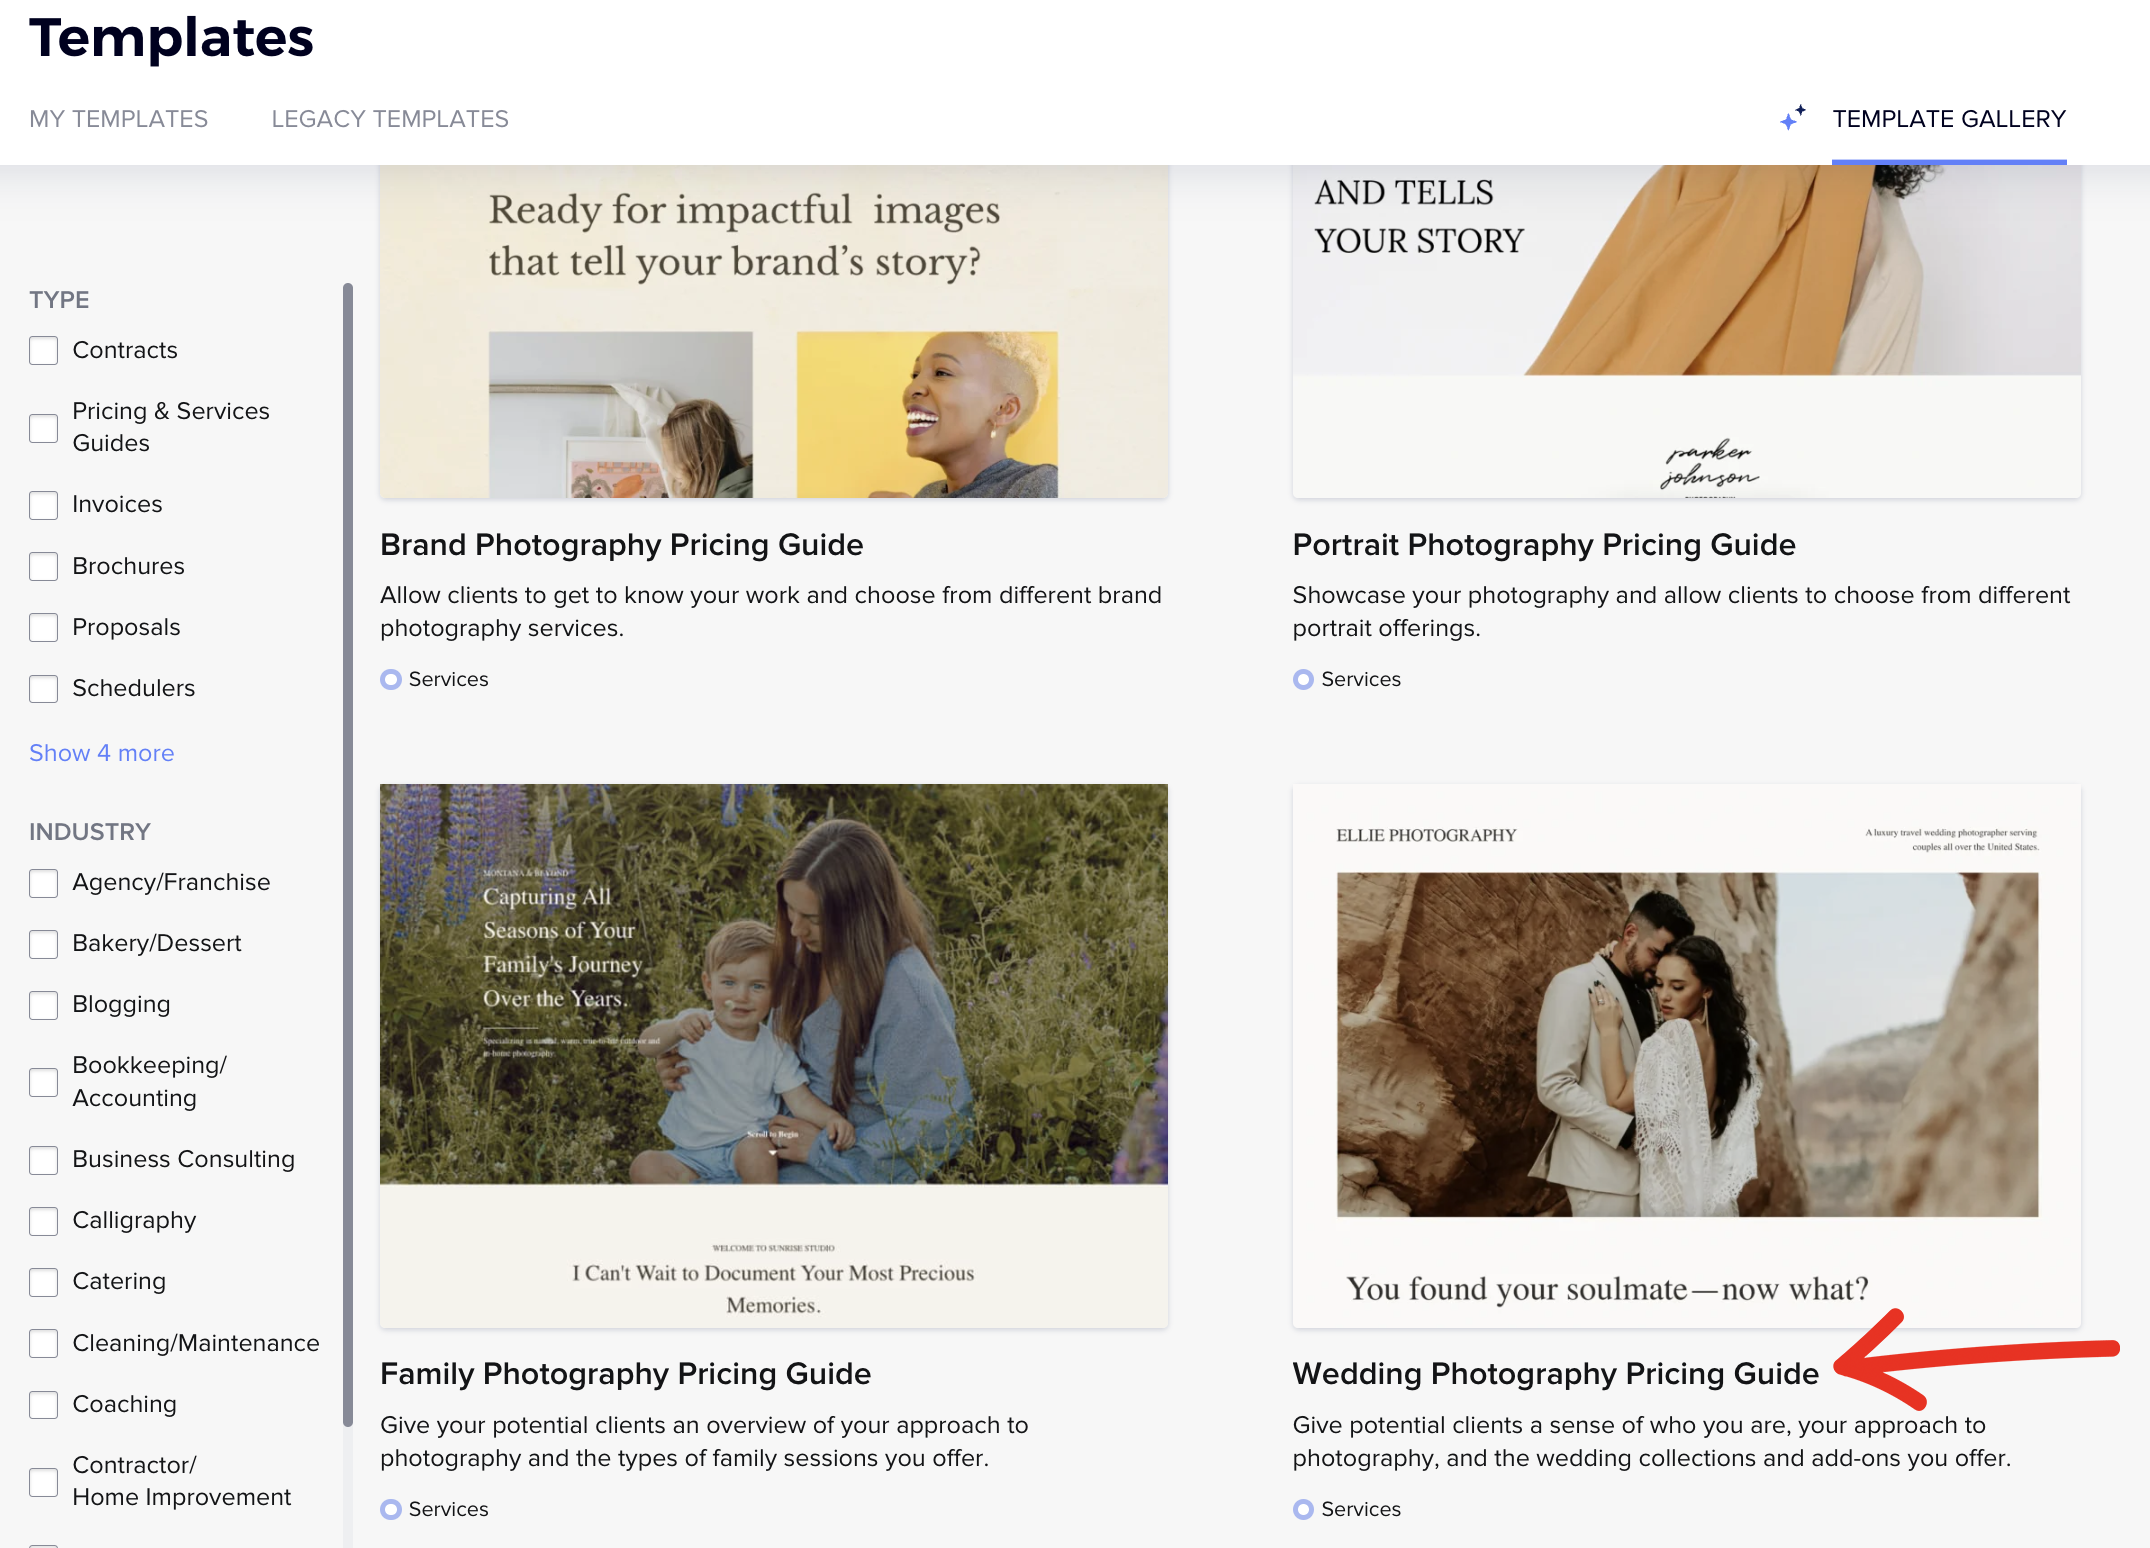
Browse through the available options and choose a template that would work best for your offerings and business.
From here, you can customize any of the fields to fit your brand and style. Also, you can add or take out pages, move them around, and give them the flow that works best for you.
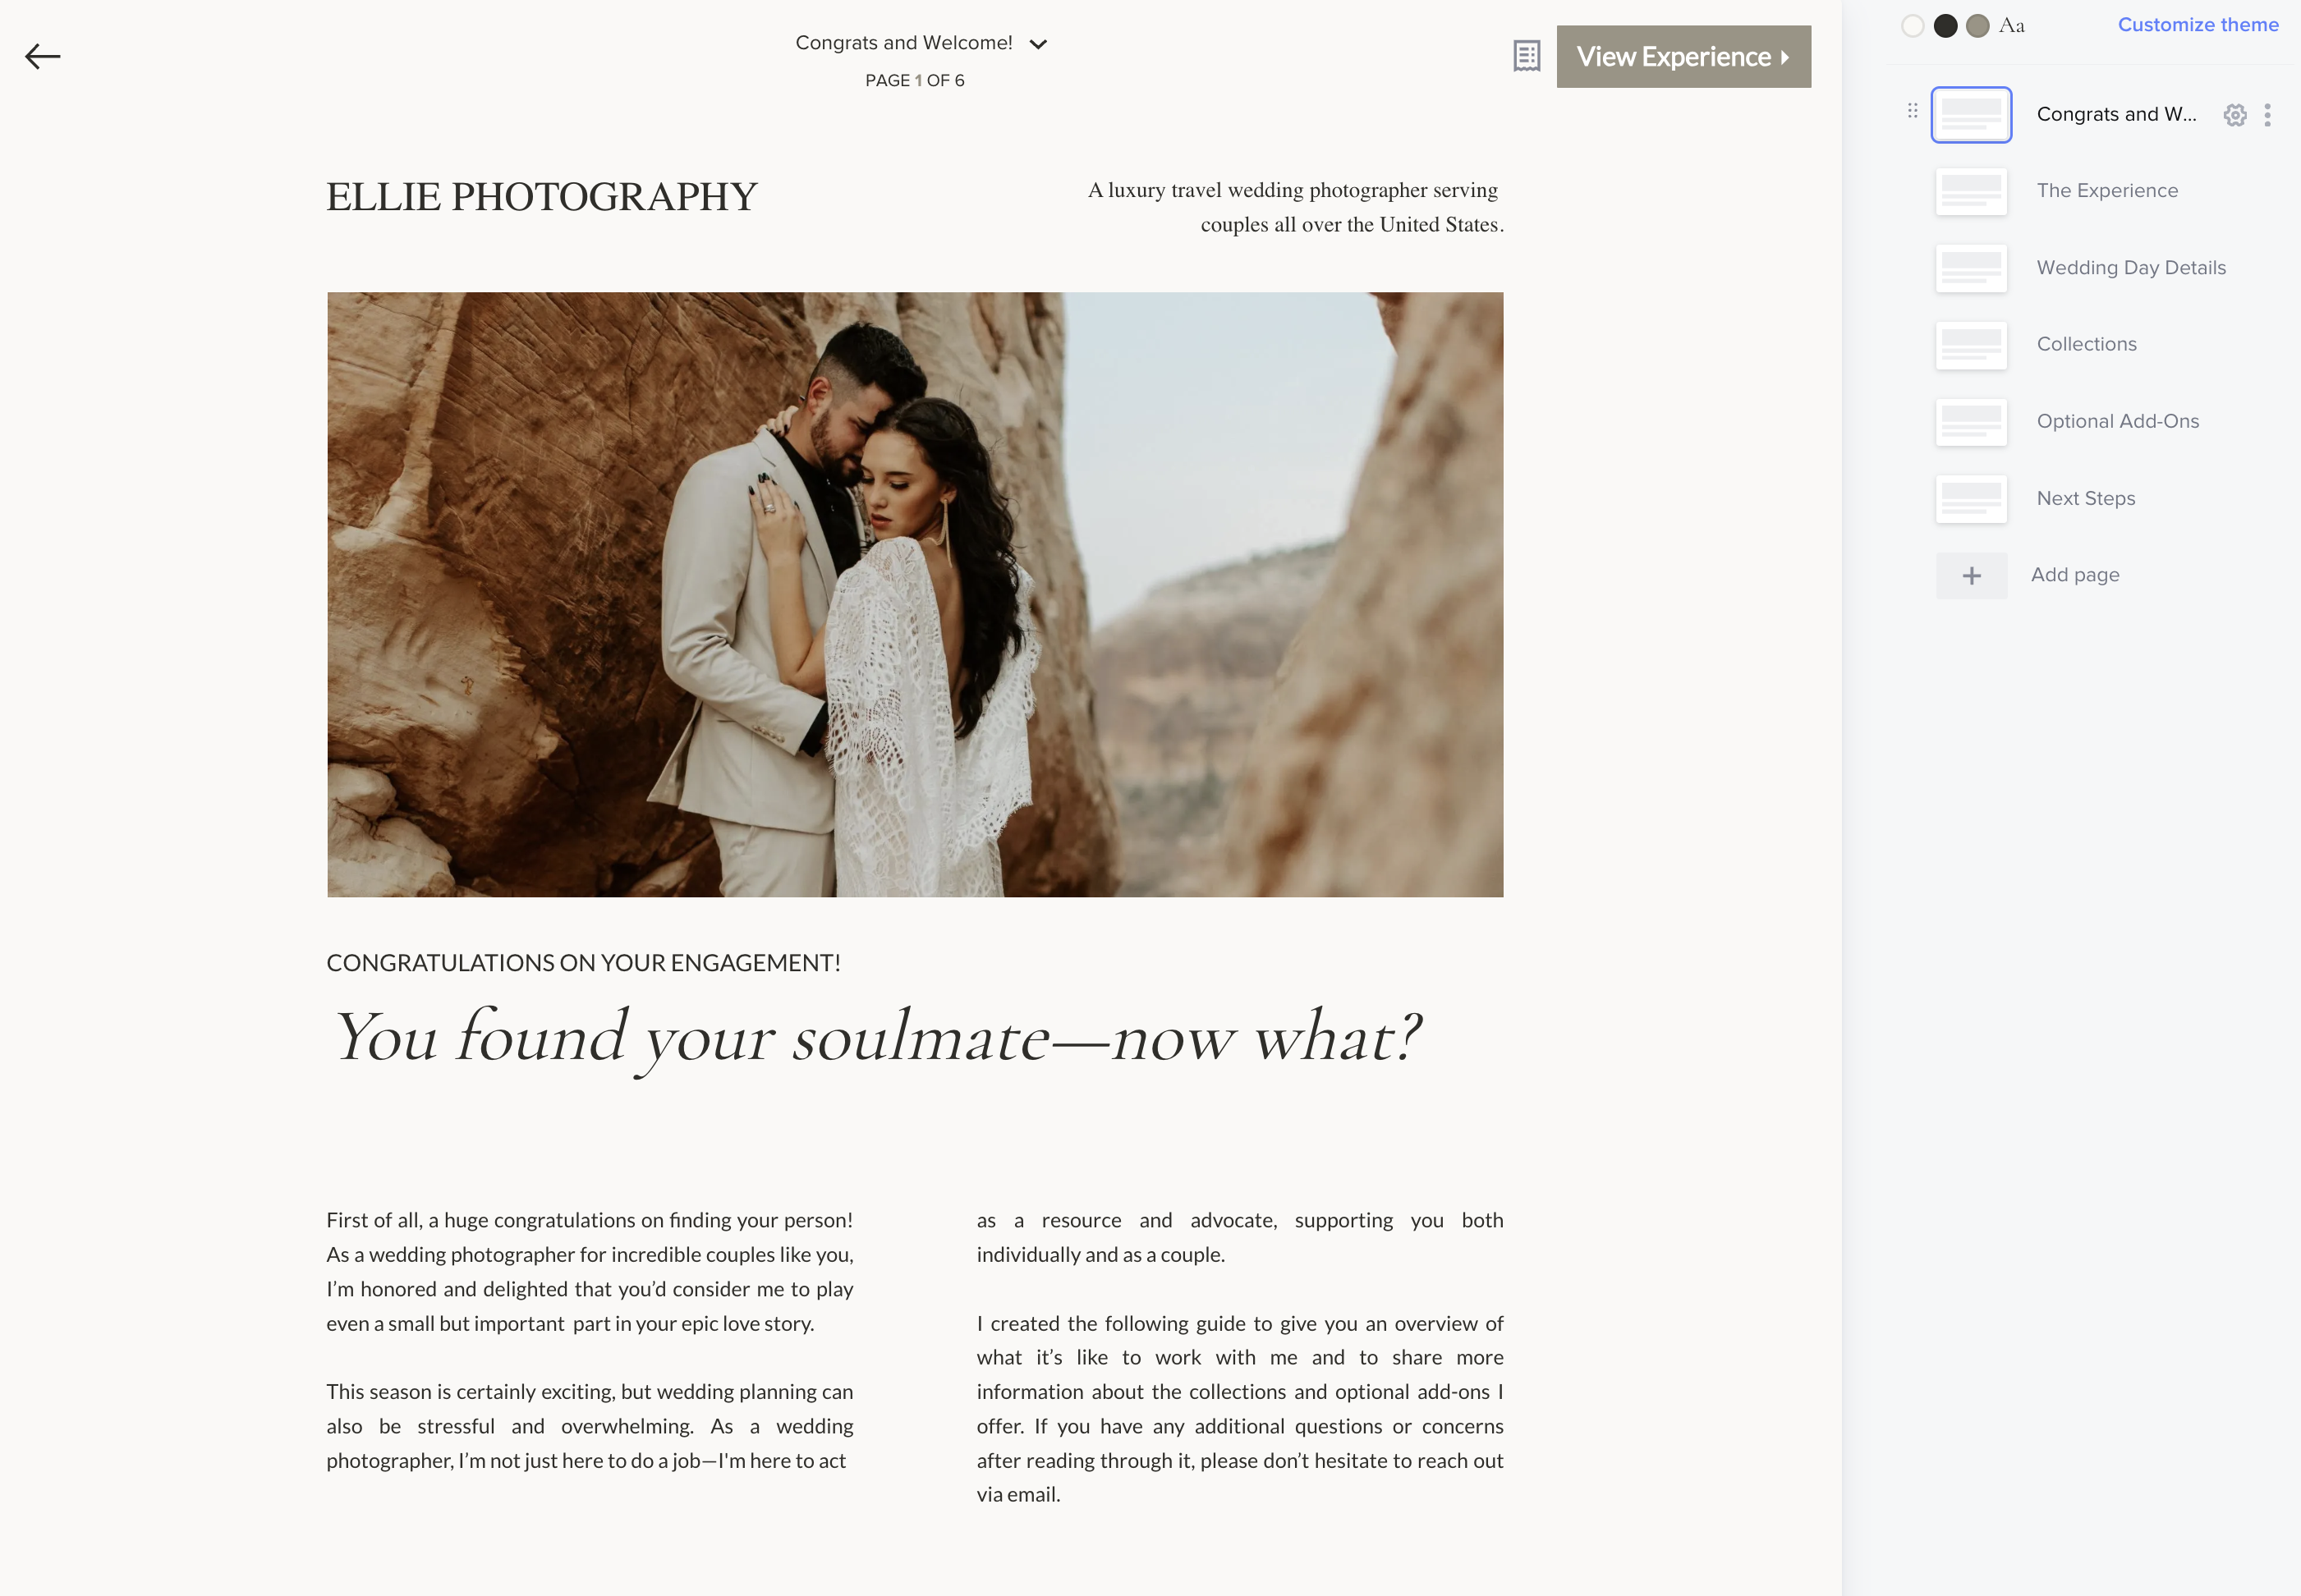
While you can use the template you selected as-is, you also have the flexibility to add or remove steps in order to make your booking workflow easier. Here’s a peek into what my workflow looks like!
My Step-By-Step Client Workflow
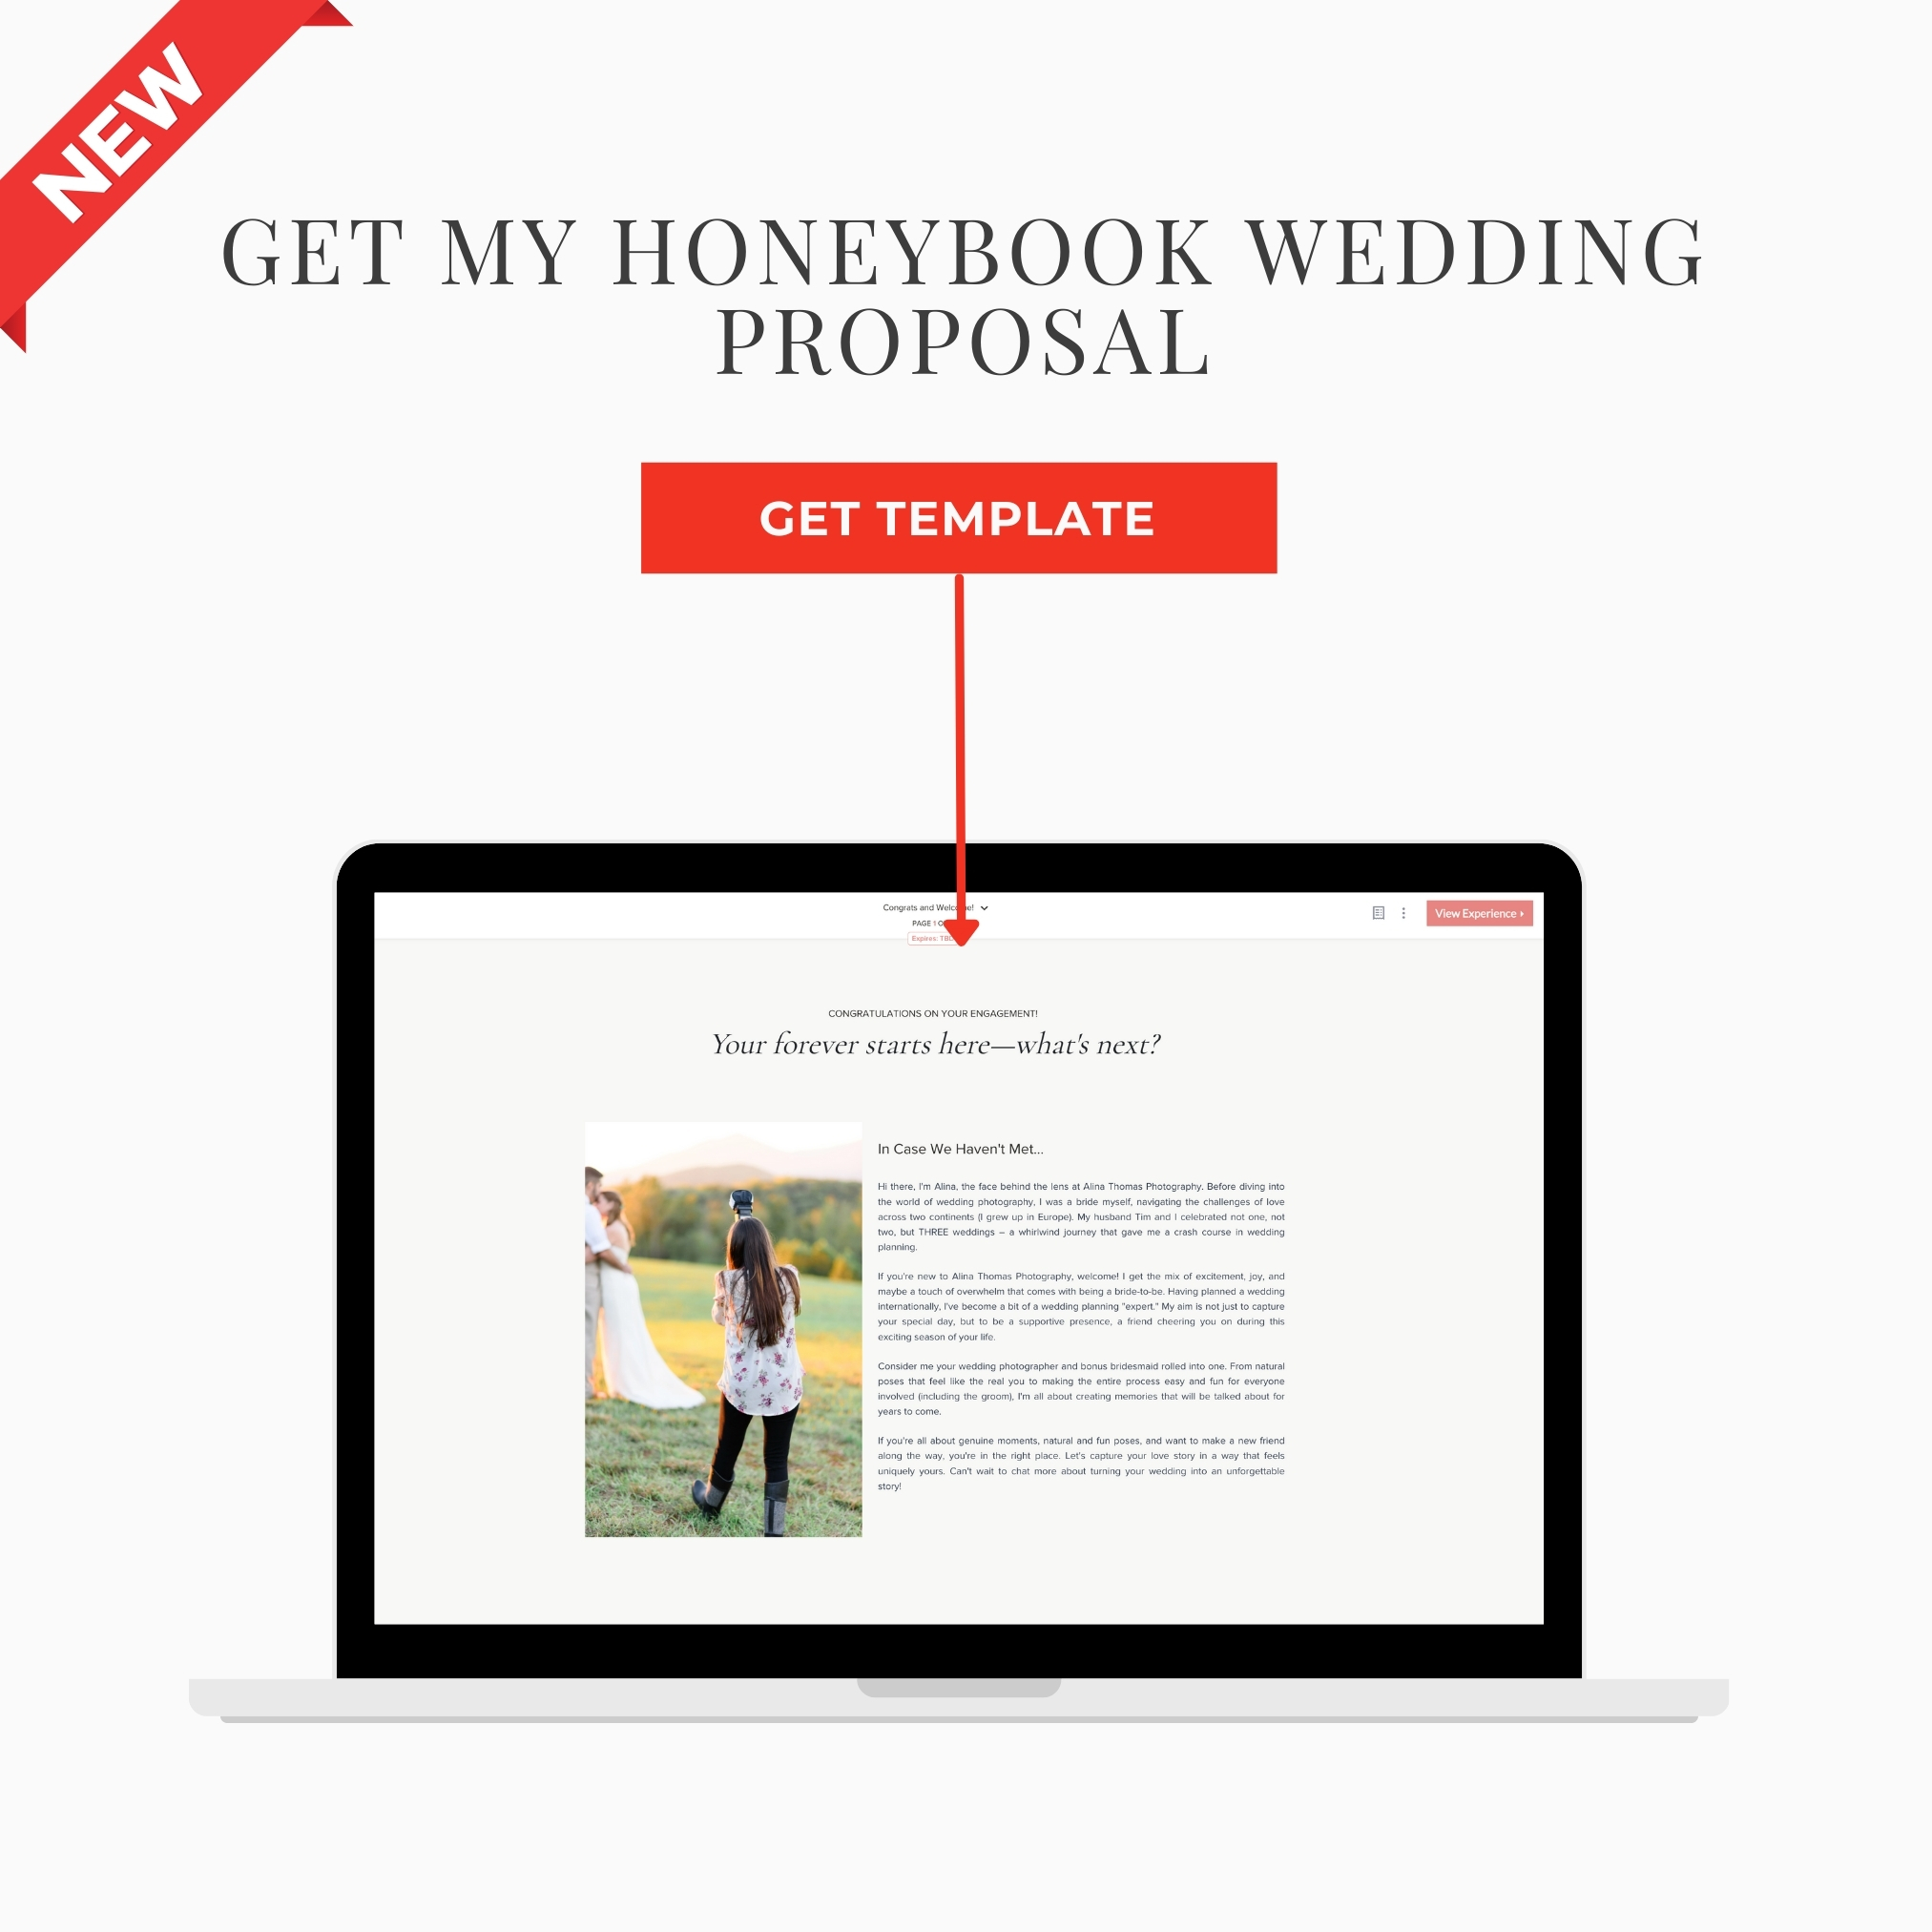
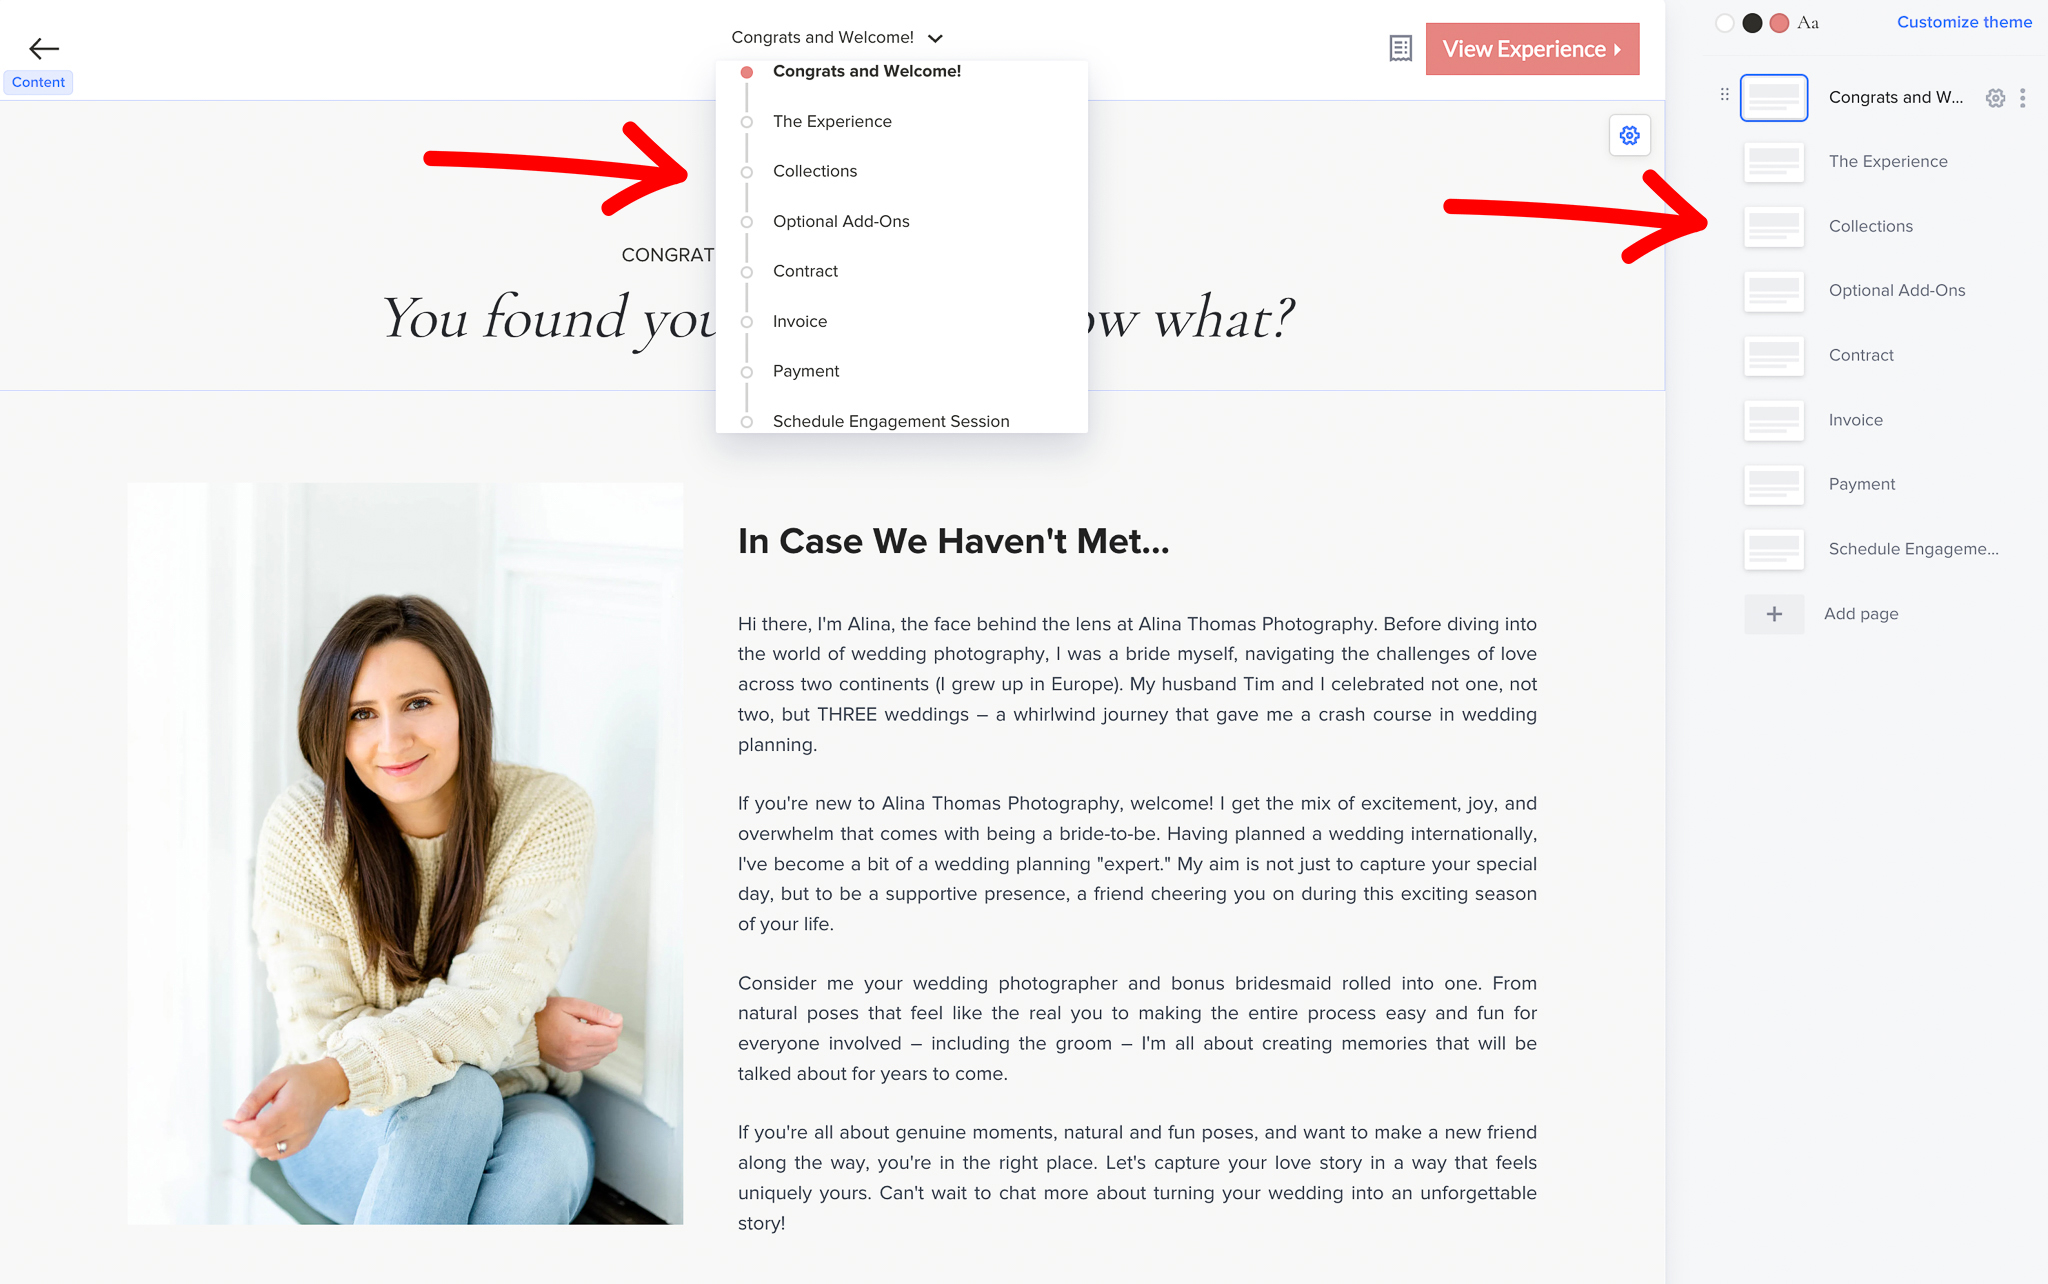
Step 1-2: This is the first page they see after they click the button in the email. Here, they can learn more about me and when they are ready, they can click on the “View Experience” button to read more about the ATP wedding experience.
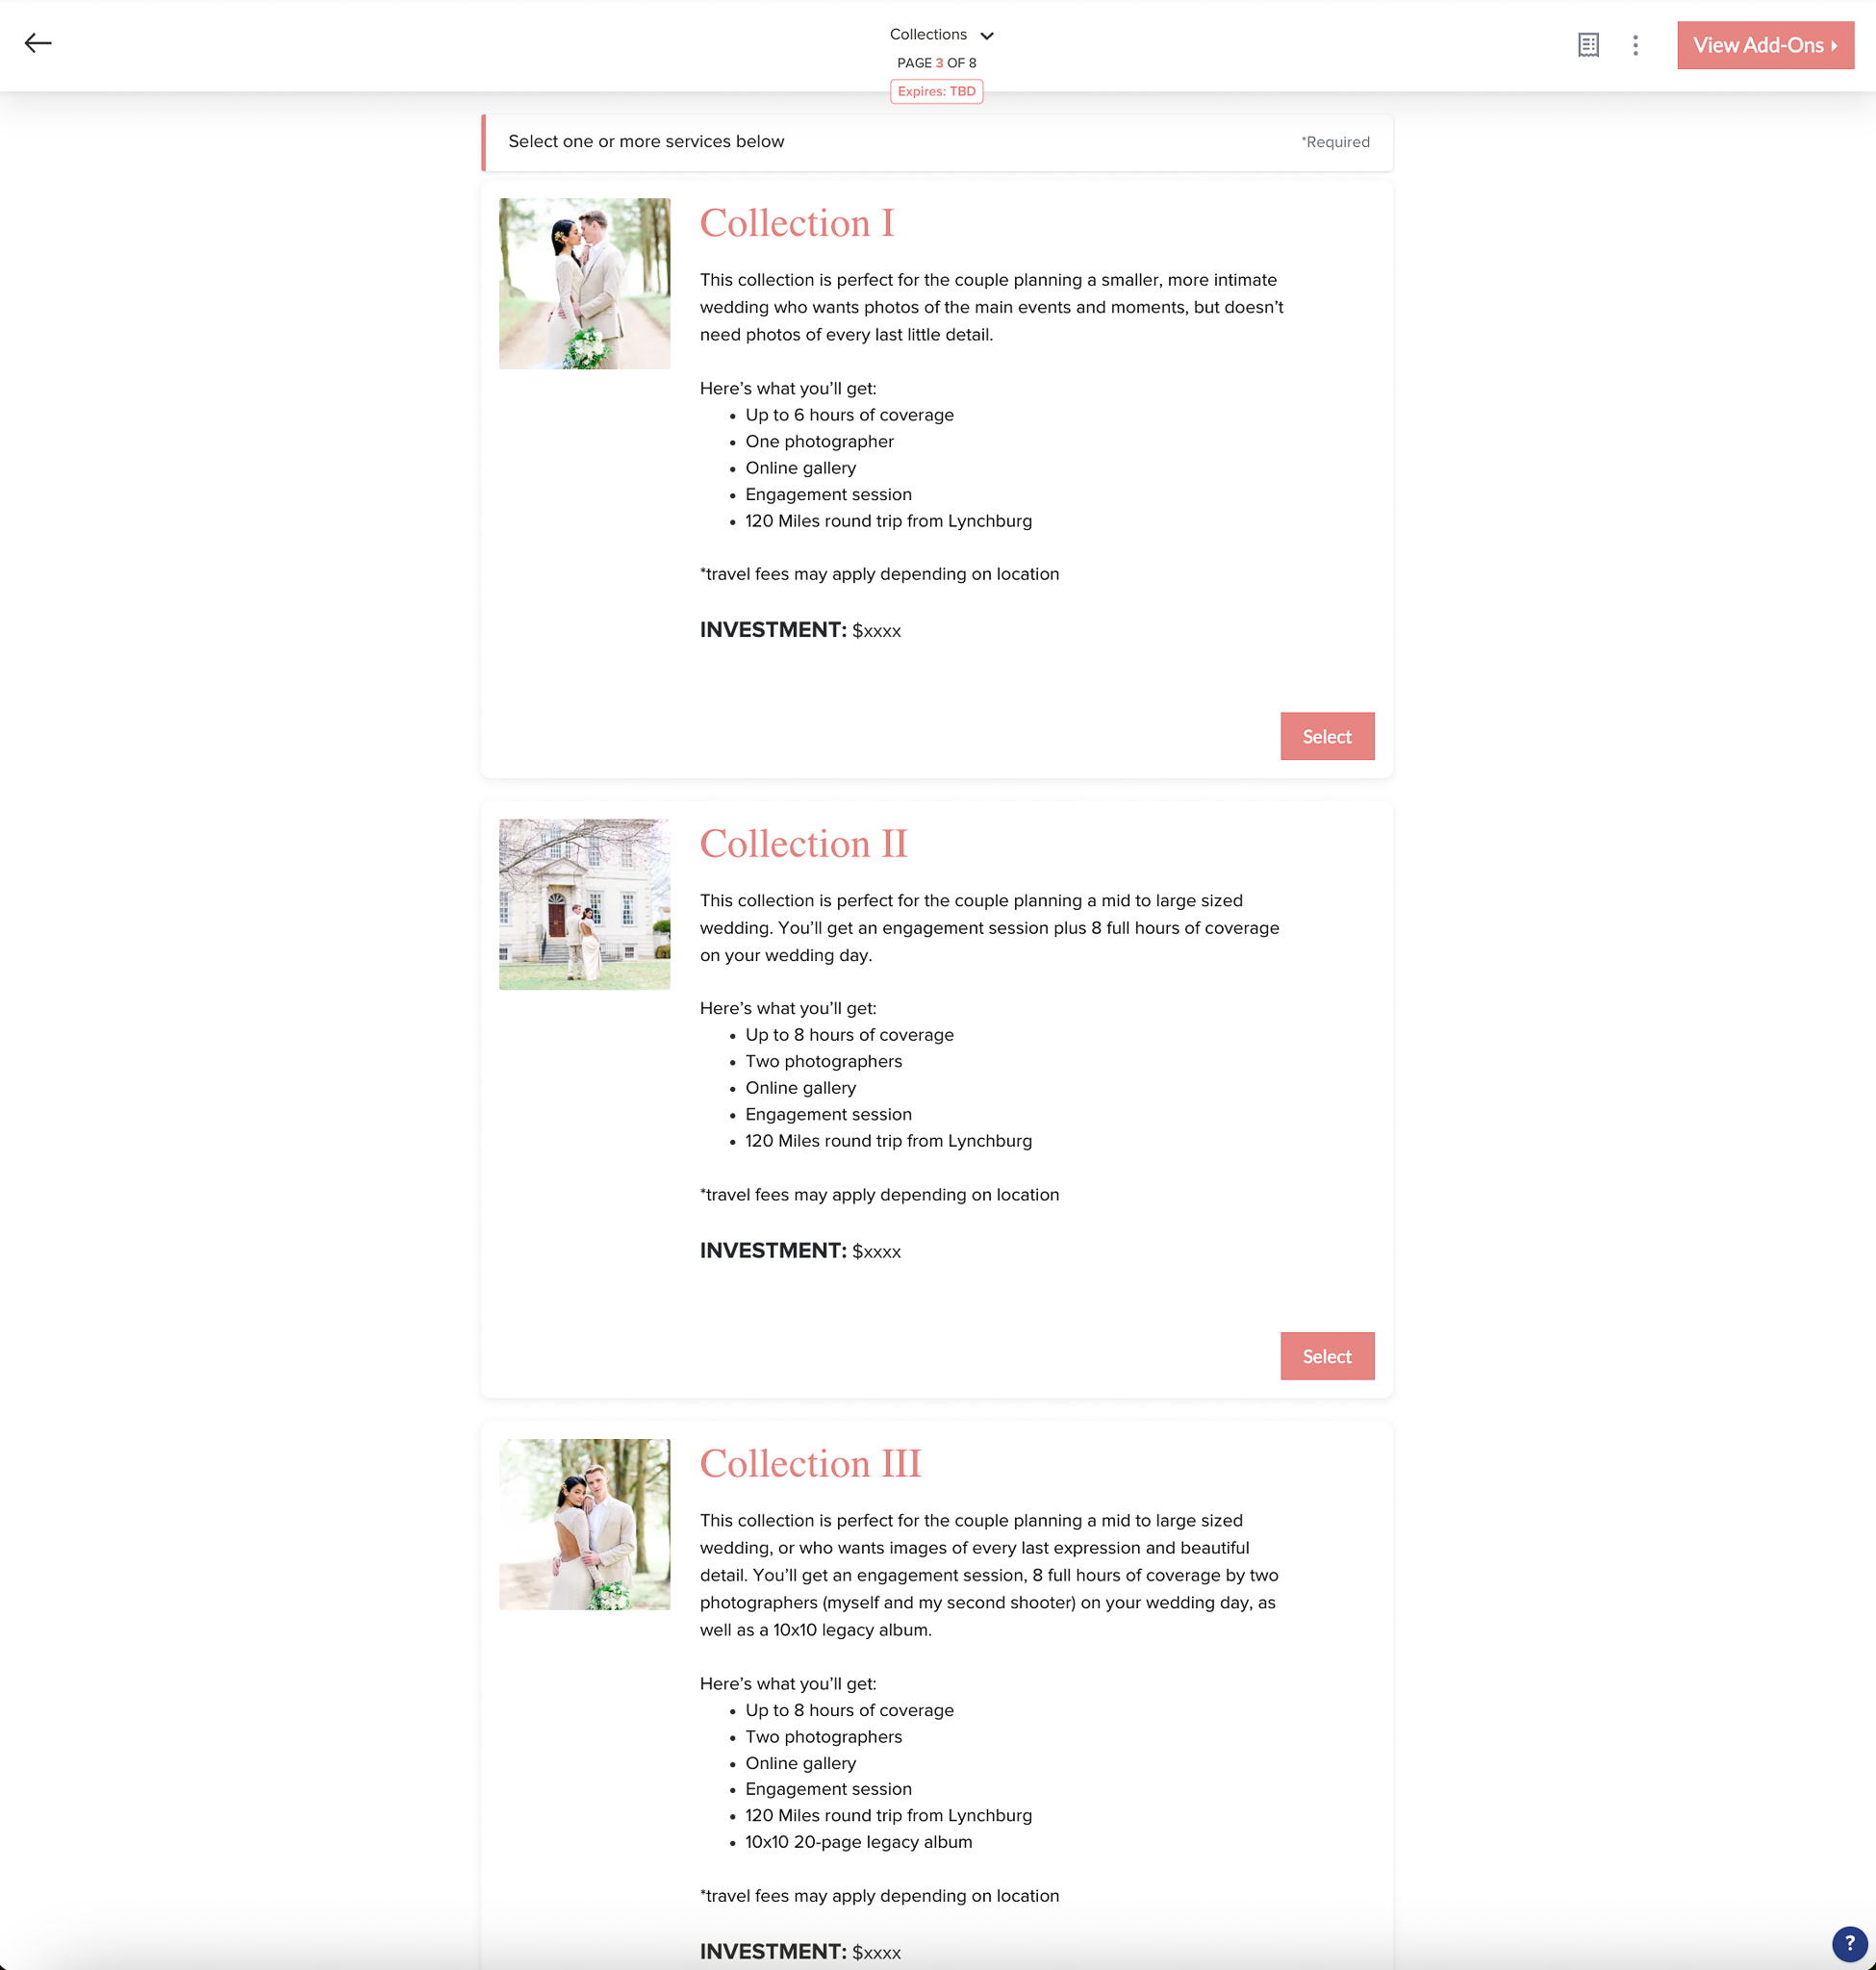
Step 3: From there, they can go to the next page where they can choose a wedding collection that works best for them. Here’s what that looks like.
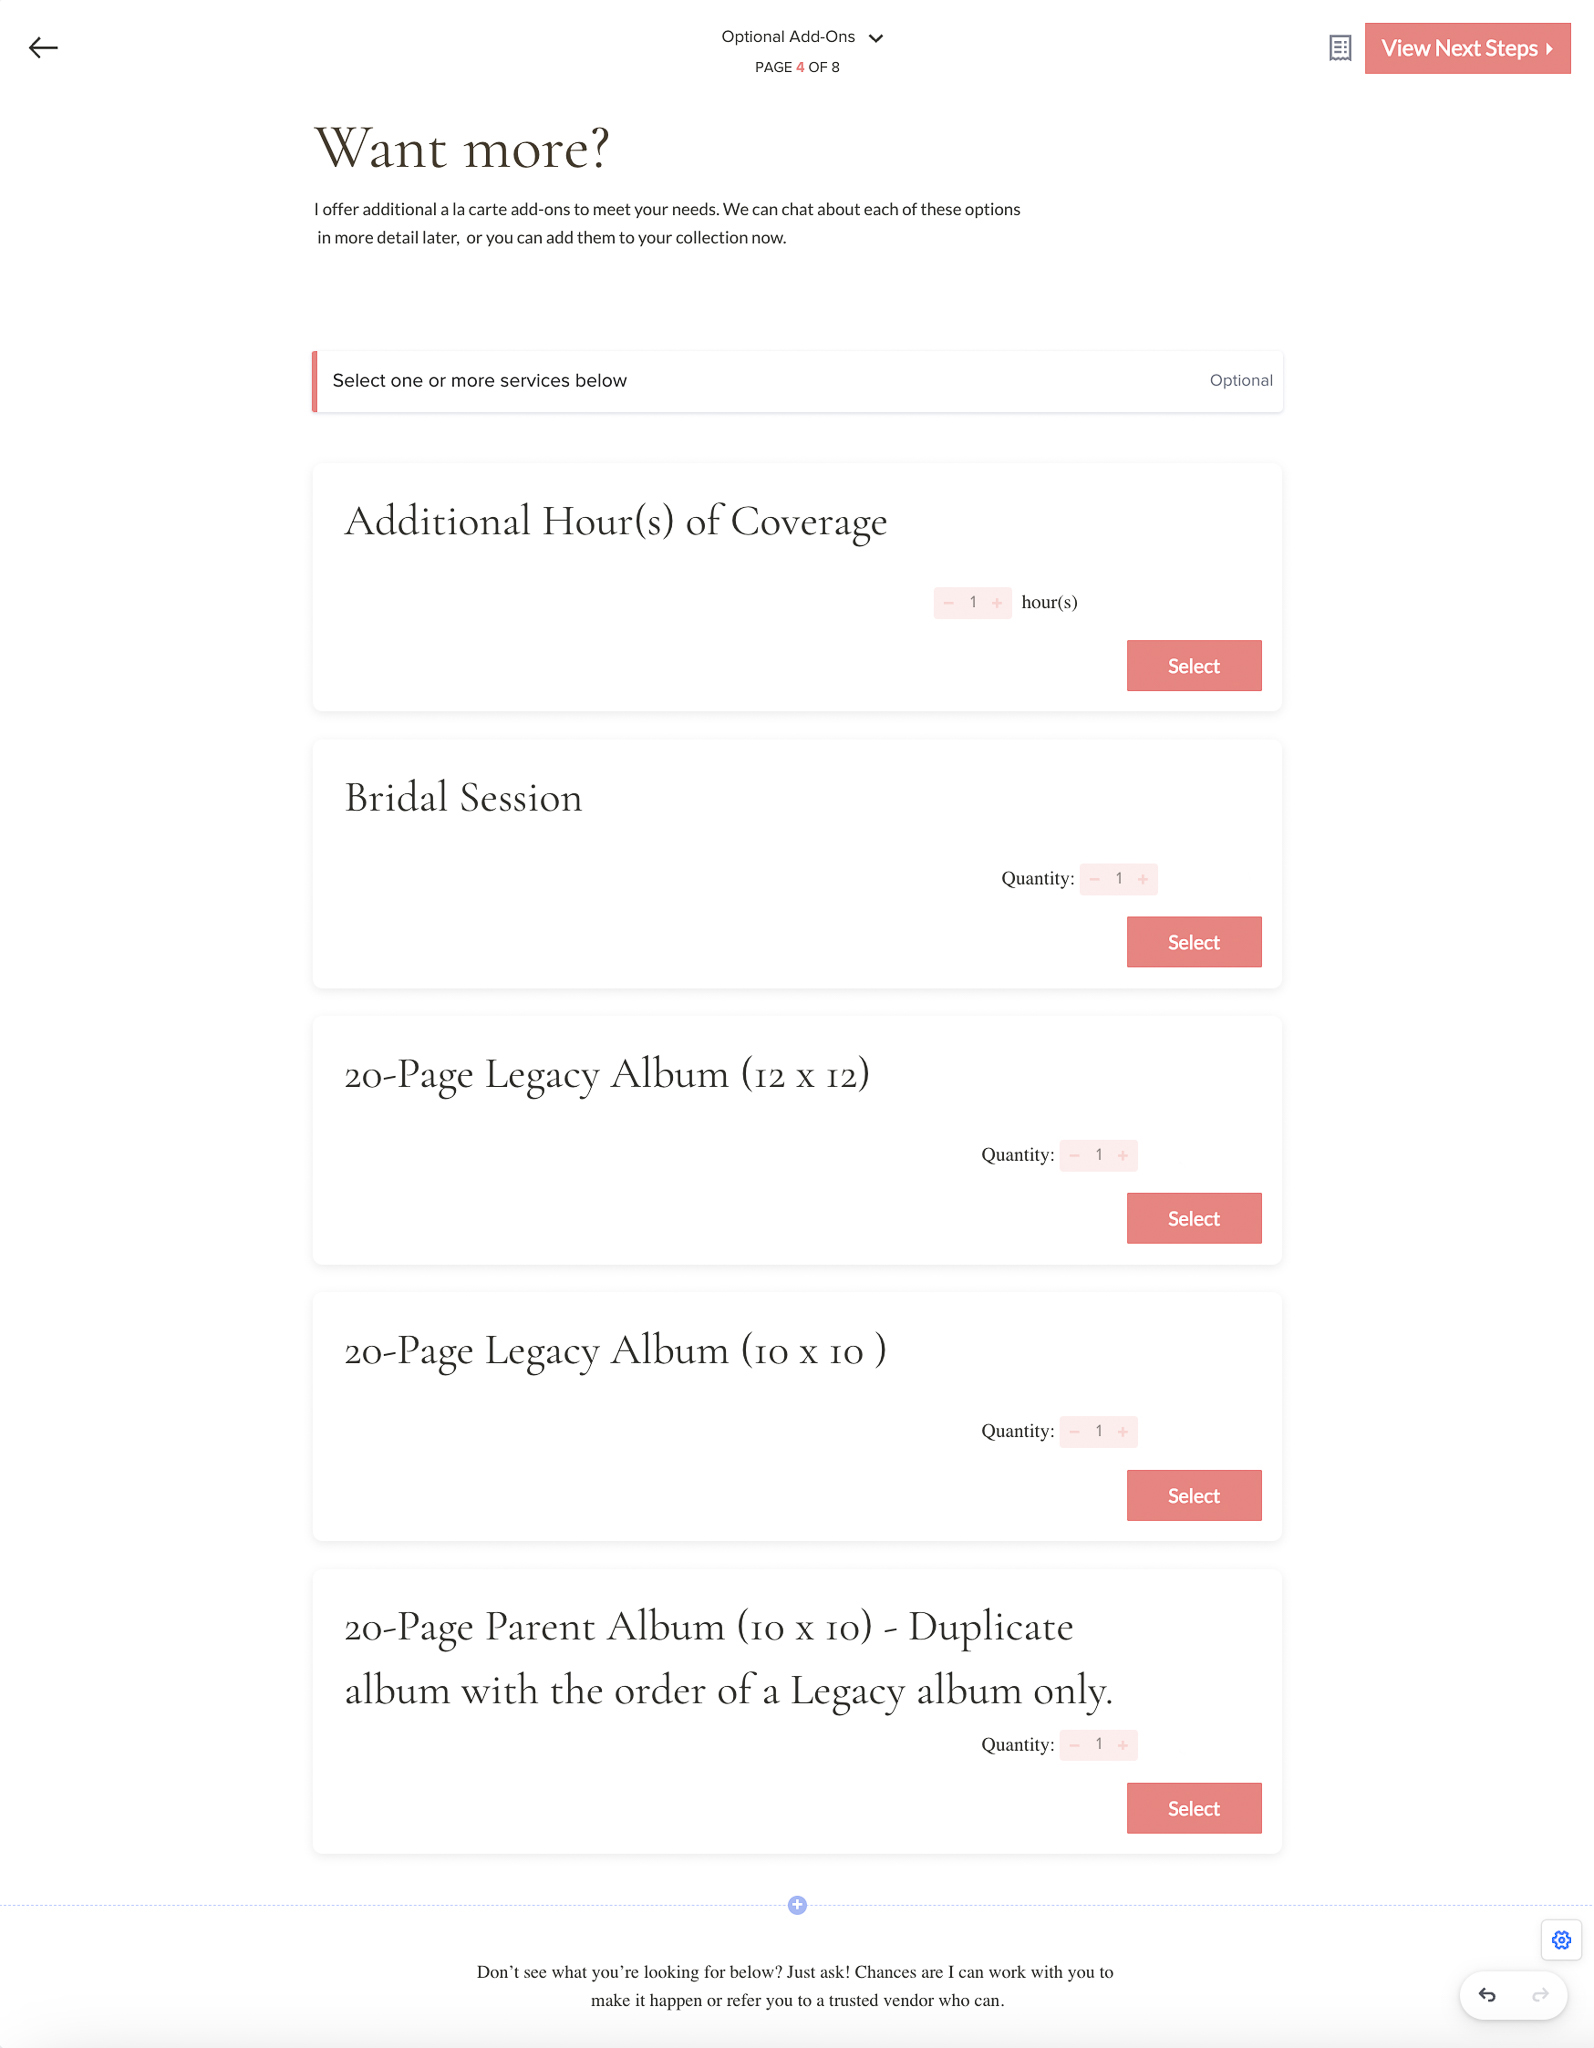
Step 4: Once they’ve selected their desired collection, they can click over to see the a la carte options.
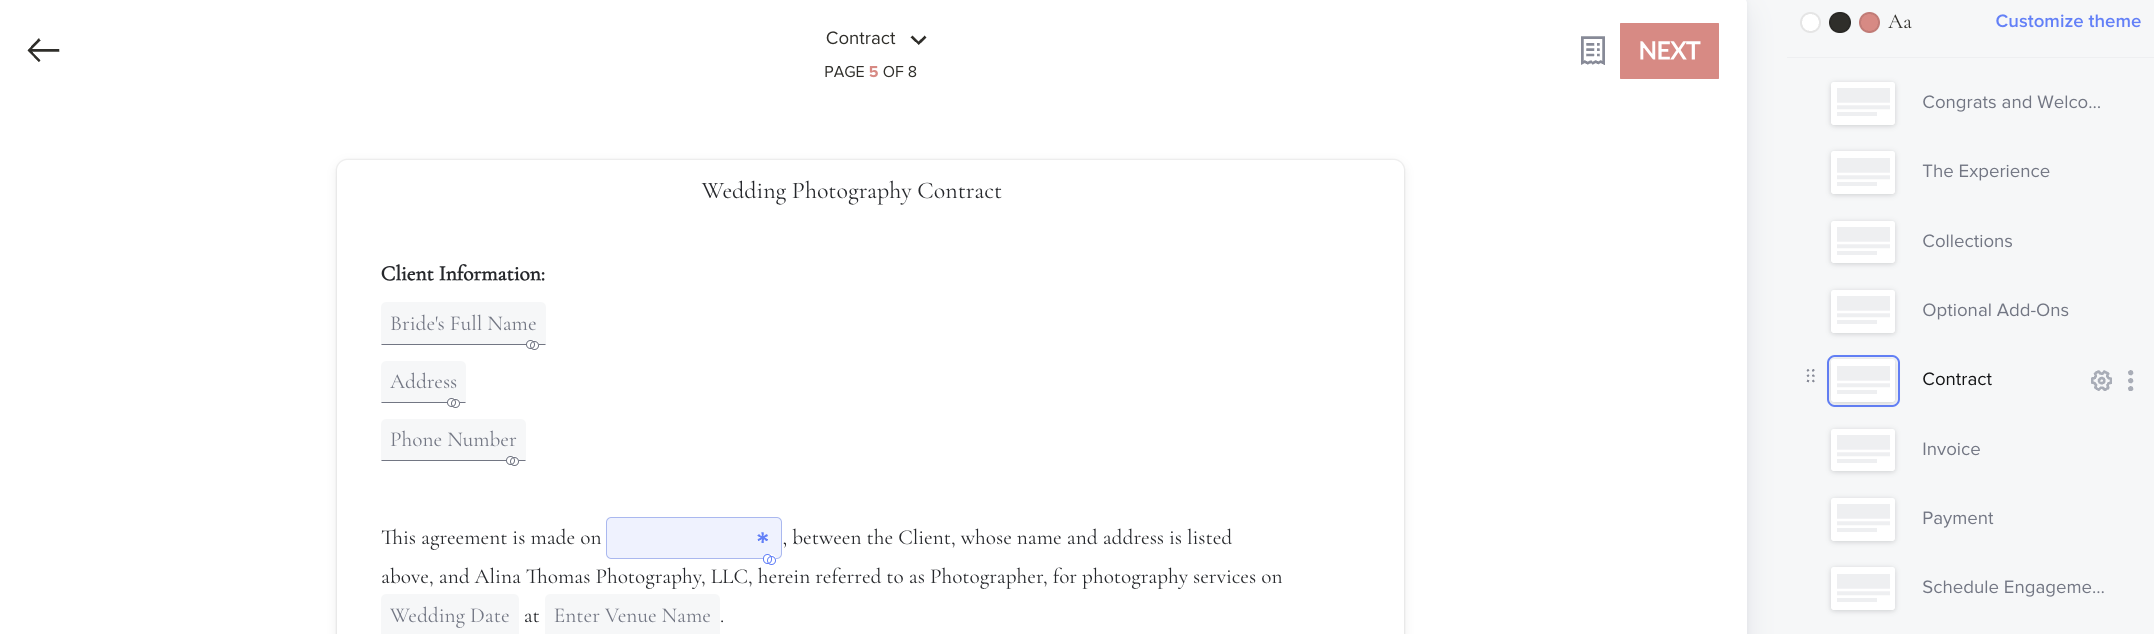
Step 5: Next, they get to read and sign the contract. I personally use this wedding contract template from The Lawtog.
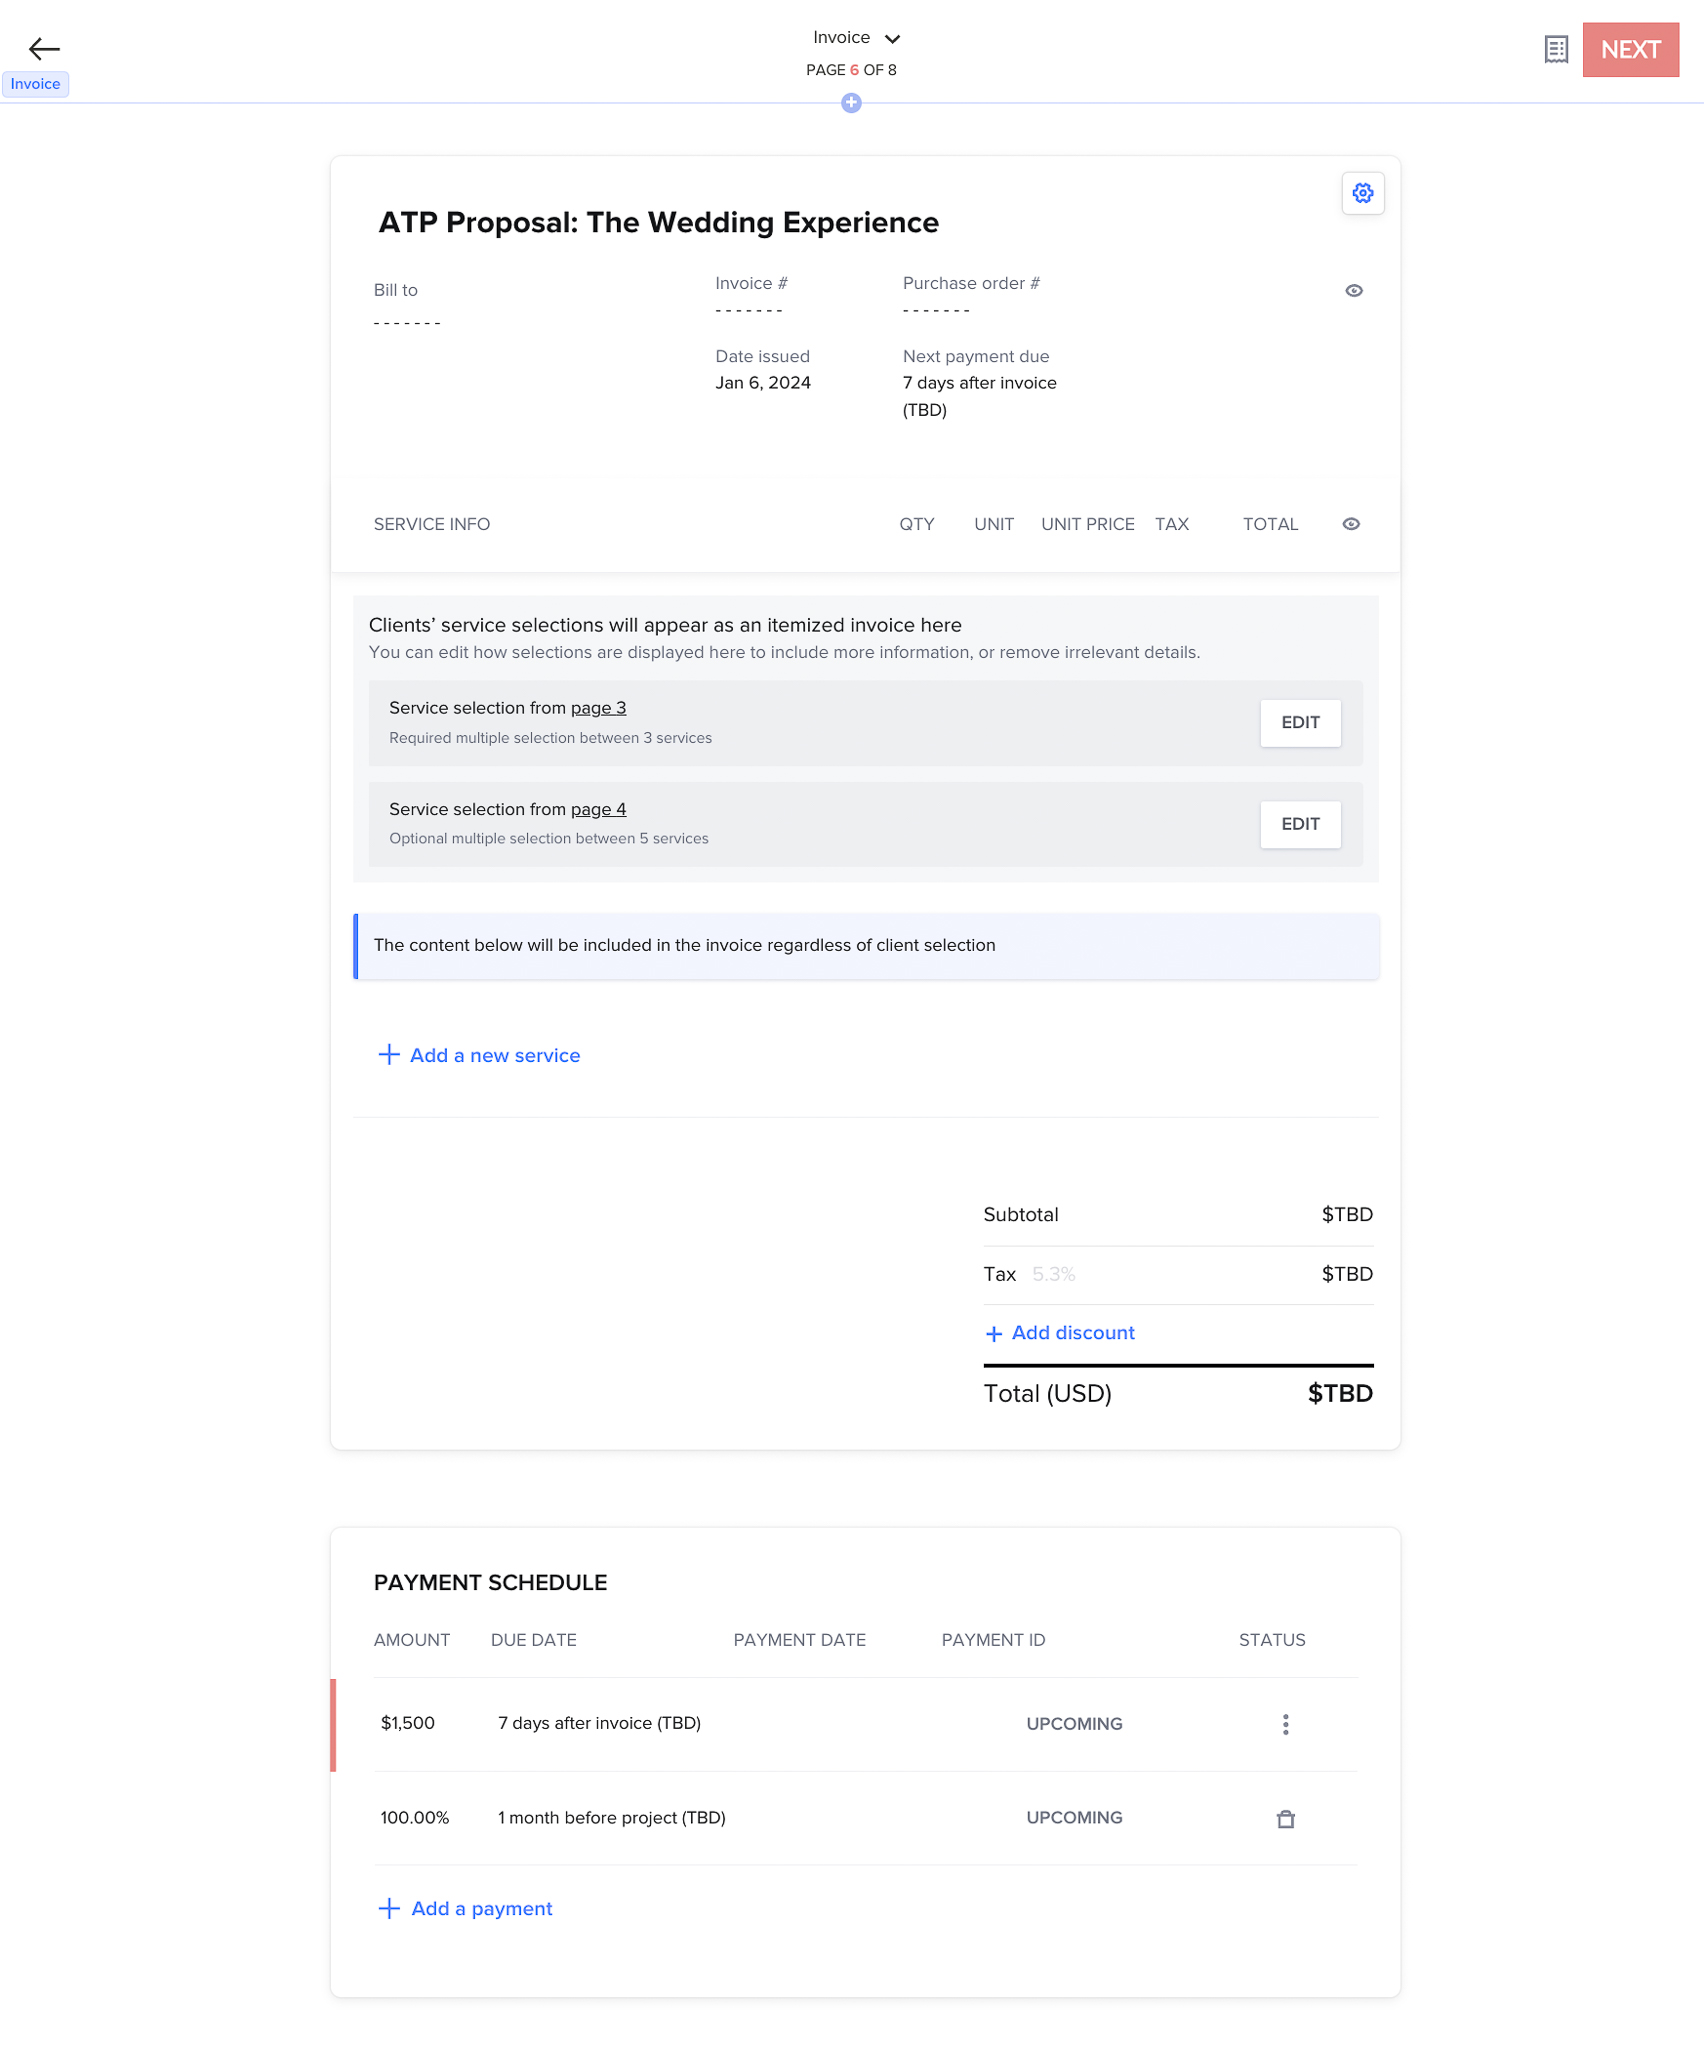
Step 6: Next, they get to see the invoice that lists everything they’ve selected for their package (the wedding collection + add ons). If you need to add a travel fee, you can include this before you email the smart file to your client. Another helpful thing here is that you can customize the payment schedule. Personally, I require a $1,500 retainer fee with the remaining balance due 4 weeks before the wedding.
Step 7: Next, they’ll be prompted to pay the invoice. Here’s what that looks like.

Step 8: While this could be the end of the workflow, I decided to go one step further and have them schedule their engagement session on my calendar as soon as they submit their payment.
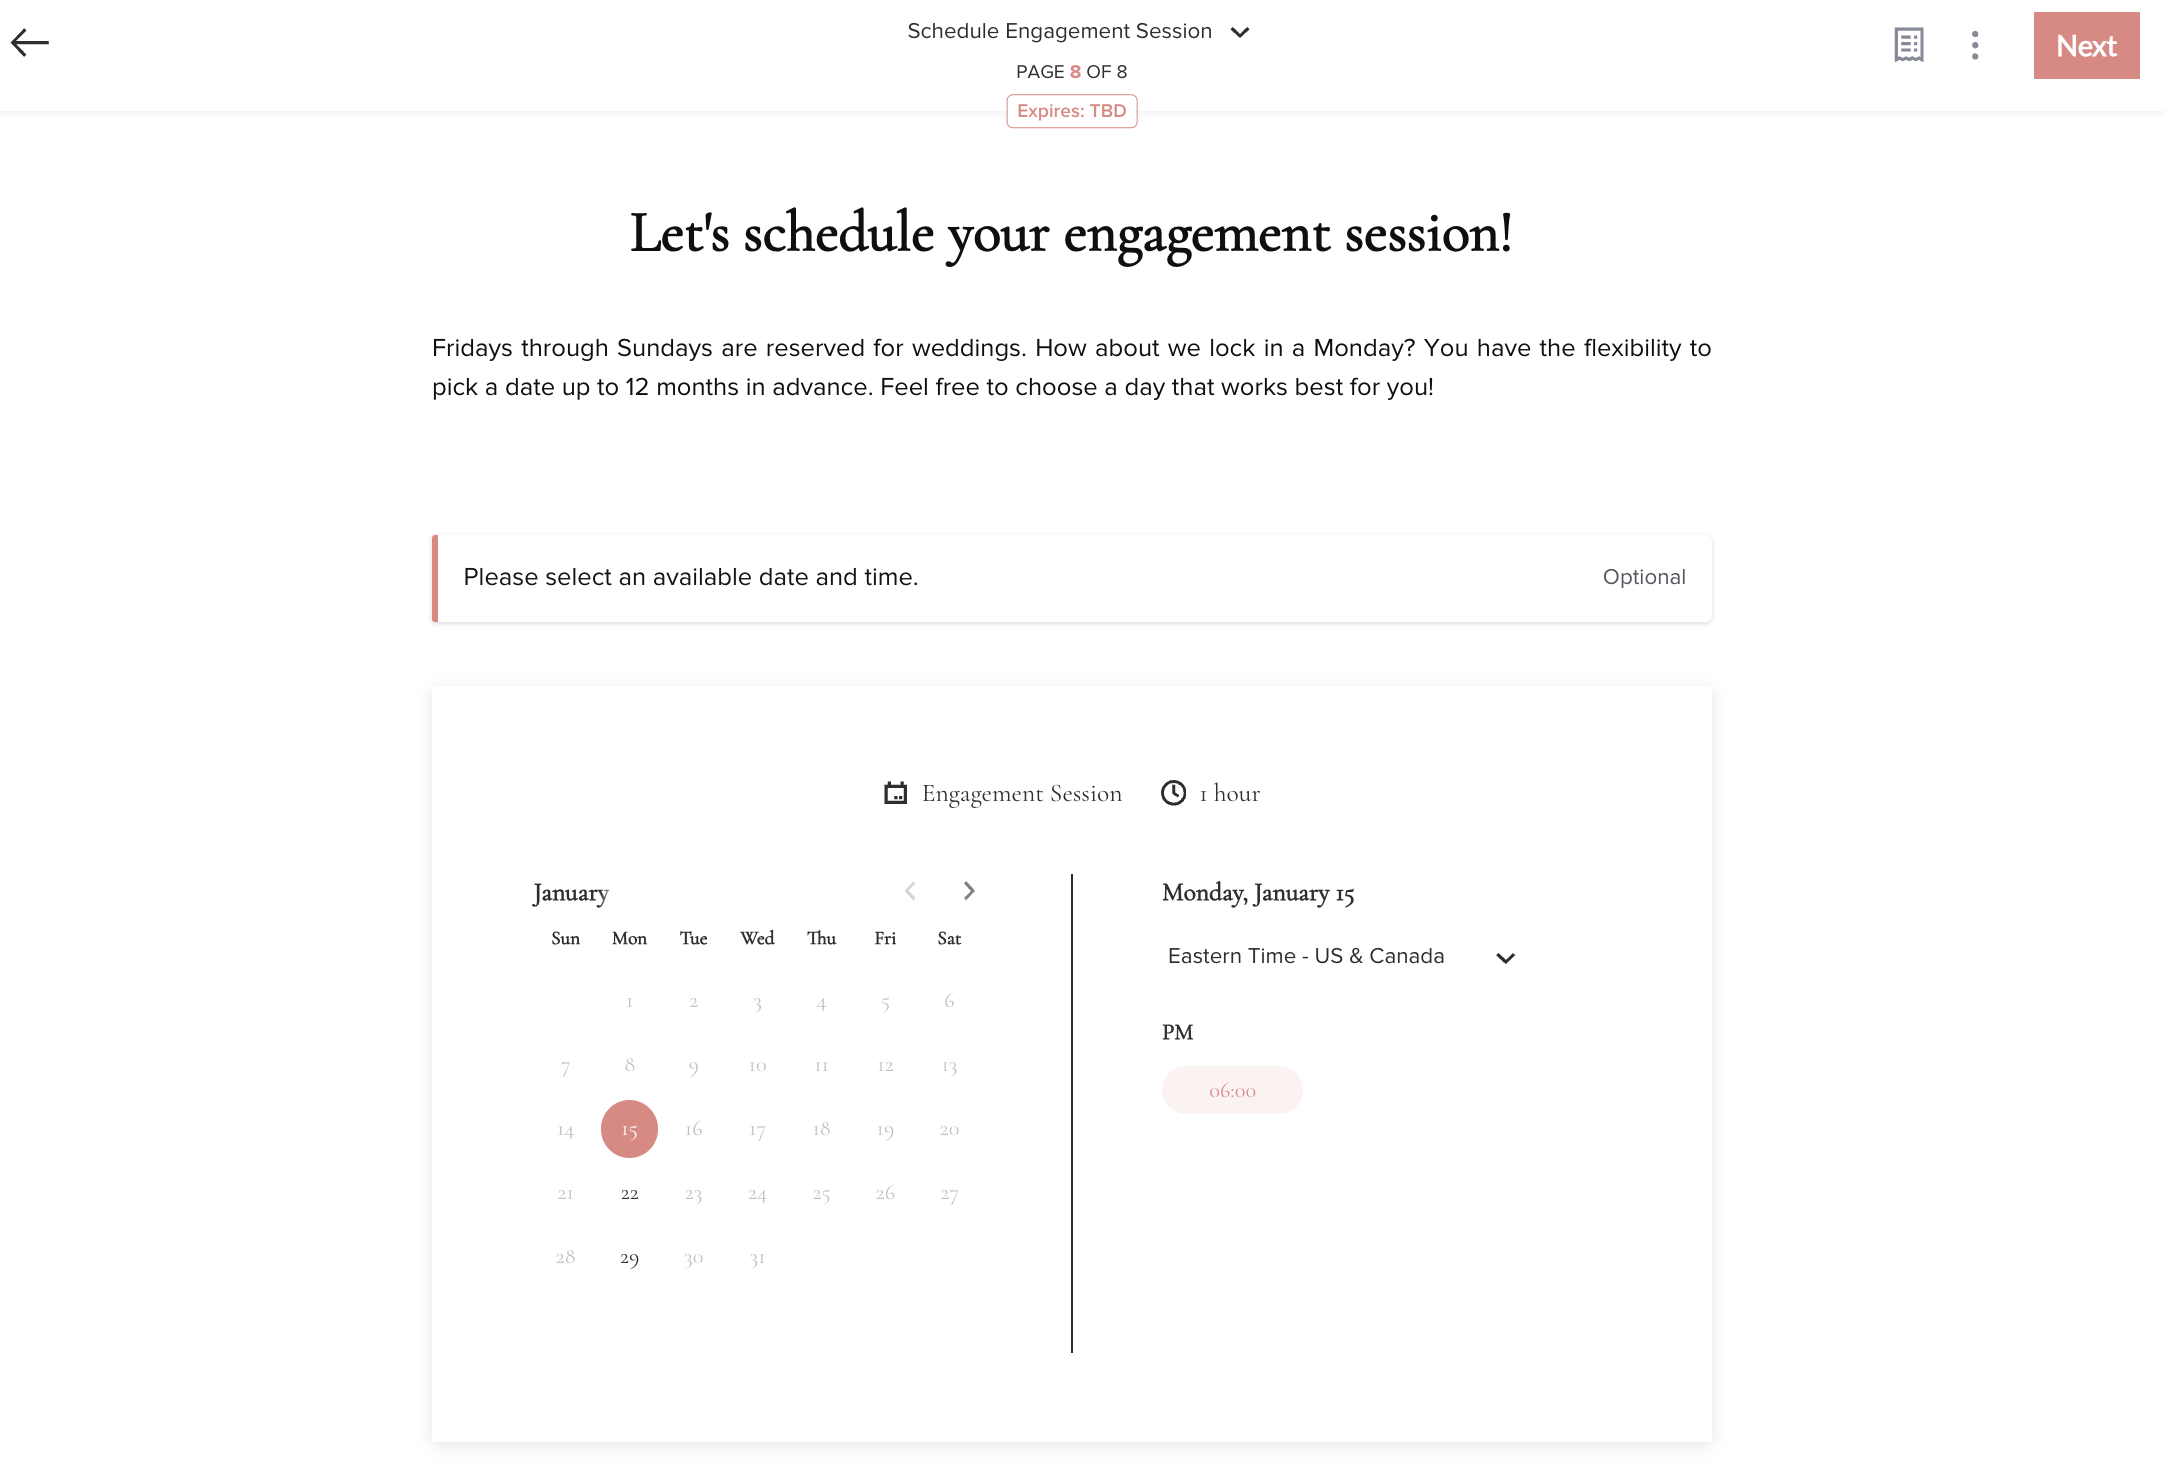
Once they book their engagement session, they’ll get an email confirmation that includes their session details, as well as tips on how to choose their outfits if they need help. In the past, this would require me to manually send out at least 2 additional emails, but now this is all done automatically thanks to HoneyBook’s smart files feature. If you photograph between 10-15 weddings a year, just think about how much time this would save you in email communication!!
Time Saving Features You’ll Love
- Add expiration dates to your Smart Files
- Custom payment schedules
- Instant calendar booking
- Automatic confirmations
Final Thoughts: Why I Use HoneyBook
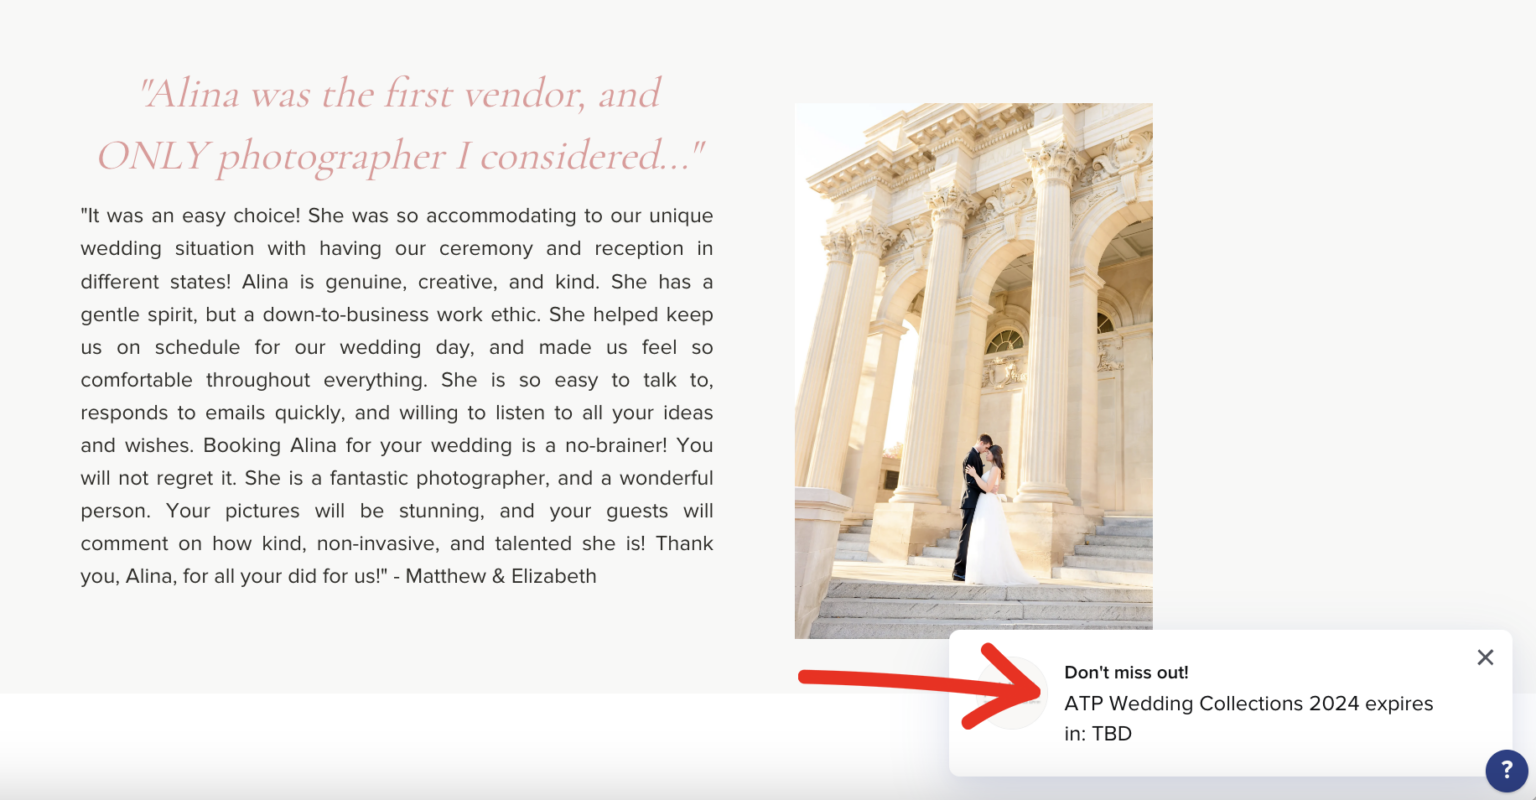
And this is it! This is how I use HoneyBook to automate my client workflow. Oh, and my favorite part of all of this?! You can add an expiration date to the smart file and HoneyBook will display an expiration message at the bottom of the page to create urgency and reduce ghosting.

Disclaimer: For your convenience, this post contains affiliate links. When you use these links we may earn a small commission at no additional cost to you. This helps us to be able to continue sharing free photography tips and resources like this with you.