

Today, I want to chat with you about how you can add a Messenger chat box to your website. It’s incredibly important to make it as easy as possible for your potential clients to contact you. Not everyone that visits your website will fill out your contact form.
That’s where the Messenger bot comes in!
The Messenger bot makes it extremely simple for you to manage conversations directly through your page’s inbox.
Here’s how to set up a Messenger chat box on your website using ManyChat:
1. Create a ManyChat account.
2. Go to “Growth Tools” ⟶ “New Growth Tool” ⟶ “Customer Chat”.
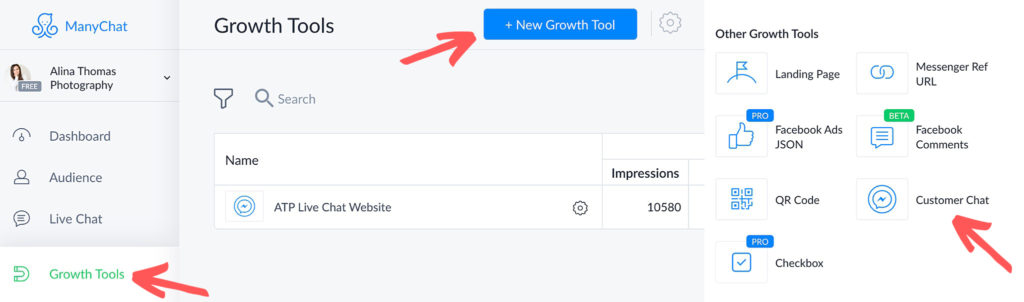
3. Name your Growth Tool something that is easy to remember. I named mine “ATP Website Messenger Chat”.
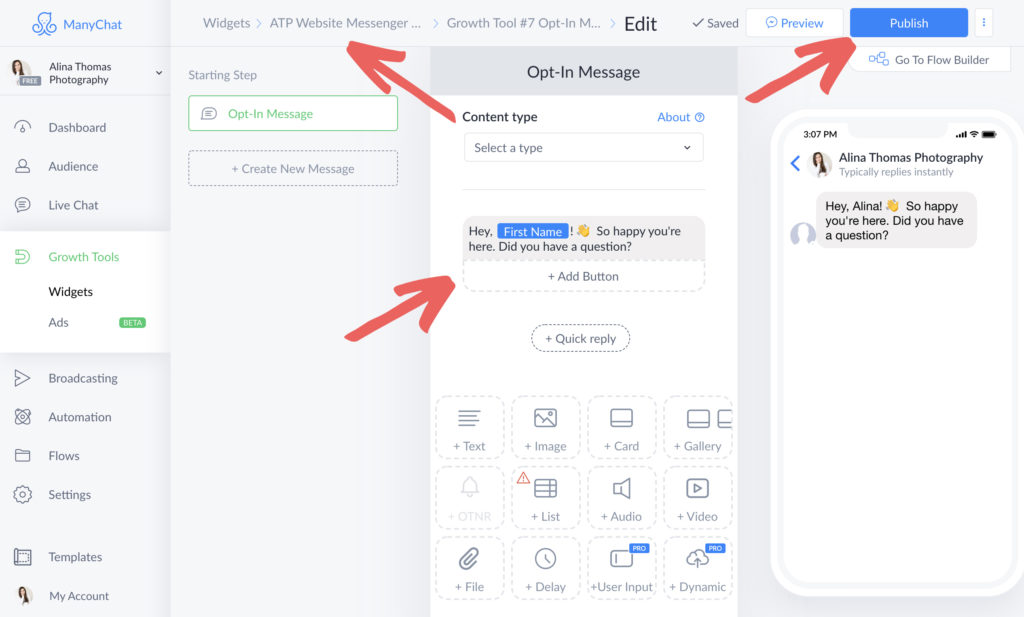
4. Next, click “Edit” to customize the initial message that your customers will see when they click the chat widget on your site to start a conversation.
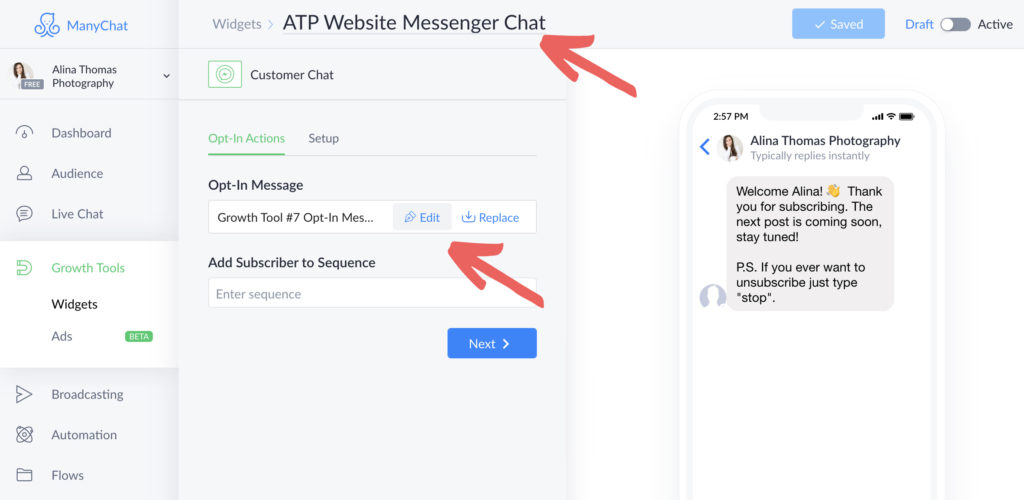
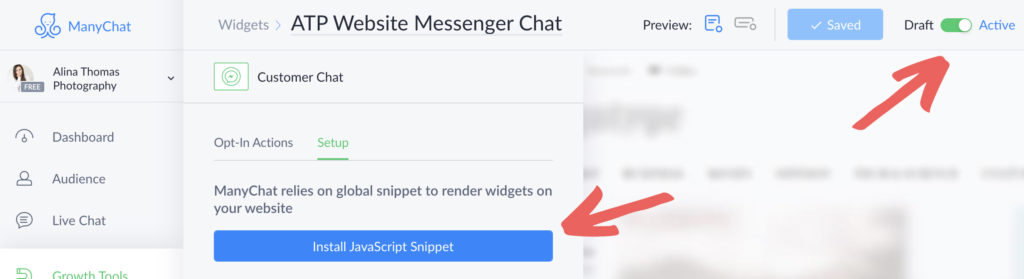
5. When you’re done editing your message, click “Publish”. Next, click “ATP Website Messenger Chat” (or whatever you named your Growth Tool).
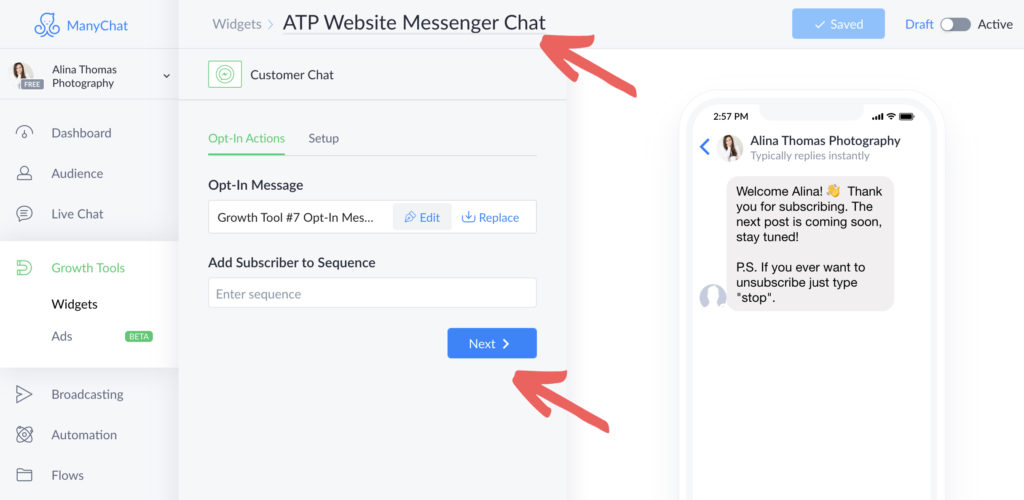
6. In the new window, click “Next”. Here, you are going to find a few additional customizations that you can make, from changing the color of your widget, to choosing which pages to display on or hide from, etc.
7. After you’ve finished making all the changes you’d like, change your widget from “Draft” to “Active”, in the top right corner. Next, click the blue “Install JavaScript Snippet” button.
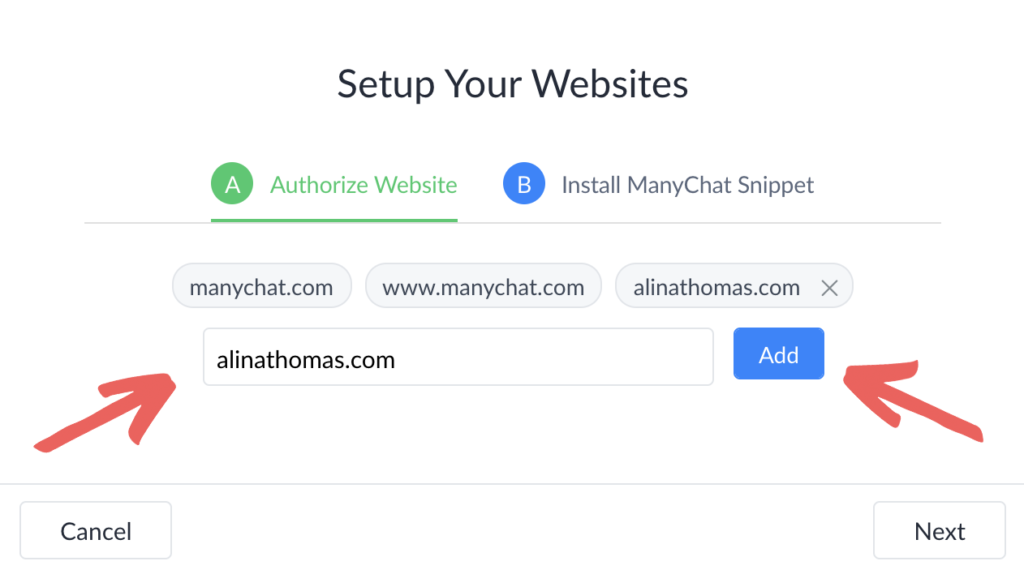
8. Enter your site name, and click “Add”.
9. After you click “Next”, ManyChat will generate a code that you can copy and paste into your website.
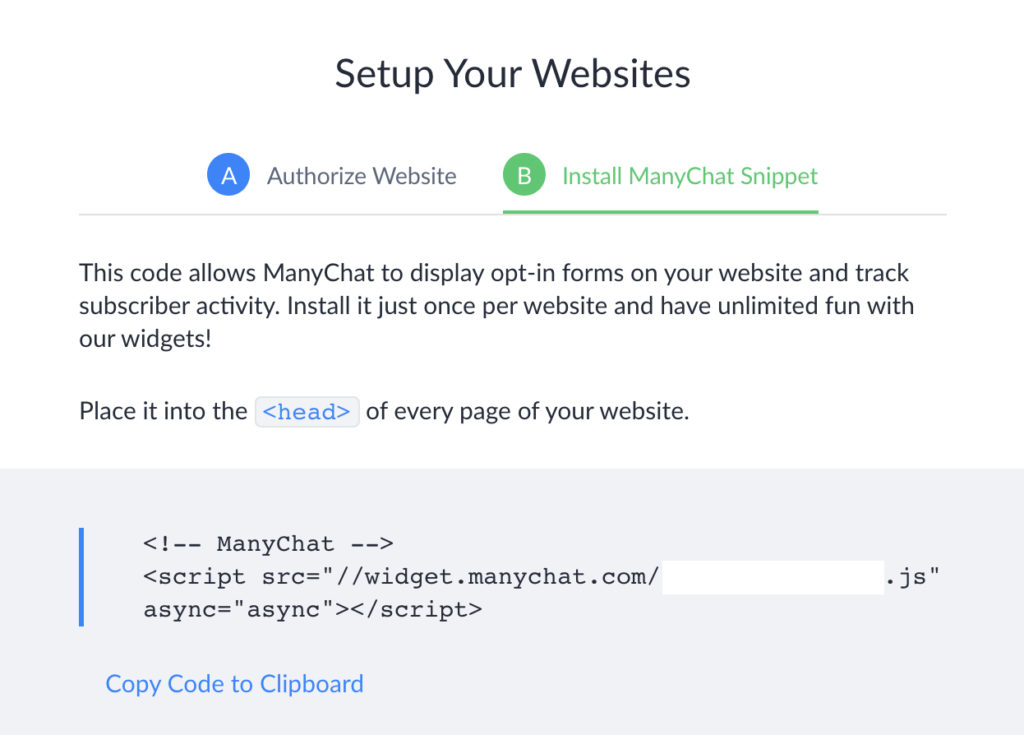
10. Lastly, all you need to do in order to install the chat widget on your website is to paste the code into the website’s header.
How to install the Messenger bot on your WordPress website:
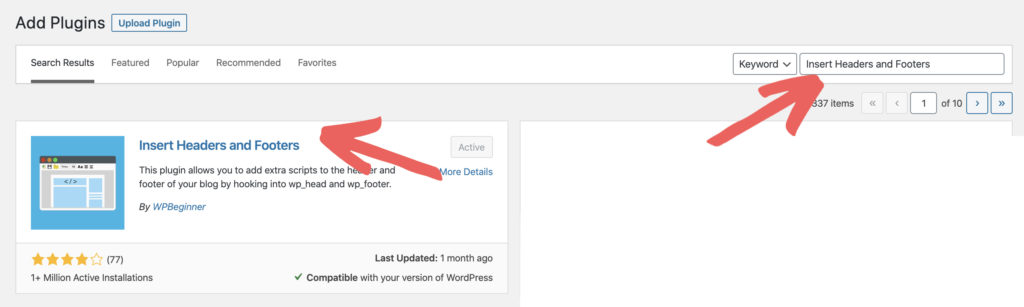
For my WordPress website, I use the “Insert Headers and Footers” plugin. If you don’t have the “Insert Headers and Footers” plugin installed, all you need to do is go to “Plugins” ⟶ “Add New”. Type “Insert Headers and Footers” in the search bar, then click “Activate”.
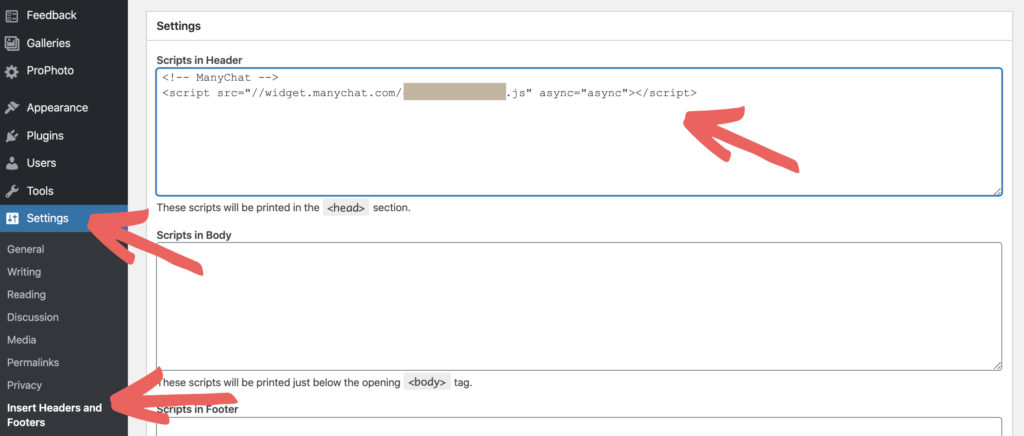
Next, go to “Settings” ⟶ “Insert Headers and Footers” and paste the ManyChat code into the “Scripts in Header” box. Click “Save” and you’re done!
How to install the Messenger bot on your Showit website:
In the right column, go to “Page Info” ⟶ “Advanced Settings”. Select the “Custom Head HTML” box and paste the ManyChat code, then click “Save”. You have to follow this process for every single page of your Showit site! Once you do that, you’ll have the Messenger chat box on your entire website.
Was this helpful? Come hang out with me inside the Facebook group and show me your brand new Messenger chat box!!


Thank you for this! Not even the people at my website could tell me how to get the messenger chat box on there. Amazing!
So glad it helped, Debbie!!I peeked at yours and it looks amazing. Great Job!