

Let’s go over some tips for shooting your first wedding! Now, before we start, I’m going to assume that you already have a basic understanding of how your camera works. You’re comfortable shooting in manual mode, you understand the exposure triangle, and you’re able to adapt and change your settings fast based on the lighting situations that you’re shooting in (outdoors vs. indoors, harsh light vs. shade, etc.). You’re also shooting in RAW and are very comfortable with your camera. If this is not the case, then I believe that you should practice a little more before you start photographing weddings. Wedding days are fast paced, so you need to understand your camera well and be able to think on your feet.
Recently, one of my students reached out to me about some tips and tricks that I wish I had known before photographing my first wedding.
So, if you’re ready to start photographing your first wedding, here are a few tips you might find helpful!
Pre-Wedding
1. Create a Photography Wedding Day Timeline
Make sure you create your own wedding day timeline (and share it with your couple) so that they know exactly how long each portion of the day takes to photograph. If their wedding planner/coordinator already has a master timeline, make sure to merge the two so that everyone is on the same page. The chances are that if you don’t allow for enough time to capture all of these special moments, and things run behind schedule (they usually do!), then you’re going to feel rushed and flustered, which will lead to you feeling stuck and not knowing what to do next.
Here’s how long each portion of the wedding day usually takes me to photograph:
- Details & Prep: 1-2 hours
- First Look & Portraits : 30-45 minutes
- Bridal Party Photos: 30 minutes
- Family Formals: 30 minutes
- Ceremony Decor: 15-20 minutes
- Reception Decor: 15-20 minutes
- Extra Portrait Time: As much as the couple gives me!!
One important thing to consider is including your start and end times so everyone is on the same page as to when the photography coverage starts and ends. In case the reception and ceremony are not in the same location, and traveling is involved, your clients might need to add an additional hour of coverage. If you need help creating a timeline, here is my own wedding day timeline template that you can use for free.
2. Family Shot List
Always make a list for family formals and ask your couple to provide you with the first names of everyone that will be in the family pictures. This way you eliminate the chances of getting requests for extra combinations from a family member. And if you still do, you can politely tell them that you have a list from the bride and groom that you have to go through first. Also, calling everyone by name eliminates confusion when it comes to lining people up for group pictures and makes things move a little faster.
I encourage my couples to only include the immediate family in these portraits (parents, grandparents, and siblings) because you can do individual extended family photos during the reception as you will be following them throughout the entire evening. I also let my couple know in advance that each grouping usually takes 1-2 minutes to corral and photograph, so if we could keep the total groupings under 20, that would be ideal. This way, you don’t end up with a five page shot list!! I also provide them with my typical family shot list to serve as a starting point. They can add/take out any combinations they would like.
Bride’s Side:
- B&G with Grandparents:
- Bride with each Grandparent:
- B&G with Parents & Siblings (+spouses if applicable):
- B&G with Parents:
- Bride with Mom:
- Bride with Dad:
- Bride with Siblings:
- Bride with Each Sibling:
(The same would be repeated for the groom’s side.)
3. Contract
You want to have a contract in place even if you’re working with family and friends. I almost didn’t include this in here as a tip, but I wanted to make sure that you never ever shoot a wedding without a contract. Here’s a blog post about the 3 things that you should include in your wedding photography contract. I purchased my wedding contract from the Lawtog and I’ve been using it for the over a decade now.
The Getting Ready Part of the Day
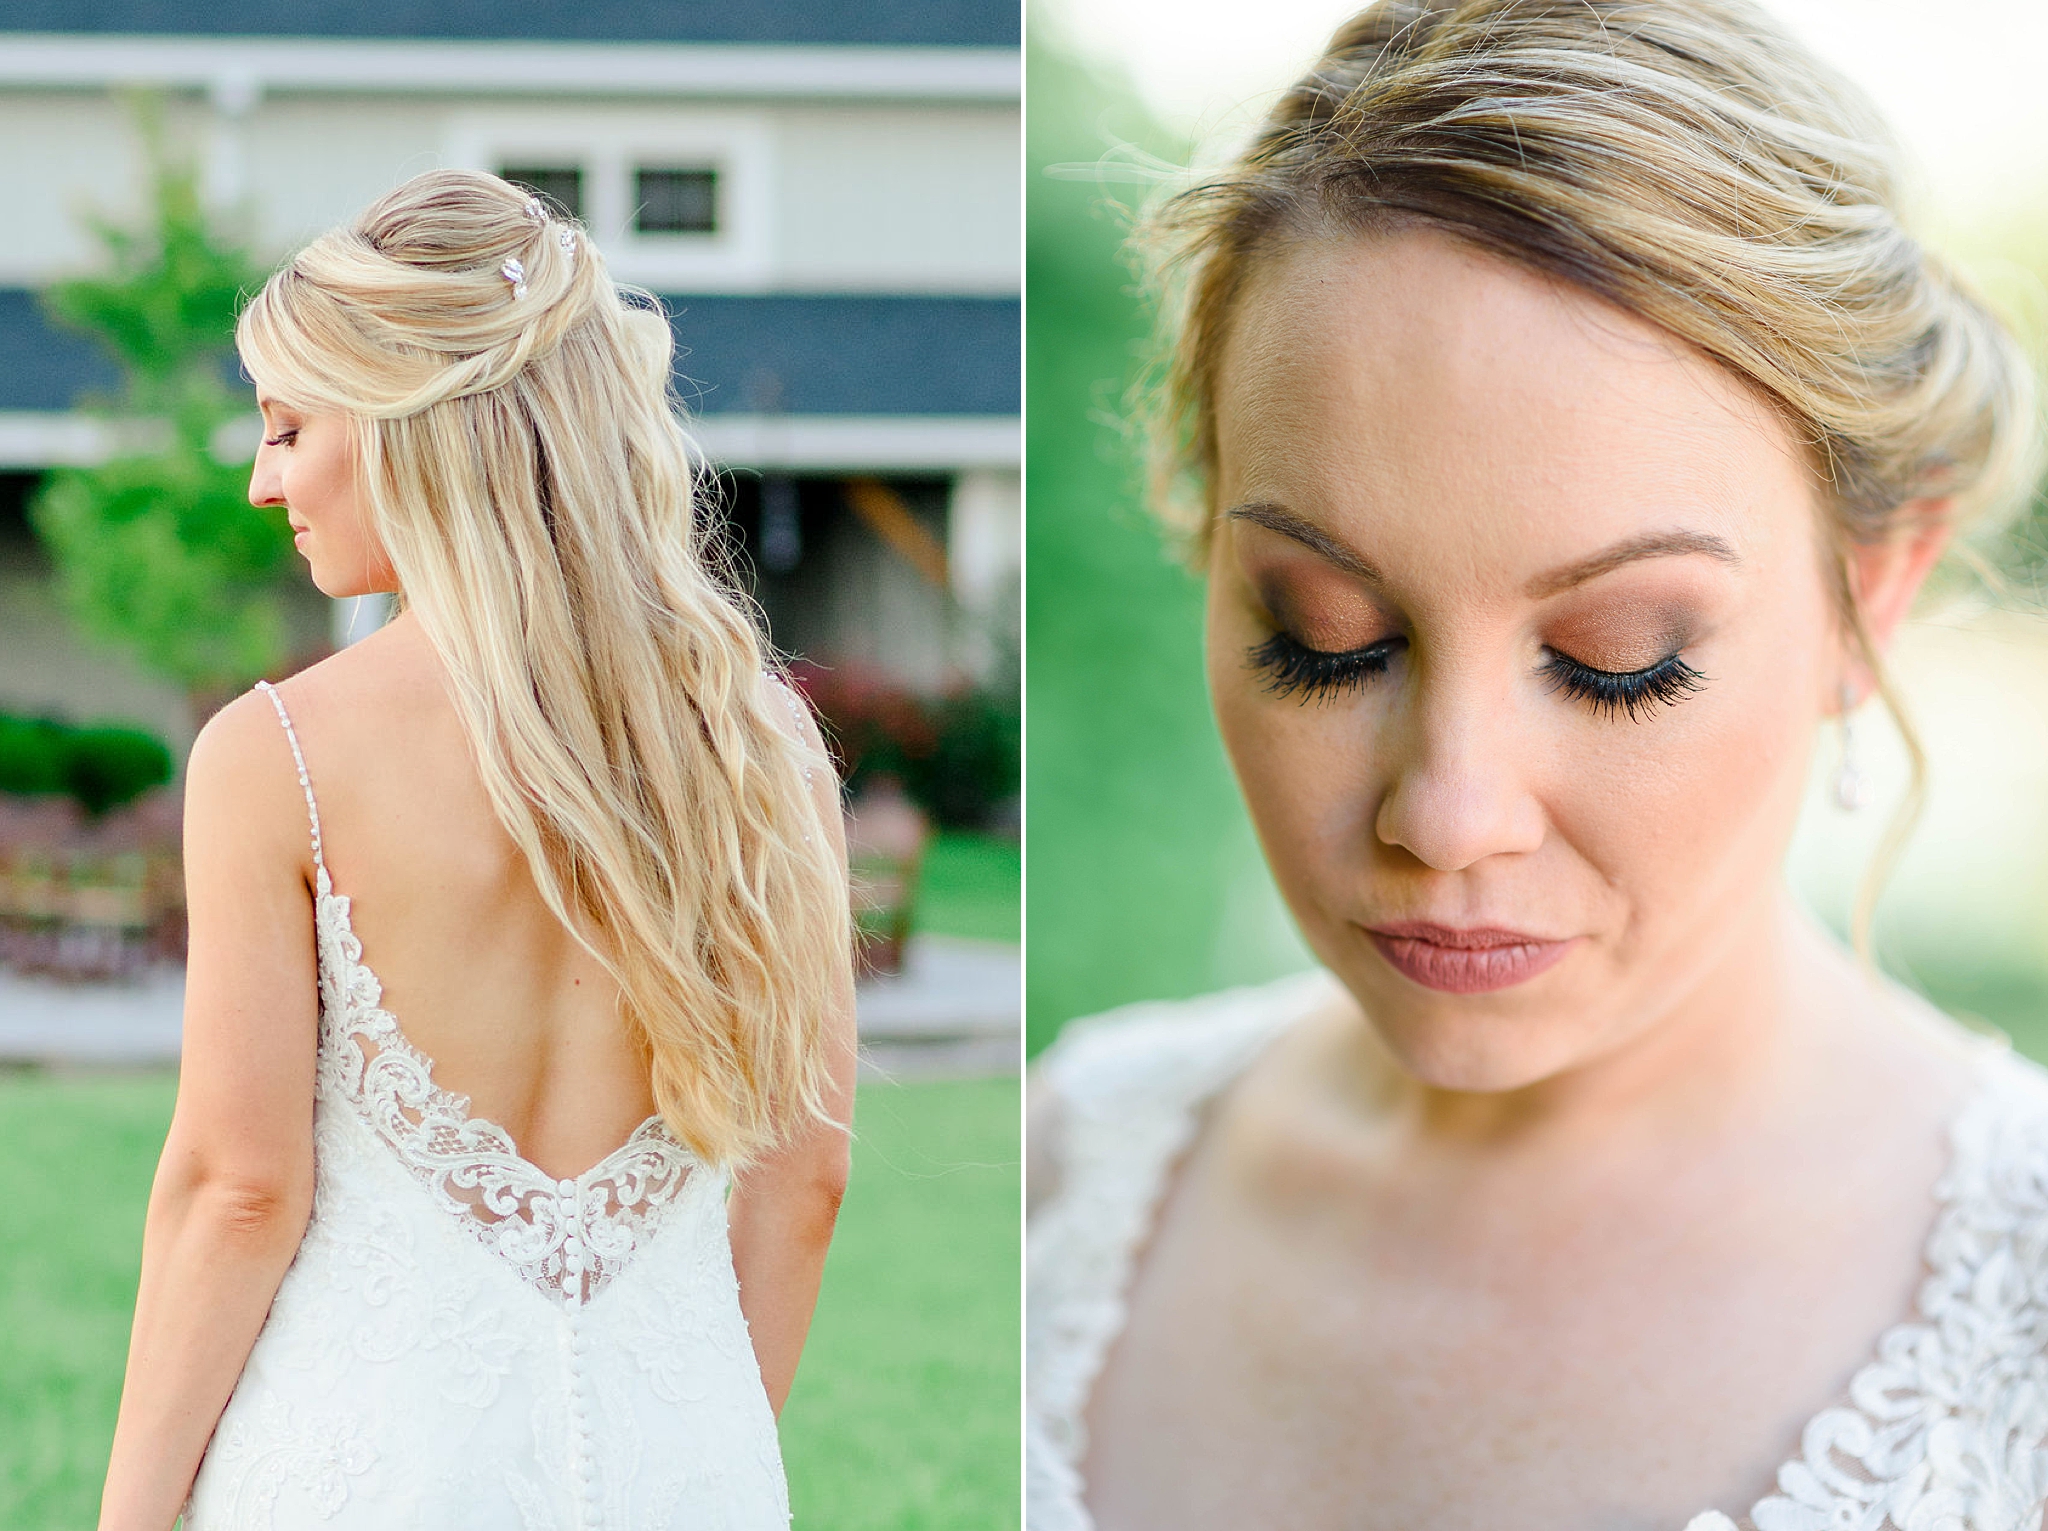
1. Photographing Details
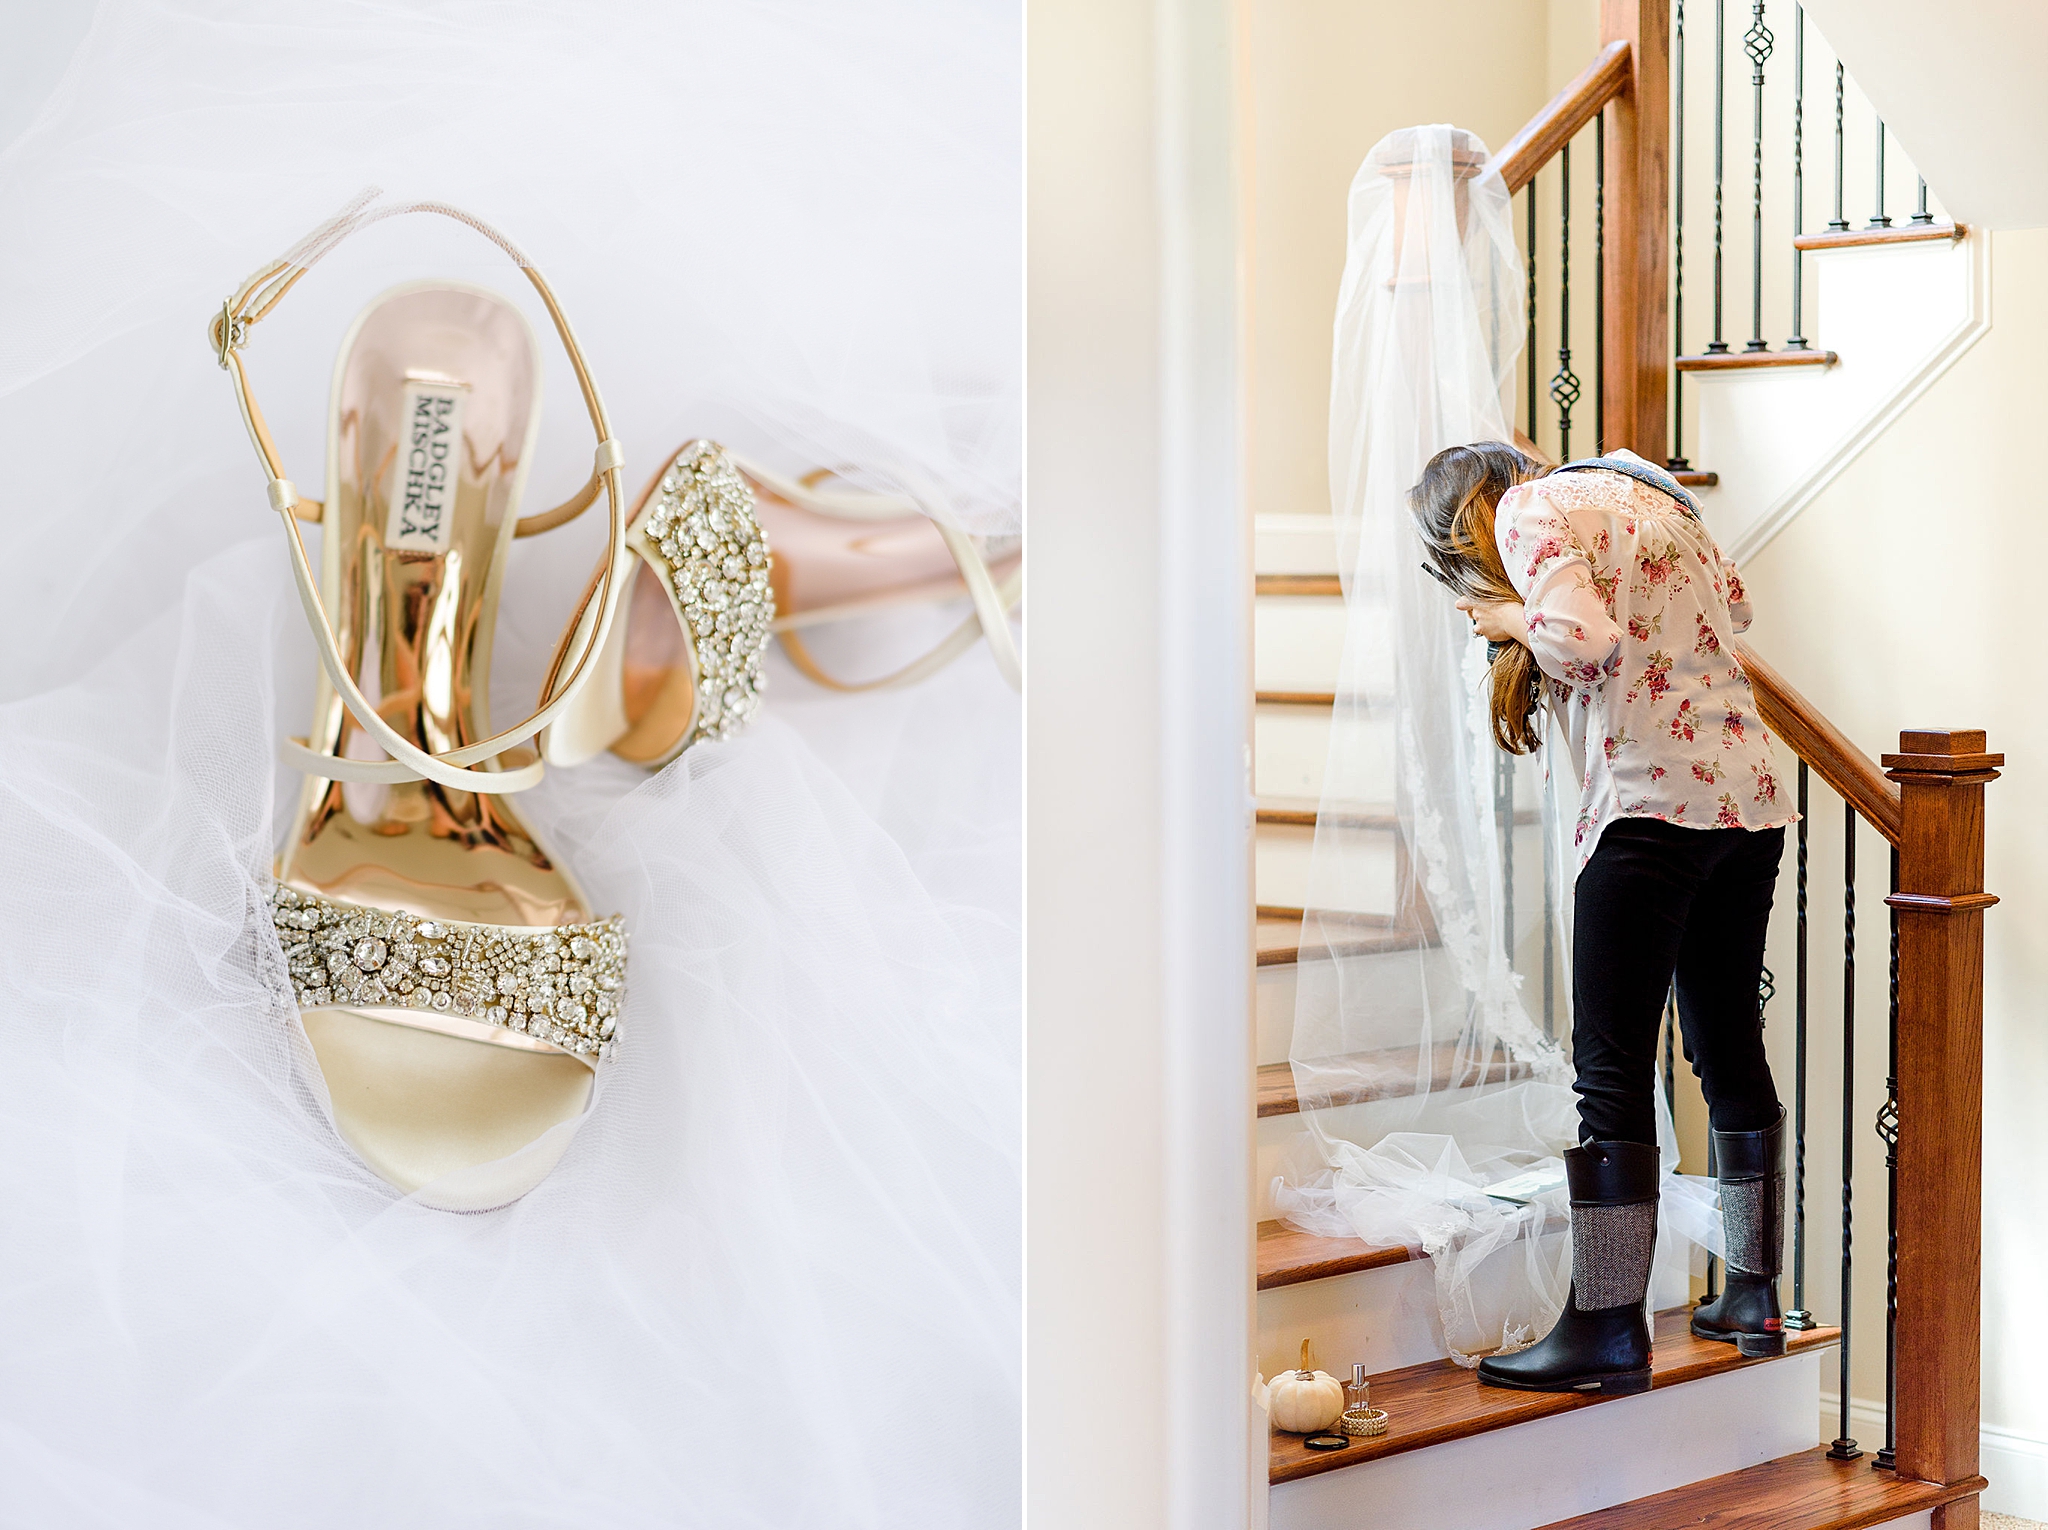
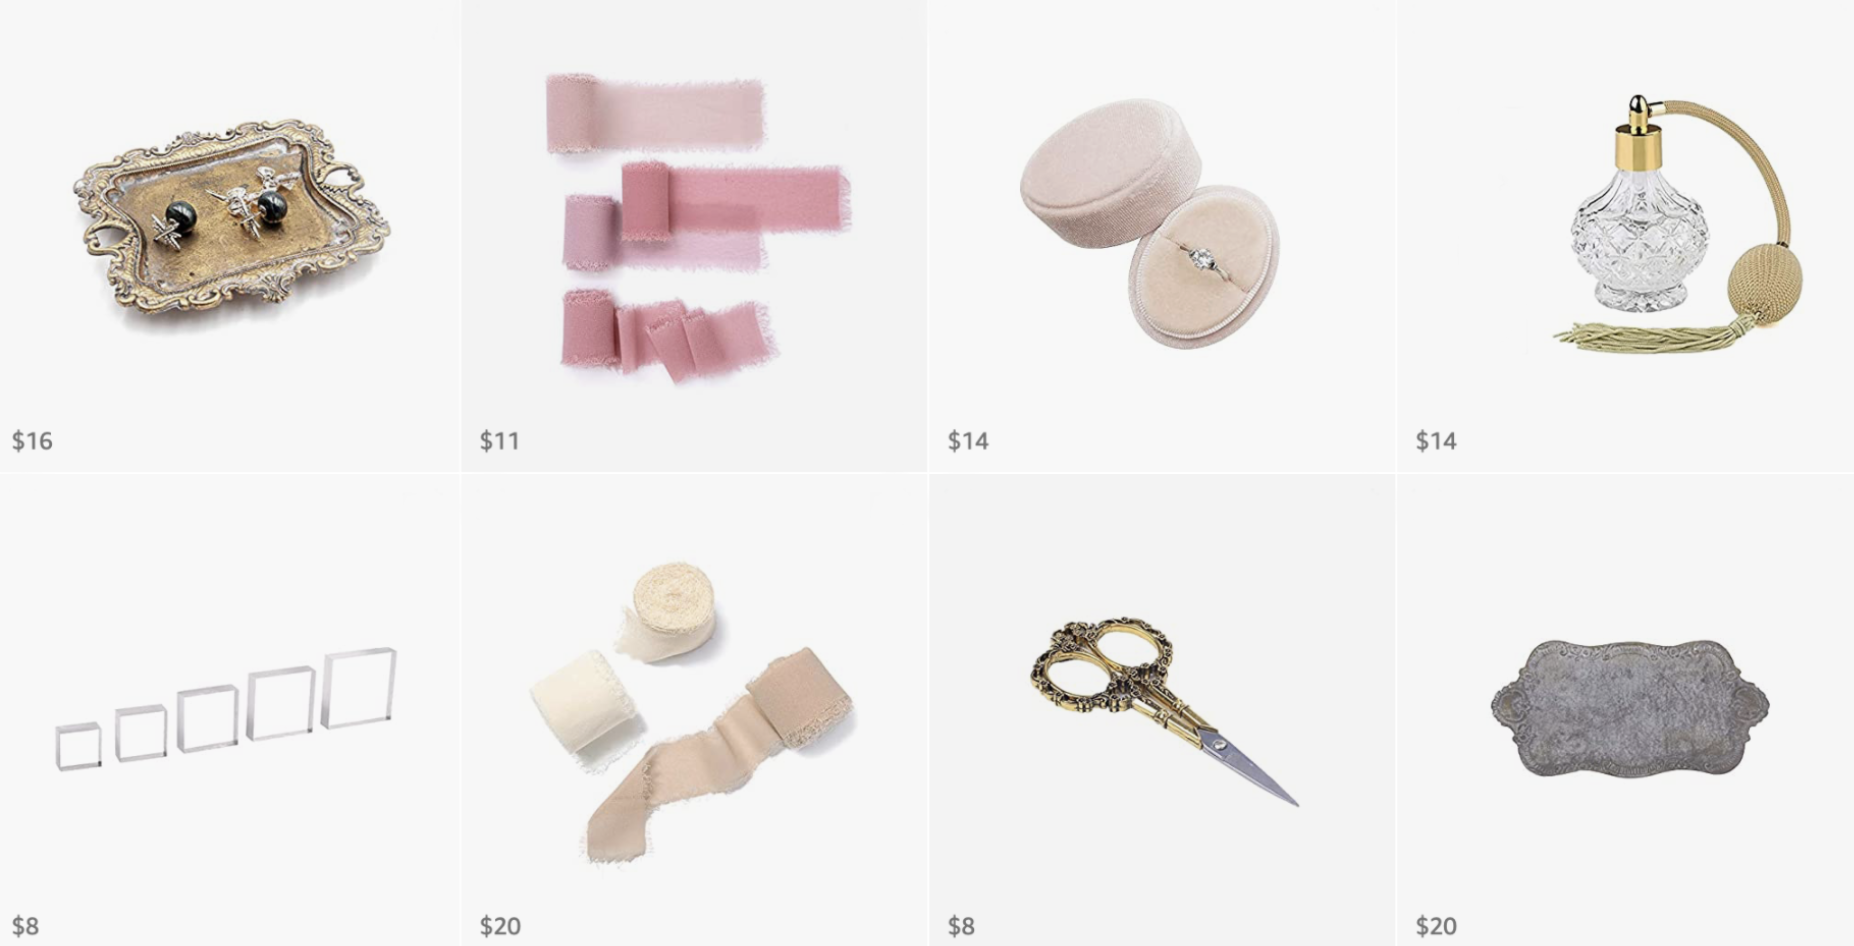
I ask my brides ahead of time to gather all of their details together in a bag that I can grab and go with no interruptions. For bridal details, you’re going to need two things: a clean surface to photograph on (like a styling mat or a styling board) and a macro lens. If you don’t own a macro lens, these macro filters are amazing and they are only $20 on Amazon. One thing to keep in mind when you’re shooting macro is that you need to shoot with a higher F stop. For example, I’ll use an aperture of f/4 to photograph the rings. Another quick tip I want to share with you is to use acrylic blocks (or even your lens caps) under your invitations to add dimension to your flat lays.
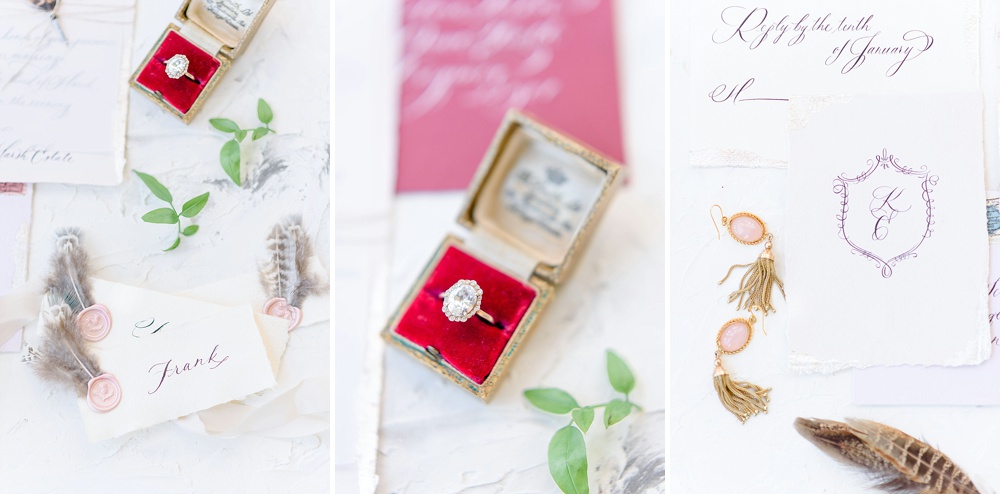
Here are some classic shots you’ll want to focus on: wedding dress, jewelry (rings, necklace, earrings), perfume, invitation, shoes, groom’s shoes, tie, etc. I personally like to take a shot of each of the items individually first, then style them on my board and photograph them together as flat lays. Use the veil to add dimension to your photos (you can drape it over the shoes, or use it in the background). Also, feel free to reach out to the florist to see if they could bring some loose flowers when they deliver the bouquets.
If you need help with shooting details, here are a few helpful blog posts:
- 3 Composition Rules for More Dynamic Images
- How to Photograph Wedding Invitation Flat Lays
- 10 Tips for Better Flat Lay Images
- How to Style Wedding Invitations
- 12 Ways to Photograph the Wedding Shoes
If you’re curious as to what I use to elevate my detail shots, here’s a link to the items in my styling kit.
2. The Getting Ready Pictures
Make sure to allow enough time for some getting ready pictures, like robe shots, bride getting in her dress, putting her earrings or shoes on, etc. These can be taken after you photograph the details and it’s totally ok to be staged. What I mean by this is that the bride can already be in her dress while her mom pretends to close the zipper. Or she might already have her earrings on, and she will just pretend to put them on, etc.
Another tip is to always place your bride near a window and make sure that the background is clutter free. If the getting ready room is not big enough or is too dark, don’t be afraid to ask the bride to step outside for some of the “getting ready shots”. The pictures will be more flattering when you have good light.
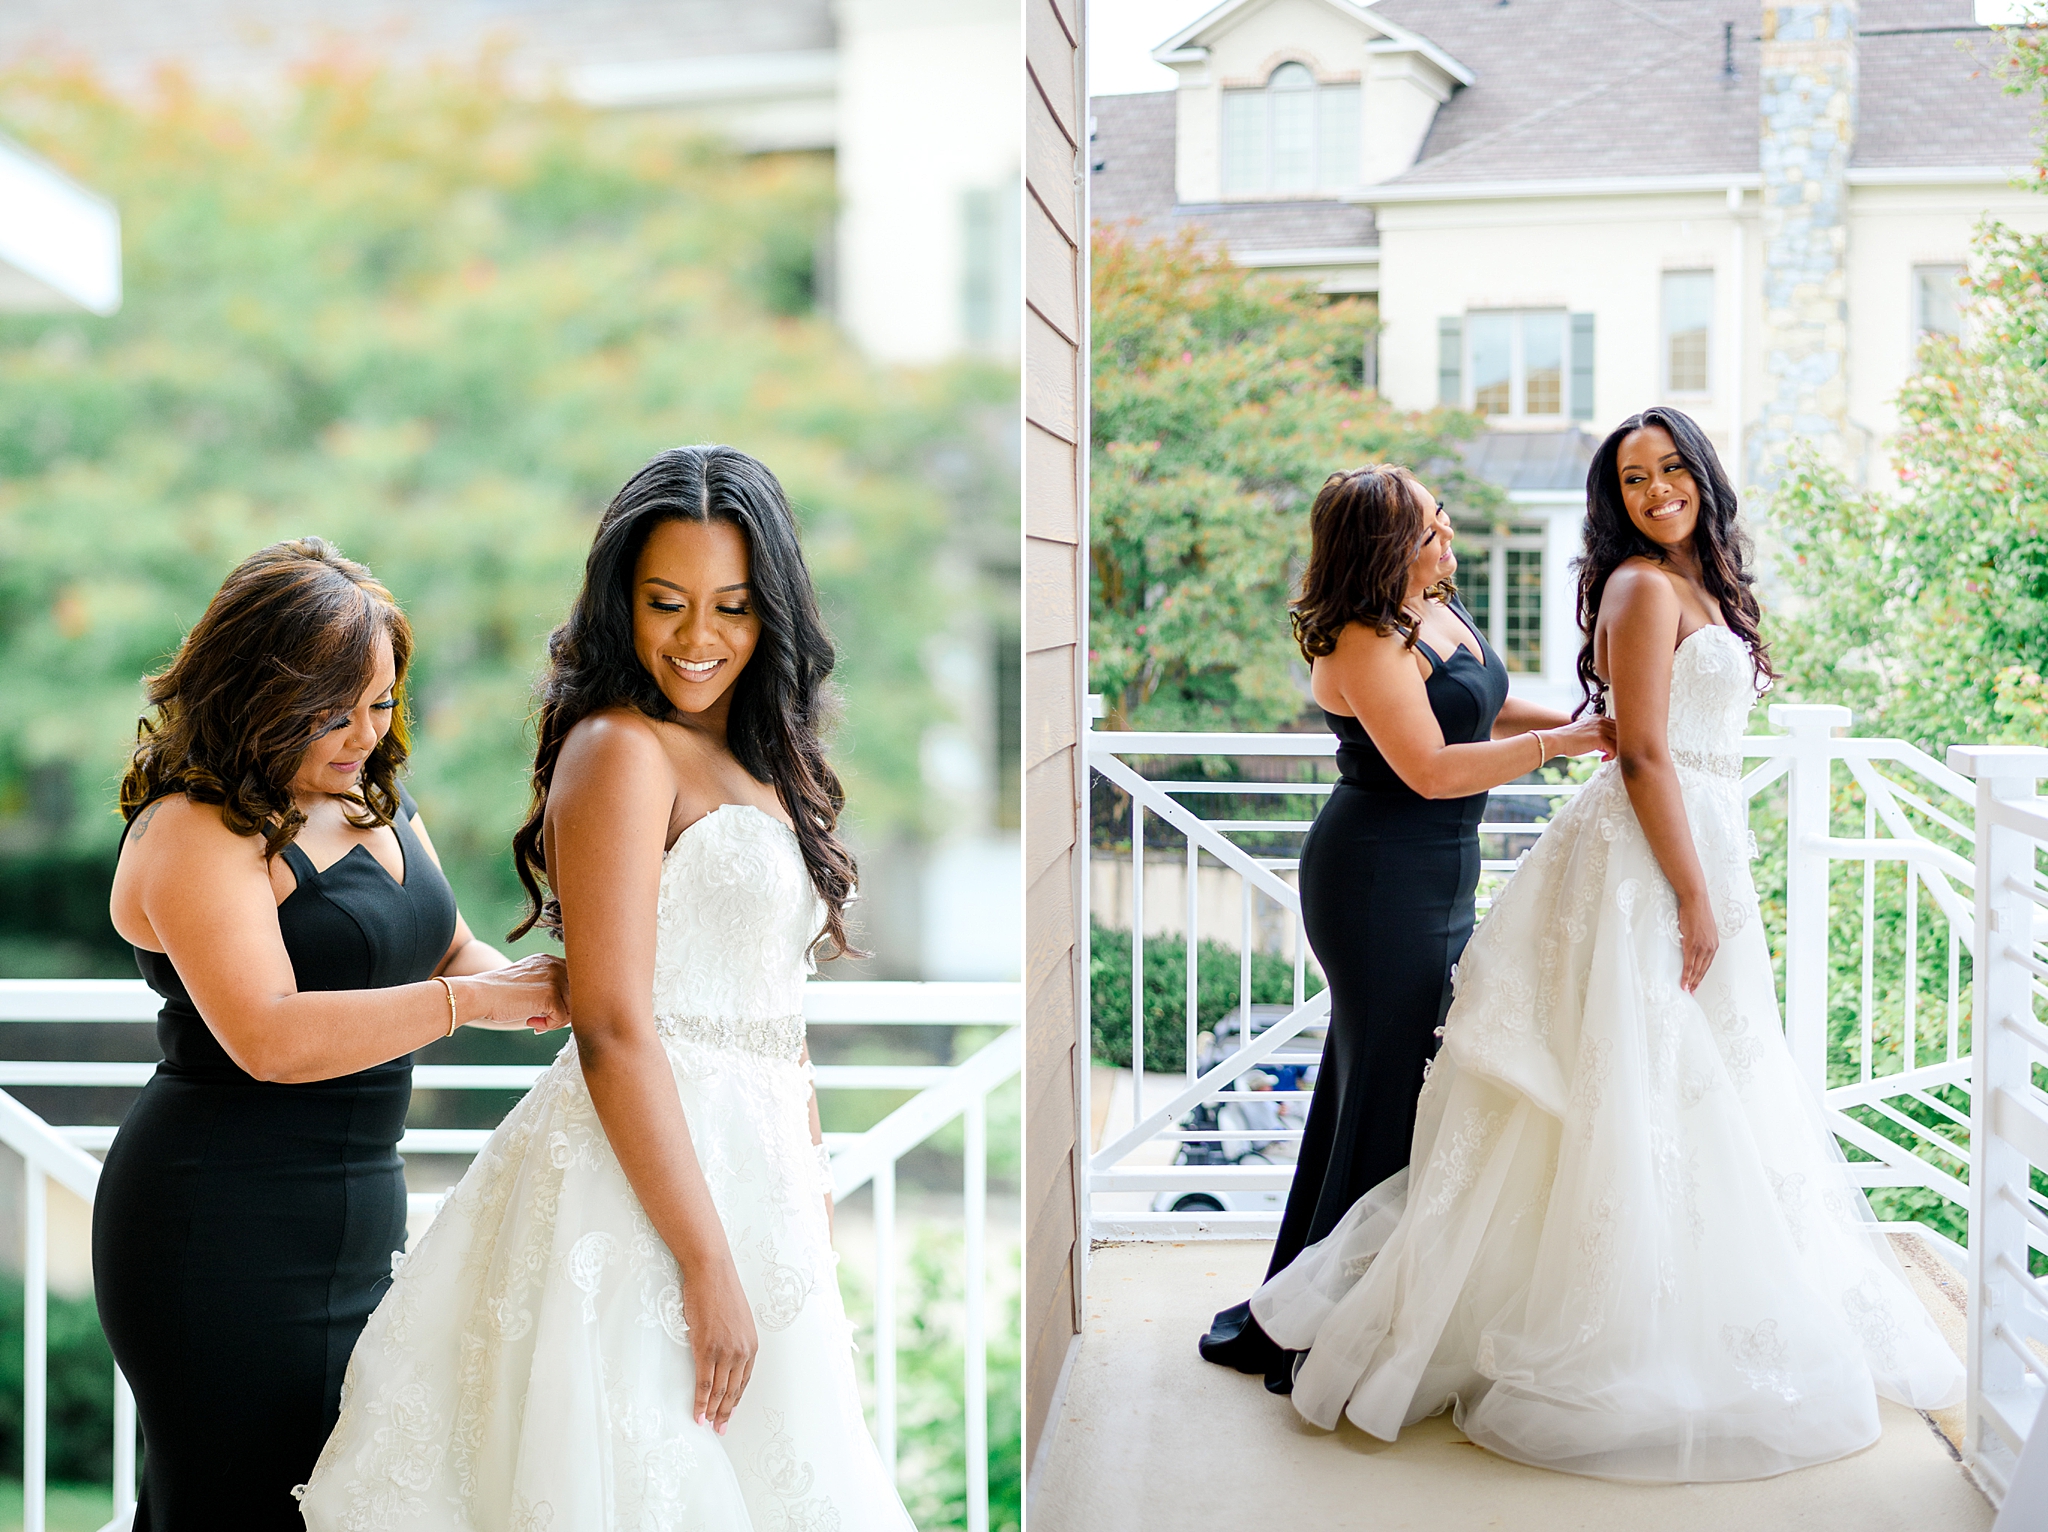
Bonus tip: take some close up shots of the hair and makeup for the hair and makeup artists. It’s a great way to create new relationships and get referrals!
On a typical wedding day, I usually have about an hour to photograph this portion of the day so I need to be quick and know exactly what I need to be shooting and do so as fast as possible. So, if you’re new to wedding photography, I encourage you to practice styling details so that it becomes second nature to you.
This is part one of my Tips for Shooting Your First Wedding series. Next week, I’m going to focus on the ceremony, portraits (bride & groom, family formals, bridal party), and reception. So, make sure to tune in next Thursday! See you then!
Disclaimer: For your convenience, this post contains affiliate links. When you use these links we may earn a small commission at no additional cost to you. In fact, you’re likely able to save money through special discounts I get to extend to you. This also helps us to be able to continue sharing free photography tips and resources like this with you.


